Chaperon 1884 Stern Wheeler

Great progress Jan. Thumbsup Even though there is no defined keel as such, I wouldn't wait too long now before starting from the middle of the underside (where the keel would have been on a conventional ship) to start the outward planking.
 
Great progress Jan. Thumbsup Even though there is no defined keel as such, I wouldn't wait too long now before starting from the middle of the underside (where the keel would have been on a conventional ship) to start the outward planking.
Hi Heinrich,

There will be a 1/16 X 3/16 inch strip added as a center keel strip once the bottom is fully planked. That will be an interesting project since that piece wraps around the bow from the sheer to the bottom of the hull. I think that will require the bending tool and a little bit of luck.:D

Jan
 
Ugh, another scorcher of a day here: Admiral says go work in shipyard:

Got to love that logic :D

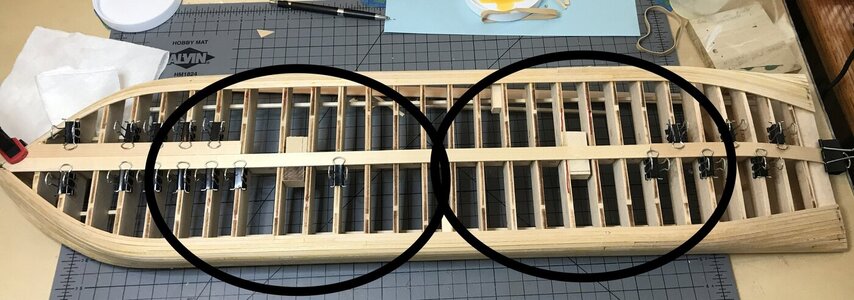
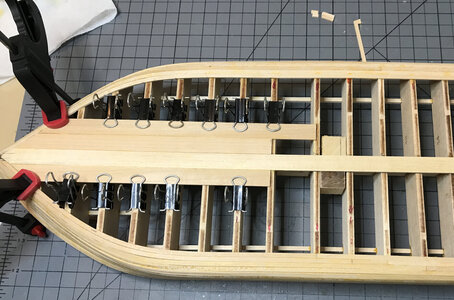
The start of the flat bottom planking. Before gluing the first plank I glued in a couple of support blocks between the bulwarks (about 10 inches in from stem and stern). The plan is to countersink a couple of blind nuts to hold the screws for the pedestals. The keel thickness is only 3/16 of an inch. Plus I'm sure I would have hit dead center on the keel if I tried to set in a screw or nut later after the planking was done.

7F9A2B8D-E5B0-4C2B-9DED-8B99742D2ED2_1_201_a.jpeg

The location of the blind nuts.

2471D0CB-DFE7-44BB-B0B8-2A807E1F8E51_1_201_a.jpeg

To be continued:

Jan
 
Last edited:
That looks good and straight Jan! Now what I would do is - once the "keel" is in and set, is to lay three or four strakes from the keel outwards towards the existing planking. Then alternate between the two, so that the joint is somewhere in the middle of the keel and the existing planking.
 
Ugh, another scorcher of a day here: Admiral says go work in shipyard:

Got to love that logic :D

The star of the flat bottom planking. Before gluing the first plank I glued in a couple of support blocks between the bulwarks (about 10 inches in from stem and stern). The plan is to countersink a couple of blind nuts to hold the screws for the pedestals. The keel thickness is only 3/16 of an inch. Plus I'm sure I would have hit dead center on the keel if I tried to set in a screw or nut later after the planking was done.

View attachment 250291

The location of the blind nuts.

View attachment 250292

To be continued:

Jan
Always good the think a few steps ahead,Jan.
Regards,Peter
 
That looks good and straight Jan! Now what I would do is - once the "keel" is in and set, is to lay three or four strakes from the keel outwards towards the existing planking. Then alternate between the two, so that the joint is somewhere in the middle of the keel and the existing planking.
Excellent suggestion. Great minds ......

E5B3CF35-98D1-4FBC-A7CE-0EA16EFF26AA_1_201_a.jpeg

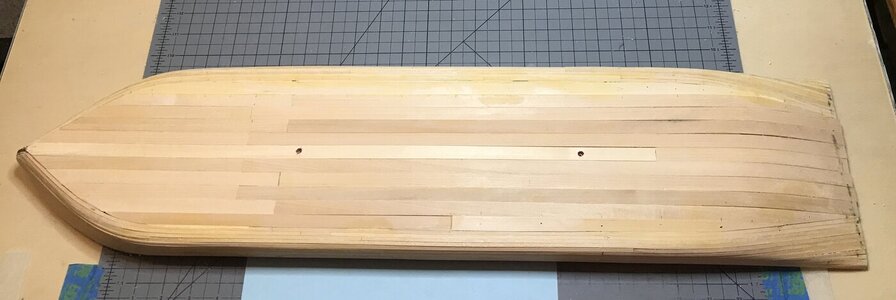
I chose the upper end to start the stager planking. I wanted as much of a full length plank as I could get because of the angle bend the plank has to assume at the stern. That's the reason I ran the first plank from the stem to the bulwark about 9 inches from the stern. The next bulwark is the start of the down angle to the stern. The planks are a little over 23 1/2 inches long. The length that needs to be spanned as measured on the keel is a little over 30 inches.

Jan
 
Always good the think a few steps ahead,Jan.
Regards,Peter
Hi Peter.

Yup that is one of the lessons I learned following your Robt. E. Lee build. I hope I can "improve" this kit using some of your neat suggestions and examples. Feel free to add , suggest and kibitz as I bumble along. I appreciate all the help from "Mentors" such as yourself and other SOS members.

Jan
 
Hi Peter.
Yup that is one of the lessons I learned following your Robt. E. Lee build. I hope I can "improve" this kit using some of your neat suggestions and examples. Feel free to add , suggest and kibitz as I bumble along. I appreciate all the help from "Mentors" such as yourself and other SOS members.
Jan
For this stage I am just looking to your build. Because the build of your hull is different from the Lee. When you are at the Main Deck, I hope to give you some tips&tricks. So far so good!
Regards, Peter
 
For this stage I am just looking to your build. Because the build of your hull is different from the Lee. When you are at the Main Deck, I hope to give you some tips&tricks. So far so good!
Regards, Peter
I'll be looking forward to your suggestions, tips and tricks.

Jan
 
Excellent work Jan! Now the narrowing of planks where needed becomes so much easier! It looks really good!
 
@Heinrich.

Your suggestion at work. Push pins to hold the planks in place while they conform to the right shape and dry. I used my mini drill with a bit just slightly smaller than the diameter of the push pin to drill a hole half the length of the push pin. Since I have to remove the planks to apply the glue I wanted to be sure I had firm seat for the pins to apply pressure to the planks locking them in place.

53D1F938-4E6C-4D83-A98A-B7C2474CC118.jpeg

Again thank you for the suggestion.

Jan
 
Last edited:
Excellent Jan! I am very happy to see how beautiful the Chaperon is turning out! That is a proven method and is infinitely more practical in my opinion. If you want to single-plank a hull that's the way to do it. It has also given you the ideal dress rehearsal for when it is the Duyfken's turn! Great work my friend!
 
A question for Peter:

Before I fall off the deep end and have to start over.
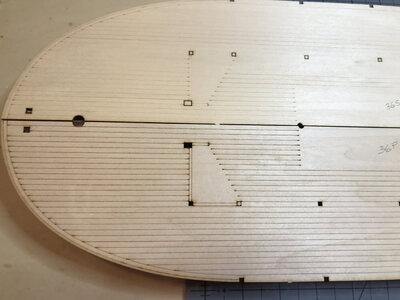
The start of the deck. First a picture of the deck dry fitted.

5C46C72E-A5D6-47D8-83F4-BD56B84F3185_1_201_a.jpeg

The deck is in four pieces. The individual planks show up well on two but aren't clearly defined on the other two pieces.

E4D692B7-AEEA-453E-B179-654C8DBF05F0_1_201_a.jpeg

Do I use a pencil or a fine point Sharpie to highlight them? Is worth the Herculean effort to punch in and imitate the treenails?
My plan is to stain this deck in Min Wax Light Oak.

Jan
 
Congratulations on a fine planking job! Let the sanding commence!
Hi Paul,

I'm getting a lot better at this planking stuff. It's good to have an ample supply work with. The only fault I found with my effort was that I was slightly off placing the first plank centered on the keel. It made for a 1/8 inch error for the final two planks. The edge on the Port side had to be trimmed by that amount and the Starboard side needed that amount added. Other than that I bumbled my way through this part.

Jan
 
Back
Top