Guys in these matter the ladies always win…..Well, in that case I stand corrected.
-

Win a Free Custom Engraved Brass Coin!!!
As a way to introduce our brass coins to the community, we will raffle off a free coin during the month of August. Follow link ABOVE for instructions for entering.
-

PRE-ORDER SHIPS IN SCALE TODAY!
The beloved Ships in Scale Magazine is back and charting a new course for 2026!
Discover new skills, new techniques, and new inspirations in every issue.
NOTE THAT OUR FIRST ISSUE WILL BE JAN/FEB 2026
You are using an out of date browser. It may not display this or other websites correctly.
You should upgrade or use an alternative browser.
You should upgrade or use an alternative browser.
Cheap Chinese Halcon speed build [COMPLETED BUILD]
- Thread starter DARIVS ARCHITECTVS
- Start date
- Watchers 51
-
- Tags
- completed build halcon
I found some useful info in this YouTube video on how to stain basswood. Basswood is a common, cheap, softwood, and this Chinese mode of the Halcon is made of basswood. If I had known how to do a finish on basswood, the hull probably would not have turned to crap like it did. For those who are trying to build this kit, this information will be very helpful.
Thanks for the vid, very interesting. Will use this info on my Harvey build.


Now I know everything only excellence can resultThanks for the vid, very interesting. Will use this info on my Harvey build.
Ho guys, got told off for being rude, apologies gents
.
.
I didn't think anything you have said (typed) has been rude. But that's me and everyone is different. I'm sure whatever it was, you didn't mean to be rude and it was just taken that way by someone that didn't understand what you meant. However, better to apologize to make sure.Ho guys, got told off for being rude, apologies gents
.
Great video ! I think I'm still going to paint mine (if I ever complete my shop and start buiding again).I found some useful info in this YouTube video on how to stain basswood. Basswood is a common, cheap, softwood, and this Chinese mode of the Halcon is made of basswood. If I had known how to do a finish on basswood, the hull probably would not have turned to crap like it did. For those who are trying to build this kit, this information will be very helpful.
Can't see where. I've thoroughly enjoyed the banter. As far as the hull finish goes on my boat, it's a bit too late to correct since a hard varnish in covering the stain alreadyHo guys, got told off for being rude, apologies gents
.
- Joined
- Jul 26, 2013
- Messages
- 443
- Points
- 158

There is always paint.
That is 100% correct.There is always paint.
You are definitely showing us that it is not the kit as much as it is the talent of the builder ! You have taken a kit that everyone says is a piece of crap and turned it into a very nice result ! Bravo! The mark of fine craftsman ! I hope mine looks half that good when I get back to it (soon I hope) !
Just tuned into your build Kurt, impressive work.
Thanks guys! The build is going slow because of the limited amount of time available for it, plus I'm researching a new style of rigging, but the little boat is coming along.
Day 34
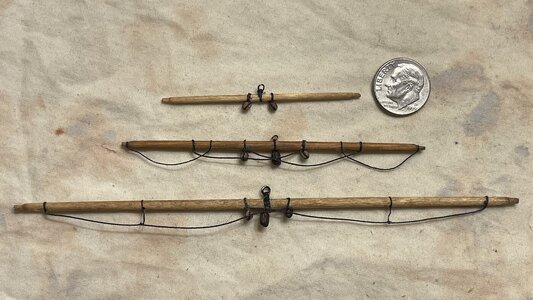
The sequence in which lines are rigged has to be carefully considered so you don’t make an area of the model inaccessible before all the work is completed there. The rigging for the halyards for the foremast yardarms was begun. The halyards for the fore topsail and too gallant were not secured permanently to the yards, but were just lashed to the top of the mast, leaving extra line, so the decision of whether the yards will be positioned aloft or lowered for storage can be made later. Why? Because I’m not sure I can rig this schooner with sails or not at the scale, so I’m leaving the option open.
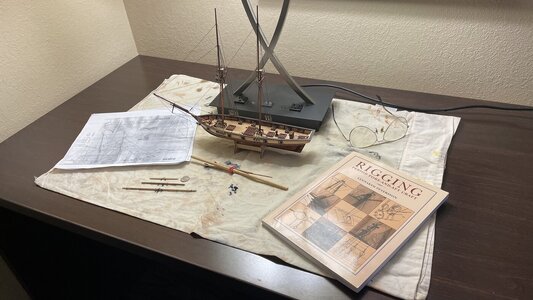
The rigging plan is similar to Lennarth Petersson’s plan in his book.
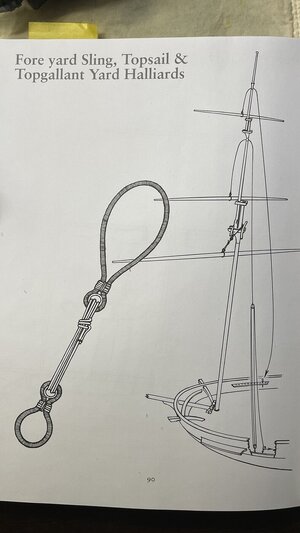
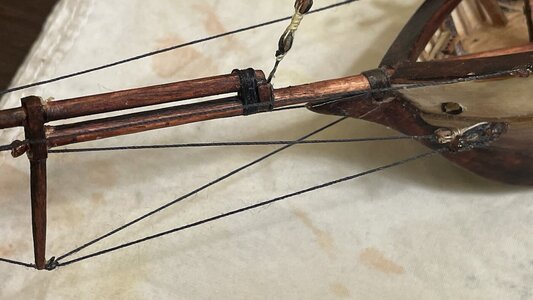
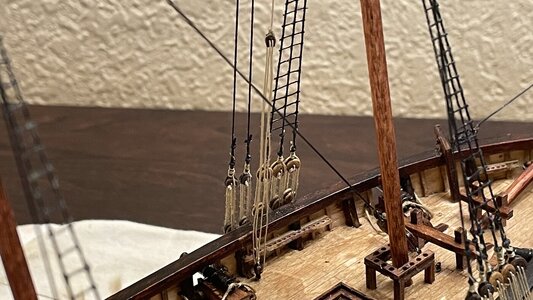
The fore course yard was simply hung from the masthead by a sling made with heavy black coat thread, without rigging a halyard. The topmast yard halyard is rigged with block and tackle to the deck on the port side and the fall is belayed to the rail on the bulwark as shown below.
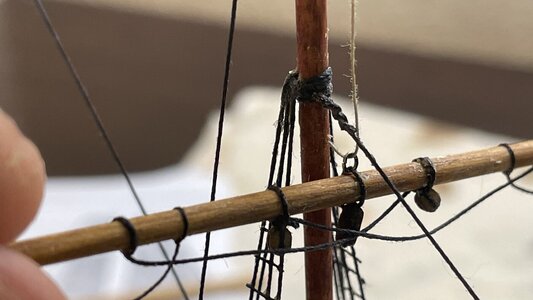
The topsail yard is not secured to the halyard yet, but run up to the top of the mast.
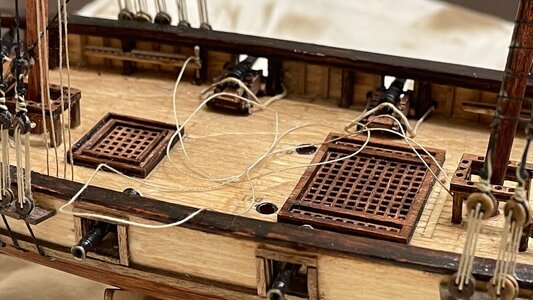
For the top gallant yard, the yard is light enough to have its halyard belayed directly to the pinrail on the starboard side. First the line is secured to the pin with an overhand knot, then ran in one pass under the pin once it is inserted in the rail.
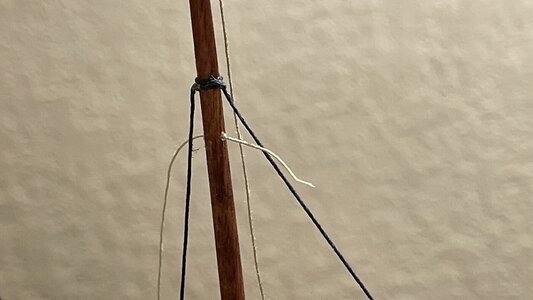
The halyard is then rove through the back of the mast, then through the ring on the yardarm, and tied temporarily to the top of the mast like the halyard for the topmast yard.
Progress so far. Rigging the lifts for the yards is probably next.
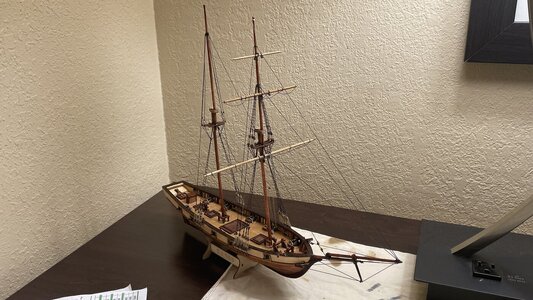
The sequence in which lines are rigged has to be carefully considered so you don’t make an area of the model inaccessible before all the work is completed there. The rigging for the halyards for the foremast yardarms was begun. The halyards for the fore topsail and too gallant were not secured permanently to the yards, but were just lashed to the top of the mast, leaving extra line, so the decision of whether the yards will be positioned aloft or lowered for storage can be made later. Why? Because I’m not sure I can rig this schooner with sails or not at the scale, so I’m leaving the option open.
The rigging plan is similar to Lennarth Petersson’s plan in his book.

The fore course yard was simply hung from the masthead by a sling made with heavy black coat thread, without rigging a halyard. The topmast yard halyard is rigged with block and tackle to the deck on the port side and the fall is belayed to the rail on the bulwark as shown below.

The topsail yard is not secured to the halyard yet, but run up to the top of the mast.

For the top gallant yard, the yard is light enough to have its halyard belayed directly to the pinrail on the starboard side. First the line is secured to the pin with an overhand knot, then ran in one pass under the pin once it is inserted in the rail.

The halyard is then rove through the back of the mast, then through the ring on the yardarm, and tied temporarily to the top of the mast like the halyard for the topmast yard.

Progress so far. Rigging the lifts for the yards is probably next.

Last edited:
Outstanding work as usual Kurt. I have a bit of a conundrum with my rigging, I simply have so much info I don't know what to leave off and what to use.Day 34
The sequence in which lines are rigged has to be carefully considered so you don’t make an area of the model inaccessible before all the work is completed there. The rigging for the halyards for the foremast yardarms was begun. The halyards for the fore topsail and too gallant were not secured permanently to the yards, but were just lashed to the top of the mast, leaving extra line, so the decision of whether the yards will be positioned aloft or lowered for storage can be made later. Why? Because I’m not sure I can rig this schooner with sails or not at the scale, so I’m leaving the option open.
The rigging plan is similar to Lennarth Petersson’s plan in his book.
View attachment 422332
The fore course yard was simply hung from the masthead by a sling made with heavy black coat thread, without rigging a halyard. The topmast yard halyard is rigged with block and tackle to the deck on the port side and the fall is belayed to the rail on the bulwark as shown below.
View attachment 422333
The topsail yard is not secured to the halyard yet, but run up to the top of the mast.
View attachment 422334
For the top gallant yard, the yard is light enough to have its halyard belayed directly to the pinrail on the starboard side. First the line is secured to the pin with an overhand knot, then ran in one pass under the pin once it is inserted in the rail.
View attachment 422335
The halyard is then rove through the back of the mast, then through the ring on the yardarm, and tied temporarily to the top of the mast like the halyard for the topmast yard.
View attachment 422336
Progress so far. Rigging the lifts for the yards is probably next.
View attachment 422337
At this scale, some things need to be left out for simplicity's sake, such a the tackles on the foremast used for cargo operations. Putting those on would crowd the channels, because I'm not using line and blocks equal to scale. Gun tackles are left off for the same reason. What you chose to leave off needs to be considered carefully. On small scale ships, bowlines are often omitted. I am considering rigging the sails furled, so the rigging appears complete, but I have never rigged furled sails before, and at this scale, the challenge is particularly difficult in terms of making them realistic. Plus, there's the added research into learning what to do the sheet, clue, brace, and leech lines. Information on schooners is limited to Petersson's book and some well written threads on rigging them on Model Ship World forum.Outstanding work as usual Kurt. I have a bit of a conundrum with my rigging, I simply have so much info I don't know what to leave off and what to use.
Last edited:
Yes, Peterson's book and some other stuff I downloaded are my primary sources, and as you stated careful consideration is required. This has primarily been an exercise in learning about rigging before I start my Harvey so the quest continues!At this scale, some things need to be left out for simplicity's sake, such a the tackles on the foremast used for cargo operations. Putting those on would crowd the channels, because I'm not using line and blocks equal to scale. Gun tackles are left off for the same reason. What you chose to leave off needs to be considered carefully. On small scale ships, bowlines are often omitted. I am considering rigging the sails furled, so the rigging appears complete, but I have never rigged furled sails before, and at this scale, the challenge is particularly difficult in terms of making them realistic. Plus, there's the added research into learning what to do the sheet, clue, brace, and leech lines. Information on schooners is limited to Petersson's book and some well written threads on rigging them on Model Ship World forum.
I like that they gave you laser etched details on two pieces of the rudder assy so both sides would have them. The Harvey's is one piece and so only etched on one side:Day 3
The rudder is integral with the sternpost and comes in two pieces, with details laser etched.
View attachment 405728
The transom is glued to the ends of the bulwarks. The gap at the top edge will be covered up by the second layer of railing pieces later, as will the visible edge of the bulwarks.
View attachment 405729
The first half of the upper railing piece is attached on the starboard side after trimming the front end to the proper length.
View attachment 405730
To speed building, spots of CA glue are used to hold long parts like this railing between areas help by PVA glue. Using this trick, you don't need clamps because the parts are instantly held in place by the CA glue. This technique is also useful in planking a hull.
View attachment 405731
View attachment 405732
The final railing layer is added at the stern.
View attachment 405733
Strips of wood 3mm wide are cut from spare wood in the kit to make the counter.
View attachment 405734
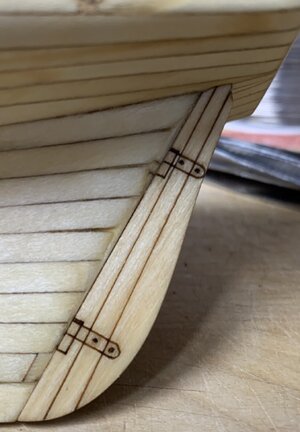
I asked my daughter to copy that to the other side with one of her thinnest art pens (after testing the ink would not bleed with linseed oil):
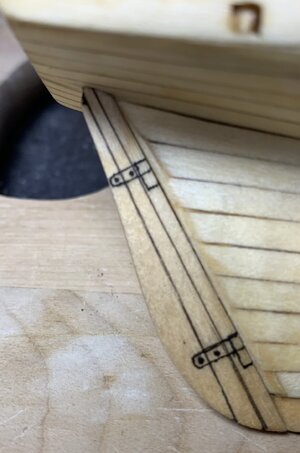
I've been trying to get her to do the same inking of the hull side hinge brackets, but so far, no luck...
M.
Well according to my research 3 pivor5w arevreqir e


