-

Win a Free Custom Engraved Brass Coin!!!
As a way to introduce our brass coins to the community, we will raffle off a free coin during the month of August. Follow link ABOVE for instructions for entering.
-

PRE-ORDER SHIPS IN SCALE TODAY!
The beloved Ships in Scale Magazine is back and charting a new course for 2026!
Discover new skills, new techniques, and new inspirations in every issue.
NOTE THAT OUR FIRST ISSUE WILL BE JAN/FEB 2026
You are using an out of date browser. It may not display this or other websites correctly.
You should upgrade or use an alternative browser.
You should upgrade or use an alternative browser.
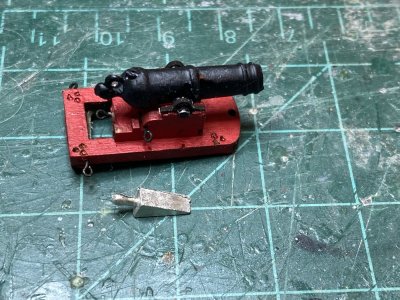
Falling along the lines of Tom Culb's work I took some 1/8 X 1/16 stock and cut it into 3/16" length. I then, using a new blade, split them diagonally to create some smaller wedges.
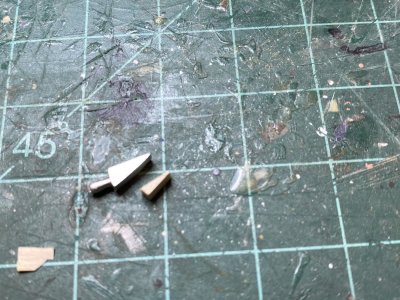
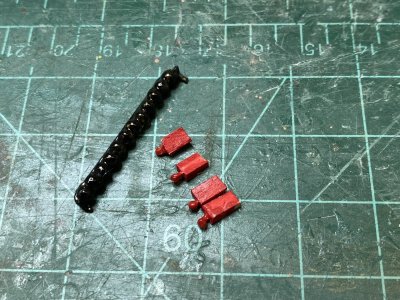
Using a vey small drill I attached some small eyebolts to the ends pf the wedges to make smaller quoins. I will fill the eyebolts with drops of white glue to simulate the handles and paint them red.
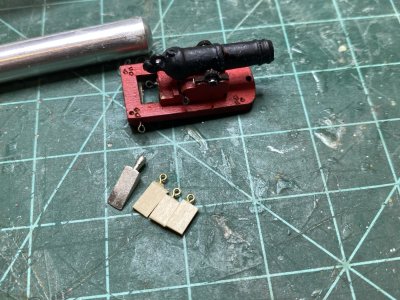

Using a vey small drill I attached some small eyebolts to the ends pf the wedges to make smaller quoins. I will fill the eyebolts with drops of white glue to simulate the handles and paint them red.

Last edited:
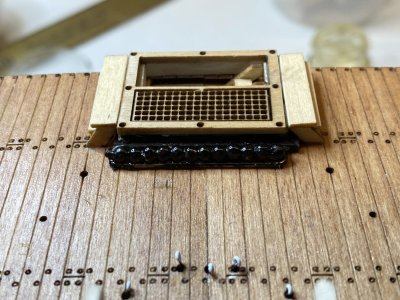
While working on that I also prepared the cannonball rack. The supplied "cannon balls" are small plastic beads that I threaded upon a 1/32" brass rod. I then put a drop of glue on each end to hold them in place. Using some more rod I shaped a bracket that will hold the cannonballs.
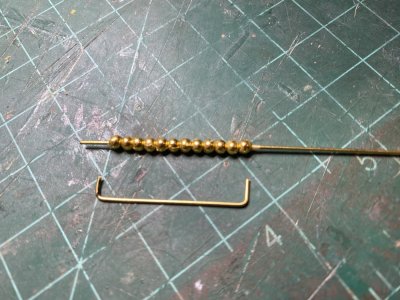
The rod holding the cannonballs and the bracket were trimmed and glued together.
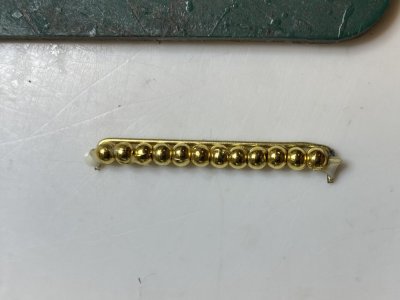

The rod holding the cannonballs and the bracket were trimmed and glued together.

Last edited:
The cannonballs were glued into place. It is difficult to drill the holes on the hatchway with all the equipment in place. I would have done this part earlier in the construction if I were to do it over again.
A number of large and small hooks were blackened using brass black to prepare for rigging the cannonades. Knowing my unique ability to lose items I made sure to blacken more than I needed.
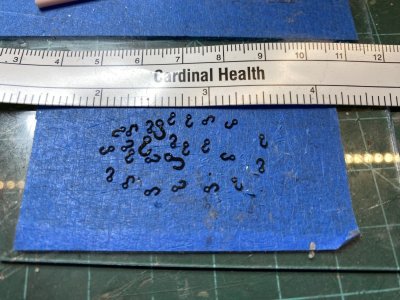

A number of large and small hooks were blackened using brass black to prepare for rigging the cannonades. Knowing my unique ability to lose items I made sure to blacken more than I needed.

While waiting for things to dry, I glued the "eyebrows" above the gunports. To make sure they were in good alignment, I cleaned out the holes in the metal eyebrows with a small drill and then placed a small piece if 1/32" rod into the hole on the hull to match were the gunport was to sit.
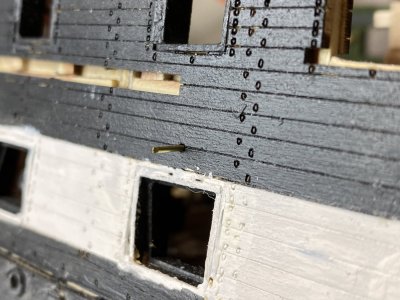
Wood glue was the applied to the back of the eyebrow and it was settled into place.
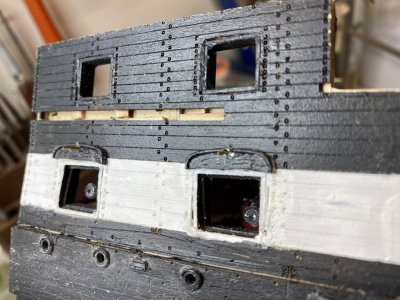

Wood glue was the applied to the back of the eyebrow and it was settled into place.

I started the rigging for the Cannonades next. Since they are on the exposed deck I will be trying to use some better shaped blocks than provided by the kit. I have purchased some Model expo "Beautiful Blocks" and some 3D printed blocks from Syren models. Both are a step up. I have to say it is difficult to believe the Syren blocks are not made of wood. I will take some pictures of the 3 varieties later on.
First off I made some breeching lines for the cannonades. I used the same slightly smaller diameter line I used for the cannons. It was nice to have the small "stage" I made for the cannons to work on. I cut the lines 2.5" in length. Using the large hooks I threaded them through. I used a bit of glue on the ends and "crimped" them together with a forceps with some glue before I seized them.
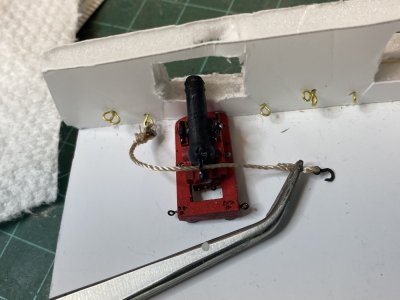
I then seised the ends.
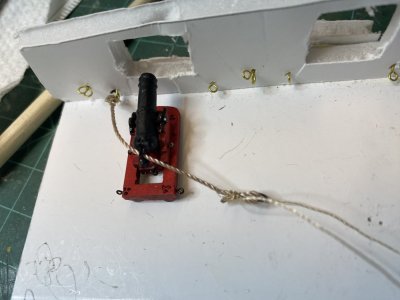
Since the lines are passed through a metal part of the cannonade, you have to do each individually.
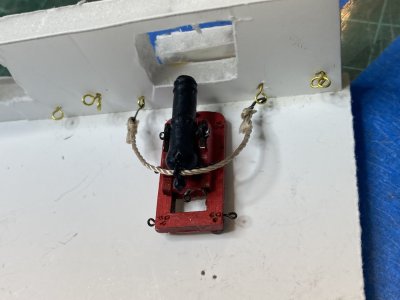
First off I made some breeching lines for the cannonades. I used the same slightly smaller diameter line I used for the cannons. It was nice to have the small "stage" I made for the cannons to work on. I cut the lines 2.5" in length. Using the large hooks I threaded them through. I used a bit of glue on the ends and "crimped" them together with a forceps with some glue before I seized them.

I then seised the ends.

Since the lines are passed through a metal part of the cannonade, you have to do each individually.

Last edited:
- Joined
- Oct 9, 2020
- Messages
- 2,229
- Points
- 488

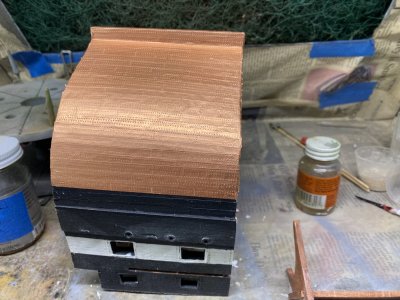
did you apply the clearcoat to the copper plates as well? I was wondering about that for my boat too.After taking off the Tamyia tape and allowing everything to "set" overnight. I wiped the coppering off with some alcohol to remove any fingerprints and grease then I airbrushed the hull and the cradle for the Constitution with 2 coats of Model Master clear coat enamel.
View attachment 518653
Yes the copper plates were also coated. If you want to "age" the copper you should do so before you coat it. You can also use a matt spray or Dullcoat on the plates instead to tone down the shine.did you apply the clearcoat to the copper plates as well? I was wondering about that for my boat too.
- Joined
- Oct 9, 2020
- Messages
- 2,229
- Points
- 488

tksYes the copper plates were also coated. If you want to "age" the copper you should do so before you coat it. You can also use a matt spray or Dullcoat on the plates instead to tone down the shine.
- Joined
- Aug 14, 2018
- Messages
- 829
- Points
- 403

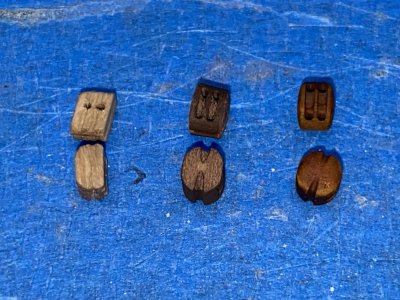
Here is a comparison of the 3 blocks. The ones on the left are the blocks supplied with the kit. The middle blocks are Model Expo's "Beautiful Blocks" the one on the right are the 3D printed blocks produced by Syren models.
View attachment 519749
Hi Rob,
What is your opinion between the "Beautiful Blocks" and the 3D Syren blocks? Dry-Dock Models do what looks like a very similar block to the Model Shipways ones and I found them very good. You are making a great job of this build and I am looking forward to seeing the finished article.
Regards JJ..
They both look great. The holes for the lines are very small and to use the same diameter lines I have had to drill out both sets of blocks. They handle about the same IMHO. I will certainly be buying more of them. I believe the beautiful blocks are produced in Italy and the Syren are made in the USA.Hi Rob,
What is your opinion between the "Beautiful Blocks" and the 3D Syren blocks? Dry-Dock Models do what looks like a very similar block to the Model Shipways ones and I found them very good. You are making a great job of this build and I am looking forward to seeing the finished article.
Regards JJ..
Thank you for your complement and I am also looking forward to seeing the finished cross section. But of course I will also be sad that it is finished! However my next project will be the Occre Black Pearl, so there is something to look forward to.
I think using this "stage" for rigging the armament is very convenient and greatly reduces the chances of destroying other pieces of deck gear you may already have put onto the ship. I am, basically going to do one set of rigging at a time and then transfer it to the ship. Here I am doing the train tackle.
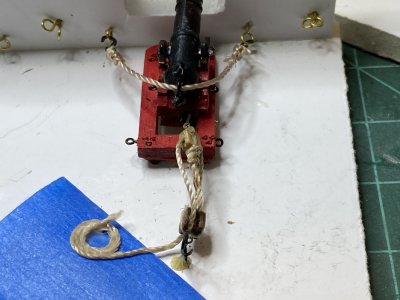
After everything has set the tackle is unhooked and placed onto the cannonades on the deck. I put a tiny drop of glue onto the hooks and eyebolts and under the rope coil to secure them in place. The cannonades have also been secured with glue.
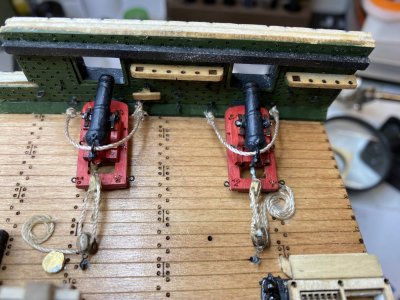

After everything has set the tackle is unhooked and placed onto the cannonades on the deck. I put a tiny drop of glue onto the hooks and eyebolts and under the rope coil to secure them in place. The cannonades have also been secured with glue.

- Joined
- Oct 9, 2020
- Messages
- 2,229
- Points
- 488

good idea.
After being away for a bit, I restarted the rigging of the cannonades. I was having trouble holding the blocks steady as I stropped them. I thought up a method that helps. I put a piece of poster tack down upon the foam board and then gently press down the block upon that. It holds the block in position as I place the line around the block and secure it. The poster tack holds the block in place yet releases it easily when I am done.
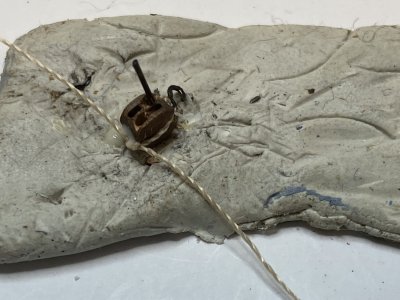
The cannonades are slowly getting their rigging.
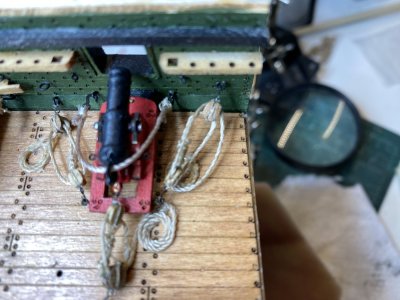

The cannonades are slowly getting their rigging.

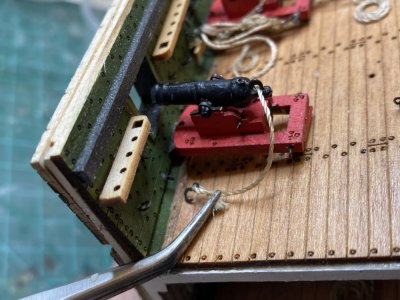
I finally installed all the cannonades. for some reason the breaching line for the last one was just a fraction too small to fit. I had to replace it. Replacing it was a little bit difficult and it brought home how much easier it is to do the rigging for each piece of armament separate from the ship itself. I know I would have had a much more difficult time with all the lines and would probably have damages pieces of the ship.
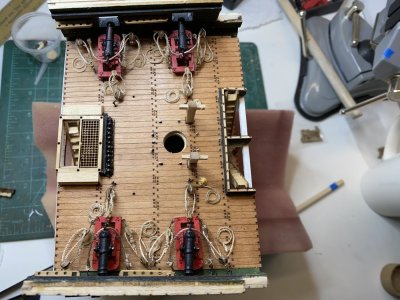


Next up is the fife rail. There are 5 stanchions that are laser cut and they want you to round the middle portion. The one end has been laser cut into very thin slices, I believe to represent sheaves. They recommend to treat these with CA to harden the wood. I think it would have made more sense not to cut these slots but to represent them with thin pencil or sharpie lines. But it is what it is. Besides rounding the stanchions, you also need to remove all the char since they want these pieces stained a natural wood color.
Instead of files I decided to try the nail drill I bought for $10. besides the miniature drum sander, it also has other bits that appear to be small diamond burrs of various shapes.
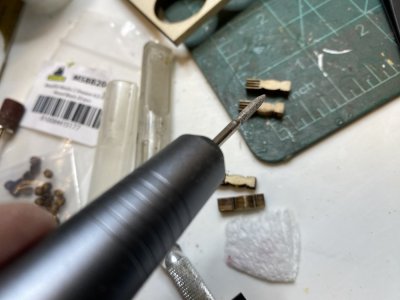
I am using the bit you see to slowly round the center portion and remove the char. It seems to work fairly well doing both. The small size allows you great control over it's actions.
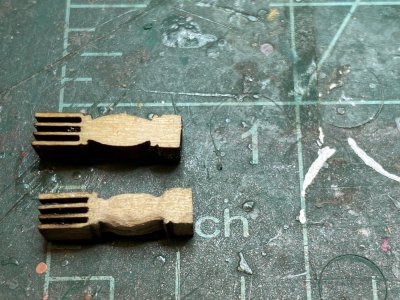
Instead of files I decided to try the nail drill I bought for $10. besides the miniature drum sander, it also has other bits that appear to be small diamond burrs of various shapes.

I am using the bit you see to slowly round the center portion and remove the char. It seems to work fairly well doing both. The small size allows you great control over it's actions.

Last edited:
- Joined
- Oct 9, 2020
- Messages
- 2,229
- Points
- 488

I can see many uses for that tool. I find my dremmel too powerful to sand things like this, even though it has a variable speed.Next up is the fife rail. There are 5 stanchions that are laser cut and they want you to round the middle portion. the one end has been laser cut into very thin slices, I believe to represent sheaves. They recommend to treat these with CA to harden the wood. I think it would have made more sense not to cut these slots but to represent them with thin pencil or sharpie lines. But it is what it is. Besides rounding the stanchions, you also need to remove all the char since they want these pieces stained a natural wood color.
Instead of files I decided to try the nail drill I bought for $10. besides the miniature drum sander, it also has other bits that appear to be small diamond burrs of various shaves.
View attachment 522046
I am using the bit you see to slowly round the center portion and remove the char. IT seems to work fairly well doing both. The small size allows you great control over it's actions.
View attachment 522049


