DE 7 PROVINCIËN (1665) 1:50

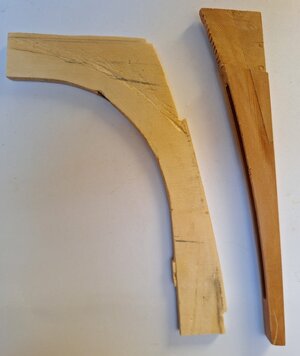
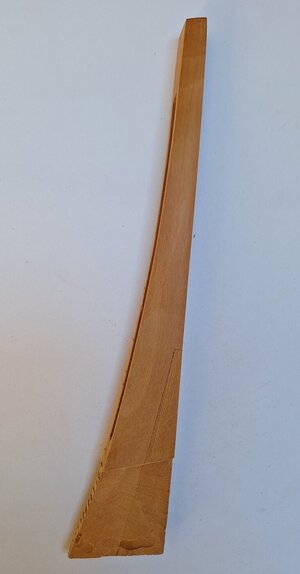
I have made the sternpost out of two separate pieces of pear as per the drawings of O.Blom.
20240120_142328_resized.jpg

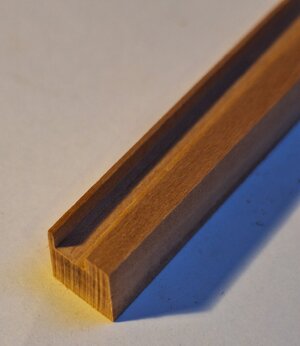
A slot was milled in the sternpost, into which a piece of plywood fits. That piece of plywood was part of the plywood out of which the middle frame was made and later used as a stand on which the hull was built (see the first picture below). That piece of plywood therefore fits perfectly into the slot in the hull. It will keep the sternpost firmly in place when gluing it to the hull. The same method will apply later for the keel and bow.

20180916_173200_resized.jpg

20240120_142353_resized.jpg

20240120_142404_resized.jpg

20240120_142423_resized.jpg

The stern was sanded down to fit the round shape of the sternpost. At that time I marked out the sternpost in line with the planking and milled down both sides of the sternpost onto which the remaining two rows of planks will fit. Looking at the last pictures please bear in mind the sternpost is not yet glued to the model and the bottom part will be shortened as soon as the last plank is fitted to the sternpost.

20240120_142550_resized.jpg

20240120_143319_resized.jpg


And now on to the last two rows of planking.
 
I have chosen for building this ship as my father left me the book "De 7 Provinciën" by G.C. Dik. A book that comes with a set of plans (1:77). Years later I decided to actually build this model.
I wanted the model to be a bit larger than it would be on a scale of 1:77, envisioning a completed model in our living room. We have double doors entering this room with on both sides about 1,6 / 1,7 meter free wall, What a sight it would be to have one or even better to have a model on each side of the entrance of our living room. A fine scale to build this model would be about 1:48-1:50 making it a model of roughly 1.30 meter over all.
More info on this ship/model was searched for and found amongst other things on the website of the now deceased Otte Blom, who made an elaborate study of this ship and his drawings/plans can be found on internet. I looked around on several forums and found a building log by Dražen Carić, whose method appealed to me and for a first build (it has been over 40 years since I built a model) it appeared to me to be a good role model to get me started.
In the meantime I have collected several books to get deeper into the matter of 17th/18th century ship building and rigging. My latest and much appreciated acquisition "The Art of Ship Modeling" by Bernard Frolich (ancre.fr).

.. to be continued ..
Hallo @Herman
we wish you all the bEST and a HAPPY BIRTHDAY
Birthday-Cake
Enjoy your special day
 
Somehow, I missed a lot of updates from about 25-12 on a lot of logs. Even in this one. Nice work you show us Herman. Love the planking.
And a Happy Birthday
 
Herman, Ik wens u gezond en succesvol leven vooruit. Gelukkige Verjaardag!! Geniet van uw speciale dag!! Birthday-Cake
 
Hallo @Herman
we wish you all the bEST and a HAPPY BIRTHDAY
Birthday-Cake
Enjoy your special day
Somehow, I missed a lot of updates from about 25-12 on a lot of logs. Even in this one. Nice work you show us Herman. Love the planking.
And a Happy Birthday
Gefeliciteerd met je verjaardag, Hermann
Van harte gefeliciteerd! Birthday-Cake Beer
Wonderful Herman! I hope you have a great day celebrating with family and friends!
Herman, Ik wens u gezond en succesvol leven vooruit. Gelukkige Verjaardag!! Geniet van uw speciale dag!! Birthday-Cake

Thank you all for the birthday wishes, highly appreciated.

I hope he will show us the presents he got. He always got a lot of stuff to use in model building. :cool:

Hi Stephan, I promise I will show all related stuff.
 
Only related ROTFROTF:cool:
As you already hinted, I was spoiled again this year:cool:

First of all a desk lamp as the last one had broken down and I was now a bit struggling like a miner with the head light from my magnifying glasses. That will improve my working place drastically.
20240122_181129.jpg

My son's girlfriend was educated on an art school and is always enthusiastic when she sees someone in a creative process. She always makes me happy as she shows a genuine interest in the progress of my 7 Provinciën.
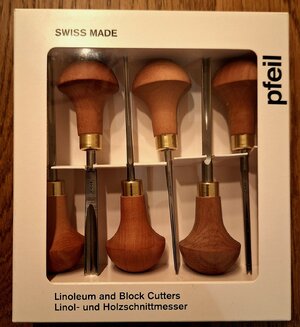
I had mentioned that I want to try to make the carvings by hand so they surprised me with a set of Pfeil gouges and a slip strop to keep them sharp. Now I certainly hope to have a talent for wood carving.
20240122_181238.jpg
20240122_181246.jpg

I also received a new book for my collection.
81X9zpYFHVL._AC_UF350,350_QL50_.jpg

And last, but certainly not least, my admiral takes me on a city trip to Stockholm this year, date still open. Related to model building? Yeah...a visit to the highly interesting VASA museum will be included.
20240122_181043.jpg

Needless to say it was a happy day with a great family.
 
Last edited:
Together with the last 2 rows of planking the sternpost will have to be glued to the model. Before doing that I wanted to check how the sternpost would fit in connection to the wing transom. The easiest way to check that is simply to make the wing transom at this point (and a welcome short break from planking).
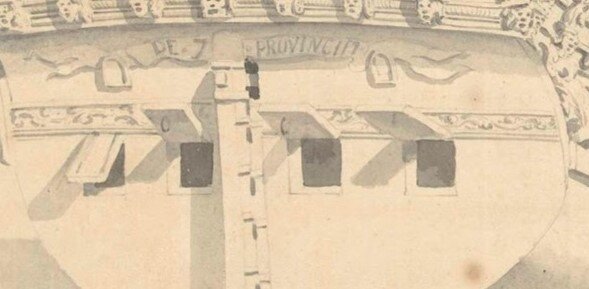
This is how the wing transom was drawn by Willem van de Velde:

unnamed.jpg

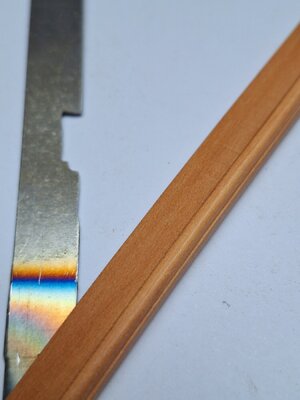
I started with a piece of wood, that had been made to fit into the recess in the planking on the model. The profile on the underside of the transom was copied/filed into a piece of metal and with that piece of metal the edge profile was scraped into the wood.

20240127_151046_resized.jpg

At that point I had to mill a slot into the top of the transom and that went wrong as I had started with a piece of wood that was already beveled to the angle of the stern I had to counterbalance that angle. I simply made a piece of wood that corrected the angel, but it slipped during milling and damage the transom.

I started all over again by making a new piece of wood with the correct curvature to fit into the recess but this time no beveled angle. To get the milling over with I started by making the slot.

20240127_172054_resized.jpg

And scraping the profile again to the underside of the transom.

20240127_192437_resized.jpg

Enclosed two pictures of the wing transom provisionally place on but obviously no glued to the model. I have sanded it somewhat down, but it still needs a bit more work as it should only just protrude beyond the planking. A carving of a series of acanthus leaves belongs in the groove of the transom. That will be quite a challenge for later as the height of the slot is only 4,5 millimeters (abt 0,18 inch).

20240127_200425_resized.jpg

20240127_200514_resized.jpg
 
Back
Top