Donnie's HMS Blandford Cross Section Build: 1/32 Scale [COMPLETED BUILD]

Both of you are correct, I will use one or combo of the suggestions. I was aware that the keel must have a positional reference. Both methods mentioned will provide this.
thank youThumbsup
 
Another way to align the top and bottom of the jig is to strike a centerline on the top and bottom and align them with a square, as long as the vertical supports are square the top and bottom can be different sizes and the bench does not have to be level.
 
Thank you for the visits and encouragement. I got off course this evening. I am hi-jacking my own thread and getting way off topic.

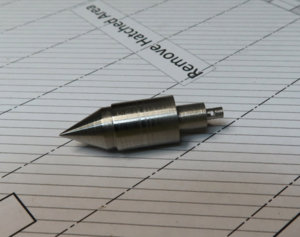
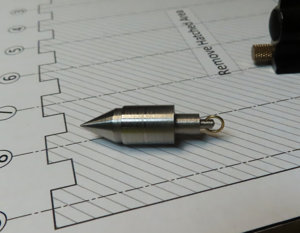
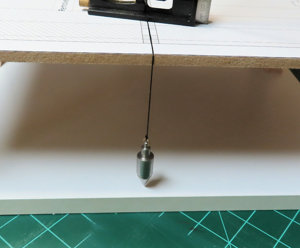
I decided to use a weight to align the KEEL. I knew I had a weight (plumb) from many years ago and I looked for it for over an hour and could not find it. Well, I remember it was a little too large for this project anyway. So, major distractions set in. I wanted to cut out my jig pattern, but somehow I got the urge to just make my own plumb weight. So here it goes, this has nearly nothing to do with the Blandford, but more for entertainment value, I guess.

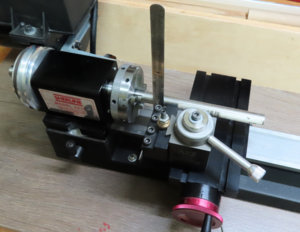
I had some T-303 Stainless Steel and I commenced to cut off a piece. No plans, just making it off the top of my head and let's see what I can come up with. The main thing is this thing going to work when I am finished or did I just waste ( 1-1/2 ) hours of time. We will see when the time comes.

The ruler assists in proper center alignment of the tool to stock when tool/cross slide engages the
ruler, if the cutting tool is not exact centerline, the ruler will flex back and forth. Aim for near 90°

plumb01.jpg


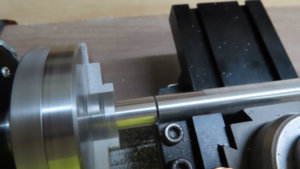
Cut-off tool working - use 270 RPM (no lubricant)
plumb02.jpg


Finished Cut off Excess Stock (no lubricant)
plumb03.jpg


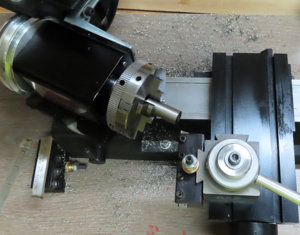
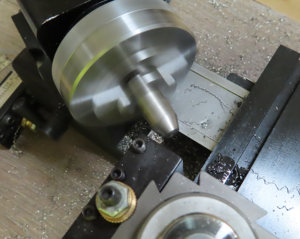
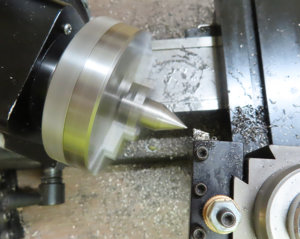
Setup Headstock for 25 ° Cut for Taper
plumb04.jpg


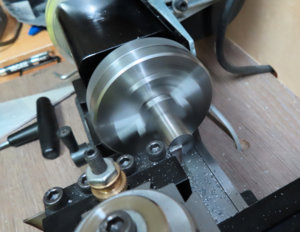
Taper in Progress About 700 RPM
plumb05.jpg


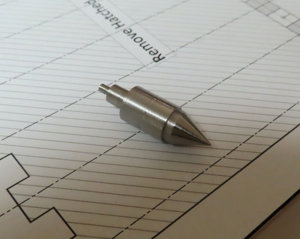
Taper Finished
plumb06.jpg


Main Plumb Weight complete - need to drill a hole for Split Ring

plumb07.jpg

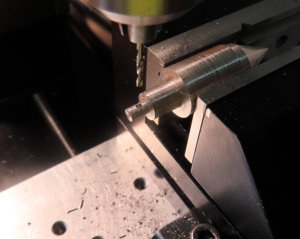
Using Micro Marks Drill Bits - going slow downward & maybe 400 RPM

plumb08.jpg


Hole Completed
plumb09.jpg


Mounted Split Ring for string
plumb10.jpg


Putting it into Practice
plumb11.jpg
 
Last edited:
Time was on my side tonight. I was able to cut out the jig notches. This is straight off the scroll saw. No filing to be done yet - I will wait to see how a .5 inch dummy frame will fit in the notches tomorrow. Jig is still not glued or screwed together but just dry fitting. I did leave an indention reference mark where the KEEL is located, you just cannot see it in the pics. I took an Exacto knife and made a tiny "v" cut in the middle.

jig03.jpg

jig04.jpg

jig05.jpg
 
This is now the official first opening remarks about my 1:32 build log of the Blandford. The first comment is that this is my first scratch build. I have been putting this off for a long time and now is the time. I also ordered the Blandford AOTS to help me with terminology.

First things first are getting the plans printed out. Since I have an HP 7740 Wide Format printer, this is at least one fortunate thing. Printing plans from pdf are not my forte'. However, a few adjustments needed to have the correct dimensions reflected correctly on the sheets.
I would like to expound on this if you do not mind. In the printer settings (advanced settings) there is a drop-down to choose between "Fit to Page" and "Actual Size". The default setting is "Fit to Page" and seems logical. I printed out a test page and from initial observation all is ok. But, closer inspection reveal that this is not the case. The first item to print was the Keel. One notch seems ok until I measured the full length and noticed a problem. Then I remembered the "Actual Size" selection from a long time ago dealing with the same situation. Printed the Keel again and it is now EXACT. I need to mention that the difference is NOT noticeable at first. the dimension difference is barely noticeable, but the dimensional error does add up. It is NOT the plans. It is the way the printer makes internal adjustments.
So, I include a small screenshot in case someone has this dilemma. Also, my basic printer dialog setting has "Tabloid" instead of the usual 11x17 settings. The tabloid is fine. Please take note that you might not have this problem. If you have a printing company doing this for you, mention "Actual Size". For those that already know this, then disregard as this is a new experience for me.

The next item that I felt was important was what method I was going to use to build the frames on. I must give credit to Norway (Knut) as I read his log on this. So, since my wife works at Hobby Lobby, I was able to get a 23 x 18 sheet of glass really cheap and it is 1/8 inches in thickness. I also grabbed a very thin transparency sheet. This one sheet is about $1.50 so, it is not major to buy more in case glues makes it messy.
I am not sure how this will work, but I think it will be ok. The glass serves as a strong flat surface. Then I lay my plan on the glass, then on top of the plans, I will lay my transparency sheet. The sheet is .030 inches, or 1/32", or .75mm in thickness. It seems so thin that I cannot tell the transparency sheet is there. Below are some samples of such:

View attachment 127217


Now this image below is just that the plans sheet static clinging to transparency. Kind of optical illusion.
It looks like the plans are on top, but the plan is underneath the transparency.

View attachment 127218

View attachment 127219

The wood selection: I have no experience here. I have always used "kit wood". I have contacted Dave at dlumberyard for some samples: Here is a list of samples. The (F) denotes all of the framing. The other woods are for (pillars, shot locker, pumps, etc.) is yet to be determined. My main concern, for now, is the framing selection. As you can tell, I am leaning towards a darker selection for framing. ONLY ONE (F) will be selected for framing. These are just choices. I am NOT mixing these.
  1. Alder (F)
  2. Basswood
  3. Boxwood
  4. Cherry (F)
  5. Dogwood
  6. Holly
  7. Hornbeam
  8. Madrone (F)
  9. Swiss Pear
  10. Walnut (F)
So, there it is, as I am off to a start and waiting for some wood samples. I have always been a kit builder so I hope that I have not overloaded myself.

Donald
Hi Donald, Paul here
You said you could not build like my Royal Clipper but looking at this, your going to make a perfect model, may take you a long time but scratch building is a great and satisfying challenge and I'm sure your skills are up to it.
Have patience, Paul
 
My samples arrived this afternoon from Dave. I wrote Dave a special thanks. Some timber I have never seen before - It will not be long and I will have my selection made shortly. Again, thank you Dave very much !!!

Donald
 
Ok, so, now the Jig is finally finished and pleased with it. A dummy piece of Red Oak I had laying around cut down to .5 inches wide. The very faint pencil ine down the middle is the Keel Center established using plumb.

jig06.jpgjig07.jpgjig08.jpg
 
Last edited:
......... I also ordered the Blandford AOTS to help me with terminology.

Donald

Perfect work Donald for a beginner like me!


What is the “Blandford AOTS to help me with terminology”?


Can you please tell me a bit more about it and where did you get it? I think it may help me with the terminology which I have a major problem understanding. I haven’t started building anything yet but I hope one day to do so.


Thank you.
 
Well, hello there 528i Jim, nice to hear from you - I am pleasantly surprised about your post. I have a selection of wood now to choose from and will be starting soon.

Also to Oskar27, The AOTS is short for The Anatomy of the Ship series of books are comprehensive treatments of the design and construction of individual ships. They have been published by Conway Maritime Press since the 1980s and republished in the US by the Naval Institute Press.

I think I had my abbreviation wrong. This can be bought from Amazon or eBay, etc. It was suggested to me by Mike41 to buy this as it shows and describes in detail each part and piece of the ship. I have been putting off building this for about a year and this is something I need to do to learn. The jig is a very important part as well. I hope that you join us in this Project. If you do, then I can send you the link to download the entire Build Of Materials (BOM) and plans and patterns. You have a choice of 1:32 of which I am doing or the 1:48.
AOTS-BNFRD.jpg


Perfect work Donald for a beginner like me!

What is the “Blandford AOTS to help me with terminology”?

Can you please tell me a bit more about it and where did you get it? I think it may help me with the terminology which I have a major problem understanding. I haven’t started building anything yet but I hope one day to do so.
Thank you.
You can find a Book Review here in SOS:
 
Thank Donnie for the reply, I found the book and I will order it.


I also appreciate your help regarding the link for the entire BOM and plans, it will help me a lot to get going. As for the scale I will leave it up to you since I don’t know which will be easier for a beginner 1:32 or 1:48?
 
Donnie just take it easy and all will fit into place soon or latter, after all it is a hobby project – something to enjoy.


I never built any model but my experience from other projects says that lumber is sold in standard lengths and cutting to length is the end users job. So if you have similar wood type/size in various lengths you just add up the lengths and you order the total lenght you need + some extra for safety.
 
Back
Top