You are correct, Smithy. Those types of changes only mods and admins can do. However, 'Report' has a different purpose, though. It is better to use PM (Private Messages) for asking about these types of changes.As if by magic.
In fact, by Jimsky. Since nothing we tried was working I guessed that title changes here are only possible for admin staff so I reported your difficulties by clicking on the 'report' button bottom left of each post. It seems to be the best way to contact the admins.
-

Win a Free Custom Engraved Brass Coin!!!
As a way to introduce our brass coins to the community, we will raffle off a free coin during the month of August. Follow link ABOVE for instructions for entering.
-

PRE-ORDER SHIPS IN SCALE TODAY!
The beloved Ships in Scale Magazine is back and charting a new course for 2026!
Discover new skills, new techniques, and new inspirations in every issue.
NOTE THAT OUR FIRST ISSUE WILL BE JAN/FEB 2026
You are using an out of date browser. It may not display this or other websites correctly.
You should upgrade or use an alternative browser.
You should upgrade or use an alternative browser.
Endurance (1912) - Occre, Scale 1:70 - My First Shipbuilding Adventure
- Thread starter The Ships Cat
- Start date
- Watchers 21
Before I ordered my Endurance from Occre, in excitement I would scour the web (prior to finding this awesome crew  ) and watch in awe the experienced modelers with there life-like creations.
I came across one guy who put LEDs in his ship, so I thought, yep, doing that, what can go wrong ?
Well, firstly I didn't even know what an LED looked like let alone work with them.
To business:
Firstly where to put them, I looked at the picture on the box and worked out the portholes that will need illuminating and added a few "dots" where I needed to put them before drilling any holes.
Trust me, I checked at least half a dozen times before I drilled.
Looming, new to me.
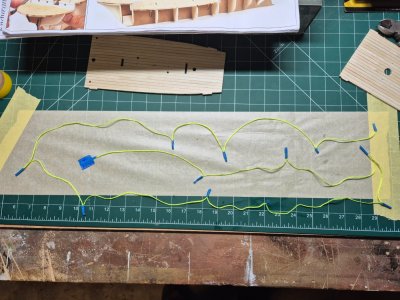
OK me thinks, how about I create some sort of "looming template"? So I did.
I did a mock up using twine and blue tape (representing the LED) ,not sure if this is the correct way to go but it works for this rookie .
.
Any experienced folks out there with LED knowledge that could give a few pointers, maybe some do's and don'ts would be immensely appreciated.
I need to get these in place prior to fixing the decks and making a start on the hull planking.
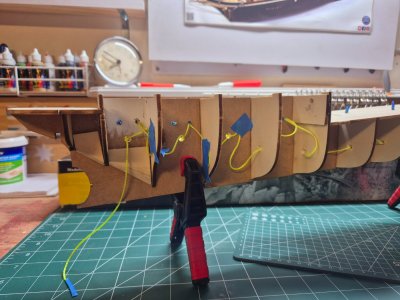
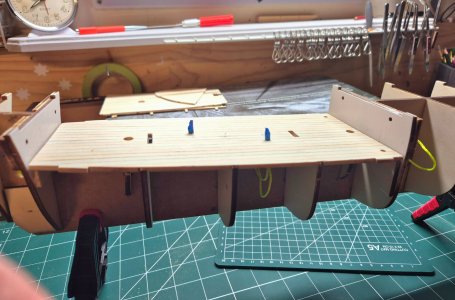
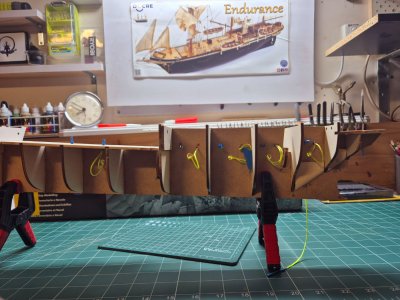
I came across one guy who put LEDs in his ship, so I thought, yep, doing that, what can go wrong ?
Well, firstly I didn't even know what an LED looked like let alone work with them.
To business:
Firstly where to put them, I looked at the picture on the box and worked out the portholes that will need illuminating and added a few "dots" where I needed to put them before drilling any holes.
Trust me, I checked at least half a dozen times before I drilled.
Looming, new to me.
OK me thinks, how about I create some sort of "looming template"? So I did.
I did a mock up using twine and blue tape (representing the LED) ,not sure if this is the correct way to go but it works for this rookie
Any experienced folks out there with LED knowledge that could give a few pointers, maybe some do's and don'ts would be immensely appreciated.
I need to get these in place prior to fixing the decks and making a start on the hull planking.


- Joined
- Dec 3, 2022
- Messages
- 1,547
- Points
- 488

do's and don'ts
You don't lack for boldness, do you mate?
 What's next, a robot dog team?
I'm no expert in lighting with LEDs, never done it but I'd like to one day. So do tell us exactly what you are doing and don't set the ship on fire.
You don't lack for boldness, do you mate?What's next, a robot dog team?
I'm no expert in lighting with LEDs, never done it but I'd like to one day. So do tell us exactly what you are doing and don't set the ship on fire.

Never thought of it before mate but I guess that "chew like crazy" must come from an in-built Aussie attitude
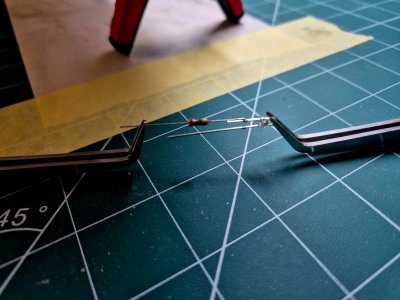
I definitely will post updates on this perilous pyrotechnic self-inflicted journey mate, there's a little leaflet that came with the LED's from Occre that explained how they need to be all connected, but I don't think Blue tack will cut it so I guess some soldering practice is needed
There's a sparky shop not far from here, ironically next to the country fire station so looks like I'm covered for all eventualities

- Joined
- Dec 3, 2022
- Messages
- 1,547
- Points
- 488

Soldering is one of my favourite things. It’s very useful at the rigging stage of a build. My tip is to concentrate your attention on three things:
Cleaning the surfaces
Using flux only where you want the solder to go
Using minimum amount of solder.
I’ll be very surprised if your sparky mate disagrees.
Cleaning the surfaces
Using flux only where you want the solder to go
Using minimum amount of solder.
I’ll be very surprised if your sparky mate disagrees.
Thanks for the video mate, but still a bit nervous giving this a go, but it won't stop me getting it done.The resistors and leds are big, should be no problem at all soldering.
You could use heat shrinking tubes to isolate.
I understand to the more experienced these may be a large size but I've never seen one before and this to me is akin to brain surgery using chopsticks with boxing gloves on

Thanks SmithySoldering is one of my favourite things. It’s very useful at the rigging stage of a build. My tip is to concentrate your attention on three things:
Cleaning the surfaces
Using flux only where you want the solder to go
Using minimum amount of solder.
I’ll be very surprised if your sparky mate disagrees.

I look forward to your responses mate.
- Joined
- Dec 3, 2022
- Messages
- 1,547
- Points
- 488

Thanks Smithy
I look forward to your responses mate.
Same on mine. We'll keep each other going eh?
So far so good 

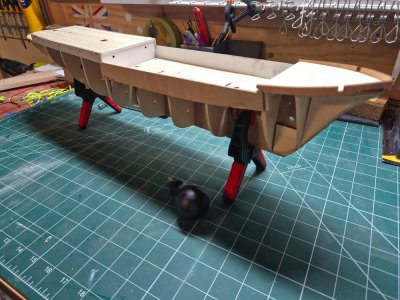
Fitted some Bulwarks today (hope that's the right terminology)
I'll be honest guys I am not a fan of that "pin pusher" gizmo one bit
Look, I understand of course this is all brand new territory for me and I'm guessing that with practice and experience I'd develop some sort of "knack" with it
but right now, I just don't trust it.
I've had pins bend over double, go in at 45deg, and a few times I've almost (almost) gone through the decking which had that happened you all would of heard me cuss from here.
I ended up using small long nosed pliers to hold/guide the pin straight and hammer all the way.
After umming a few times and poking about a bit he confessed he really doesn't deal a lot with soldering so I did what any decent Aussie would do and promptly robbed him of all his valuables and sent him on his way.

Fitted some Bulwarks today (hope that's the right terminology)
I'll be honest guys I am not a fan of that "pin pusher" gizmo one bit
Look, I understand of course this is all brand new territory for me and I'm guessing that with practice and experience I'd develop some sort of "knack" with it
but right now, I just don't trust it.
I've had pins bend over double, go in at 45deg, and a few times I've almost (almost) gone through the decking which had that happened you all would of heard me cuss from here.
I ended up using small long nosed pliers to hold/guide the pin straight and hammer all the way.
Update on the LED's
I had a good friend come round yesterday who's a professional electrician and I warned him prior that I'd be picking his noggin for a few tips.After umming a few times and poking about a bit he confessed he really doesn't deal a lot with soldering so I did what any decent Aussie would do and promptly robbed him of all his valuables and sent him on his way.
- Joined
- Dec 3, 2022
- Messages
- 1,547
- Points
- 488

that "pin pusher" gizmo
Likewise. I think they are useless gimmicks that look good on the designer’s sketch book but are badly made, painful to use and impossible to control. There’s no feeling of what’s happening until BANG you are wrist deep in your hull.
I use a pair of serrated jaw long nose pliers which I improved by filing a groove leading back from the tip to stop the pins turning sideways. I stick my pins half way Into a big rubber eraser and I can then reload the pliers with one hand and push them into the boat with a little twist all under control.
I don’t push them all the way in though, Cat. And as soon as the glue’s dried I pull them out again. Sanding down a boat with hundreds of pins in it is horrible. It’s really difficult to get it even when the pins are so much harder than the wood. Also it rips the sandpaper and cuts your fingers.
Others may disagree of course, this is just my experience.
Now THAT I likeI don’t push them all the way in though, Cat. And as soon as the glue’s dried I pull them out again.

Hi SC
There are planking tutorials on lining off the hull and tapering and shaping the planks that you might find useful, especially before you get to the difficult areas lower down. You will see that there is no need to pin the planks. www.youtube.com/watch?v=KCWooJ1o3cM
Allan
There are planking tutorials on lining off the hull and tapering and shaping the planks that you might find useful, especially before you get to the difficult areas lower down. You will see that there is no need to pin the planks. www.youtube.com/watch?v=KCWooJ1o3cM
Allan
- Joined
- Dec 3, 2022
- Messages
- 1,547
- Points
- 488

there is no need to pin the planks.
I agree.
It's a useful technique for a beginner but there are far better ways to do it. You can't really pin through the second planking anyway - all those holes would let the water in.

Hi SC
There are planking tutorials on lining off the hull and tapering and shaping the planks that you might find useful, especially before you get to the difficult areas lower down. You will see that there is no need to pin the planks. www.youtube.com/watch?v=KCWooJ1o3cM
Allan
Thanks Allan, I will definitely give that a watch for sure, I've been studying the pictorials and videos but concluded that experience is the key so this is very interesting to me

Ever tried floating a siv ?I agree.
It's a useful technique for a beginner but there are far better ways to do it. You can't really pin through the second planking anyway - all those holes would let the water in.
Makes for interesting comments at the boating park

- Joined
- Dec 3, 2022
- Messages
- 1,547
- Points
- 488

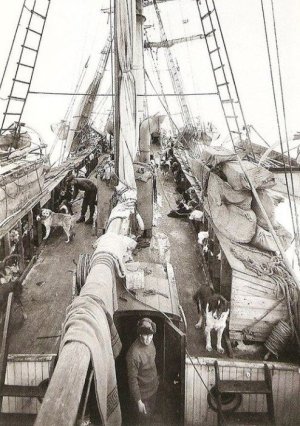
I have some information for you about the colour of Endurance’s decks.
I’m reading Landing’s book page 25-6:
“The ship herself presented an appalling sight. Sixty-nine quarrelsome Huskies were tied forward. [brown decks] Several tons of coal were heaped on the deck midships [black decks] and up in the rigging hung a ton of whale meat for use as dogfood. It dripped blood constantly, spattering the deck [dark red decks].”
It certainly wasn’t white!
Mate, I've taken the safety option of following Mr O'ccre's advice and gone with the finish indicated in the instructionsI have some information for you about the colour of Endurance’s decks.

I too did what I could to research and agree, it certainly was not white, although I did like the idea of no indication of joints or nails so I fitted the decks without the penciled lines and dots.


