Endurance (1912) - Occre, Scale 1:70 - My First Shipbuilding Adventure

Well, I think I must of watched almost every conceivable YouTube soldering tutorial so being newly qualified I set about the task with swaggering confidence.
That lasted about 2 minutes.....tops.
Never one to give up, I kept experimenting, after all I'm sure there are millions out there who are skilled craftsman at soldering but I bet they weren't skilled craftsman by a long chalk to begin with :p ROTF
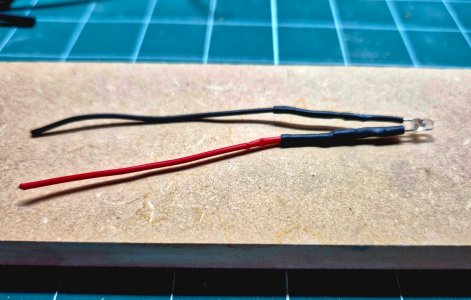
After a short while and a long length of practice wire, things started to come together. Literally.
Very pleased with my very first attempt at soldering, it's taking me ages but refer to comment previous, (and shrink wrapped looks even better ;))
I won't show you the solder itself as it's about as pretty as a Bulldog licking sour cream off a Thistle but I'm confident to continue tomorrow so that's a plus Thumbsup

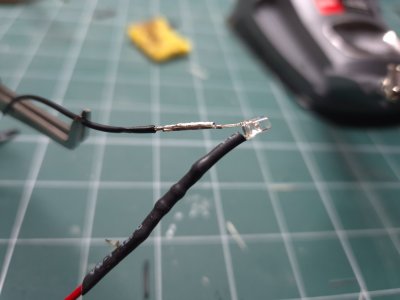
Bought one of those "helping hands" gizmos thinking it would make the job a tad easier, a cheapy from Amazon, and it acted like a cheapy from Amazon.
Ended up using self closing tweezers to clamp and hold, worked fine Thumbsup;)

008.jpg
 
Never one to give up, I kept experimenting, after all I'm sure there are millions out there who are skilled craftsman at soldering but I bet they weren't skilled craftsman by a long chalk to begin with :p ROTF

So true. I learned in the RAF where the required standards were a bit good (and later taught it as an instructor). I find it very satisfying precisely because I remember how hard it was to get it right fifty years ago.

Yours looks nice and tidy compared to a lot of first attempts I’ve seen. The heat-shrink is a nice touch, though I used to make trainees get their soldering signed off before they were allowed to bury it. ROFL.

Bought one of those "helping hands" gizmos thinking it would make the job a tad easier, a cheapy from Amazon, and it acted like a cheapy from Amazon.
Ended up using self closing tweezers to clamp and hold, worked fine Thumbsup;)

Keep the gizmo, sometimes they are useful when you are doing the rigging.
 
Yours looks nice and tidy compared to a lot of first attempts I’ve seen.
Thankyou Smithy mate Thumbsup Very encouraging my friend.
I almost threw the gizmo in the bin but will keep following your advice mate, wise words, you just never know. ;)
I continued with the task yesterday evening, and after a few trials and a few more errors I actually got it going into a nice procedure.
I did some in the afternoon but wasn't getting very far, then I went onto this forum and re-read your tips on soldering.
Cat !! :oops:.....FLUX first you idiot !!
Made all the difference in the world.:pROTF
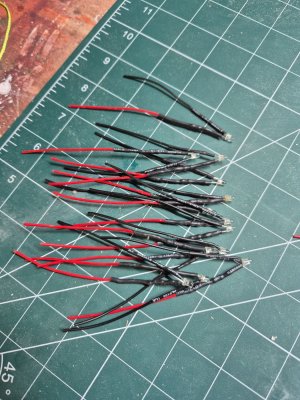
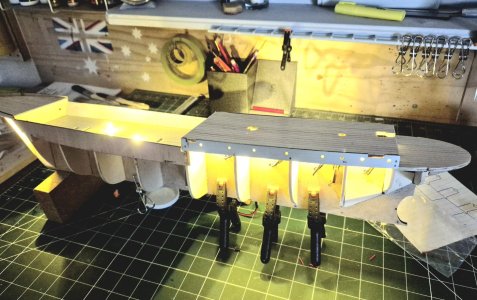
I've now got all 12 LED's "primed" so to speak, intending to do a simple test on each one.
(I want to try some yellow highlighter on one to see if it might give a more period looking glow, we'll see)
Decided to prep all the wire ends with a little solder, then glue each one in, then trace the wiring through the bulkheads rather than make an entire loom first and try to thread that through (I rehearsed that in my head over and over and never ended well)
009.jpg 009 (2).jpg
 
Last edited:
Tasty soldering there mate. That’s the sort of thing I used to look for. Not too much solder, nice and clean and straigh, no loose strands. You melted the insulation a li’l bit but I’ll let you off that tiny detail. ROFL

You could make the joints shorter when you are working inside the hull, it might make life easier. Since no one will see em, you could make the ends into hooks after you’ve put solder on them. Just link them together and touch them with the iron and the jobs a good un.

No need for heat shrink insulation inside a wooden box if there’s only one joint in there.
 
Thanks Smithy mate, taking all your experience in earnest my friend, you've helped/encouraged heaps Thumbsup :)
All the LEDs are firmly in place now and ready for looming.
I did try the yellow highliter for a more subtle glow and it did the trick nicely as I had visions of the completed ship looking like Sir Earnest had halogen fluorescents installed ;)ROTF
 
I just thought, what sort of stand are you going to use? You’ll be bringing those wires out to a battery somewhere I guess so you’ll need a plan for a tidy place to hide it. Might have to modify the kit stand a bit.
 
You’ll be bringing those wires out to a battery somewhere I guess so you’ll need a plan for a tidy place to hide it.
Yes mate, we really do think on a similar wavelength.
The stand, I'll probably make one, not shy in having a go with the ol' woodwork and confident in that department.
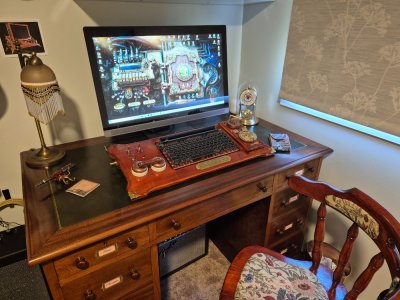
I'm actually in the middle of creating a Steampunk computer station 20241009_110519.jpg
I'm sure I'll hide those wires somehow, not got a plan yet, but to be honest I'm grinding the cogs more on how to exit the hull ??
I'm hoping somewhere out there in that quant little country town of Bye-on-Lyne there could possibly be a tiny socket that I could attach to the hull with a plug from the switch.
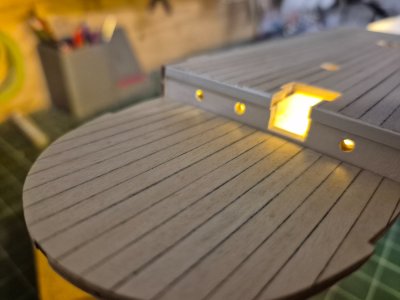
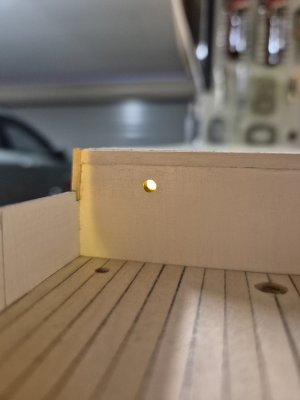
LED's are up and running, although my idea with the yellow highlighter has not gone quite to plan, looks way too yellow but I'm not stressing as I'm certain a dab of "something "on the end of a Q-tip to remove the highlighter will soon sort that out.
Happy daze Thumbsup:)

010 (1).jpg
 
I love the steampunk PC!

A handy and available plug/socket if you are going for a removable battery pack could be a miniature headphone jack?

Highlighters fade fast. Those lights might be white again in a year. Have you got any acrylic ink in brown? Wood stain?
 
Yes mate, we really do think on a similar wavelength.
The stand, I'll probably make one, not shy in having a go with the ol' woodwork and confident in that department.
I'm actually in the middle of creating a Steampunk computer station View attachment 477159
I'm sure I'll hide those wires somehow, not got a plan yet, but to be honest I'm grinding the cogs more on how to exit the hull ??
I'm hoping somewhere out there in that quant little country town of Bye-on-Lyne there could possibly be a tiny socket that I could attach to the hull with a plug from the switch.
LED's are up and running, although my idea with the yellow highlighter has not gone quite to plan, looks way too yellow but I'm not stressing as I'm certain a dab of "something "on the end of a Q-tip to remove the highlighter will soon sort that out.
Happy daze Thumbsup:)

Good morning. Very well done. Will provide wonderful lighting through the portholes etc. Cheers Grant
 
Thanks mate, pet project between household maintenance, playing guitar, building a ship and avoiding Interpol.

I sometimes wash up. I had a guitar (now I have arthritis instead). I’m building a ship. When asked what I’m planning to do today my stock answer is “same as every day, plotting to take over the world”. The resemblance is striking. I may have to have you assassinated.
 
Very well done. Will provide wonderful lighting through the portholes etc.
Thanks mate, very appreciated.
Still not sure on that yellow-ish glow, although I must admit it's growing on me, I'm after that early 1900's-ish electric light glow, it had
that "hue" to it compared to now.
I liked Smithies comment on the dye so I might give that a dab at some point just to experiment.

011 (1).jpg 011 (3).jpg
 
You’ll soon be ready to start "puttin' wood int thole”, as we say back in th’old country”.

That will test you. Getting the hang of hull planking was the hardest thing about doing my first boat. I made it harder by trying to do the first layer perfectly. You know, no gaps, dead smooth, proper spiling (shaping) of the planks and trying to go all the way from bow to stern with every plank.

Later I did the Occre Beagle and learned the Occre way. I hope the Endurance instructions are the same? On Beagle I made it look like crazy paving, first layer. It doesn’t much matter as long as the shape is right with nothing sticking out. Fill the gaps with little triangles of wood and sand those thick planks nice and smooth.

You’ll still have to learn to bend the planks around the hull but you don’t need Chuck Passaro’s edge bending yet. It might be fun to try it but you don’t need it.

Second planking is the one that has to look good and the Occre wood for that will be very thin and a lot easier to lay neat. It’s also easy to bend on both directions.

Good luck. WHEN you get stuck ask for help before resorting to stamping on the model with your size elevens, as a certain crazy bloke might once have done.
 
the Endurance instructions are the same?
Yes mate, going by your description pretty much the same.
I think the hardest curve I'm struggling with is knowing which areas are "nah, she'll be right, that gets covered by (whatever) anyway" and the areas where surgical expertise is demanded to avoid any catastrophes.
Applying aged logic, this is what is known as the learning curve, or in model ship building "the long drop". :p
That aside, I am very much enjoying this, and very grateful for finding SOS, the support and help from you guys, loving it mate. ThumbsupGold Star

You’ll still have to learn to bend the planks around the hull
I've hung on to your advice in a previous post my friend, about knocking the pins in enough to hold the glue and then pulling them out again.
I do like the sound of that, and in wanting to do that I figured I could practice some wood bending.
I looked back amongst my collection of Uri Geller Monthly but no mention of wood, just fork 'n spoons. ;)
Oh ! by the way, I think I may of solved that 'LED from hull to switch" thingy we were talking about.
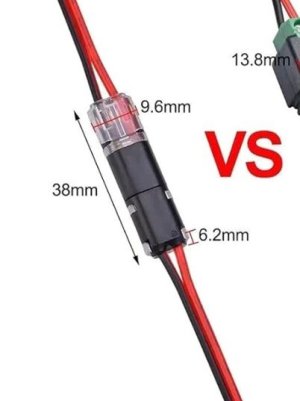
There's a doo-hicky called a "double wire plug and socket" and looks like it might do the job.
I'm now thinking of getting one to permanently mount (say) midway along the lower hull and then planking around it.
It's very small, I'll post pics when I can.
Time for some guitar.
Uru mate.

Here's that cable plug and socket mate, cheap enough, but they come in packets of 50 (about $40 a bag)

Screenshot 2024-10-14 201433.jpg
 
Last edited:
Back
Top