Endurance (1912) - Occre, Scale 1:70 - My First Shipbuilding Adventure

Did you read the part in my thread about quick setting the glue with heat?
Hey mate.
It must be my technique :confused:
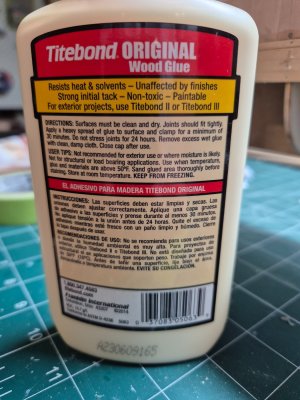
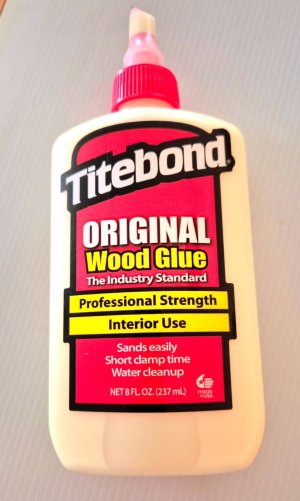
Firstly is this the glue you use ??
Titebond.jpg Titebond 2.jpg
I re-read your post about setting using heat but I can't seem to get it right.
In your post I think you mentioned you put your glue in a pot and apply with a brush ??
Because I applied straight from the bottle and there was a LOT, I wiped away some but I found it a bit hard to control.
Also you mentioned you apply like a contact adhesive ? Both sides then let dry ?
Would really appreciate a fresh pointer mate Thumbsup;)

TSC
 
Hey mate.
It must be my technique :confused:
Firstly is this the glue you use ??
View attachment 479310 View attachment 479309

Yes.

I re-read your post about setting using heat but I can't seem to get it right.
In your post I think you mentioned you put your glue in a pot and apply with a brush ??

Yes. That allows you to scrub it into the surface so it soaks in properly to both sides of the joint. Dust often stops that happening when you just pour it on.

Because I applied straight from the bottle and there was a LOT, I wiped away some but I found it a bit hard to control.

That’s your error. Just like me three years ago, you are probably using way too much glue. It’s not very good at filling holes so it’s important that your bulkhead edges are properly faired so the plank lies flat on the maximum surface area.

Using too much glue does not make the joint stronger. Quite the opposite in fact.

It also makes a mess which you will want to avoid

It also slows the setting time

Also you mentioned you apply like a contact adhesive ? Both sides then let dry ?

Yes. Have another look at the YouTube video which I link to from the post on the first page of my thread. That guy actually uses quite a lot of glue but he is working with a table. We only need to use a tiny bit.

You can let it dry completely before bringing the plank to the bulkhead and applying heat. You need a lot of heat not particularly high temperature but a lot of heat if that makes any sense the tip of a clothes iron or a big plank bending iron Contains enough energy to heat the joint enough to melt the resin and allow the two parts to fuse. a soldering iron might not do it. It will be too high in temperature and burn the wood but won’t contain enough heat energy to penetrate the wood and melt the glue.

Would really appreciate a fresh pointer mate Thumbsup;)

TSC

Remember, I have not used this method on a first planking. You are the pioneer.!

You can heat set the glue only at the bulkheads because you need to press quite hard. I think you will have to use the glue normally for sticking the plank edge to the previous plank edge. This is something that I have not personally tested yet.

—————-

For other readers my post on it is HERE.

There’s a link in that post to a you tube video by titebond where a guy laminates a whole table using Titebond instantly.
 
Last edited:
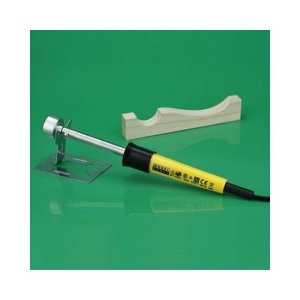
This is the Modelcraft tool I'm using. That big aluminium blob on the end can contain enough heat energy to set the glue.

plank bender.jpg

It's strange but since I stumbled on this technique, many modelers from 'the West', (Brits, Americans, Australians) have been surprised and enthusiastic, while modellers from the old Soviet Block, (Germans, Russians, Poles, Ukrainians) have been really surprised that anyone didn't already know about it because they have been doing it like that for years.
 
This is the Modelcraft tool I'm using.
Well that's a bit fancy_schmancy my friend !
I'm using a wet sponge and a soldering iron while lifting/twisting :p
Well, I now have aforementioned glue safely decanted into a suitable container in preparation for my newly educated approach of brush both sides, grab a tinny (Aussie timer: usually lasts 10 minutes) then introduce the lil' beauties' and seal with warm end of something hot.
Got it ;) Thumbsup
Bit late to have a go tonight as Precious (my guitar) is giving me side looks so I'll "take her for a walk" for an hour.
Thanks massively for your kind support Smithy, you are a dead set legend my friend.Thumbs-UpFirst Place Metal
 
Last edited:
I can't help noticing that you've not been posting photos since you began to plank
Sprung !!! ROTF ROTF ROTF
I'll send some later on when I've done a bit more.
Still in the dark as to how this works, and I'm assuming after my first attempt and that it's all sanded back to expose the butterfly from the cocoon will I truly
get my penny to commence it's long drop.
Currently it looks like a truck carrying builders planks has crashed into a glue factory.
Actually there are a few questions about things which are not clear to me even from the pictorials and videos from Occre. ;)
 
Actually there are a few questions about things which are not clear to me even from the pictorials and videos from Occre

Planking was a mysterious art the first few times I did it. There were so many different ways to do it competing for attention in my head.

The worst thing for me was getting to understand the geometry. I can draw things on a flat piece of paper, plank a flat deck easy, but geometry on a complex curved object was like quantum mechanics. I’d bend things to ‘fit’ and discover that I should have bent them exactly the other way!

I’d panic when I got that terraced field effect and start sanding before all was done - fatal! It seemed that I was always going to be patching stuff up. Why couldn’t I be as neat as those other people on line?

I was comparing the worst of my efforts with the specially selected and photographed best of theirs. Very demoralising.

It took me more than one hull before I started to get the overall view straight in my mind. And honestly, it still scares me a bit.

I was waiting for the penny to drop and even that was a mistaken idea because there are LOTS of pennies, many ‘aha!’ moments when a particular thing comes out right. And all followed by more frustration when the next bit turns to worms.

That’s why these models are so satisfying I think. I’m always struggling with them. They haven't ever run out of challenge. Alert is the fourth one that I’ll finish (there were others that I messed up so much I binned them) and I’m still fighting the thing most of the time.

Of course, it’s getting better with each one. My trouble is that the moment I planked a hull ok with long strips front to back, I thought I’d do it with scale length planks and but joints. Then I wanted my stealer ends cut right, then I wanted to do clinkering, coppering… There’s always something else to master. It’s great! It’s hard graft but it’s great. I’ll never be as good as I want to be even if I live another 100 years so I’ll not ‘run out of hobby’ like I did with plastic planes.

You look at my thread with admiration but remember, I’m looking at half a dozen other threads with the same feeling. I see you meeting the same issues I did and those guys I’m struggling to copy see me making their mistakes over again. It’s a lot like learning guitar in that way. Wanting to be Chuck Berry when I only knew A D and E!

I’m rambling on a bit but I hope that’s encouraging in some way.

Now show us the pictures so we can help!
 
Don't be shy - we are missing the best bit. :D
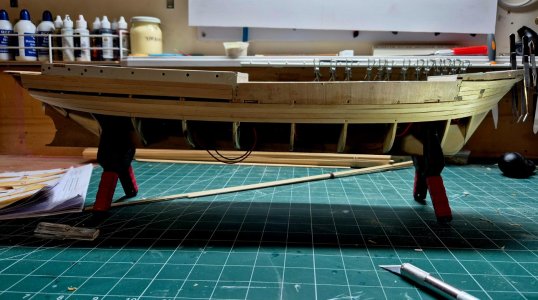
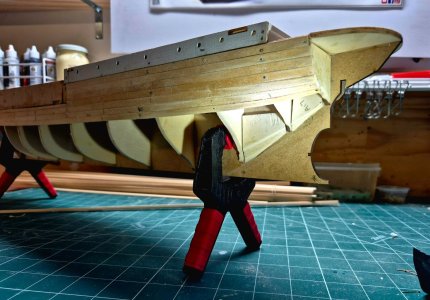
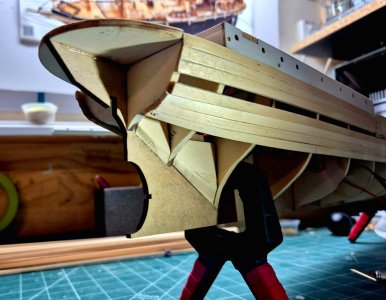
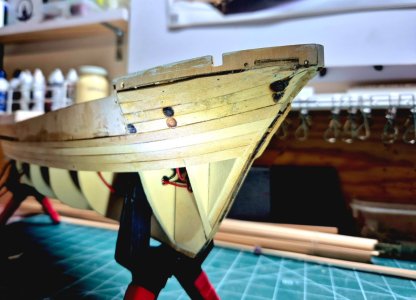
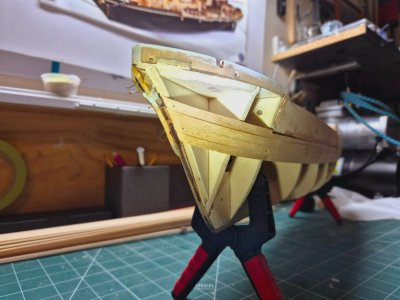
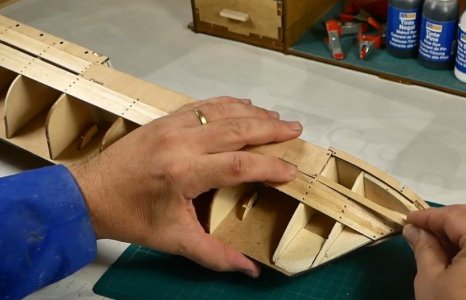
Here she is in all her glory, well, as much glory as I've done so far.
A few experiments with glues and techniques (notice burn marks on the bow planks 3 and 4 ), and still feel the need to twist and
roll the plank and "dry fit" prior to planking. Is that right ?
The magic hands on Occre's video look like the planks are straight out the box and onto the hull, bending/twisting/nailing as he moves along the bulkheads ??
Also I watched and watched again how the sanding is carried out.
It looks to me like the planks are sanded to within their last breath at the edges of Bow and Stern, am I right ? Is that how it ends up ?
Anyway, I'm determined to see this through (of course) - probably too over cautious but I think I'll be far more relaxed on the next hull.
.........woah Cat.........next hull ?.............yep, this bug has bit me good :p Thumbsup

14 (5).jpg 14 (4).jpg 14 (3).jpg 14 (2).jpg 14 (1).jpg
 
Last edited:
I’d panic when I got that terraced field effect and start sanding before all was done - fatal! It seemed that I was always going to be patching stuff up
Precisely the feeling I get Smithy, and I do find myself sanding waaaaay to early just so it looks the right shape.

Chuck Berry, one of my heroes.:cool:
Did you know Johnny B Goode is on that Golden disc sent to outer space on the Voyager ? ;)
 
I got out of bed to see those pictures and you posted thumbnails! They are no better on my laptop than they were on my phone. I can't see well enough to comment on them sensibly really. You seem to have started in the middle, which puzzles me a bit.

feel the need to twist and
roll the plank and "dry fit" prior to planking. Is that right ?

It's something you'll need to do right eventually on later models. It's not actually necessary here though, judging from my experience of an Occre kit. Trying to make the first layer of planks look like someone's outer layer may drive you nuts. The first layer planks are really thick, so there's plenty of sanding possible to tidy up at the end. Unless you waste it by sanding now, that is.

If I sand before the hull is covered I always cause problems for myself. The planks next to the big open space always end up too thin, so the next plank on has to be sanded even more. Before I know it, I'm patching holes I put there.

Occre's video look like the planks are straight out the box and onto the hull, bending/twisting/nailing as he moves along the bulkheads

Yes, that's how the Occre designers want you to do it. Their wood is soft and flexible and they aren't bothered about leaving triangular gaps everywhere - you just fill them in with little pieces. You might not even need filler. Occre, very sensibly in my opinion, don't care what the inner layer of planks look like. They want the builder to bash it on quick, and then sand it smooth, to the right shape. It's got to feel good more than look good. THEN, with their very thin and flexible second layer, you can worry about the appearance.

It looks to me like the planks are sanded to within their last breath at the edges of Bow and Stern, am I right ? Is that how it ends up ?

Yes. It doesn't much matter if they come to a point. You won't want to do that on the outer layer but see above, this layer doesn't matter. First layer on first kit is not, in my view, the place to be overthinking and trying to do 'proper' stealers and eighteenth century joints. That would be like polishing the bricks in the foundations of your house.

Did you know Johnny B Goode is on that Golden disc sent to outer space on the Voyager ?

Did you know I saw him live at Buxton Rock Festival in 1973?
 
Back
Top