Endurance (1912) - Occre, Scale 1:70 - My First Shipbuilding Adventure

so I'm not going to stress about it.
Yes I am.

No pics tonight gents as I'm back tracking and fixing that LED error.
Getting there, but it's taking quite a few layers of paint under the decks to do it.
Layer, dry, test with camera in the dark --- Layer, dry, test with camera in the dark - you get the idea.
I've had to surgically remove 2 or 3 small sections of that planking I was panicking about (far more relaxed now, thanks Smithy ;)) so I could
manage to get a small brush in there.
It's working, ..........slowly.
 
Paint's not much good for this is it? I've been thinking about it all day but can't come up with anything better, at least not that you can apply through holes in the hull.

Thinned filler perhaps? That one just popped into my mind as I typed.
I think I've pretty much got the decking to submit, just a few teensy areas that show up on the camera which I'll sort this afternoon.
The hull, .....yeah.
I have the final planking, plus some varnish of some sort which is applied according to the instructions, then Occre's black paint on top of that.
I've been thinking today of how many coats of black could I add without losing the look and texture of the final planking.
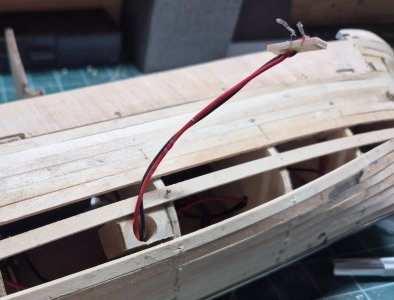
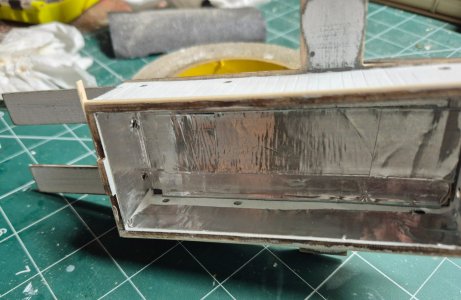
I've found some sticky backed aluminium tape in my garage, and with rehearsed contortions of the didgets can just about apply to the upper halves of inside the hull, but only while there's a gap, which needs to be filled of course.
I wonder if there's a sort of "light blocking" paint I could apply to the planking before the black ?
I'll have a look on the Google-o-matic.

The books arrived :p

20241031_122605.jpg
 
What a nightmare this is turning out to be, but I'm making progress so I think I'm coming out of the woods now.
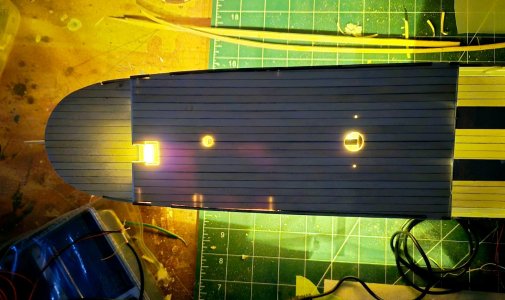
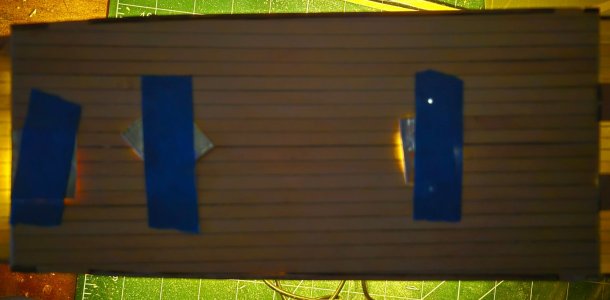
I'll put 2 pics up, before and then after at least 3 coats of paint under the deck.
The thing is people, only the camera can pick these light bleeds up, you honestly cannot see any light bleed with the naked eye, not even in darkness with your nose almost against the deck - nothing.
But if/when I take pics of the finished ship in all her glory....................................
17 (7).jpg 18 (3).jpg
Left was last night, Right was this afternoon - Happy Daze.

Looked to try and find paint that omitted light and come across many model building forums discussing the exact same issue with LEDs showing through hulls, fuselage etc. - the most popular advice was a coat of silver paint.
I'm going to test the hull of course prior to top planking and after, and if it comes to it, maybe put a coat of silver prior to the black top coat.
If anyone out there in SOS land has any Do's or Don'ts it would be appreciated enormously.
 
thing is people, only the camera can pick these light bleeds up, you honestly cannot see any light bleed with the naked eye, not even in darkness with your nose almost against the deck - nothing.
any Do's or Don'ts it would be appreciated enormously

Don't take photos of the ship in the dark with the LEDs on.ROTFROTF


Let me know if it's ant good. I might get one once my bibliomoratorium finishes.
 
I pour my shattered heart out to the community and that's what you got from it ?? ROTF ROTF

Let's face it Cat, it was you who decided to fit the LED's in the first place so you're kinda complaining about a self-inflicted wound here. ROTF ROTF ROTF ROTF

I got a few books in line before the Lunar Men mate, I've had a little sticky beak and it looks awesome Thumbsup:)
n.b. - "sticky beak" = a look

That's a fragment of 'Strine' that I've never heard before. Is it a rhyme with 'peek'?
 
Been a tad busy this last few days so only managed an hour here and there to try and keep up the momentum of righting my wrongs
with regards to the light bleed, and today was the final test and to quote the response by Shackleton's crew, "we are all well"
I've also added a block to take the jack plug after the hull is completed.
So after all that garb there's not much to post apart from a few pics of Franken-Durance and the silver sticky tape I used.
Job done, time to move on Thumbsup;)

19 (1).jpg19 (2).jpg19 (3).jpg19 (4).jpg
 
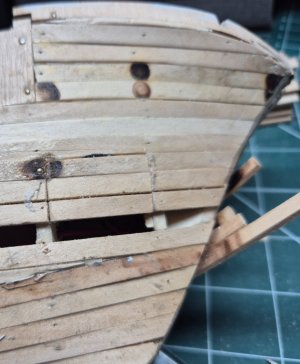
Franken-Durance

I didn’t realise you were modelling Endurance after the ice crushed her.
ROTFROTFROTFROTFROTF

I found it horribly demoralising when I did the first planking on my first model and it looked like that. My first planking STILL looks like that but it doesn’t bring me down anymore because I now understand that it doesn’t really matter as long as the shape is ok.

You will find the second layer infinitely easier to lay down because you will have a surface to stick it to instead of just the edges of the bulkheads and a lot of empty space.

What worries me is that the next build I’m planning only has one layer of planks! Help!

~~~~~~~~~~

Good use of the ally tape. I didn’t realise you could still get inside to do that. I thought it was all glued down.
 
I didn’t realise you were modelling Endurance after the ice crushed her.
ROTF ROTF
I thought it was all glued down
About 60% ~ 65% Smithy, mostly on one side so just a case of cutting few sections away at the bow end where the angles are tighter.
All good Thumbsup
I had a little fun though mucking around with odd pieces while Franken_Durance healed.
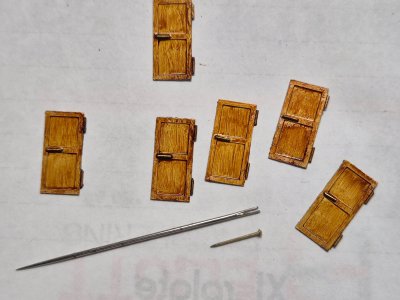
I fancied blinging up the doors supplied, the instructions are to add a tiny length of 2mm wire to act as door handles but I thought way too big so I used those pesky little nails instead to improve the scale somewhat, and also add some hinges too for a tiny touch of realism.
I like it.
Plus it gave an opportunity to try that great idea of yours with using the end of a needle to add glue. Genius.


20 (1).jpg
 
Last edited:
A trailer for a documentary about Endurance swimming. The premiere is coming soon. Very informative.
 
Watched the National Geographic doco last night. 5 stars, brilliant.
Well, I think I've saved my dear Endurance, but only just.
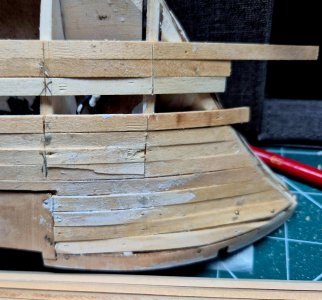
Finished 1 side of her hull, rough sanded into shape and hardly any filler, I was anticipating cupfuls of the stuff.
The hardest area I found was the stern, I never really took much notice but it's a bit of an odd shape, sort of flat at 45 deg. side on, then concave, then morphing into convex it blends onto the hull.
I was watching the doco last night and studied every shot of the real Endurance trying to find a good angle to gain references :p ROTF
Just a few planks around the wire exit on the starboard side, then rough sand to match, and finally fine sand both sides and go from there.

6-11-24 (4).jpg
 
Back
Top