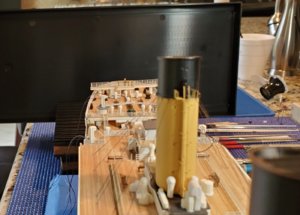
Looks like you have finalized the color for the funnels. With so many theories on the color it seems almost impossible to know who’s right. Maybe if the Nomad had a few original paint chips hidden on her funnel somewhere we might be close to the exact shade of White Star Buff. Personally, I think you are spot on. And wow you are blasting through this build. Quite a magnificent job you’re doing too.
-

Win a Free Custom Engraved Brass Coin!!!
As a way to introduce our brass coins to the community, we will raffle off a free coin during the month of August. Follow link ABOVE for instructions for entering.
-

PRE-ORDER SHIPS IN SCALE TODAY!
The beloved Ships in Scale Magazine is back and charting a new course for 2026!
Discover new skills, new techniques, and new inspirations in every issue.
NOTE THAT OUR FIRST ISSUE WILL BE JAN/FEB 2026
You are using an out of date browser. It may not display this or other websites correctly.
You should upgrade or use an alternative browser.
You should upgrade or use an alternative browser.
Thank you. The funnel color is subjective as nobody really knows what it is. There is only one color photo with the Olympic in the background that exists. Who knows how accurate that is considering how old it is, what film was used etc. I'm happy with what I put on there and my model isn't accurate historically at all anyway. I feel if you think it looks good go for it.
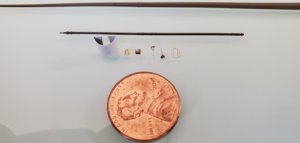
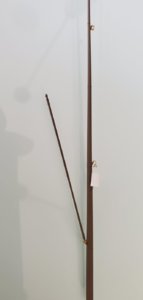
Today I did probably the most frustrating part so far, the ladders for the funnels. I can't believe how long it took me to do four ladders. I found them extremely difficult to do. The little platforms are only supported by a tiny strand of brass and all the bending, twisting, adjustment, and positioning rides on that fragile little piece. If something is out of alignment and you try to bend it into position something else goes out of whack because it's all tied into that strand. Plus the whole ladder bends if you breath on it lol! I wasn't able to make them up according to the directions as I don't have that kind of ability. The railing is supposed to be bent into a curve....no way I could get that done. Once again it will have to be good enough. Thankfully I had a few extras since I mangled the first two beyond repair.
The model is getting tricky now since I have to try and be careful I don't bend all the fragile stuff that's on it now with my hand or arm.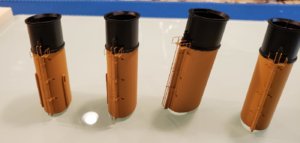

It seems to me that photo etch, at least on ship models, is and exercise in torture, both physical and mental. That is until the finished product, which yields such detail and personal satisfaction and that’s worth to all of your efforts. In regards to rolling those railings around the funnels, I don’t know if you’ve tried it, but I found using a piece of dense packing foam, or even foam board, the type used for display presentations, works as a base under which you can roll and create the curve. For me it works pretty well. You just have to be careful with pressure and not to roll it too far so that it damages your other bends.
By the way, as you and I both know, several of the Titanic research sites are no longer available, and I know you have definitely done your homework in preparing for this build and your forthcoming larger Titanic project. If you need any type of research that you cannot find, I may have it and would be glad to share what I have.
By the way, as you and I both know, several of the Titanic research sites are no longer available, and I know you have definitely done your homework in preparing for this build and your forthcoming larger Titanic project. If you need any type of research that you cannot find, I may have it and would be glad to share what I have.
Thanks, I appreciate the offer. I can bend curves it's just on those particular ladders I had a real problem keeping everything straight. I felt if I tried to make anymore bends I would probably ruin them and I didn't have anymore left.
I also had a few problems today. I put the pipes on the funnels in the wrong place (should learn to read the directions more carefully) and had issues with the plastic pipes that had to be bent. When I was looking through the instructions when I first got the model I thought bending those plastic pipes 90 degrees was going to be a problem and it was. As a result it cracked and is misshapen. I even tried heating it first but still no good. I think it looks like junk to tell you the truth but it is what it is. I really had no choice in positioning them because that's where the bend wound up.If there weren't all the holes on the roof that the pipes attach to I probably would have just left them off the model as it looks sloppy and detracts from everything else.
I started threading the rigging through the holes in the funnels. I also made another error there. All the cable stays are anchored to the boat deck. There were two holes on the roof by the first funnel that the directions said to add threads to. I assumed that these were rigging that would go up to the top of the ship so I used heavier thread there. Turns out they are also cable stays so now those two threads don't match the rest. I guess I need to pay closer attention to the instructions.
As I have said before I'm looking at this model as a learning experience so I can figure out how to build these models and improve my skills for the next one. That has been the case, I am learning from my mistakes. I am also honestly looking forward to working on a bigger scale with the 1/200 Titanic. These tiny parts can drive you crazy!! I don't know how people build 1/600 or smaller. The brain wants to do it but my old eyes don't want to cooperate lol.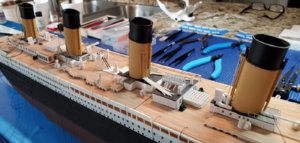


By the way, did you use any other type of adhesive underneath your wooden deck to supplement the stock adhesive. Just curious as I am considering using Loctite medium tack spray adhesive. Not quite sure yet as how I will apply it yet. Like you, I am unsure of the adhesive quality of these Decks. Mine and most of my photo which came from Flyhawk incidentally.
The wood decks I used are from Scaledecks which don't have adhesive on them from the manufacturer. I have been using Gators Grip Glue for gluing the decks down. I actually bought them because I wanted to use my own glue. So far so good. The Gators Grip Glue seems to work really well.By the way, did you use any other type of adhesive underneath your wooden deck to supplement the stock adhesive. Just curious as I am considering using Loctite medium tack spray adhesive. Not quite sure yet as how I will apply it yet. Like you, I am unsure of the adhesive quality of these Decks. Mine and most of my photo which came from Flyhawk incidentally.
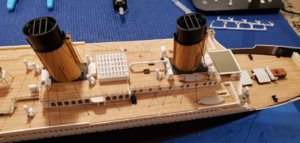
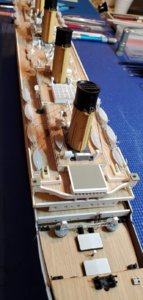
I attached the cables and completed the first two funnels tonight. I have to wait to do numbers 3 and 4 as I have to finish up the railings and some other stuff back there.
Looks really great, Chris. What material you have used for the cable? It looks tiny.
Thanks Jimsky. I'm using EZ Line. I have two sizes of it. I'm using fine size for the funnels and heavy for the rigging.Looks really great, Chris. What material you have used for the cable? It looks tiny.
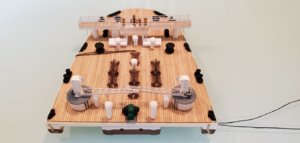
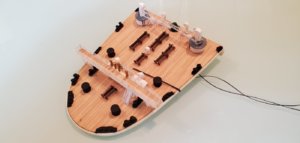
I started installing some of the photo etch benches and continued with more railing. I need to make up some more benches as I don't have enough. There were a lot of benches on that ship!
The railing was kind of tricky to bend in one piece. In researching how to do railing most recommend making a lot of splices and sections. I think it looks better if you can get it done with one continuous piece. It's not always possible to do that but if I can I would rather make a single piece. Time consuming stuff.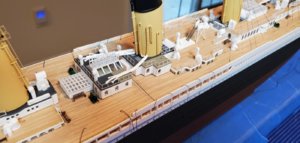
The railing was kind of tricky to bend in one piece. In researching how to do railing most recommend making a lot of splices and sections. I think it looks better if you can get it done with one continuous piece. It's not always possible to do that but if I can I would rather make a single piece. Time consuming stuff.

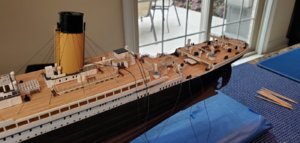
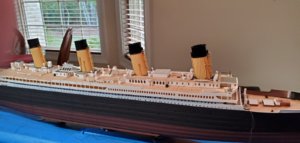
I got the funnels and boat deck finished, except for the boats lol. Next I'll try to finish up the aft promenade deck railing. I think I will have to do that one in two sections because there are a lot of fragile things to get caught up in it if I try to install a long railing over them.
I was working on it last night and the light was coming through some of the windows and I thought it would probably have looked cool if I had lit this model with LED lighting. I wasn't thinking of that at the time, I was just trying to figure out how to build it as it is. I will probably try that on the 1/200 model. I need to learn about wiring LED lights first.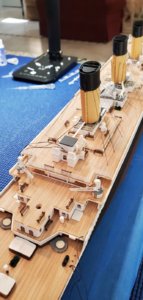
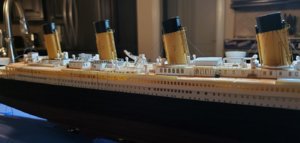
I was working on it last night and the light was coming through some of the windows and I thought it would probably have looked cool if I had lit this model with LED lighting. I wasn't thinking of that at the time, I was just trying to figure out how to build it as it is. I will probably try that on the 1/200 model. I need to learn about wiring LED lights first.


I'm glad I bought a used Entex kit for cheap on ebay for spare parts. I went to work on the docking bridge and found my new kit didn't have the holes or recess for the instruments. I had already glued down the wood decking so I was kind of stuck. The Entex kit had the correct part and I had some scrap decking that I cut to fit the docking bridge.
Once again I should have built the old kit and just used the few updated parts from the newer Minicraft kit. The Entex is so much nicer as far as the quality of the pieces. I would have saved myself a bunch of aggravation dealing with the crumby parts on the Minicraft. Live and learn! Anyway the docking bridge is finished except for the ladder.
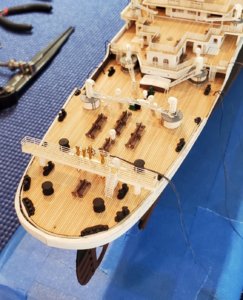
I have to make even more benches for the poop deck, I threw out a bunch of the first ones I made when I was figuring out how to make them as they really looked bad.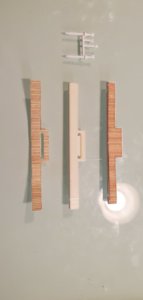


I finished the poop deck railings. I believe I installed them upside down. The instructions didn't show if the relieved areas should go on top or bottom. In thinking about it now I think they probably should be on the bottom...don't know.
I built this model knowing that the hull was warped. The bow is twisted one way and the stern is twisted in the opposite direction. I put four stanchions affixing the model to the stand and tried to torque the bolts down at different values to somewhat straighten it. I even ground down one of the stanchions on an angle trying to get the stern to sit level. Unfortunately I just couldn't remedy this twisted hull and if looking at the ship from the bow straight back the docking bridge has an obvious lean to one side. Maybe someone with more experience could have fixed it but it is what it is. When looking at it from the side which is how it will be displayed it isn't very noticeable. On to the forecastle.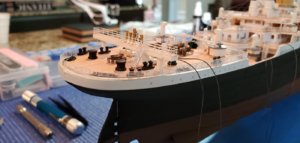
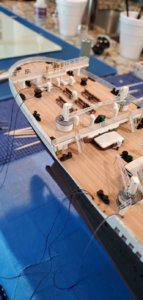
I built this model knowing that the hull was warped. The bow is twisted one way and the stern is twisted in the opposite direction. I put four stanchions affixing the model to the stand and tried to torque the bolts down at different values to somewhat straighten it. I even ground down one of the stanchions on an angle trying to get the stern to sit level. Unfortunately I just couldn't remedy this twisted hull and if looking at the ship from the bow straight back the docking bridge has an obvious lean to one side. Maybe someone with more experience could have fixed it but it is what it is. When looking at it from the side which is how it will be displayed it isn't very noticeable. On to the forecastle.


Started on some lifeboats. I initially spaced them wrong so I tore them off and redid them. Luckily I didn't do too much damage, just some glue marks which are mostly covered up with the new spacing. I'm not really sure if they look better or worse than the plastic davits but I need to learn how to build and install the photo etch ones anyway. The plastic davits are all on a plastic strip so they are nice and evenly spaced but kind of thick and no detail.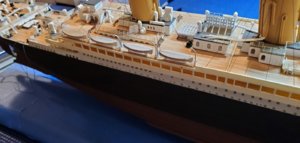
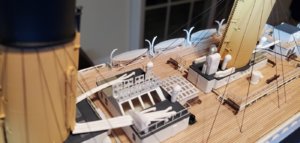


I got all the lifeboats on except the front ones on each side. I will have to figure out how to hang them over the smaller (collapsible?) underneath. I was not looking forward to putting the tiny pulleys on each boat but that has been taken off the table since I didn't do such a good job of bending the davit arms. I experimented with fitting them and they would be pointing in all sorts of directions and look bad. The arms needed to be very uniformly bent for that to work and they certainly aren't uniform. The lifeboats were really hard for me to even get installed at all with the photo etch since you have to be really good at spacing them all with no reference points. Hopefully I'll improve on that with some more practice.
My faithful companion is in one of the photos, that dog will stay right by my side for hours when I'm working on this model. He actually will stay by my side wherever I am! Whoever came up with the term mans best friend knew what they were talking about.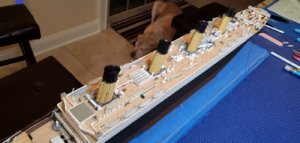
My faithful companion is in one of the photos, that dog will stay right by my side for hours when I'm working on this model. He actually will stay by my side wherever I am! Whoever came up with the term mans best friend knew what they were talking about.


