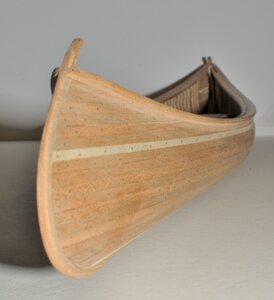
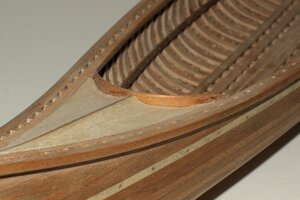
Gilles' 19-inch Canoe - cherry - Canoe # 1 [COMPLETED BUILD]

So here is today's update.
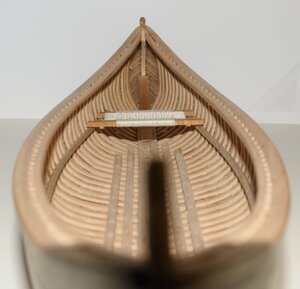
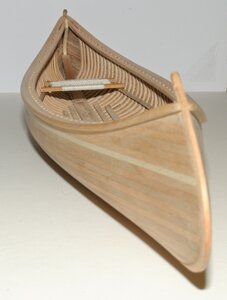
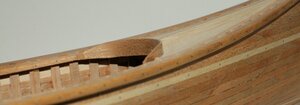
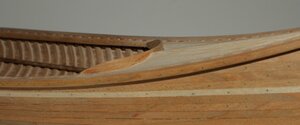
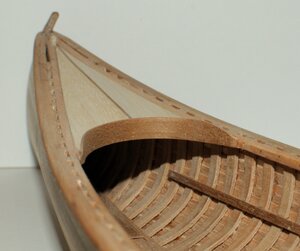
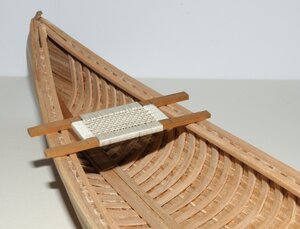
The ribs are in, the inner gunwales are in place followed by a light sanding to smooth the top surface joining the sheer edge, top of the ribs and gunwales.

Not sure about the next step yet: maybe this canoe will get the full treatment including nails / tacks simulation on the outside. I am going to sleep on this tonight and will make a decision in the morning. Nailing would take about as long as the time put in so far. If not, then the decks will be next and I will be close to completing this canoe.

The seats were made before the lumber arrived....

_DSC1153 aa.jpg

G.
 
Last edited:
About the glue...
CA glue is only used for the installation of the outer stems and the ribs: because I need parts to set very fast.
For everything else: carpenter's glue.
G.
Thank you for the clarification. I have not seen the email from you yet for the canoe instructions that we agreed would be sent to my email address: rgmaris@msn.com
I'll keep looking to print the pdf out.
Thanks, 5:26 pm PDST
PT-2
 
So here is today's update.
The ribs are in, the inner gunwales are in place followed by a light sanding to smooth the top surface joining the sheer edge, top of the ribs and gunwales.

Not sure about the next step yet: maybe this canoe will get the full treatment including nails / tacks simulation on the outside. I am going to sleep on this tonight and will make a decision in the morning. Nailing would take about as long as the time put in so far. If not, then the decks will be next and I will be close to completing this canoe.

The seats were made before the lumber arrived....

View attachment 169815

G.
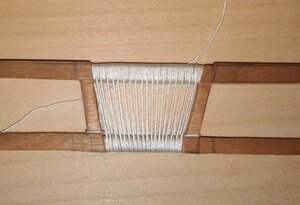
Do you have a jig or small loom like a sock darning devise to weave the thread for the seat? It looks very precise and well made. Nothing sloppy about that. PT-2
 
Do you have a jig or small loom like a sock darning devise to weave the thread for the seat? It looks very precise and well made. Nothing sloppy about that. PT-2
No special loom for the seats. I just cut the seat frame and work directly from it.
I have to eventually make more seats later for other canoes, so I will be posting some instructions or photos of the process.
But here is a sample image to give you an idea:

20200703_211554 a.jpg

G
 
No special loom for the seats. I just cut the seat frame and work directly from it.
I have to eventually make more seats later for other canoes, so I will be posting some instructions or photos of the process.
But here is a sample image to give you an idea:

View attachment 169825

G
These look like around the upper and lower edges; then it is just over and under weaving across the loom except that those threads cannot be switched and a shuttle sent across. I'll have copy as jpg and enlarge to check.
I'll have to wait to receive the instructions and materials list to make the correct quantity order.
PT-2
 
So here is today's update.
The ribs are in, the inner gunwales are in place followed by a light sanding to smooth the top surface joining the sheer edge, top of the ribs and gunwales.

Not sure about the next step yet: maybe this canoe will get the full treatment including nails / tacks simulation on the outside. I am going to sleep on this tonight and will make a decision in the morning. Nailing would take about as long as the time put in so far. If not, then the decks will be next and I will be close to completing this canoe.

The seats were made before the lumber arrived....

View attachment 169815

G.
We were never allowed to sit on a seat as the COG would be too high. Always younger knees on a pad (often a life preserver) keeping the COG low to better balance the boat. PT-2
 
"It is enough to fix the strips one by one with super glue and "hand-hold"
The strips are soaked in hot water for a few minutes, then bent directly on the canoe. I use "super glue" for this as well as for the installation of the rib.
You can just take your strip out of the water, wipe it down so that it is not dripping water, do a test fit on the canoe. once you know it bends well, apply a small amount of glue on the strip and put in place. Hold for a minute or so with your fingers. please make sure the surface on the stem is smooth for good contact with the strip.
Place a strip on one end of the canoe. Then move to the other end while the glue dries and so on.
You will probably need to laminate 5 strips on each side.

Here is the glue I use for the outer stems and for the ribs

View attachment 169608

Here is what the surface looks like before laminating the strips.

View attachment 169609

G


Hello Gilles,

thanks for the detailed description. Of course, a newbie like me wants to make as few mistakes as possible so as not to endanger what has been achieved so far. With your instructions, it is now "safe". Thank you very much.

Since I have various super glues available (very liquid to slow drying and pasty), I will choose the best one.
When it comes to super glue and wood, I have a bit of a gut grin because the glue can penetrate quite deeply into the wood structure and thus produce distinct discoloration.

matz

"Super glues" usually come in 3 kinds: liquid, medium viscosity and gel.
I have tried all 3 and all this is really a matter of personal opinion.
So in my opinion:
-The liquid (very runny) version has too much penetration power in the wood and when 2 parts are pressed together the glue does not disperse throughout the joint, instead it penetrates the wood.

-The gel is difficult to apply on the parts I use it on. It is ok for "spot" tacking but not practical on longer pieces such as ribs and the laminated stems. And it is a pain to apply.

-The medium viscosity kind is what I found to work best. Fairly easy to apply as there is better control. It can be carefully wiped off if needed, but better to avoid doing it.

One thing I have found out about using any glue is that it is better to be careful during application, use as little as possible by ensuring good contact between the surfaces to joined.

Water will accelerate the drying process and will make the glue turn white.
The parts (strips) I use CA on are usually soaked in water. Before applying the glue, you need to make sure that strips are wiped off so that you do not end up with a water layer on the surface: just humid.
What I do is take the strip out of the water and and remove whatever water drips out from it by wiping it on a towel, the strip is then "dry fitted" in place, basically pre-bending and holding for a few second, which may squeeze a bit more water out of the strip. Once I am sure that that strip bends as needed, then the glue is applied onto the strip which can be installed.

Here is the pre-bending process of a rib: it only takes a few seconds:
(Note the towel on my work surface to remove excess water)

View attachment 20200801_111332.mp4

G.
 
Last edited:
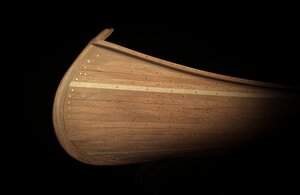
Here is what part of the woodstrip canoe looks like as of today: while working of simulation the plank fastenings.

1 a NR (1 of 1) aa.jpg

A few numbers:
When completed the outside of the canoe will count over 900 nails (in reality - clinched nails).
I am using 0.020" (0.5 mm) diameter x 12" (33 cm) long wire / rod as base material.
It looks like the total number of rods will be 10. That is 10 feet of brass....
So far it has taken about 15 hours for 3/4 of the work to be done. So it looks like it will take about 20 hours to complete the job.

On a side note, the top of the stem still needs some adjusting to finalize the curve.

Sorry, the photo is a little different from the usual view (a bit more artistic) , but this work deserves to be seen and photographed in a different way.
G,
 
Well, since I will be making this size and the other (using different woods), here is the image with them both: for size comparison.

View attachment 159728

Sorry, the building bases don't look as nice as the you guys!
I think the membership at large is going to get sick of seeing canoes!!
G
That may be because they have never been one. . . especially a real wood one . . neither have I. Only old aluminum. . . loud metallic and cold to kneel in!!! Easier to weld a repair than wood annual upkeep. PT-2
 
"Super glues" usually come in 3 kinds: liquid, medium viscosity and gel.
I have tried all 3 and all this is really a matter of personal opinion.
So in my opinion:
-The liquid (very runny) version has too much penetration power in the wood and when 2 parts are pressed together the glue does not disperse throughout the joint, instead it penetrates the wood.

-The gel is difficult to apply on the parts I use it on. It is ok for "spot" tacking but not practical on longer pieces such as ribs and the laminated stems. And it is a pain to apply.

-The medium viscosity kind is what I found to work best. Fairly easy to apply as there is better control. It can be carefully wiped off if needed, but better to avoid doing it.

One thing I have found out about using any glue is that it is better to be careful during application, use as little as possible by ensuring good contact between the surfaces to joined.

Water will accelerate the drying process and will make the glue turn white.
The parts (strips) I use CA on are usually soaked in water. Before applying the glue, you need to make sure that strips are wiped off so that you do not end up with a water layer on the surface: just humid.
What I do is take the strip out of the water and and remove whatever water drips out from it by wiping it on a towel, the strip is then "dry fitted" in place, basically pre-bending and holding for a few second, which may squeeze a bit more water out of the strip. Once I am sure that that strip bends as needed, then the glue is applied onto the strip which can be installed.

Here is the pre-bending process of a rib: it only takes a few seconds:
(Note the towel on my work surface to remove excess water)

View attachment 169846

G.
When building a full size wood strip canoe would the process be reversed: 1. build frames jig. 2. fair them and fasten several full length planks to form the profile. 3. bend and secure the actual frames over those. 4. Now install the actual outside hull planks fastening them to the inside frames. 5. invert the whole jig and forming assembly and install part of the gunwales for horizontal stability before removing the forming jig and inner forming planks, Or something like that where those numerous inner frames are early and not ending work???? PT-2
 
When building a full size wood strip canoe would the process be reversed: 1. build frames jig. 2. fair them and fasten several full length planks to form the profile. 3. bend and secure the actual frames over those. 4. Now install the actual outside hull planks fastening them to the inside frames. 5. invert the whole jig and forming assembly and install part of the gunwales for horizontal stability before removing the forming jig and inner forming planks, Or something like that where those numerous inner frames are early and not ending work???? PT-2

When building a full size ribbed canoe:
1st) the form is built (it can be looked at building a canoe inside a canoe) including the inner gunwale.
2nd) the ribs are bent and secured over the form.
3rd) the planking is then installed and fastened to the ribs

For practicalities the sequence is reversed for the model.
The model can also be built without the ribs if one chooses...

Notes:
Traditional ribbed canoes were built using wide, none continuous planks as opposed to strip planking from one end to the other: the model is strip planked.
The ribs were most often wider and tapered from bottom to top (wider at bottom of the vessel). They were also one piece ribs running from one gunwale to the next on the other side: the ribs on the model are installed in halves, continuous width.
The planking was secured to the ribs by way of clinched nails.

And lastly:
The model is a combination of different things. Again it is not traditionally / historically correct in the building method or look. The construction of such craft can be adapted to the wishes of individual builders. This is merely an introduction to strip planking with a "twist".
It concentrates on one planking method and should be looked as an introduction to model building where the builder will learn about working with wood, cutting, bending, gluing while fine tuning attention to details: especially ending up with a clean model that hopefully many will find as being an aesthetically attractive end-product. From there, the builder may use his or her own artistic licence and make his model a one of a kind piece of art.

Here is what I wrote in the introduction page and what really should be the "take way" from this entire project.
Our models are often built to accurately represent a historically correct piece,
but in some cases we should allow ourselves some liberties by allowing our own
creativity to take over in some way: and small crafts, such as canoes are perfect for that.

Somewhere, being creative is part of model building.

The nice thing about building such model is that there is really no constraints in following "anything to the letter".
- The novice can learn some basics and have fun at the same time.
- The more experience (intermediate) builder can fine-tune his or her techniques and have fun at the same time.
- The experience (advanced) builder does not need any of this but still may find some inspiration or motivation and have fun at the same time.


All along, there is a common thread: have fun...

G
 
Last edited:
When building a full size ribbed canoe:
1st) the form is built (it can be looked at building a canoe inside a canoe) including the inner gunwale.
2nd) the ribs are bent and secured over the form.
3rd) the planking is then installed and fastened to the ribs

For practicalities the sequence is reversed for the model.
The model can also be built without the ribs if one chooses...

Notes:
Traditional ribbed canoes were built using wide, none continuous planks as opposed to strip planking from one end to the other: the model is strip planked.
The ribs were most often wider and tapered from bottom to top (wider at bottom of the vessel). They were also one piece ribs running from one gunwale to the next on the other side: the ribs on the model are installed in halves, continuous width.
The planking was secured to the ribs by way of clinched nails.

And lastly:
The model is a combination of different things. Again it is not traditionally / historically correct in the building method or look. The construction of such craft can be adapted to the wishes of individual builders. This is merely an introduction to strip planking with a "twist".
It concentrates on one planking method and should be looked as an introduction to model building where the builder will learn about working with wood, cutting, bending, gluing while fine tuning attention to details: especially ending up with a clean model that hopefully many will find as being an aesthetically attractive end-product. From there, the builder may use his or her own artistic licence and make his model a one of a kind piece of art.

Here is what I wrote in the introduction page and what really should be the "take way" from this entire project.
Our models are often built to accurately represent a historically correct piece,
but in some cases we should allow ourselves some liberties by allowing our own
creativity to take over in some way: and small crafts, such as canoes are perfect for that.

Somewhere, being creative is part of model building.

The nice thing about building such model is that there is really no constraints in following "anything to the letter".
- The novice can learn some basics and have fun at the same time.
- The more experience (intermediate) builder can fine-tune his or her techniques and have fun at the same time.
- The experience (advanced) builder does not need any of this but still may find some inspiration or motivation and have fun at the same time.


All along, there is a common thread: have fun...

G
Thank you for your time in giving me more understanding about the variations. I will be using the single plank option as my learning to plank introduction. I looked into which "mahogany: Northeast is selling and it is Sapele which I compared online with others. I will give it a try after asking again what the grain pattern is: ribbon or quilted. Either could work but the ribbon has a more pronounced color variation which I could sort out in plank locations for consistency of adjacent planks and not a zebra effect. PT-2
 
Thank you for your time in giving me more understanding about the variations. I will be using the single plank option as my learning to plank introduction. I looked into which "mahogany: Northeast is selling and it is Sapele which I compared online with others. I will give it a try after asking again what the grain pattern is: ribbon or quilted. Either could work but the ribbon has a more pronounced color variation which I could sort out in plank locations for consistency of adjacent planks and not a zebra effect. PT-2

I have tried mahogany, black walnut, cedar, cherry, pine and what is sold as "obechi" wood for strip planking and I am about to try pear wood.
Considering the size of the strips used and keeping the canoes with the natural wood finish:
- "Mahogany" was ok to work with but too porous and to dark.
- Black walnut was giving a very nice finish but too dark and grain was to pronounced with some colour variations.
- Pine was ok but did not like the end results after finishing.
- Obechi is too porous and too brittle
- Cherry is not perfect but has been the best option so far along.
- Red cedar was good but dark. Nice finish and has the advantage of been a traditional wood for this type of vessel on your coast.

Now I am waiting for pear wood which I suspect is going to be one of the best options, but we will see.

It really depends as to what you envision the end product to look like and the type of finish you will apply. Wood choice is more or less a matter of personal preference. Some of the wood, like pine and obechi were "fine" to use for painted canoes for example but needed to be treated for a smooth, uniform surface before painting.

G
 
Last edited:
Tuesday Aug 4th, 2020 update:
About 27 hours to complete the woodwork done so far. An additional 19 hours for the brass work.
Here is what the canoe looks like:
- some flooring planks.
- dry fitting the stern seat.
- a couple battens running through the mid section to help support the seat for this photo.
In regards to the seats, their final location will be slightly higher (3/32") than shown in this photo

_DSC1204 aa.jpg

And an overall view of the beast ....
The nails are there but can you see them?

_DSC1211 aa.jpg

Well, yes you can see them when you focus on the right spot....

_DSC1232 aa.jpg

The next step will be to build and install the "deck" at both ends.

G
 
Last edited:
I did some on-line searching into the subspecies of the generalized name of Mahogany and found quite a difference in several ways. The one that Northeast said that they sell is Saypele which has two different grains: ribbon (quite pronounced like a zebra) and quilted which is more uniform. They did not say which grain type it is. All will darken with age as does charry from what I am reading. I don't see sources for Pear so a link to that milled to the project sizes would be great as I don't have the experience to mill lumber down from boards to strips.
Great looking build as your progresses. PT-2
 
Pear wood available from:
"The Lumberyard"
and
from here as explained:

G
 
Back
Top