Your bow and stern decks caught my eye. One looks flat and the other is scalloped over a center member like draped canvas. Maybe just the difference in the view. Please share more of your creativity on these for this great looking canoe. PT-2Aug 6 update.
Working on decks. Apart from a few details to take care of, one end of the canoe is basically done so here are some close-up views:
View attachment 171186
View attachment 171187
View attachment 171188
View attachment 171189
G
-

Win a Free Custom Engraved Brass Coin!!!
As a way to introduce our brass coins to the community, we will raffle off a free coin during the month of August. Follow link ABOVE for instructions for entering.
-

PRE-ORDER SHIPS IN SCALE TODAY!
The beloved Ships in Scale Magazine is back and charting a new course for 2026!
Discover new skills, new techniques, and new inspirations in every issue.
NOTE THAT OUR FIRST ISSUE WILL BE JAN/FEB 2026
- Home
- Forums
- Ships of Scale Group Builds and Projects
- Group Build Archives
- Canoe Group Build
- Canoe Build Logs
You are using an out of date browser. It may not display this or other websites correctly.
You should upgrade or use an alternative browser.
You should upgrade or use an alternative browser.
Gilles' 19-inch Canoe - cherry - Canoe # 1 [COMPLETED BUILD]
- Thread starter Gilles Korent
- Start date
- Watchers 7
-
- Tags
- completed build
- Joined
- Feb 18, 2019
- Messages
- 717
- Points
- 353

Your bow and stern decks caught my eye. One looks flat and the other is scalloped over a center member like draped canvas. Maybe just the difference in the view. Please share more of your creativity on these for this great looking canoe. PT-2
Good morning,
Both are the same shape: it is just the viewing angle.
Here is the detail before the end strip is installed.
I may even end up shaping that strip to follow the shape of the upper face of the deck: not sure yet.
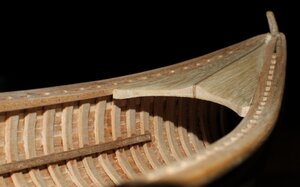
As for details about the construction of the decks, see this:
#7 Support: Installation of the decks
Here we will address: All matters related to the Installation of the decks. Find information.... INDEX: Decks: - https://shipsofscale.com/sosforums/threads/7-support-installation-of-the-decks.5331/#post-117658
shipsofscale.com
The "group build" is designed to motivate builders to be creative with their own project and make their craft as unique as they want.
Since I am building at least 2 canoes within the scope of this project, the subsequent canoes will be different.
G
- Joined
- Feb 18, 2019
- Messages
- 717
- Points
- 353

- Joined
- Feb 18, 2019
- Messages
- 717
- Points
- 353

- Joined
- Feb 18, 2019
- Messages
- 717
- Points
- 353

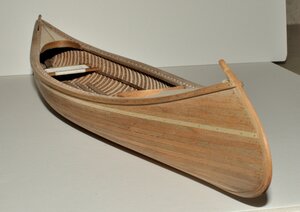
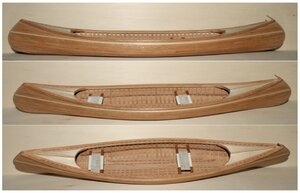
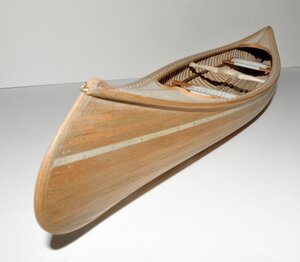
19-inch canoe as of today: almost completed!
Some viewers may wonder about varnish .... Well, contrary to my usual practice, this piece will not see the application of any finish at this point.
A few small details to add, a bit of cleanup in some areas and of course, paddles need to be made to complete the model.
G.
Some viewers may wonder about varnish .... Well, contrary to my usual practice, this piece will not see the application of any finish at this point.
A few small details to add, a bit of cleanup in some areas and of course, paddles need to be made to complete the model.

G.
Last edited:
Nice clean simple canoe. Have you ever experimented with using Watch Furniture Oil on your work? I may take some to try a sample to see the outcome in color variation. I am now waiting for my cherry from Northeastern to arrive deciding to use their strips and not mill my own from sheets for an initial build. I may do a second one and vary the scantlings for a broader flatter bottom as you indicate this is artists freedom. Thanks for your patience with my questions. PT-219-inch canoe as of today: almost completed!
Some viewers may wonder about varnish .... Well, contrary to my usual practice, this piece will not go through the application of any finish at this point.
A few small details to add, a bit of cleanup in some areas and of course, paddles need to be made to complete the model.
View attachment 171529
G.
They may tire out but seeing the canoes brings back the sound of paddling on ponds and lakes in a setting sun. Never enough! PT-2 Oh yes, also the sound of wind in sails and rush of bow spray on a screaming plane hiking full out!!!!Well, since I will be making this size and the other (using different woods), here is the image with them both: for size comparison.
View attachment 159728
Sorry, the building bases don't look as nice as the you guys!
I think the membership at large is going to get sick of seeing canoes!!
G
- Joined
- Feb 18, 2019
- Messages
- 717
- Points
- 353

Great accomplishment and very well defined build log, so much to learn!! Many thanks for your time and dedication.
- Joined
- Feb 18, 2019
- Messages
- 717
- Points
- 353

Great accomplishment and very well defined build log, so much to learn!! Many thanks for your time and dedication.
Thank you Jim.
Hopefully some will find the motivation to start working on their models.
Canoes are surely not as "sexy" as most ships being built and shown around forums, but they are a good starting point.
G
Beautiful and well presented on that wood base. Your experience and skills are inspirational as to that may be done. PT-2
Very nice, Gilles.!! It seems like you moved right along with it. I'm still waiting on the rest of my pear wood. Hopefully soon.!!
Its obvious that your skills are at a high level. Is that a piece of driftwood for the base.??
Its obvious that your skills are at a high level. Is that a piece of driftwood for the base.??
Good note on the base. We live between two rivers in Oregon, McKenzie and Willamette and are an hour from the Pacific coast so I should have plenty of hunting grounds for natural base materials. No deer spreads though as I don't hunt. PT-2Very nice, Gilles.!! It seems like you moved right along with it. I'm still waiting on the rest of my pear wood. Hopefully soon.!!
Its obvious that your skills are at a high level. Is that a piece of driftwood for the base.??
Nice clean simple canoe. Have you ever experimented with using Watch Furniture Oil on your work? PT-2
Hey brother.... I am not familiar with "Watch Furniture Oil"..?? I'm wondering if you meant "Watco"..??? Maybe an 'autocorrect' thing on the computer.?? Or, maybe I'm behind the times and just not aware of certain finishes.!!
Thanks,
Howard
Watco it is. It was probably a typo on my part as I don't know if spelling auto correct works in SoS but it may if the text is somehow tied to MS Word or the related platforms.Hey brother.... I am not familiar with "Watch Furniture Oil"..?? I'm wondering if you meant "Watco"..??? Maybe an 'autocorrect' thing on the computer.?? Or, maybe I'm behind the times and just not aware of certain finishes.!!
Thanks,
Howard
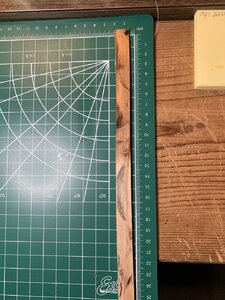 A sample try on a recently self cut and milled piece of Sherofujin Cherry from my yard, cut last month which shows with the initial application on the darker half, the initial penetration color change. It will probably get somewhat darker with more coats between drying times. IT is penetration oil and resin, not a surface finish or coating. They say it may be used on walnut, teak, cherry, birch, oak, mahogany, cedar, pine and similar woods. I think it would be a good "natural" finish to one of the canoe builds and perhaps on other admiralty ones. PT-2
- Joined
- Feb 18, 2019
- Messages
- 717
- Points
- 353

- Joined
- Feb 18, 2019
- Messages
- 717
- Points
- 353

On small models such as canoes, I normally use water base semi-gloss varnishes and sometimes, oil varnish, brushed on "wipe on poly". I have also used "tung oil" with good results.
This one will stay unfinished as an experiment: between naturally aging the wood and oxidation of the brass.
On larger models (ships), I use either wipe on poly or tung oil.
G.
This one will stay unfinished as an experiment: between naturally aging the wood and oxidation of the brass.
On larger models (ships), I use either wipe on poly or tung oil.
G.
Last edited:
- Joined
- Feb 18, 2019
- Messages
- 717
- Points
- 353

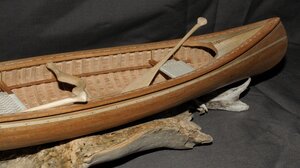
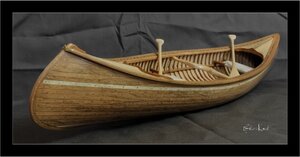
This canoes is now ready for display.
In the end, I did apply full varnish treatment:
- a total of 9 coats were applied on the outside. two primary / base coats, then very light sanding with 600 grit paper between coat 3 to 8. No sanding applied between 8 and 9 but a wipe with a clean cloth. Once coat 9 was dry / cured for 48 hours, the surface was very lightly "polished" with 1500 grit paper: this is basically like wiping the surface using the paper as you cannot really tell but it gets rid of impurities in the top surface.
- 1 coat inside and seat frames.
- 4 coats on decks, sheer (including inner gunwale) and yoke.

Another skillful and beautiful build. The wood character comes out well with your finishing process which demand as much care at the setting of the nails. PT-2This canoes is now ready for display.
In the end, I did apply full varnish treatment:
- a total of 9 coats were applied on the outside. two primary / base coats, then very light sanding with 600 grit paper between coat 3 to 8. No sanding applied between 8 and 9 but a wipe with a clean cloth. Once coat 9 was dry / cured for 48 hours, the surface was very lightly "polished" with 1500 grit paper: this is basically like wiping the surface using the paper as you cannot really tell but it gets rid of impurities in the top surface.
- 1 coat inside and seat frames.
- 4 coats on decks, sheer (including inner gunwale) and yoke.
View attachment 175046


