Grants Xebec 1:60 (using Jabeque Cazador Occre1:60 kit) [COMPLETED BUILD]

Grant, I don't know what the red arrow is pointing at other than a really beautiful, well-constructed hull my friend!
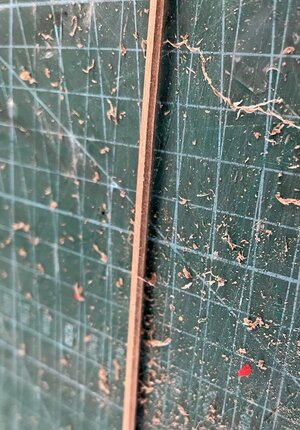
Good afternoon Daniel. Thank you. The arrow just shows another chip I had to repair. The good thing about veneer is you repair fairly easily.
Agree with Daniel...that is some really fine work Grant.
Thanks Paul
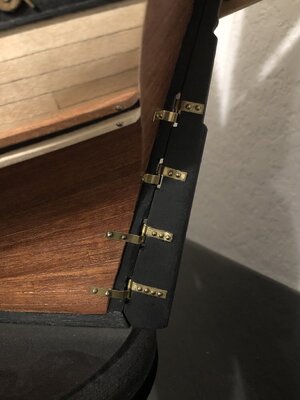
Great progress Grant and it looks perfect. However the kit is wrong with the rudderpost. These gaps shouldn't be in there only on the rudder. I made the same mistake, corrected it later during my build. I had some trouble to fit the hinges correctly, that's when I found out the mistake. If you can correct it at this point during the build would help you later on.

View attachment 370555

1653762136543-png.310813
Hello Peter. I had a look and I see what you are referring to. Some solace for you and I is that it is not our mistake but a kit error. I have no African Walnut and am hesitant to remove this. I will see what I can do when I come to place the rudder. Thanks you for the compliment it is much appreciated.
Cheers Grant
 
I have no African Walnut and am hesitant to remove this. I will see what I can do when I come to place the rudder.
Take some pieces of the planking of the hull, there must be some spare and glue them in the stern beam, the difference in wood is minimal. Sand it and after treatment of the wood it will almost not be visible. What Peter means to say is in this stage of the build it is easy to do. And on the spots that are repaired there will attached the hinges of the rudder. Win-Win.
 
Take some pieces of the planking of the hull, there must be some spare and glue them in the stern beam, the difference in wood is minimal. Sand it and after treatment of the wood it will almost not be visible. What Peter means to say is in this stage of the build it is easy to do. And on the spots that are repaired there will attached the hinges of the rudder. Win-Win.
Good morning Stephan. Thanks for this tip. i agree this has to be “fixed” at this stage. I test fitted the rudder and Peter is spot on, it just won’t go. I need to change my rudder due to the hull changes I made so I will fix this all then. Weird the kit makes this so. Thanks again. Cheers Grant
Better, take the frame where you took the rudderpost out off.
Good morning Peter. Excellent thinking. Thank you. Hopefully I can get it neat and tidy. Cheers Grant
 
Great progress Grant and it looks perfect. However the kit is wrong with the rudderpost. These gaps shouldn't be in there only on the rudder. I made the same mistake, corrected it later during my build. I had some trouble to fit the hinges correctly, that's when I found out the mistake. If you can correct it at this point during the build would help you later on.

View attachment 370555

1653762136543-png.310813
Good morning Dean. @Dean62 Did your kit do the same? Peter has kindly provided me with a solution, I was just wondering if you had the same rudder post? Cheers Grant
 
Good morning Dean. @Dean62 Did your kit do the same? Peter has kindly provided me with a solution, I was just wondering if you had the same rudder post? Cheers Grant
Grant, my kit had the notches in the keel. In fact I had to extend the notches upwards some in order to be able to put the rudder on. The rudder has a notch too, and they are offset. Here is a pic…
C626E251-3032-42F8-B921-2DDAB7DF7F14.jpeg
 
Grant, my kit had the notches in the keel. In fact I had to extend the notches upwards some in order to be able to put the rudder on. The rudder has a notch too, and they are offset. Here is a pic…
View attachment 370766
Good morning Dean. Thanks for this. The problem Peter (@Ptèr) and Myself had/have is that the kit doesn’t align properly. I can see why Peter made the post without the notches. This may be my solution as I also remade the stern of my Xebec with more angle and longer. (My post was already modified.)This accentuates the problem so I am going to have to adjust a whole lot. Hmmm….happens when one does not think mods through to the end ROTF. Typical Grant. Cheers Grant
 
Good morning. I broke my treenail drill bit so work on the hull ceased. Over the past 5 days I have been playing with the waterways and foremast support.

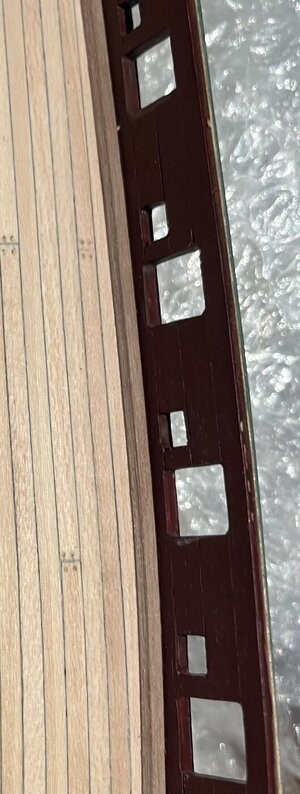
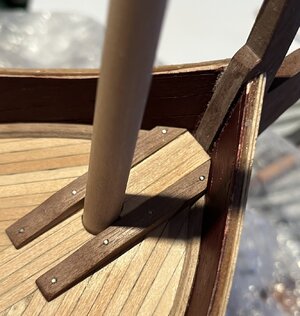
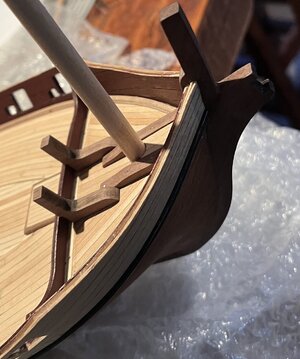
Waterways. I added a concave curve to the 3x2mm strake. Just to add a little more accuracy…I scrapped this into the walnut being careful to leave 2mm for the bulkhead supports.
9A436009-DCDF-4FAA-B268-663547FA3A40.jpeg

06CFABCF-942B-4E88-9043-5C74B3F04889.jpeg
Foremast support.
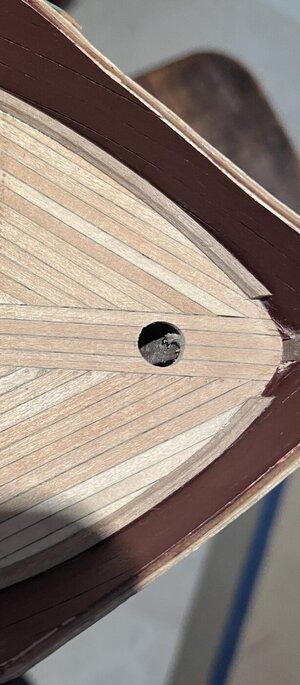
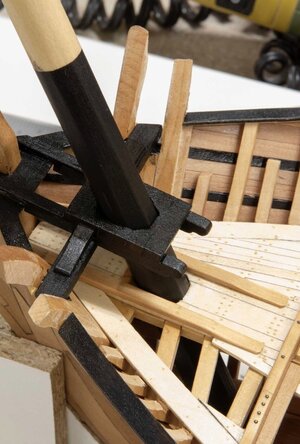
I made these from scratch. I did not like the Cazador kit design so went more for the Le Requin structure. For The entire foremast support I want to be more open and visible than the Occre kit suggest.
The waterways were cut to fit the mast support structure:
800C8CF3-2A74-454E-BA62-9D8661611689.jpeg

I cut and shaped the supports from left over African walnut from the kit CNC base. Added some nails. The shiny nails will darken quickly as this is not brass.
DE5C8540-B6ED-4FD1-A1EC-F0FF519102FC.jpeg
Lesson learnt: cut out surrounding parts and dry fitted everything first including the angle and mast placement etc- all dry fitted
77670087-7F79-4022-BA2E-2C063E961ABD.jpeg

Got my replacement drill bits so back to the hull.
Cheers Grant
 
Hi Grant

Very sharp work.Whilst working with Veneers is a learning curve on it's own, it keeps you focused as the margin for error is very limited with such thin material.

Kind Regards

Nigel
 
Love the shape of the waterways!!! You make it look easy! Okay The changes you made at the foremast are none like the kitdesign describes, but love it. Where did you get your inspiration from?

regards,
Peter
Good morning Peter. Thank you. My inspiration came from the beautifully built Le Requin by Jean Boudriot. Maybe when I’m big I will model somewhere like this ;)
B7BD0369-BBFA-4DD3-B898-775F4BEEAFB1.jpeg
I agree fully with @Pter Peter. The waterways look brilliant and so does the assembly at the foremast - excellent work!
Thank you kindly Heinrich.
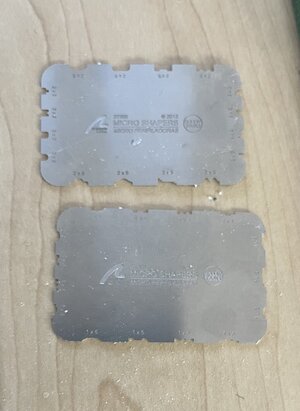
Great work Grant. Those shape scrapers are a must in a modelers tool chest.
Good morning Daniel. There is not much I get here but when I saw these I grabbed them. My first go with them and what a pleasure.

2F71432C-51CE-4157-87DF-6203291E47B7.jpeg

I’m just catching up on a couple of weeks and five pages worth of your log Grant. I’m impressed with your workmanship and skills on this fine build.
Very nice work Grant!
Lovely work Grant, looking really nice
Thank you guys. Much appreciated.
Very nice. I couldn't help but notice how precise and clean your work has gotten. I'm going to miss the old Grant ROTF.
Thanks Paul. He is still here, just every once in a while he gets lucky ROTF
Hi Grant

Very sharp work.Whilst working with Veneers is a learning curve on it's own, it keeps you focused as the margin for error is very limited with such thin material.

Kind Regards

Nigel
Good morning Nigel. My first go with veneer and many lessons learnt along the way. Totally agree with you- my biggest lesson learnt was : the base and surface needs to be perfect for veneer and more time preparing for its application was needed. The Sapele veneer is also brittle so for me each plank must be completed as I go- no loose ends for another day as I just break or chip them. Thanks for checking out my Xebec. Cheers Grant
 
Yes, Le Requin is a great example of inspiration. For my ship as well. However, the Cazador kit is different in many ways so you really have to bash a lot of things to get in the same area as Le Requin. I really like your approach on the Fore and it will be a great addition to your model and other builders will follow for sure.
It's almost tempting to build another Xebec after this one and follow your lead on this on, maybe I'll get to it in the future. Who knows. :)
 
Back
Top