-

Win a Free Custom Engraved Brass Coin!!!
As a way to introduce our brass coins to the community, we will raffle off a free coin during the month of August. Follow link ABOVE for instructions for entering.
You are using an out of date browser. It may not display this or other websites correctly.
You should upgrade or use an alternative browser.
You should upgrade or use an alternative browser.
H.M.S Granado. Plank on frame 1/48 scale. CAF model.
Exactly, thank you! I have the same inquiryBrian, havent seen any updates lately, are u still building Granado?
Hi gang,
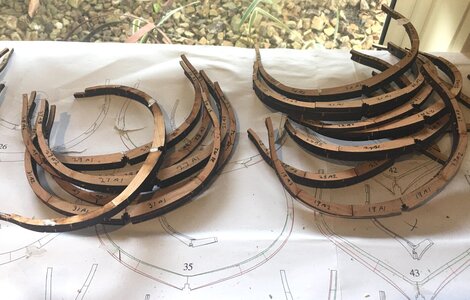
I have jumped back into my Granado build with much vigour. Not really much to see in regards to photos, but assembling the frames one at a time.
I am finding this a very enjoyable experience. Its a bit like assembling a jigsaw puzzle.
The frame sections need to be identified and cross referenced from the instruction manual and numbered on the timber. Everything is clearly itemised for ease of assembly. The instructions are in English and very comprehensive.
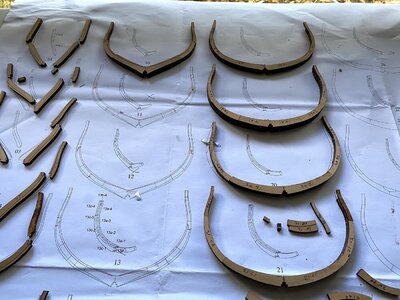
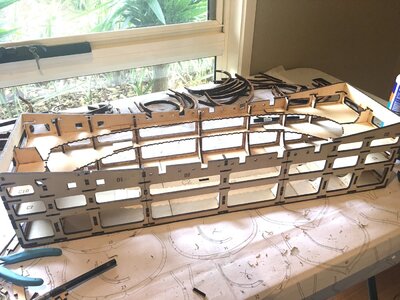
Anyway this is my assembly workbench.
.
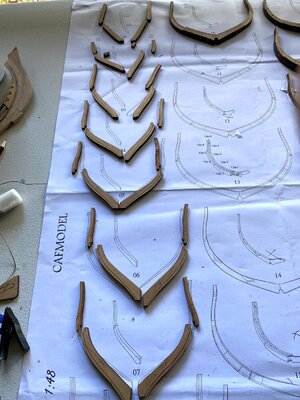


Thanks for posting. Have "season one" unopened on my bench and just pulled the trigger on "season 2". Going to start on this as soon as I finish up a Model Airways kit. Looking forward to seeing more of your fantastic work.
Looking good Brian! Not too much laser char on the pieces shown, are they all that good? Man some of those frames look really thick, are there three layers on some of those? Are you weighing the futtocks down as you assemble over the plans or do you have a different method?
Hi Lou,
there's a variation between some of the frames. Some are single thickness, some are double and there are a few triple thickness frames.
I put small weights on the frames to hold everything in place and just using normal white carpenters wood glue for these pieces.
As for laser char, there is a bit on the edges and back of the frames, but I will run the frame assemblies through my Byrnes thickness sander checking the thickness against the plans with my calliper.
My stage 2 of this kit has just been mailed to me from CAF model. Happy days.
Great to have you back on the Granado build. The frame assembly is fiddly work, but one of the important works, and I can see the frames assembly is coming along nicely.I am finding this a very enjoyable experience. Its a bit like assembling a jigsaw puzzle.
The frame sections need to be identified and cross referenced from the instruction manual and numbered on the timber. Everything is clearly itemised for ease of assembly. The instructions are in English and very comprehensive.

Question: I can see the laser line on each of the frames, is it a 'fairing line'? On the plan, the red and green lines where the green lines are the outside fairing and the red is inside? Thanks for the answer.

Yes Jim they are the fairing lines that need to be bevelled off.
Looking very good and like a very interesting kit.As for laser char, there is a bit on the edges and back of the frames, but I will run the frame assemblies through my Byrnes thickness sander
running through the thickness sander will only adjust the floor timbers - already some futtocks, but latest the top timbers are thinner, so you will have to use the old but well known method with hand sanding ....
Ahoy shipmates,
been making up frames for the Granado this week. Not really much to see but a stack of frames.
The photo is the current status of things before I clean them up with sandpaper. I have dry fitted the frames to the keel structure to see if they fit as directed in the instructions. I have found this a challenging but most enjoyable experience. There are multiple sheets of laser cut timber and the builder needs to transcribe the numbers from the instruction index onto the framing pieces.
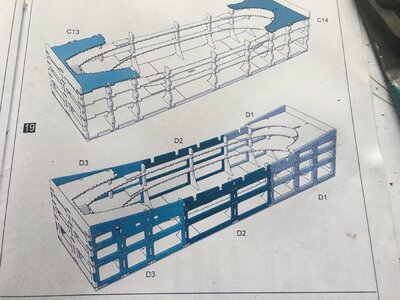
I did find an error in the instruction book. The framing jig had the parts D1 and D4 the wrong way around. It's no big deal and the mistake is easily identified.
I am referring to the side panels on the building cradle in the photo below.
.


BEAUTIFUL WORK AS ALWAYS BRIAN, JUST SUPER. GOD BLESS YOU AND YOURS DON
Yes that actually looks good, Brian and there comes a bit of envy because you are already working on this great model.
Hi Brian, great progress in such a short time. Hope you also had some time to sleep.I'm going to start cleaning up the frames today with sandpaper. Should take me a few hours.
.View attachment 262963
Are the frames already marked for the great cut?
Nice work Bryian,
Your post has just sent me into my workshop to see whether I had got the side frames back to front, but all is well.
My jig and keel are done, but I've only managed half a dozen frames so far - workshop time is currently tight! - but they are fully fitted to keel and jig and rough sanded inside and out. I'm finding there is a lot of fitting required for each frame - you'll need more than a 'few hours' !
Ted


