H.M.S. Victory by Caldercraft - Build Log

Hi Peter, the show is absolutely the worst as an accurate portrayal of history! No doubt. It is nice that it includes many of the famous pirates of that time period and I have a habit of looking up various things on my laptop as I watch a tv show, so I could see where fact and fiction took their separate paths!

For me, I was enthralled with the actual sailing and scenes on ships. We have a Catalina 380 sailboat on Lake Ontario in upstate/west NY in the US and anything sailing is cool for me!
The production, sailing, battles and grit are fabulous. I love the 1930s Errol Flynn Bodice Busters for the same reason! Thumbsup :p
 
Hi John,
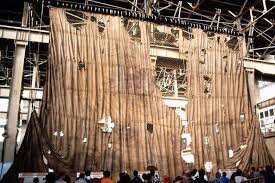
Can you say where was this photo taken? Where is this sail on display?
I've seen that picture before. Everything I have just searched said it was found in a school gym in the UK. I believe it was on display at some point, I see that in 2018 they were working on restoring or stopping further decay. Just not sure it is still up. If so, I would assume it is in the vicinity of the actual ship.

I think their intent is to put in on permanent display, much like The Star Spangled Banner flag is displayed in the US at the Smithsonian. Under special lights, no cameras allowed, etc.
 
Chris,
According to Wikipedia; Victory's fore topsail was severely damaged during the Battle of Trafalgar, perforated by upwards of 90 cannonballs and other projectiles. It was replaced after the battle, but was preserved and eventually displayed in the Royal Naval Museum.

Scroll down a bit....just above 21st Century
 
Last edited:
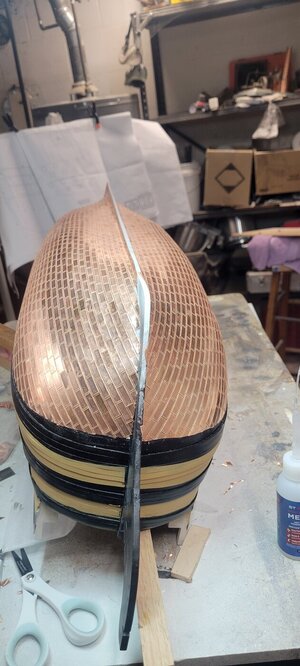
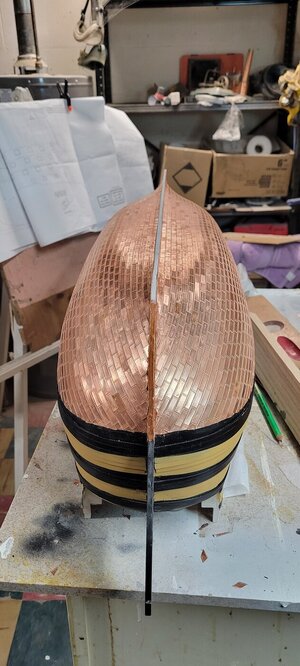
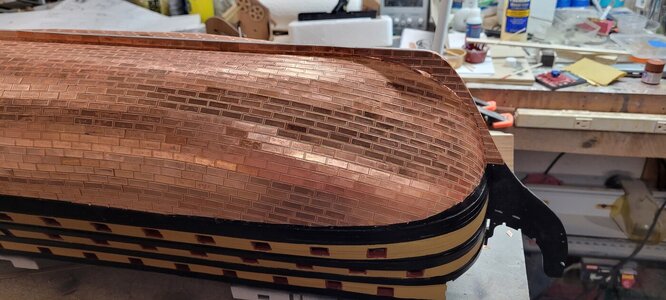
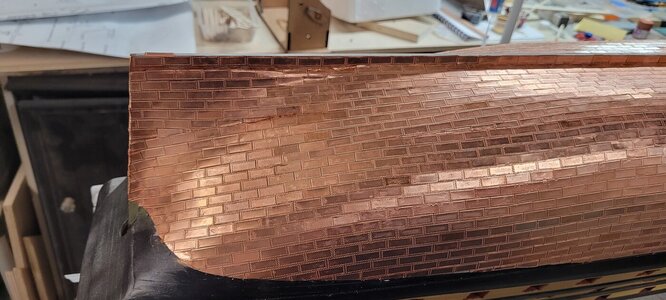
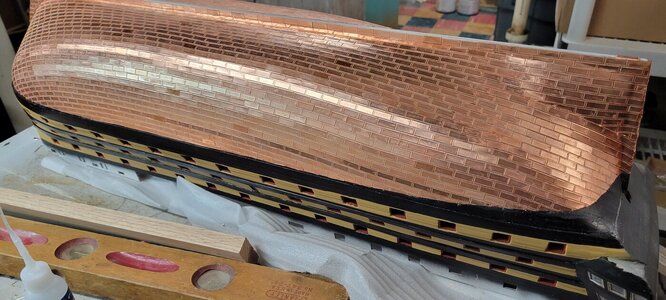
Still here!!! Been slowly cutting tiles to finish the water line. I spend an hour or so every few days, but we're getting close.

Right now, I am trying to think how I'll 'finish/smooth' out the line between the copper plates and wooden hull. I thought the best, creative way would be to use a small strip of wood, perhaps 1mm square and route a groove on one side for the copper plating to lay under. That isn't possible with the tools I have.

I think I may end up taping the plating and painting the exposed area black. It may paint some of the plates on the very upper edge, but will make the line clean.

I also screwed up on one side where the keel runs up to create the bow. Instead of running the plates horizontal on the bow, I had them follow the bottom keel, so there is a row of plates that go up. It looks terrible, but now the problem is that I feel like I am very close to having enough plates to finish and no more.

I have not wasted many, so they must provide enough to do the hull with a few extras, but not a ton. I am going to do the other side so that all plates continue on parallel to the water line. If after I do that and fill in all the little slivers and have enough, I will redo the other side.

If I have to sacrifice the plates that cover the very bottom of the keel, I will do that!

....sorry, no picture of what I am talking about, but I will provide it. Just too lazy to walk downstairs and take it!

20240517_180330.jpg

20240517_180336.jpg

20240517_180344.jpg

20240606_125118.jpg

20240606_125129.jpg

20240606_125138.jpg
 
Still here!!! Been slowly cutting tiles to finish the water line. I spend an hour or so every few days, but we're getting close.

Right now, I am trying to think how I'll 'finish/smooth' out the line between the copper plates and wooden hull. I thought the best, creative way would be to use a small strip of wood, perhaps 1mm square and route a groove on one side for the copper plating to lay under. That isn't possible with the tools I have.

I think I may end up taping the plating and painting the exposed area black. It may paint some of the plates on the very upper edge, but will make the line clean.

I also screwed up on one side where the keel runs up to create the bow. Instead of running the plates horizontal on the bow, I had them follow the bottom keel, so there is a row of plates that go up. It looks terrible, but now the problem is that I feel like I am very close to having enough plates to finish and no more.

I have not wasted many, so they must provide enough to do the hull with a few extras, but not a ton. I am going to do the other side so that all plates continue on parallel to the water line. If after I do that and fill in all the little slivers and have enough, I will redo the other side.

If I have to sacrifice the plates that cover the very bottom of the keel, I will do that!

....sorry, no picture of what I am talking about, but I will provide it. Just too lazy to walk downstairs and take it!

View attachment 452035

View attachment 452036

View attachment 452037

View attachment 452038

View attachment 452039

View attachment 452040
Good morning. I agree wholeheartedly with John. Your coppering is great. Cheers Grant
 
Still here!!! Been slowly cutting tiles to finish the water line. I spend an hour or so every few days, but we're getting close.

Right now, I am trying to think how I'll 'finish/smooth' out the line between the copper plates and wooden hull. I thought the best, creative way would be to use a small strip of wood, perhaps 1mm square and route a groove on one side for the copper plating to lay under. That isn't possible with the tools I have.

I think I may end up taping the plating and painting the exposed area black. It may paint some of the plates on the very upper edge, but will make the line clean.

I also screwed up on one side where the keel runs up to create the bow. Instead of running the plates horizontal on the bow, I had them follow the bottom keel, so there is a row of plates that go up. It looks terrible, but now the problem is that I feel like I am very close to having enough plates to finish and no more.

I have not wasted many, so they must provide enough to do the hull with a few extras, but not a ton. I am going to do the other side so that all plates continue on parallel to the water line. If after I do that and fill in all the little slivers and have enough, I will redo the other side.

If I have to sacrifice the plates that cover the very bottom of the keel, I will do that!

....sorry, no picture of what I am talking about, but I will provide it. Just too lazy to walk downstairs and take it!

View attachment 452035

View attachment 452036

View attachment 452037

View attachment 452038

View attachment 452039

View attachment 452040
Looks really nice Chris. You are doing a fine job. Your symmetry is great. This is a very eye-catching part of the build and you have nailed it. Excuse the pun.
 
Hey, thank you so much for taking the time to drop a comment. It is greatly appreciated!!!!

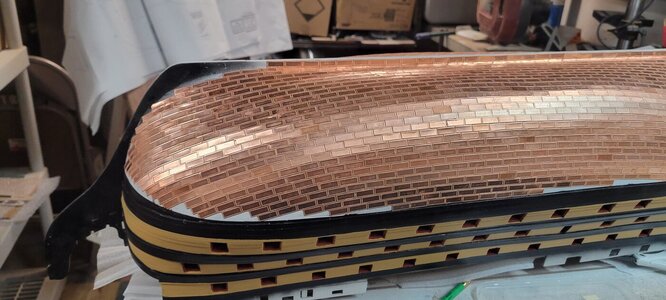
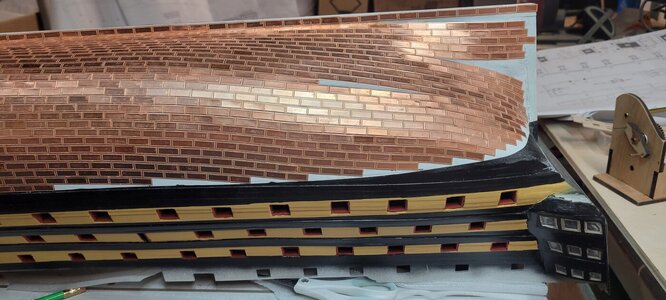
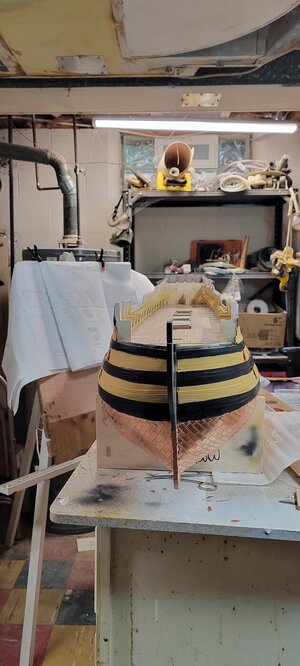
The first pic was my failed attempt at running the copper plating along the bottom keel.
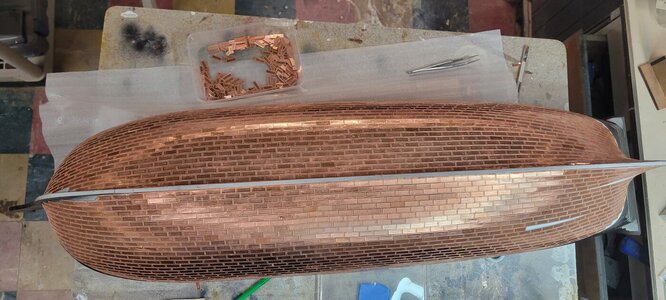
I have removed all those plates and re-installed following the water line. They look much better.


I am not sure if I will have enough plating to do the bottom of the keel and the rudder. No worries, I ordered another 100 from JoTika. They are relatively cheap, about 12 pounds....whatever that is in USD!!!!! They actually shipped it out today.

I also bought some copper paint from our local craft/hobby store. I decided to go with Tamiya and it is surprisingly close.
I see a few spaces and gaps and I painted them and then wiped away the excess. I will circle back when it dries and do it again.
I also painted the bow keel ridge before adding the base plates.

I was hoping I would be able to bend those plates so that they fit over the keel, but there is barely enough there.
I do have a PE bender, but there just isn't enough meat to bend them. I was thinking maybe to just install flat and use a wooden dowel to bend them down....not sure if that will look good, so I will check.

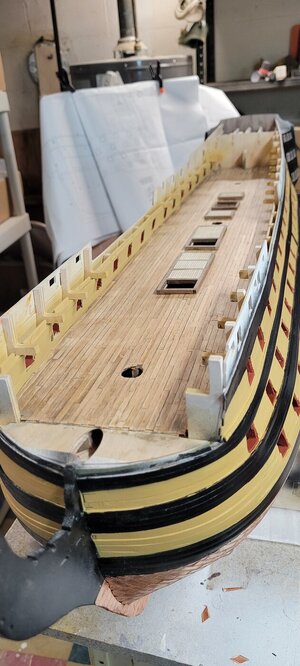
Honestly, once I turned the boat back right side up, you can barely see a lot of the issues I have with my plating, which is encouraging. I am also happy to see that none of the grating fell off.


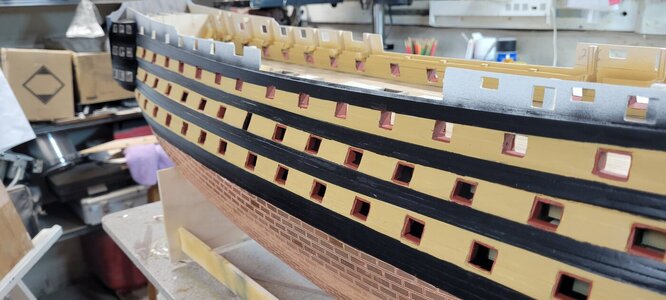
So I will tweak the plating with paint, and re-paint the black water line to clean everything up. I will also do one more touch up of the ports before forgetting I ever worked on them!

I am also thinking ahead as to how I am going to make sure the lower gun port cannon holes are all parallel and in line. Since my gun ports do not seem to be consistent in size, I am going to have to think about another way to do that.

Perhaps draw a string tight across the hull from front to back making sure the string is in the middle and using that as a guide. I think if I can get them all even horizontally, I can do what is needed to alter their stance/direction in each port so they line up. We shall see!!!!

I have also been working on the cannon bases. I also took a first stab at adding a ring to the cannons for the breaching ropes. I have done 3 and they seem ok.

Thanks for all the likes and encouragement!

Chris

20240610_161544.jpg

20240610_171550.jpg

20240610_171559.jpg

20240610_171604.jpg

20240610_171615.jpg

20240610_171622.jpg

20240610_171627.jpg

20240610_171727.jpg

20240610_171736.jpg

20240610_171742.jpg

20240610_171754.jpg

20240610_171812.jpg

20240610_171821.jpg
 
Maybe a small thing, but something to keep in mind for the future if you wish. The wales and thick stuff upon and below the wales were reduced in thickness at the bow to match the surrounding planking so they could seat in the rabbet the same as the bottom planking. Using the scantlings from David Steel's Elements and Practice of Naval Architecture and the Shipbuilder's Repository 1788 this is taking the thickness of the main wale, for example, from 10 inches to 4.5 or 5 inches for Victory.
Allan
 
Took a break from finalizing the copper plating. I still have to add the row that covers the bottom of the keel. Originally I thought I would have to add just a slight bend on each side, but there is barely enough width for that. I have a PE bender from a previous build that had an intensive use of PE and it kind of works, but most PE is very bendy, these copper plates are a bit thicker and trying to bend .5mm edges is tough.

I did order 100 extra plates from Jotika, not sure if I'll need them, but now I feel safe that I will have enough to finish and have enough for rudder.

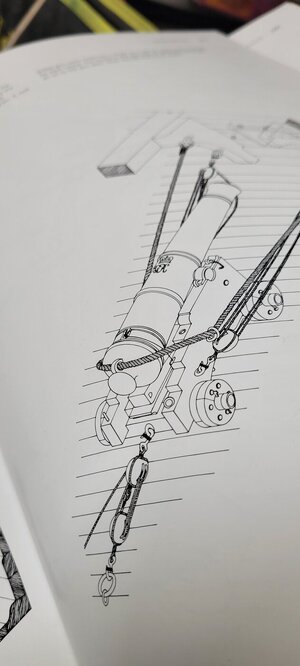
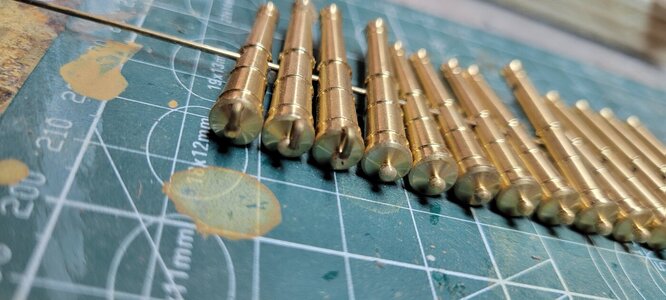
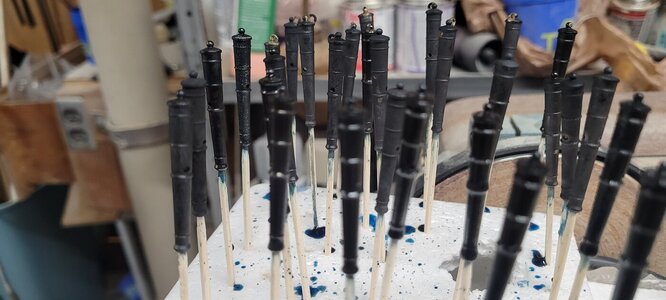
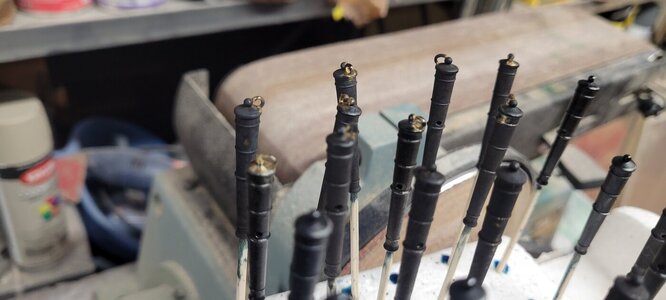
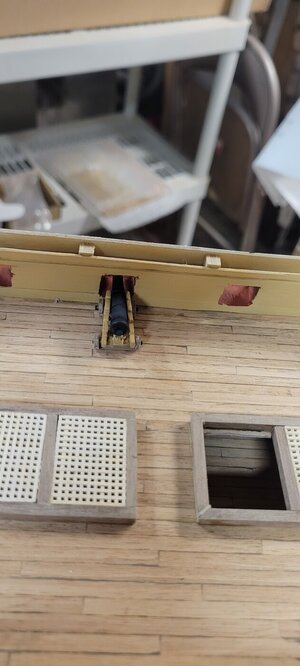
So on to whacking away at the cannons. I wanted to add the loop to the back of the cannon that is used to hold the breaching line and decided to only do this for the 10 cannons that will be visible from the higher decks. I know the loops I installed are exaggerated, but they will give the proper look. I also know that because I used CA glue to fasten them, the blackening may not take and I will have to touch up with paint. No worries.

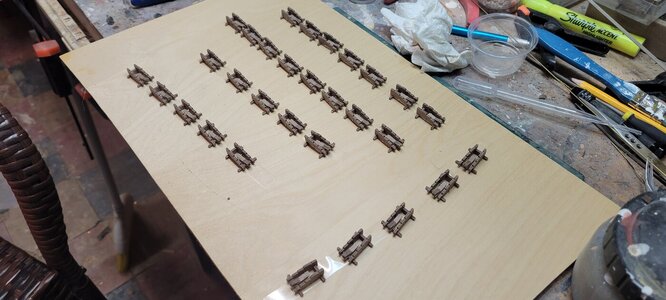
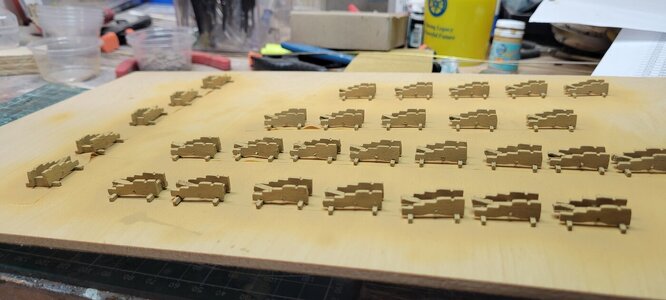
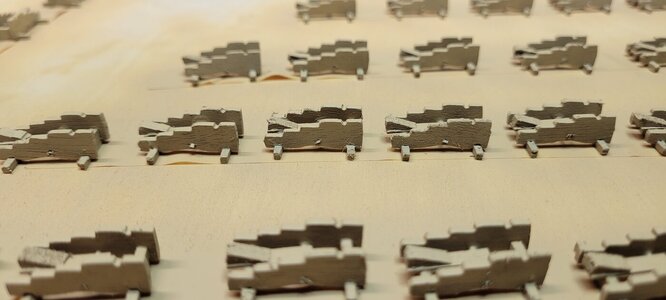
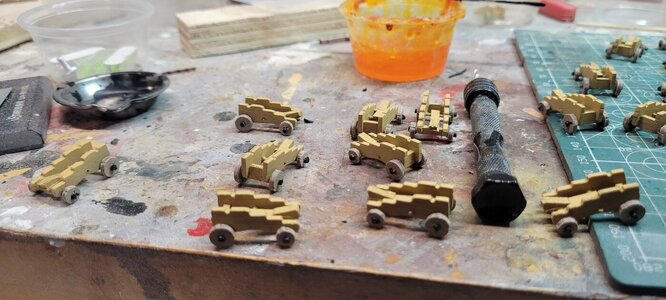
Building the cannons is very tedious in itself. Sanding the sides, axles and wheels is small work. But the extra effort of sanding all of them, give them a nicer finished look when done. I then painted the finished bases, it took 3 coats using the airbrush. Like any miniature work, painting always looks good until you take a picture of it and look closely. Closeup pics will always show the graininess of the paint and take away the realness of the smaller scale items. It's just the way it is.

Sanding the wheels was tough. I had to squish each one on the end of a toothpick and sand them one at a time. That's 120 wheels!!!!

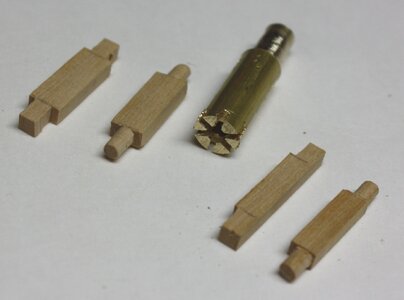
Then....I had to use a exacto knife to shave off enough of the SQUARE axle to fit into the ROUND hole on the wheel. Very odd set up!

Once done, I added some CA glue to set them and then painted the tips black. I should have waited a day for that, because I had been hunched over these things for 5 hours and my painting was a bit off. Not that anyone will see them!!!!

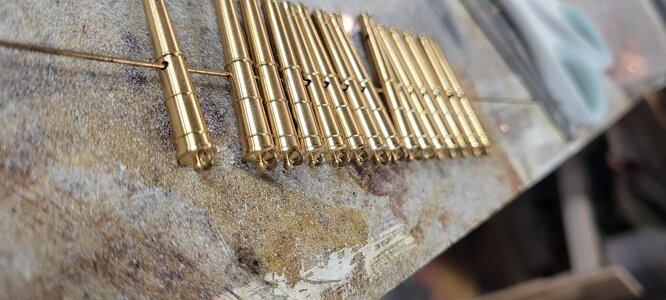
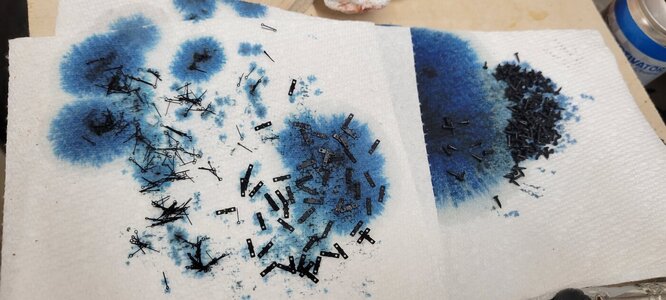
I then went to blacken all of the brass I was going to need. I have used Birchwood's with a lot of success. I first washed the 10 barrels with loops in isopropyl and water. When they came out after a minute or so they hadn't quite blackened. So I dried them off and then dipped then again and seem fine. I did the other 20 and hung them on toothpicks. I used the airbrush as a dryer to get some of the excess off...which sent blue dots all over!!! lol.

I then did the trunnion brackets, pins and eyelets. They are small and we'll see how they fair during installation. Part #480, the brass eyelets are VERY delicate. I am curious to see how they will stand up to being threaded with rigging.

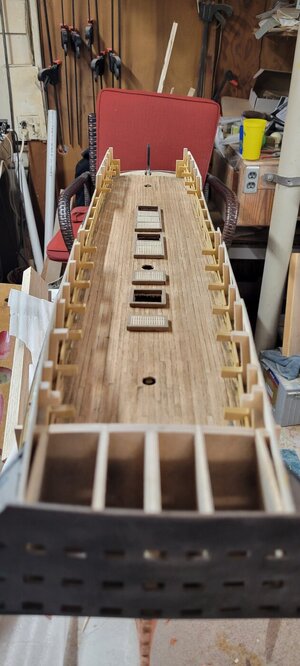
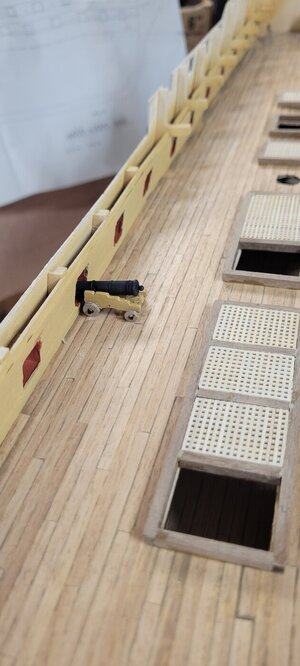
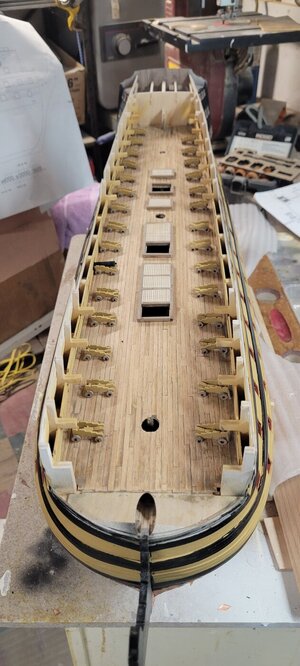
So that is where we are! Over the next week I will install the finished cannons after drilling the holes for everything and then come up with a plan for laying out the rigging.

That will be new for me! Handling little blocks, threading lines, tying teeny, tiny knots....SCARY!!!! But I think it is a perfect place to begin to learn the process on parts that will be of limited view once the upper decks are installed.

Thanks!
Chris

20240610_182408.jpg

20240610_182412.jpg

20240610_182423.jpg

20240623_165059.jpg

20240623_165115.jpg

20240623_165127.jpg

20240623_165647.jpg

20240623_165651.jpg

20240623_170719.jpg

20240629_144109.jpg

20240629_144115.jpg

20240629_144122.jpg

20240629_144130.jpg

20240629_144135.jpg

20240629_144302.jpg

20240629_162426.jpg

20240629_162520.jpg

20240629_162525.jpg

20240629_162532.jpg

20240629_162826.jpg
 
Then....I had to use a exacto knife to shave off enough of the SQUARE axle to fit into the ROUND hole on the wheel. Very odd set up!
For the future it is a simple task to make a cutter with a hand drill and hacksaw. Drill a hole the diameter for the axle diameter you want then hack saw the slots to give cutting edges. Hold the axle in a small vise and chuck the cutter in the drill and cut the square portion to round in less than a second. The step in the axle will prevent the cutter from going too far. Easy peasy.
Allan
Axletrees and cutter.jpg
 
Last edited:
Hey, thank you so much for taking the time to drop a comment. It is greatly appreciated!!!!

The first pic was my failed attempt at running the copper plating along the bottom keel.
I have removed all those plates and re-installed following the water line. They look much better.


I am not sure if I will have enough plating to do the bottom of the keel and the rudder. No worries, I ordered another 100 from JoTika. They are relatively cheap, about 12 pounds....whatever that is in USD!!!!! They actually shipped it out today.

I also bought some copper paint from our local craft/hobby store. I decided to go with Tamiya and it is surprisingly close.
I see a few spaces and gaps and I painted them and then wiped away the excess. I will circle back when it dries and do it again.
I also painted the bow keel ridge before adding the base plates.

I was hoping I would be able to bend those plates so that they fit over the keel, but there is barely enough there.
I do have a PE bender, but there just isn't enough meat to bend them. I was thinking maybe to just install flat and use a wooden dowel to bend them down....not sure if that will look good, so I will check.

Honestly, once I turned the boat back right side up, you can barely see a lot of the issues I have with my plating, which is encouraging. I am also happy to see that none of the grating fell off.


So I will tweak the plating with paint, and re-paint the black water line to clean everything up. I will also do one more touch up of the ports before forgetting I ever worked on them!

I am also thinking ahead as to how I am going to make sure the lower gun port cannon holes are all parallel and in line. Since my gun ports do not seem to be consistent in size, I am going to have to think about another way to do that.

Perhaps draw a string tight across the hull from front to back making sure the string is in the middle and using that as a guide. I think if I can get them all even horizontally, I can do what is needed to alter their stance/direction in each port so they line up. We shall see!!!!

I have also been working on the cannon bases. I also took a first stab at adding a ring to the cannons for the breaching ropes. I have done 3 and they seem ok.

Thanks for all the likes and encouragement!

Chris

View attachment 452665

View attachment 452666

View attachment 452667

View attachment 452668

View attachment 452669

View attachment 452670

View attachment 452671

View attachment 452672

View attachment 452674

View attachment 452675

View attachment 452676

View attachment 452677

View attachment 452678
Hi Chris
Absolutely beautiful
What glue did you use to stick the copper plates? CA?
 
For the future it is a simple task to make a cutter with a hand drill and hacksaw. Drill a hole the diameter for the axle diameter you want then had saw the slots to give cutting edges. Hold the axle in a small vise and chuck the cutter in the drill and cut the square portion to round in less than a second. The step in the axle will prevent the cutter from going too far. Easy peasy.
Allan
View attachment 456820

What did you use for your stock cutter? I assume something brass that was easy to drill into and cut the slots into?
It certainly makes very nice rounded pegs!
 
Hi Chris
Absolutely beautiful
What glue did you use to stick the copper plates? CA?
Thanks Gilbert.
Yes, CA glue one at a time! As I laid them middle to bow, glue in my left hand and a copper plate with tweezers in my right.
Going the other way, I switched hands.

I used Starbond Medium CA..not sure if that is available in France, but I am sure any medium CA will work.
I have thick and thin CA and they were too far either way on the consistency scale. Medium was perfect.
 
What did you use for your stock cutter? I assume something brass that was easy to drill into and cut the slots into?
It certainly makes very nice rounded pegs!
Chris
I used some scrap brass rod I had laying around and have made several for various size axles. It has been a while but I probably I bought it from McMaster Carr.
I imagine most any metal would work just as well. The below will take you to the material I use most of the time.
Allan
 
For the future it is a simple task to make a cutter with a hand drill and hacksaw. Drill a hole the diameter for the axle diameter you want then hack saw the slots to give cutting edges. Hold the axle in a small vise and chuck the cutter in the drill and cut the square portion to round in less than a second. The step in the axle will prevent the cutter from going too far. Easy peasy.
Allan
View attachment 456820
clever idea - many thanks for sharing with us
 
Back
Top