-

Win a Free Custom Engraved Brass Coin!!!
As a way to introduce our brass coins to the community, we will raffle off a free coin during the month of August. Follow link ABOVE for instructions for entering.
-

PRE-ORDER SHIPS IN SCALE TODAY!
The beloved Ships in Scale Magazine is back and charting a new course for 2026!
Discover new skills, new techniques, and new inspirations in every issue.
NOTE THAT OUR FIRST ISSUE WILL BE JAN/FEB 2026
You are using an out of date browser. It may not display this or other websites correctly.
You should upgrade or use an alternative browser.
You should upgrade or use an alternative browser.
I'm looking ahead to determine how much more I'm going to be doing. I think I have enough wood to do the masts, which means rigging. Looking at the plates I'm wondering how I determine the sizes of certain things.
My best guess right now is 5 mm deadeyes and 6 mm sheaves/blocks.
For example, I haven't been able to determine what size blocks, deadeyes, sheaves, cleats, and hearts I should be looking out. Also how do I determine how many of each I need?
I've also been reviewing the cannon situation, I'm not convinced that my decking is going to work out to the correct height where I can deck the area where the cannons to be rigged and be able to put the cannons properly through the port holes. We'll see.
I will be installing all the swivel cannons I believe.
Well I did some measurements and after some consultations with the Facebook groups I decided on the following:
Deadeyes: 5 mm
Cleats: 7 mm (I think a few will be 6 mm)
Rigging blocks: 4 mm & 5 mm
Double Sheave: 5 mm
That's my plan at least. But even at the end of the day, if I'm off by a mm what's a mm between friends.
After that I began building some coamings. This is the reminder that I said deck fittings would be in ebony but that I have two different types of ebony on the ship. The rails and wale is one type and all the fittings and the bottom of the keel is another.
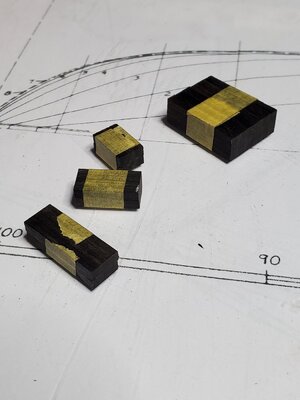
I cut one of the original slates as square as possible. Then cut out strips at 5/16 wide.
After measuring my hatches I cut off corresponding lengths, taped them together and squared them all to the same length on my disc sander. You lose a little length so these were cut a tad longer.
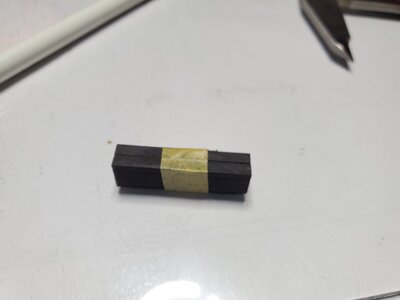
Glued them sqaure
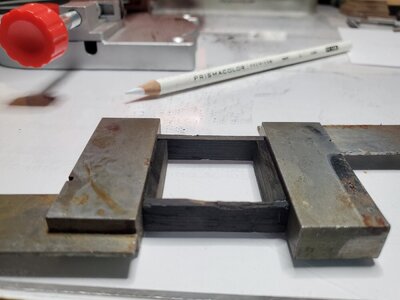
After the glue dried I took this back to the disc sander for all sides and the top and bottom. This to get it as sqaure as possible.
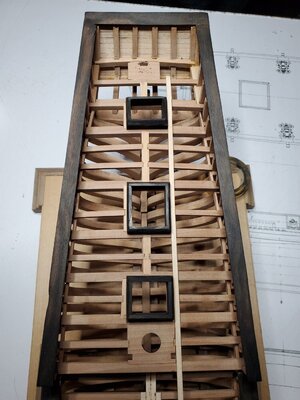
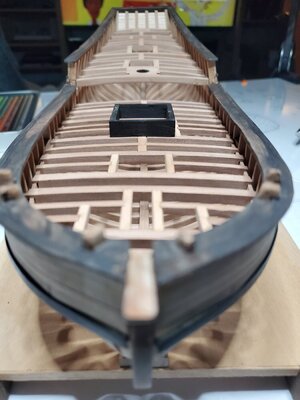
A quick look at it on the deck for comparison later.
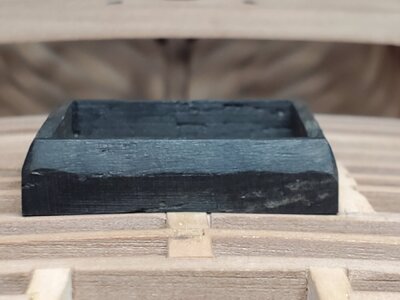
In order to get the coaming edges right I used tape instead of lines. I found when I was making the bevels on the ribs the lines don't work for me. I need the tape to act as a stopping point even if the dremel will cut right through it.

This was the first go around so it wasn't perfect, but much better than I would've done otherwise I think.
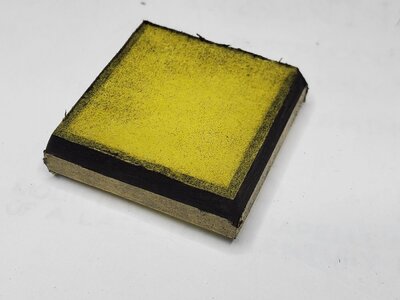
Now after removing the tape I sat it on the deck.
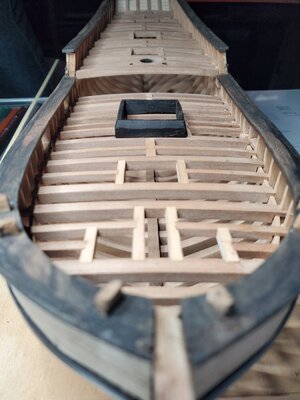
Given the deck isn't level the coaming needs some sanding below it so it sits flush. My plan is to put the coamings directly on the deck and then plank around them in some places. So the flush fit is important. To achieve this I laid 220 grit sand paper on the deck and sanded it to shape.
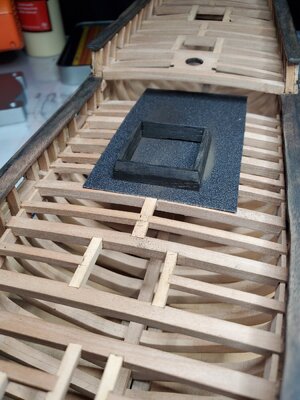
I'm happy with the results. It's not perfect but it fits nicely. I will repeat the process with the rest of the deck fittings.
Deadeyes: 5 mm
Cleats: 7 mm (I think a few will be 6 mm)
Rigging blocks: 4 mm & 5 mm
Double Sheave: 5 mm
That's my plan at least. But even at the end of the day, if I'm off by a mm what's a mm between friends.
After that I began building some coamings. This is the reminder that I said deck fittings would be in ebony but that I have two different types of ebony on the ship. The rails and wale is one type and all the fittings and the bottom of the keel is another.
I cut one of the original slates as square as possible. Then cut out strips at 5/16 wide.

After measuring my hatches I cut off corresponding lengths, taped them together and squared them all to the same length on my disc sander. You lose a little length so these were cut a tad longer.

Glued them sqaure

After the glue dried I took this back to the disc sander for all sides and the top and bottom. This to get it as sqaure as possible.
A quick look at it on the deck for comparison later.

In order to get the coaming edges right I used tape instead of lines. I found when I was making the bevels on the ribs the lines don't work for me. I need the tape to act as a stopping point even if the dremel will cut right through it.

This was the first go around so it wasn't perfect, but much better than I would've done otherwise I think.

Now after removing the tape I sat it on the deck.

Given the deck isn't level the coaming needs some sanding below it so it sits flush. My plan is to put the coamings directly on the deck and then plank around them in some places. So the flush fit is important. To achieve this I laid 220 grit sand paper on the deck and sanded it to shape.

I'm happy with the results. It's not perfect but it fits nicely. I will repeat the process with the rest of the deck fittings.

Very good idea with the sandpaper on top of the beams to get the correct bottom form.
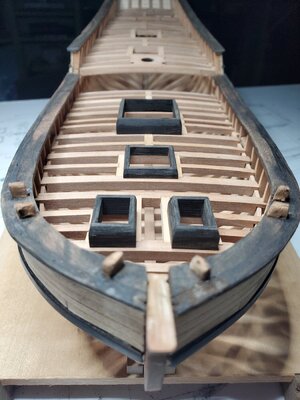
The work continues on the hatch coamings.
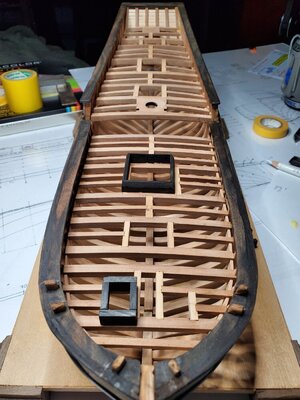
The forward hatch coamings are small and look odd before being shaped properly.
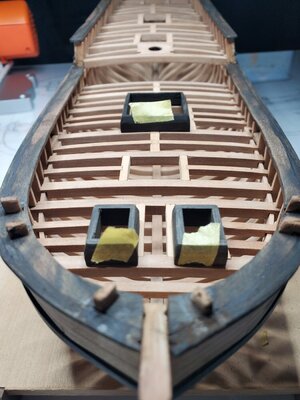
The coamings all got thinned and beveled to the correct height and thickness.
I decided to build the deckhouse in the coaming to make sure everything fit nicely.
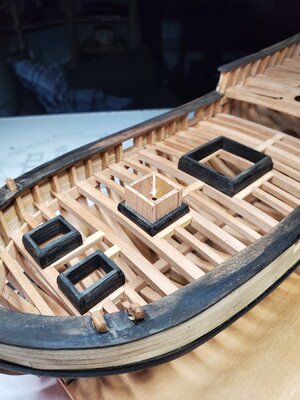
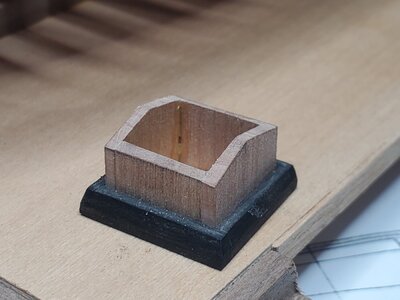
Beveled down the top for the roof.
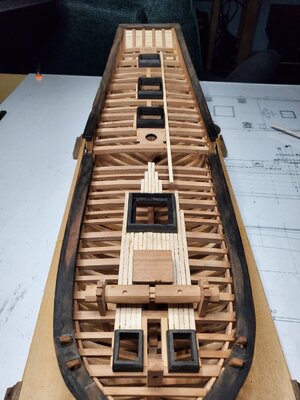
Final result for the deck. Next up is gluing everything down. I haven't decided what to do about the grating. I may add some, may not. Once everything is glued down though I will put down some decking.
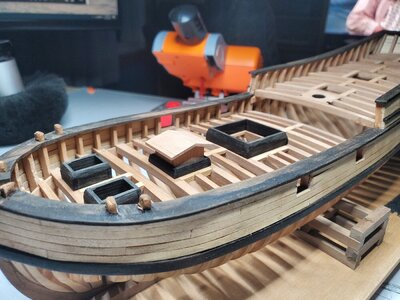

The forward hatch coamings are small and look odd before being shaped properly.

The coamings all got thinned and beveled to the correct height and thickness.

I decided to build the deckhouse in the coaming to make sure everything fit nicely.

Beveled down the top for the roof.

Final result for the deck. Next up is gluing everything down. I haven't decided what to do about the grating. I may add some, may not. Once everything is glued down though I will put down some decking.

Next up was actually to do the trimming on the deck housing. Shaved down some of ebony to the right thickness with some appropriately sized boxwood as a jig.
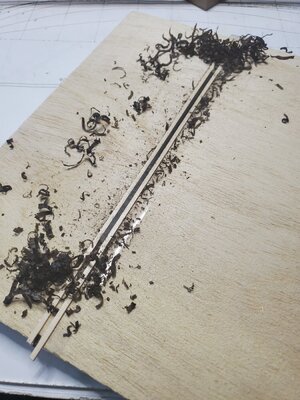
After adding the trimming and squaring up the deckhouse I cut up some 1/16" by 1/8" holly for the decking.
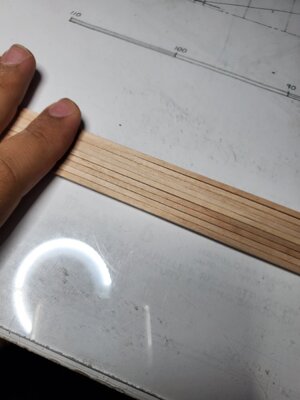
Tried to pick out the holly strips that matched the best. I'm not going to deck the whole thing, but I'm playing around with what formation I want to go with. I also added the lip to the inside of the main hatch coaming because this one will be open whether I decide to do grating or not.
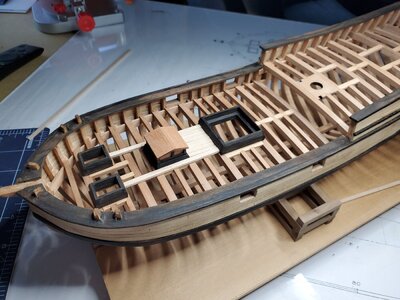
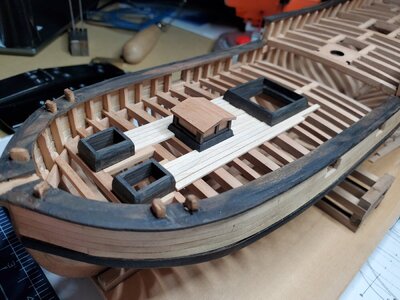
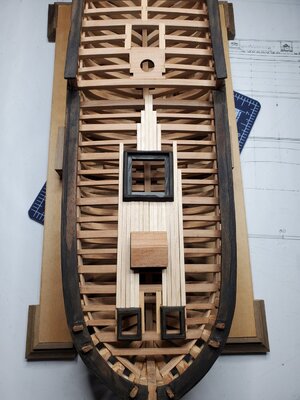
The fittings are glued down but the deck strips are still lose. Probably sleep on it and then glue them down tomorrow or so. Once I glue those in I'll move on to the windlass.

After adding the trimming and squaring up the deckhouse I cut up some 1/16" by 1/8" holly for the decking.

Tried to pick out the holly strips that matched the best. I'm not going to deck the whole thing, but I'm playing around with what formation I want to go with. I also added the lip to the inside of the main hatch coaming because this one will be open whether I decide to do grating or not.


The fittings are glued down but the deck strips are still lose. Probably sleep on it and then glue them down tomorrow or so. Once I glue those in I'll move on to the windlass.
Man, the windlass has been an adventure, let me tell you. I needed to cut an appropriate sized piece from rougher cuts. So I squared the piece I had, then I off an appropriate length and cut that piece down to the 3/8" square that I needed. And this is where I ran into trouble.
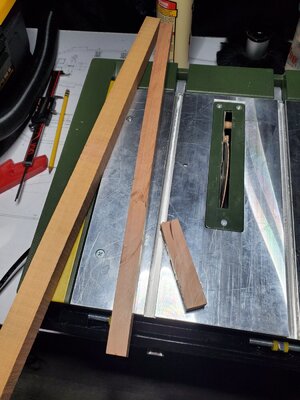
My first attempt was really close, within tens of a mm, but I thought I have enough wood let's try again and see if I can get it perfect. Well somehow I ended up burning out the next piece of wood and ruining the blade. Had to order a new one, still not really sure what went wrong.
So I took my first and only cut and went to work. First, make it an octagon.
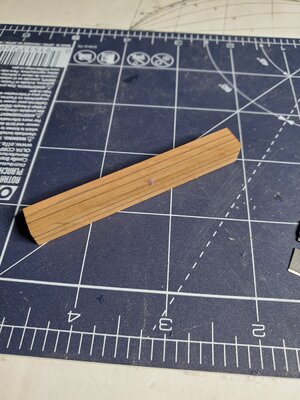
I thought maybe I could use the table saw to cut off the corners and make it a nice clean cut but after angling the blade I realized the piece was too small to run through it without making a custom sled for it. So I hand carved.
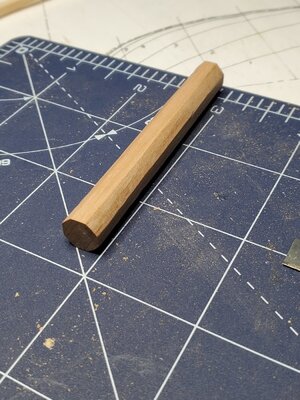
Combination of using my single sided razors and sanding on a glass base to get each side as flat as possible.
Originally I was going to cut the three sections out by using the lathe. Didn't work out.
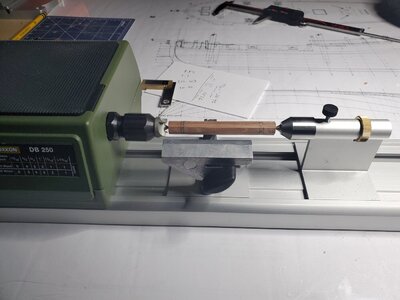
Instead, and ironically I don't have any photos, I used the mill. Turns out the square bit I have is the perfect width for what I was going for. I tried using the razor here first but I just couldn't get it straight enough. So I cut out 1/16" deep cuts in all three locations.
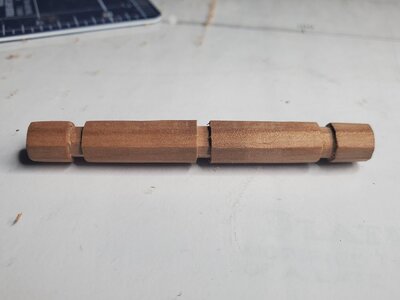
Tedious work having to remove the piece, rotate it, clamp it back down, line it up and cut 24 times, but the result worked nicely. At this point I started the taper and rounded the end cuts.
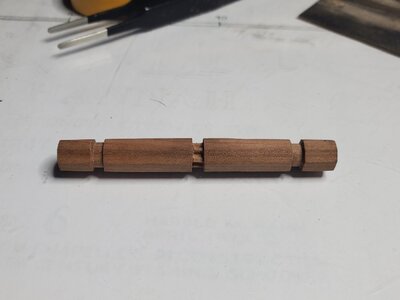
After a while it took shape. I had to carve the teeth into the middle cut, that took some serious cleaning. You'll notice it's a bit long on the ends, it'll need to shortened on the disk sander to be the correct length. I originally left extra so I could use the lathe without damaging the main piece.
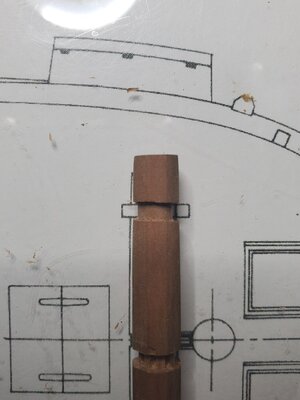
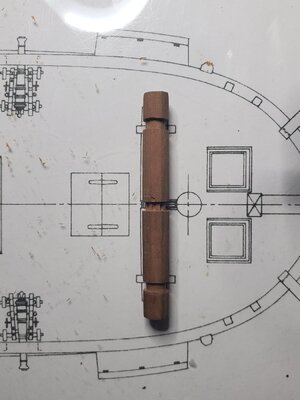
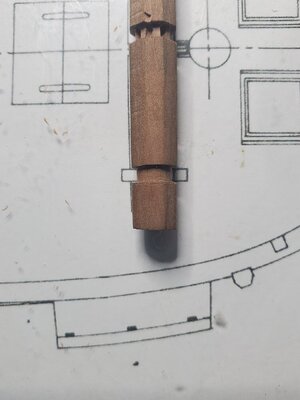
Lots of sanding, cutting, and shaping later here is my first take on a windlass minus the square peg holes I need to drill in next.

My first attempt was really close, within tens of a mm, but I thought I have enough wood let's try again and see if I can get it perfect. Well somehow I ended up burning out the next piece of wood and ruining the blade. Had to order a new one, still not really sure what went wrong.
So I took my first and only cut and went to work. First, make it an octagon.

I thought maybe I could use the table saw to cut off the corners and make it a nice clean cut but after angling the blade I realized the piece was too small to run through it without making a custom sled for it. So I hand carved.

Combination of using my single sided razors and sanding on a glass base to get each side as flat as possible.
Originally I was going to cut the three sections out by using the lathe. Didn't work out.

Instead, and ironically I don't have any photos, I used the mill. Turns out the square bit I have is the perfect width for what I was going for. I tried using the razor here first but I just couldn't get it straight enough. So I cut out 1/16" deep cuts in all three locations.

Tedious work having to remove the piece, rotate it, clamp it back down, line it up and cut 24 times, but the result worked nicely. At this point I started the taper and rounded the end cuts.
After a while it took shape. I had to carve the teeth into the middle cut, that took some serious cleaning. You'll notice it's a bit long on the ends, it'll need to shortened on the disk sander to be the correct length. I originally left extra so I could use the lathe without damaging the main piece.


Lots of sanding, cutting, and shaping later here is my first take on a windlass minus the square peg holes I need to drill in next.

Every day we are learning - with having a problem to solve, using and trying this or that tool.
Very good, that you are explaining, what you tried and what did not work..... very informative post !
Very good, that you are explaining, what you tried and what did not work..... very informative post !
Every day we are learning - with having a problem to solve, using and trying this or that tool.
Very good, that you are explaining, what you tried and what did not work..... very informative post !
Hopefully it's helpful for others!
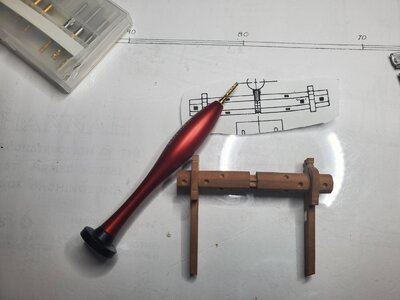
Tonight I put together the brackets. Kind of tricky.
I copied the pattern from the plate and cut the pieces accordingly.
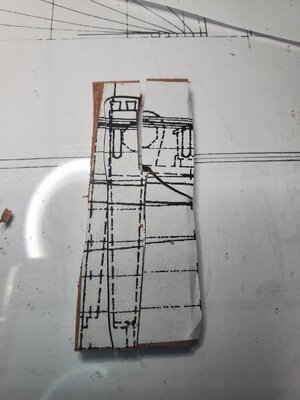
Reading the plans it looks like two simple pieces. With the right top piece sitting on the deck. But everytime I tried to make the pieces fit it didn't work. Then I realized that what I had made looked different from something I had seen before. So I went back to the book on the Hannah.
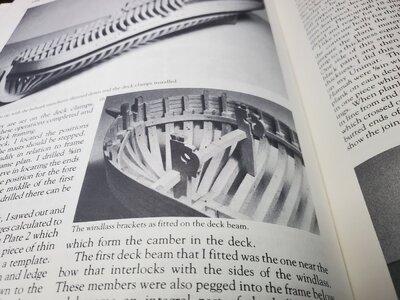
Mine don't look as nice as Hahn's but this helped fix my issue. The brackets need a cut in so that the brackets slide on. Once I had that issue figured out I was able to cut it and glue the pieces together.
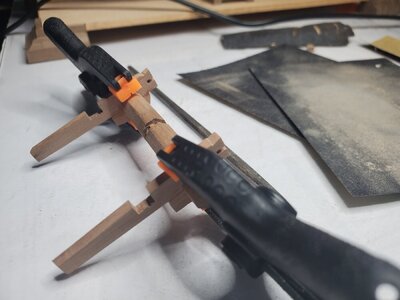
I made sure to check, the windlass does spin still, so it'll function when I put the rope on.
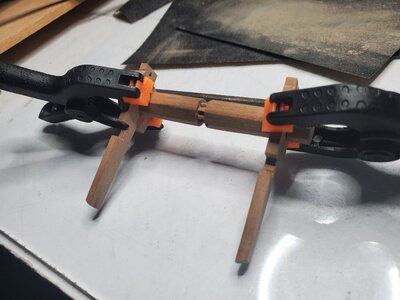
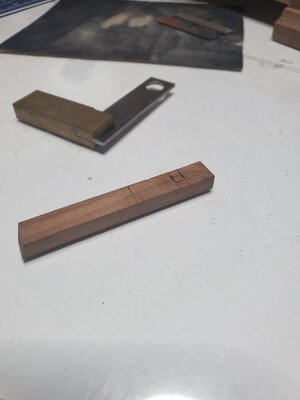
Rolling right along now. Drilled the holes into the windlass, based upon the plans and squared them up with the knife. Now different reference photos have them in different locations, so I just went with the plans.
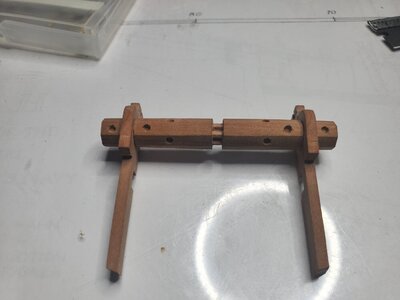
Installed it into the deck, onto the frame
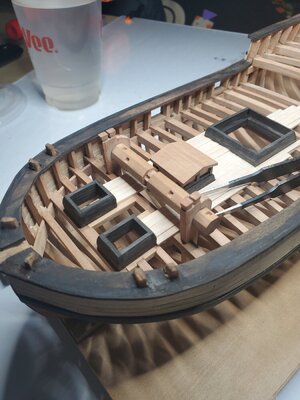
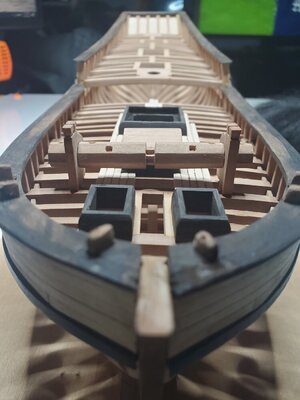
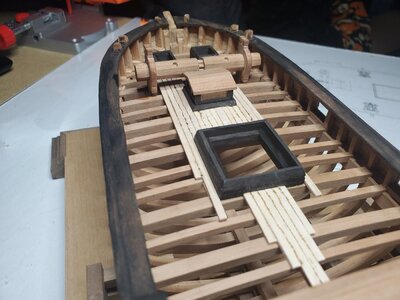
Also shaped up and installed the bow spirit timber. It was disc sanded to get the point on top and same drill to cut the 3/32 square into it.
The deck planking has also been glued in and this point.
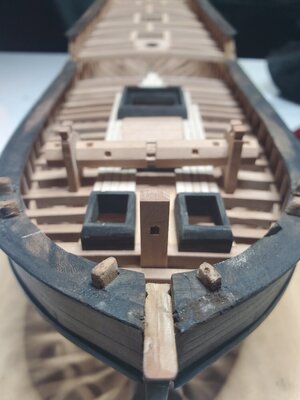


Installed it into the deck, onto the frame


Also shaped up and installed the bow spirit timber. It was disc sanded to get the point on top and same drill to cut the 3/32 square into it.

The deck planking has also been glued in and this point.

Last edited:
Very well illustrated and annotated log that you bring to us with some ideas to use as well. I admire your small detail focus on the windlass. PT-2Building the poop deck hatch coamings. To make sure the planking fits better all three coamings are being cut with the same 6 pieces.
View attachment 186708
Sanded and dry fitted.
View attachment 186709
Pretty good fit.
View attachment 186710
Hello Gventura,
Your representations are extremely informative. I am very impressed. I can only agree with the comments of PT-2.
Your representations are extremely informative. I am very impressed. I can only agree with the comments of PT-2.
Very well illustrated and annotated log that you bring to us with some ideas to use as well. I admire your small detail focus on the windlass. PT-2
Hello Gventura,
Your representations are extremely informative. I am very impressed. I can only agree with the comments of PT-2.
Thank you both! Hopefully people find my mistakes helpful.
Next I put together the riding bitt for the poop deck.
The top piece is the tricky part, since the bottom three pieces are just 1/8 squares.
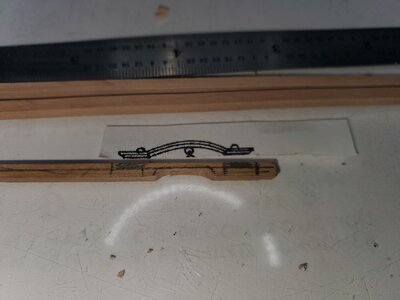
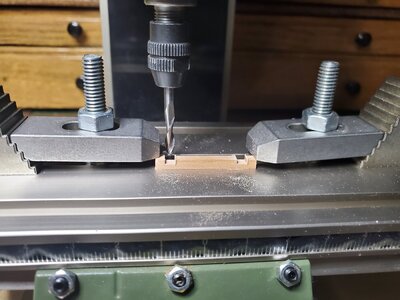
I tried transferring the template to the wood and shaping with the following:
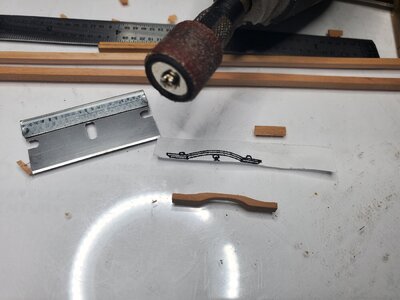
It came out alright for a first attempt. Now the cross beam piece needs notches, and since I have my 1/8 bit already on the mill I just cut them out real quick.
Here is my mock up:
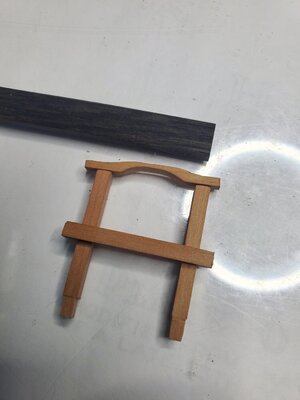
Notice at the bottom i can out the notches that fit into the decking using the plans. Remember it needs to fit into the deck and have space for the 1/16 planking.
I decided to switch out the top with ebony. Extremely difficult to shape. Not sure I like it, may need to make another.
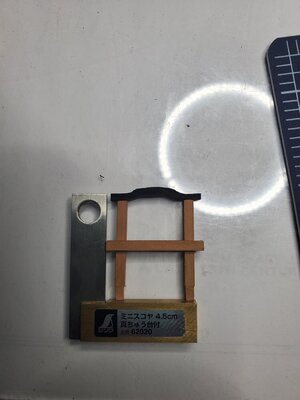
Riding bit for the poop deck? Out of context for an outside or younger minded reader that brings up all kinds of imagery. ;-) PT-2Thank you both! Hopefully people find my mistakes helpful.
Next I put together the riding bitt for the poop deck.
The top piece is the tricky part, since the bottom three pieces are just 1/8 squares.
View attachment 186913
I tried transferring the template to the wood and shaping with the following:
View attachment 186914
It came out alright for a first attempt. Now the cross beam piece needs notches, and since I have my 1/8 bit already on the mill I just cut them out real quick.
View attachment 186915
Here is my mock up:
View attachment 186916
Notice at the bottom i can out the notches that fit into the decking using the plans. Remember it needs to fit into the deck and have space for the 1/16 planking.
I decided to switch out the top with ebony. Extremely difficult to shape. Not sure I like it, may need to make another.
View attachment 186917
Your work and the photos are a good teaching process for me to be following and the "mistakes" may be taken gratefully as "don't do this" lesson that I may have taken. Thanks for the candor. PT-2Took a break today to build a temporary cradle/base for the Hannah. This is the Mantua simple base kit that I picked up a couple years back. One to build and a second to use as a template for building nicer ones later.
My favorite part of navy board builds is that you can stop at almost any point and it looks great.
View attachment 181150
Your work and the photos are a good teaching process for me to be following and the "mistakes" may be taken gratefully as "don't do this" lesson that I may have taken. Thanks for the candor. PT-2
I skipped from one kit for a long boat to a scratch build, it's been a learn process and hopefully it's helped others.
I finished the riding bitt structure, need to add the holes for the rigging at the bottom. It sits a little weird because it has extra length for when I put the planking down.
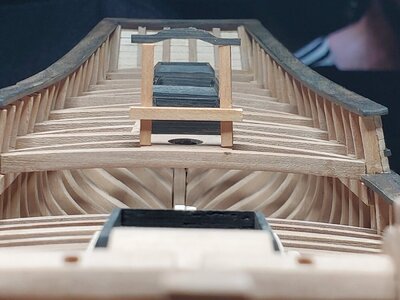
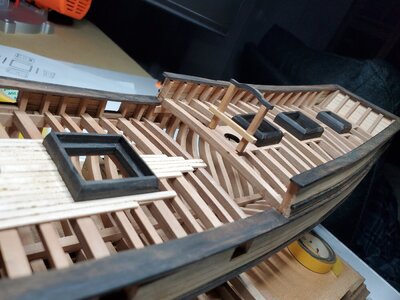
I moved ahead to start finishing the structure in the middle coaming. Same process as before with using 1/32 thick basswood to shape strips to the correct size for the decorations. This structure also is angled at the top, using the plans I made the front and back walls the correct size, the side walls the same height as the front wall, and then used a disc sander to cut the angle in properly.
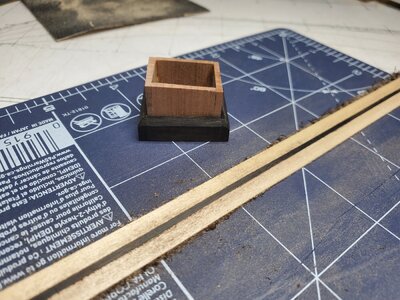
I need to put the hatch on still but it looks much better than my last structure.
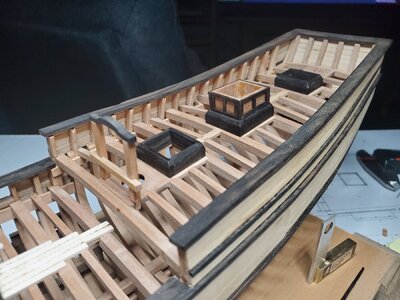
Once I finish the hatch I think I can glue the coamings down and install the planking. I'll likely do something similar on the poop deck with staggered planking.
Ebony is really making a good contrast and all ower appliance! I like the job of coamings and their joints!
Ebony is really making a good contrast and all ower appliance! I like the job of coamings and their joints!
I really like the ebony, I don't know that the Holly is exactly what I wanted but it's working.
I put together the rest of the hatch and put the planking on. By making all the coamings at the same time they fit very well and the decking is snug, solved the issues on the main deck that I had.
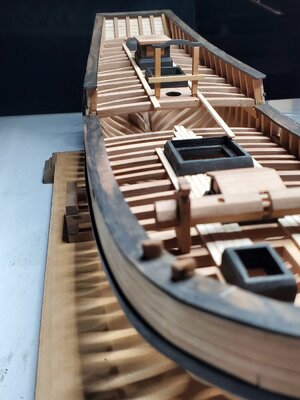
I glued the side planks first. I decided to use two full lengths instead of staggering them.
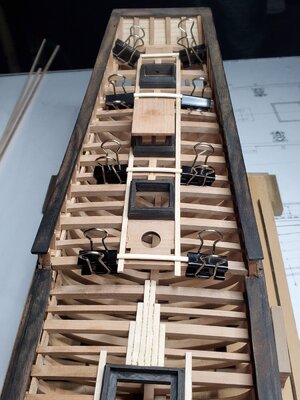
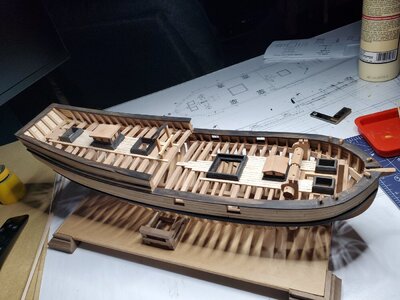
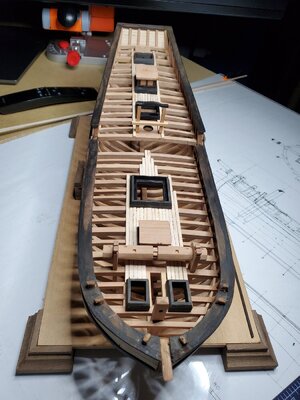
Still some odds and ends to put together: pumps, stove pipe, the final details on the windlass as well.
You have combined the output of some very nice tools along with hand skill for a well progressing build. Particularly the windlass which has shapes that I could not produce with my limited shop tools and hands. PT-2I really like the ebony, I don't know that the Holly is exactly what I wanted but it's working.
I put together the rest of the hatch and put the planking on. By making all the coamings at the same time they fit very well and the decking is snug, solved the issues on the main deck that I had.
View attachment 189295
I glued the side planks first. I decided to use two full lengths instead of staggering them.
View attachment 189296
View attachment 189297
View attachment 189298
Still some odds and ends to put together: pumps, stove pipe, the final details on the windlass as well.


