HIGH HOPES, WILD MEN AND THE DEVIL’S JAW - Willem Barentsz Kolderstok 1:50

Heinrich, wat maak je er een mooi verslag van! Een heel stuk geschiedenis met mooie foto's, erg leuk om te zien en te lezen. Ik zie je verslag nu pas, maar ik blijf het zeker volgen. Tevens vind ik het een hele eer dat je mijn verslag en foto's als referentie gebruikt voor dit verslag.

Groet Piet
 
Just to help other viewers I have translated the message Piet just posted:
Heinrich, what a beautiful log you have made! A whole piece of history with beautiful photos, very nice to see and read. I am just now seeing your log, but I will certainly continue to follow it. I also think it's a great honour that you used my building log and photos as a reference for this one.

Greetings Piet
 
Baie welkom Piet by deze bouwverslag van de Willem Barentsz. Dit is een groot eer om jouw hier te he en om van jouw plaatjes as voorbeeld gebruikt te maak.

You are very welcome Piet. It is an honor for me to you have you here and to be able to use your photographs as illustration.
 
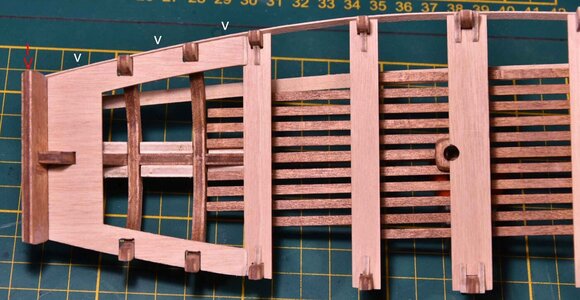
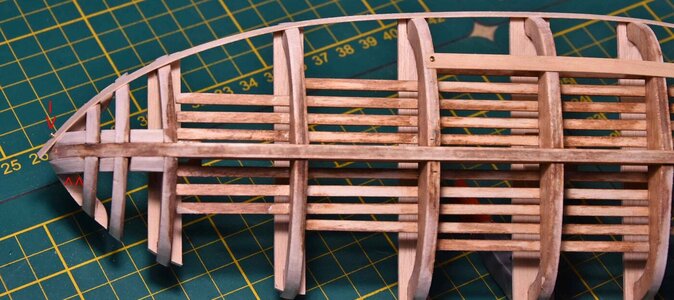
The keel was often the weakest point of a ship and in a heavy storm the forces on the rudder could easily rip off the keel and whole backside of a ship. It would then sink within minutes... To add some strength to the keel construction the lower planks where extended.
This is such an enjoyable log to read through Heinrich. Each time I go back and re-read all the very instructive posts I get another ah-ha moment of understanding.
 
This is such an enjoyable log to read through Heinrich. Each time I go back and re-read all the very instructive posts I get another ah-ha moment of understanding.
Thank you so much Roger. That is very much appreciated! :)
 
Nice to see that this build is a co-production with pictures of Pietsan! A beautiful combination.
Regards, Peter
Thank you very much Peter. Piet was the inspiration of this build. I have always liked the Willem Barentsz because of its somber simplicity, but when I saw how beautiful that very same simplicity became in the hands of Piet, I couldn't resist any longer. :)
 
Quick test fit: The cannons are more than long enough!!! With a size like that, they have to be! With the gun carriage moved back as far as it can go, the cannon still easily protrude through the gun port. And don't laugh at my trunnion nail!

View attachment 272978
You need to cut the trunnion flush with the cannonsROTF sorry I playing catch up here Heinrich
 
You need to cut the trunnion flush with the cannonsROTF sorry I playing catch up here Heinrich
No one in the world will see my nail/trunnion Grant! :D No, seriously that's just a planking pin that I inserted to anchor the cannon at front. It will all be done the right way with cut trunnion when the cannons get fitted permanently. Scout's honor!
 
Your log is as much a lesson on Dutch History, ship building at that time and how to build a good model. Really great Heinrich. Cheers
Thank you very much for the kind words Grant. The history follows automatically by virtue of it being a 16th century ship, building a good model is the challenge ahead!
 
@GrantTyler Oh yes - the challenge is an intrinsic part. And to me there is the absolutely vital aspect of keeping me busy at the moment. I have just finished an 8-and-a half-hour session of hull fairing which means that I cam covered in wood dust - but more importantly - I couldn't be happier. :)
 
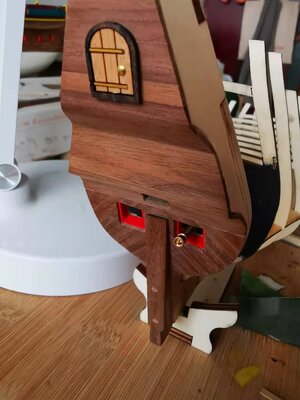
Hello Everyone. I have been quiet the last two days, because I have been flat out busy in the shipyard. First I just want to show you three picture of the cannon set-up in the stern to show you what it will look like.

微信图片_20211206103905.jpg
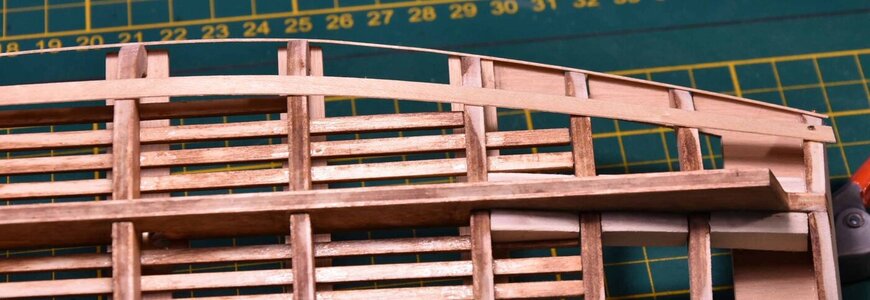
I scratch-built two "decks" in the stern area between Frames #10 and #11 (the actual stern). This is the modified cannon dry-fitted on its gun carriage, but still sporting its trunnion nail. (just for @GrantTyler ) :)

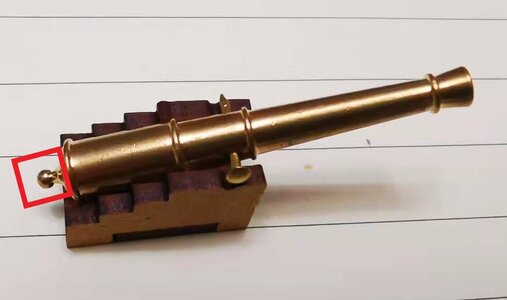
I say "modified" cannon, because as you can see on the picture of the original cannon, the breech had to go!

微信图片_20211203230213.jpg

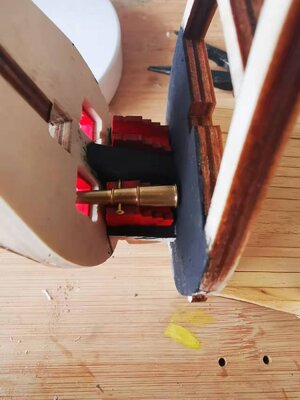
And this is what the cannon looks like from the business end.

微信图片_20211206103921.jpg

And as you can well imagine, I am very pleased at how that turned out. Now it's enough of fooling around with cannons - these will now be put away until after the hull is faired, boxed and finally sanded. They will be installed just before I start the actual planking.
 
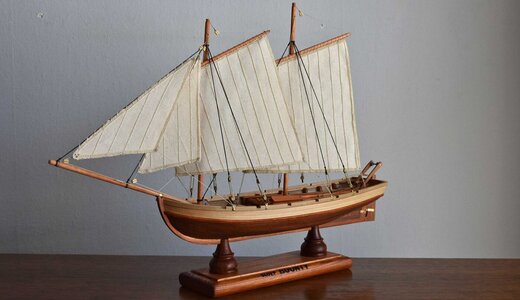
When @pietsan Piet and I discussed the fairing of the hull, he advised that I take a good look at his "tutorial" on fairing a hull while he was building the sloop of the Bounty. So, just as a starting point, let me show you some pictures of his finished sloop. (All the pictures in this posting are courtesy of Piet.
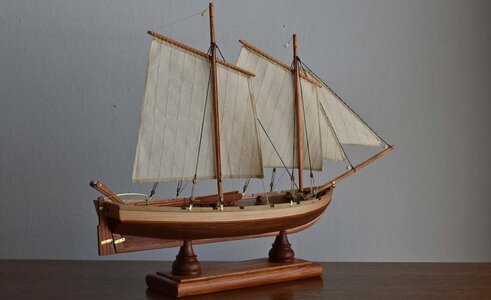
Finaal.jpg

Finaal 2.jpg
So with that as an example of the finished product, I listened to GOOD advice.

Piet's Advice on Fairing a Hull:

It goes without saying that one of the main pre-requisites for a good planking job is the fairing of the hull. Not only will it ensure a smooth line of hull planking without bumps, kinks or indentations, but it will also ensure the maximum surface for the glue to adhere to. Successful fairing of the hull serves a dual purpose. It will make the actual planking process a lot easier and will aid greatly to the radiance that the model exudes in the end.

To most modelers, fairing means grabbing a sanding block and merrily (or not so merrily) sanding away at the bulkheads from bow to stern according to an imaginary visual line. No doubt this is better than no fairing at all, but at the same time, this is not really what we want to be doing. Ideally, we should first determine where and how much and at what angle we need to sand. That will ensure that we do not sand too little- and more importantly - that we do not remove too much material from the bulkheads.

Before you start the sanding process pre-bend a strake (just as you would do if you were planking the hull already) to use as a guide.
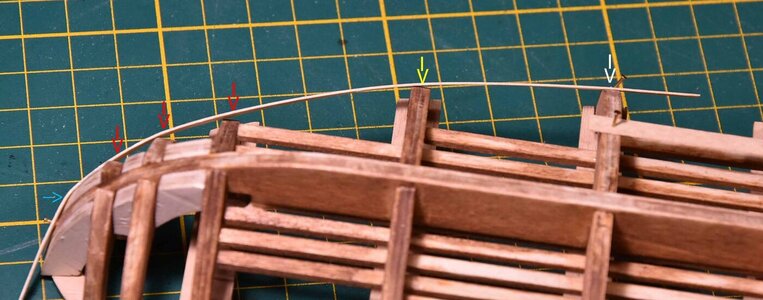
Faitring 1.jpg

Here you can see that the pre-bent strake can be pinned to the bow and then held against the bulkheads to examine the contact areas between the plank and the individual bulkheads. The white arrow indicates that the plank is in contact with the full width of the bulkhead – in principle thus, no material needs to be sanded away here. I say in principle, because the situation might change after the other bulkheads have been sanded.

The yellow arrow indicates a slight misalignment which means that only little material needs to be removed towards the bow. The situation changes at the three red arrows where the misalignment angle is considerably bigger, thus indicating that much more material needs to be removed – again towards the bow. The blue arrow shows a severe kink in our strake. This is caused by a filler block at the bow which has not yet been sanded to shape.

We can, of course not only check for alignment in one particular place and then think that if if that looks good, we are finished. Multiple checks have to be carried out because as we get closer to the keel for instance, the angles start getting smaller and it is not necessary to remove as much material as higher up on the hull.
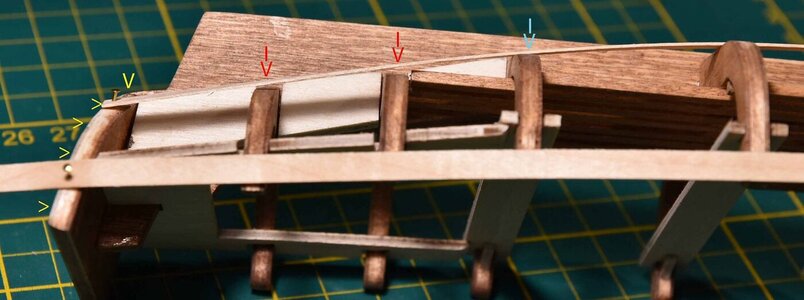
Fairing 2.jpg

At the stern adjustments are also generally smaller, but we still need to check. On the picture above, the blue arrow indicates a very slight angle, so very little fairing is required there. The red arrows however, show a much greater angle and obviously we need to address that. Pay attention though that the problem does not lie with the two bulkheads indicated by the two red arrows, but with the stern frame itself. Because the stern frame is mounted square to the keel, it has to be faired in the same curvature as the rest of the hull line. That will automatically bring the plank into full contact with the frames indicated by the red arrows.

JPG_0271_5503_bewerkt-1.jpg

Here is another example (this time viewed directly from above) where the gap indicated by the blue arrows is caused by the stern frame. The stern frame, in this instance needs to be faired until the gap at the blue arrows disappears. The frame demarcated by the white arrow, shows that very little material needs to be removed there.

Our ideal scenario is thus depicted by the last three pictures. Here we can see that our hull planks are in full contact with all the frames without any bumps, indentations/ hollows or gaps.
JPG_0274_5505_bewerkt-1.jpg

JPG_0275_5506_bewerkt-1.jpg

JPG_0276_5507_bewerkt-1.jpg

Taking the time to fair the hull properly, may be time consuming, but in the end. you will reap the benefits. Not only will your planking be much easier accomplished, but the finished product will be something that you can be proud of.

Thank you very much Piet.Thumbsup
 
Back
Top