• LUCZORAMA SHIPWRECK SCAVENGER HUNT GIVEAWAY. 4 Weeks of Fun • 1 Legendary Prize ((OcCre’s Fram Ship)) • Global Crew Welcome!
    **VIEW THREAD HERE**

HIGH HOPES, WILD MEN AND THE DEVIL’S JAW - Willem Barentsz Kolderstok 1:50

Wow, given all your research I‘m convinced your on the right track. However to achieve your goal you’ll be doing a intricate modification. I have my fingers crossed.
Intricate indeed Jan - plus there is no way that that I will be able to get the stern as pointed as in Ab's build. The kit was simply not designed for that.
 
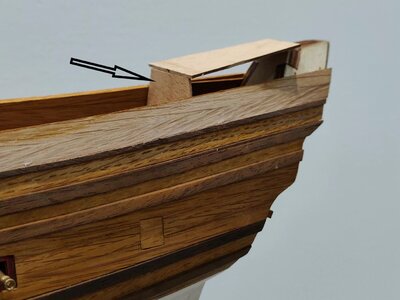
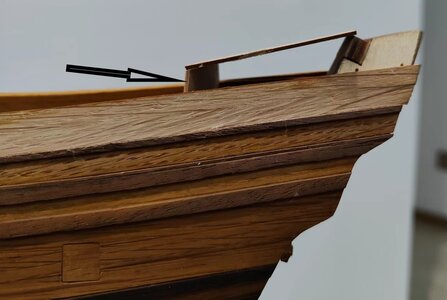
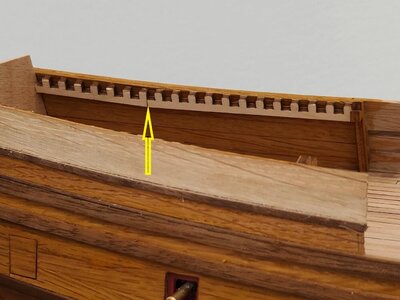
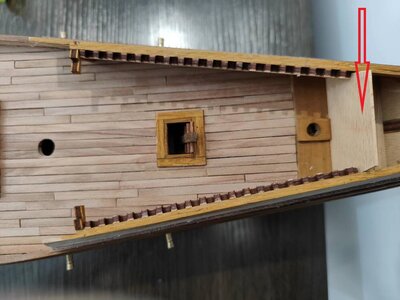
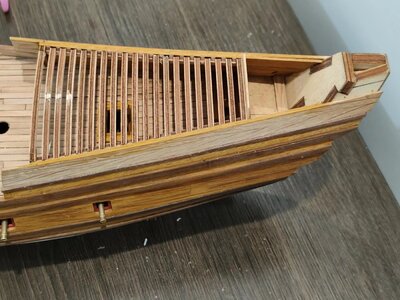
Hello Heinrich, looking at the fourth photo down from the top. Remove the little piece of bulkhead that sticks up down to the bottom of the current upper deck position. Keeping the (currently un planked) upper exterior short walls, extend the upper deck to the stern transom. This leaves you with one dropdown not two which is what you're looking for, I think. Ab Hovings ship has two drops on the hull which encloses one drop in the decks. This is what you would get using my suggestion. Technically the canopy could be considered a deck but for my descriptions I ignore the canopy as being a level or drop-down surface. Again, I think, what is confusing on Ab's ship is the doors open into the canopy room where I suppose yours open into the anterior triangle area??
 
Hello Heinrich, looking at the fourth photo down from the top. Remove the little piece of bulkhead that sticks up down to the bottom of the current upper deck position. Keeping the (currently un planked) upper exterior short walls, extend the upper deck to the stern transom. This leaves you with one dropdown not two which is what you're looking for, I think. Ab Hovings ship has two drops on the hull which encloses one drop in the decks. This is what you would get using my suggestion. Technically the canopy could be considered a deck but for my descriptions I ignore the canopy as being a level or drop-down surface. Again, I think, what is confusing on Ab's ship is the doors open into the canopy room where I suppose yours open into the anterior triangle area??
Hello my friend. OK, so let me see if I understand you correctly. Is this the piece of bulkhead that you are referring to?

微信图片_20220924032532.jpg
微信图片_20220924032543.jpg
As far as the doors go - mine will also open inside the canopy.
 
No, the piece that is sloped which would be the last piece before the transom. it looks like maybe 4 or 5mm plywood in your last photo just now.
Ah - I understand now. The problem with that is that the deck will then butt up against the transom, where it is supposed to run all the way through to the stern.
 
I may be using the wrong terminology, to me the transom is the stern piece which would be exposed or have a swan painted on it. The trick would be adding on the side strakes, so it looks like true continuity.
 
Well now I see where you do have the upper deck running out to the edge where it is exposed. You would have to build up from that deck to the top. Not unlike your first ship.
 
Well now I see where you do have the upper deck running out to the edge where it is exposed. You would have to build up from that deck to the top. Not unlike your first ship.
Exactly Daniel. Once the transom has been sawn off, the whole assembly will have to be built up again. And you are spot on with regards to the challenge of the wales to get them to look harmonious and present as a coherent unit. The other issue that I will have, is that with the transom cut away, the height of the bulwarks will be lower than it should be, so something also has to be figured out there.
 
Good morning, everyone.

The stanchions for the roof beams of the canopy have been fitted on both sides.

微信图片_20220924121625.jpg
Starboard Side: The yellow arrow indicates where I had to lengthen the row of stanchions by adding another section. The bottom line thus does not follow a perfect line, but hopefully the notches do. (Also see the picture for the Port Side.)

微信图片_20220924121646.jpg
微信图片_20220924121637.jpg
The front wall of what will be the captain's cabin fits very nicely behind the stanchions - exactly as I had planned - so at least this part of the planning has worked out. Before I can add the multitude of stanchion posts that will support the notched beams, I first want to dry fit the canopy roof beams to see if they follow a nice line.
 
And in real time ... the progress report.

微信图片_20220924151101.jpg
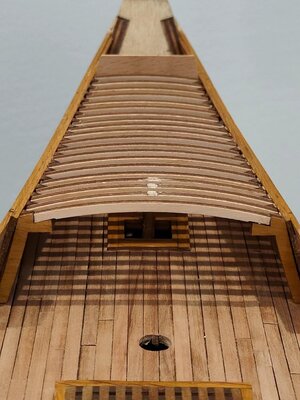
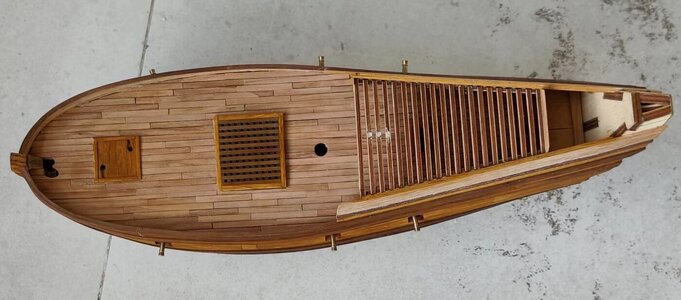
Canopy deck beams installed. Generally speaking, it was a straightforward process, except for the fact that my much wider hull meant that none of the first deck beams fitted - they were all too short. Luckily @Kolderstok Hans supplied me with extra laser cut sheets, so I could use the beams of the front canopy. The three beams on which the laser cut tabs are still visible are all beams from the front canopy.

微信图片_20220924151108.jpg
I am very happy with the line that stanchions follow - seeing that I only eyeballed it.

微信图片_20220924150858.jpg
As you can see the fit of the beams into the notches are perfect and what will eventually become the captain's cabin front wall with extension (the part protruding above the center canopy) also butts up beautifully against the roof beams.

微信图片_20220924151340.jpg
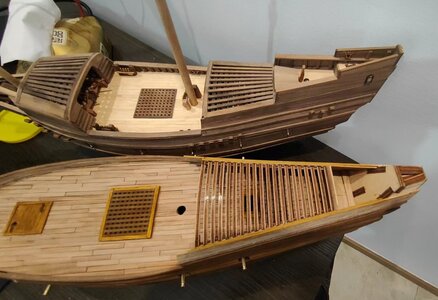
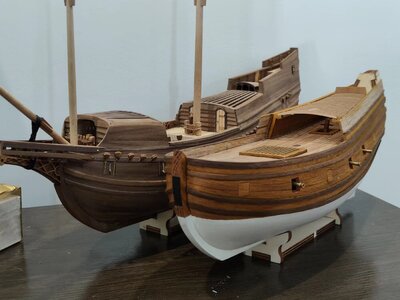
A direct comparison between the two ships highlights the much wider beam and much longer center canopy of WB#2. WB#2 obviously has the correct layout.

But despite the inaccuracies of WB#1 she remains a beauty (at least in the eyes of this beholder).

微信图片_20220924151755.jpg
Side by side ...

And then I went out on the balcony:

微信图片_20220924150920.jpg
The Pear Wood deck planking is natural light ..,.

微信图片_20220924150927.jpg
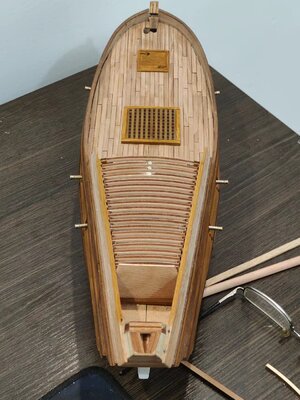
Another close up of the center canopy ...

微信图片_20220924150913.jpg
And finally, an overview.

Everything is still dry fit at this stage as the char still needs to be removed from the roof beams, they need to be stained and the stanchion posts still need to be installed - not that they are necessary (with those roof beams in place the hull and bulwarks are as strong as one can possibly hope for), but for accuracy's sake. Only then can everything be glued in place.
 
@pingu57 This picture of the replica shows a flat stern without the triangular configuration.

View attachment 330214
Judging by all the inaccuracies of the replica, this is probably incorrect too - which brings me to a hell of a choice. Do I compromise or stay true to my goal of attempting to build a historically accurate WB?
Good morning Heinrich. After all you have put into your WB#2 you will not be a “happy chappy“ if you don’t stay true to your accuracies. I know this carries significant risk, however I believe you should go for it. I understand what @pingu57 advises and he is a quality builder so his suggestion need serious consideration. Just a thought. Cheers Grant
 
And in real time ... the progress report.

View attachment 330309
Canopy deck beams installed. Generally speaking, it was a straightforward process, except for the fact that my much wider hull meant that none of the first deck beams fitted - they were all too short. Luckily @Kolderstok Hans supplied me with extra laser cut sheets, so I could use the beams of the front canopy. The three beams on which the laser cut tabs are still visible are all beams from the front canopy.

View attachment 330310
I am very happy with the line that stanchions follow - seeing that I only eyeballed it.

View attachment 330311
As you can see the fit of the beams into the notches are perfect and what will eventually become the captain's cabin front wall with extension (the part protruding above the center canopy) also butts up beautifully against the roof beams.

View attachment 330312
A direct comparison between the two ships highlights the much wider beam and much longer center canopy of WB#2. WB#2 obviously has the correct layout.

But despite the inaccuracies of WB#1 she remains a beauty (at least in the eyes of this beholder).

View attachment 330313
Side by side ...

And then I went out on the balcony:

View attachment 330314
The Pear Wood deck planking is natural light ..,.

View attachment 330315
Another close up of the center canopy ...

View attachment 330316
And finally, an overview.

Everything is still dry fit at this stage as the char still needs to be removed from the roof beams, they need to be stained and the stanchion posts still need to be installed - not that they are necessary (with those roof beams in place the hull and bulwarks are as strong as one can possibly hope for), but for accuracy's sake. Only then can everything be glued in place.
Stunning work Heinrich. Yes your WB#1 is a beaut however in my opinion your WB#2 is stealing the thunder here not doubt. Cheers Grant
 
Stunning work Heinrich. Yes your WB#1 is a beaut however in my opinion your WB#2 is stealing the thunder here not doubt. Cheers Grant
Thank you, Grant - I am sure WB#2 will be chuffed to hear that. I am like a father with more than one child = each is special and it's difficult to choose between them! I will stay true to accuracy as far as I possibly can - and where I can't, I will clearly point it out.
 
Sorry to return to an older topic, the roof of the captain's cabin, but I couldn't make sense of it and maybe I still don't.
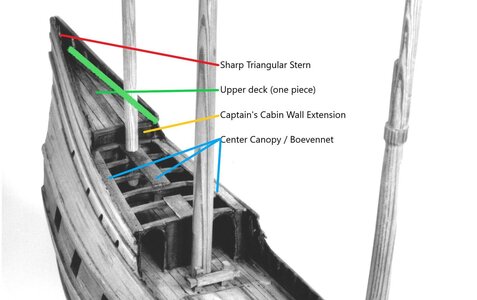
What I see in the original post is a step in the roof/upper deck of the captain's cabin in Heinrich's build.
@Ab Hoving's picture shows a sloping roof/upper deck, with a step from the canopy to the upper deck.
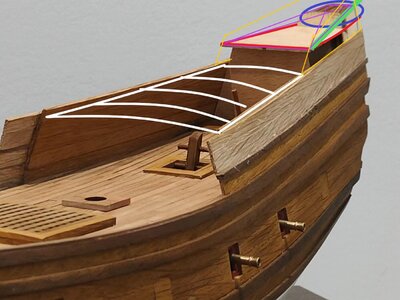
I drew two thick green lines in both pictures to show my interpretation. BTW, the captain's front wall extension looks similar to me in both pictures.
What this would mean to Heinrich's build is that a) what's in between the transom and the front wall needs to go, b) a linear, sloping upper deck (perimeter and diagonals in purple) needs to be fitted and c) the wales (in yellow) need to be extended.
I hope this does make some sense... o_O
2720639E-CF16-46A9-9CCF-6B1196268182.jpegBC5A8822-444D-49AA-862A-FA35C2FB300F.jpeg
 
Sorry to return to an older topic, the roof of the captain's cabin, but I couldn't make sense of it and maybe I still don't.
What I see in the original post is a step in the roof/upper deck of the captain's cabin in Heinrich's build.
@Ab Hoving's picture shows a sloping roof/upper deck, with a step from the canopy to the upper deck.
I drew two thick green lines in both pictures to show my interpretation. BTW, the captain's front wall extension looks similar to me in both pictures.
What this would mean to Heinrich's build is that a) what's in between the transom and the front wall needs to go, b) a linear, sloping upper deck (perimeter and diagonals in purple) needs to be fitted and c) the wales (in yellow) need to be extended.
I hope this does make some sense... o_O
View attachment 330323View attachment 330322
You interpret it perfectly Johan! Spot on!
 
So far, it is looking excellent Heinrich, verry nice work my friend :)
Thank you very much my friend. This work was all planned though and I knew I would have a good chance of success. The sad part is that everything now has to be taken apart, cleaned, stained and only then do the final installation!
 
Back
Top