HIGH HOPES, WILD MEN AND THE DEVIL’S JAW - Willem Barentsz Kolderstok 1:50

Back to the build.

微信图片_20230913212817.jpg
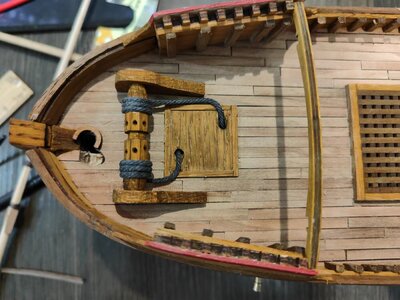
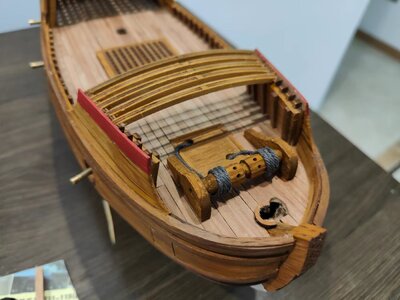
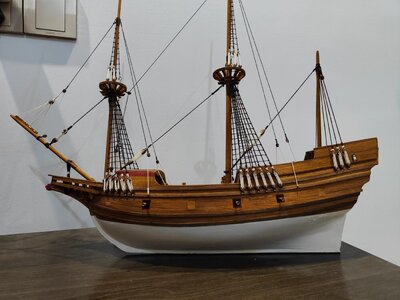
Tonight, the WB has been moved from her mooring dock to measure out the hawse holes. Unfortunately, I do not have a 3mm drill bit, but if all goes well courtesy of Taobao, I should be in business tomorrow night.

Hopefully with the Admiral here this weekend, we can get some work done on the mizzen sail and assembly. Baby steps, I know, but steps, nonetheless.

Lastly. with 250 000 views, a BIG THANK YOU is in order to all my friends who have followed this mammoth build log so diligently and who have supported me so loyally. The resurrection/completion of this build is thanks to all of you and in your honor!
 
Back to the build.

View attachment 394306
Tonight, the WB has been moved from her mooring dock to measure out the hawse holes. Unfortunately, I do not have a 3mm drill bit, but if all goes well courtesy of Taobao, I should be in business tomorrow night.

Hopefully with the Admiral here this weekend, we can get some work done on the mizzen sail and assembly. Baby steps, I know, but steps, nonetheless.

Lastly. with 250 000 views, a BIG THANK YOU is in order to all my friends who have followed so mammoth build log so diligently and who have supported me so loyally. The resurrection/completion of this build is thanks to all of you and in your honor!
Good to see that your WB is back on the yard, Heinrich.
Regards, Peter
 
Be careful with using a 3mm drill for the hawse holes - I have the experience, using a bigger drill , that there can be damages ate the outer edges of the hole.
Often it is much more precise, to use a smaller drill and make the rest with a round needlefile.
an additional advantage: you can more control the direction of the drilled hole - with a smaller predrill you can correct the direction afterwards with the file. If you have drilled the hole in once with your permanent diameter, the direction of the hawse hole is defined and you can not adjust, if necessary.
Thank you very much for the advice, Uwe - you are absolutely correct in what you say. However, I do not possess such a small diameter round needle file so rather I will have to drill the hole gradually to make sure there is no splintering at the edges.
 
and be aware about the correct direction of the hawse holes
When you say "correct direction" of the hawse holes are you referring to the fact that the hawse holes must look like they were drilled from the inside, with a slightly wider tapering hole towards their exit point?
 
When you say "correct direction" of the hawse holes are you referring to the fact that the hawse holes must look like they were drilled from the inside, with a slightly wider tapering hole towards their exit point?
Hawse holes are directed more or less parallel to the keel direction, means the ships axis, beacuse inside the ship the anchor cable has to run along the ship towards the capstan or other devices f.e. windlass, to lift the anchor. This was made, that the anchor cable has as less as possible friction against the hull. I am not 100% sure, if this was already a rule in the period your ship was sailing. So maybe you should make some more research about this subject.


Back to the build.

View attachment 394306
Tonight, the WB has been moved from her mooring dock to measure out the hawse holes. Unfortunately, I do not have a 3mm drill bit, but if all goes well courtesy of Taobao, I should be in business tomorrow night.

Hopefully with the Admiral here this weekend, we can get some work done on the mizzen sail and assembly. Baby steps, I know, but steps, nonetheless.

Lastly. with 250 000 views, a BIG THANK YOU is in order to all my friends who have followed this mammoth build log so diligently and who have supported me so loyally. The resurrection/completion of this build is thanks to all of you and in your honor!
Good evening (Italy), finally it's about time we start discussing this adventure, if I should be drilling CUBE holes I would use a hot pin.Frank
 
Heinrich, what Uwe said about the potential splitting of the hull planking (internal and external) is correct. It can happen also if you do it using growing diameter drill bits. The use of a file is one of the best solutions, as Uwe suggested.

Another tip: place a piece of scrap wood at the exit pressed agoint the hull (your case).

Another tip: I use frequently, dose cone shaped sanding Stones that come for Dremel or similar devices. You do first a small hole with the drill. Then you use the cone stone sanding tool from both sides to take it to the final diameter. If you can go from both sides. Not always possible.

With a file, be careful too. Use a soft, not to aggressive file or you do it very softly. I spliter the planking too using a file.

If the planking is perfectly glued at the point of the hole, assuming that all this talk is referred to a double planked hull, the thinner external plank has a lower chance of splitting.

I am sure you already know all this. Nevertheless these are my 2 cents.

Cheers
Daniel
 
Hawse holes are directed more or less parallel to the keel direction, means the ships axis, beacuse inside the ship the anchor cable has to run along the ship towards the capstan or other devices f.e. windlass, to lift the anchor. This was made, that the anchor cable has as less as possible friction against the hull. I am not 100% sure, if this was already a rule in the period your ship was sailing. So maybe you should make some more research about this subject.


Thank you, Uwe. That part of the build (windlass, anchor cables etc.) has already been done in the configuration as favored by @Kolderstok Hans and Ab Hoving.

微信图片_20221023085527.jpg
微信图片_20221023092008.jpg
 
Good evening (Italy), finally it's about time we start discussing this adventure, if I should be drilling CUBE holes I would use a hot pin.Frank
Dear Frank. Yes, it's good to have the ship in my hands again. Thank you kindly for the advice!
 
Please take good care of the ships cat, i think Willem B. called her Strider
Hi Peter. He did call her Strider - you are right. And Strider is now adding a new challenge to the build. At the moment he is practicing being a trapezium artist, so heights offer no protection against him. I will either have to lock him or myself up in different rooms. ROTF
 
Heinrich, what Uwe said about the potential splitting of the hull planking (internal and external) is correct. It can happen also if you do it using growing diameter drill bits. The use of a file is one of the best solutions, as Uwe suggested.

Another tip: place a piece of scrap wood at the exit pressed agoint the hull (your case).

Another tip: I use frequently, dose cone shaped sanding Stones that come for Dremel or similar devices. You do first a small hole with the drill. Then you use the cone stone sanding tool from both sides to take it to the final diameter. If you can go from both sides. Not always possible.

With a file, be careful too. Use a soft, not to aggressive file or you do it very softly. I spliter the planking too using a file.

If the planking is perfectly glued at the point of the hole, assuming that all this talk is referred to a double planked hull, the thinner external plank has a lower chance of splitting.

I am sure you already know all this. Nevertheless these are my 2 cents.

Cheers
Daniel
Your two cents are very much appreciated, my friend. Normally, with small-diameter drill bits, I have not encountered issues with splintering (I use the Kolderstok hand-drill for this), but I am a little wary of the oak with such a pronounced grain. I do actually have some cone-shaped sanding stones (I will just have to check if they are not too big) which may be a very good suggestion. The double planking is an interesting point that you raise. Officially, it is a single-planked hull, but there are sections which I have double-planked. The trouble is, I am not sure if those sections belong to the double-planked portion. :rolleyes:
 
Back
Top