• LUCZORAMA SHIPWRECK SCAVENGER HUNT GIVEAWAY. 4 Weeks of Fun • 1 Legendary Prize ((OcCre’s Fram Ship)) • Global Crew Welcome!
    **VIEW THREAD HERE**

HIGH HOPES, WILD MEN AND THE DEVIL’S JAW - Willem Barentsz Kolderstok 1:50

Good morning dear friends.

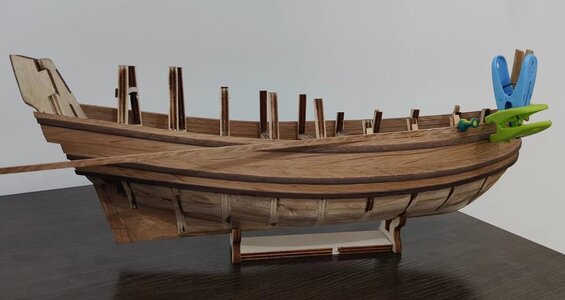
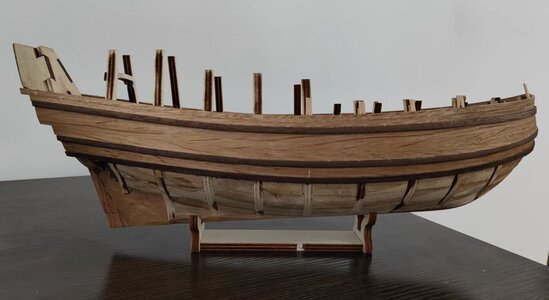
The first-level planking on the Port Side has been completed.

View attachment 320088

With that I am well pleased. Now there is one more plank to go on the Starboard Side to create the correct height and then double it into the next "false wale" as per @Ab Hoving Ab's plans. I must tell you that the more I get into this build and am beginning to understand the mechanicals of it all, the more impressed I am with Ab's knowledge and plans. In a next life, I would really like to build a POF model completely based on Ab's plans.
It's already looking superb Heinrich Thumbsup
 
Thank you very much my friend! Planking is just very s-l-o-w. As you can see I can only glue portions of a strake at the time. Then it is a 3-hour wait for the glue to dry properly, wet the remainder of the plank and on to the next portion.

View attachment 320092
Slow but sure, good old tortoise and hare stuff. I can't imagine racing through the planking process on any day of the week. Your patience will yield superb results I'm sure Heinrich Thumbsup
 
Slow but sure, good old tortoise and hare stuff. I can't imagine racing through the planking process on any day of the week. Your patience will yield superb results I'm sure Heinrich Thumbsup
Mark, you are absolutely right. I only have the single layer planking to do, so I can afford to spend the time required to get this right.
 
Thank you very much my friend! Planking is just very s-l-o-w. As you can see I can only glue portions of a strake at the time. Then it is a 3-hour wait for the glue to dry properly, wet the remainder of the plank and on to the next portion.

View attachment 320092
Good morning Heinrich. You are an example to us racers here. There is no doubt your WB shows us that patience is an integral part of producing and outstanding model. I love your WB. The oak, even with the larger grain, is looking magical. Well done. Cheers Grant
 
Good morning Heinrich. You are an example to us racers here. There is no doubt your WB shows us that patience is an integral part of producing and outstanding model. I love your WB. The oak, even with the larger grain, is looking magical. Well done. Cheers Grant
Thank you very much Grant - I appreciate your kind words sincerely. Patience was something that I struggled with, but which this hobby has taught me the value of. If I am honest, I prefer working with walnut, but the visual impact of the oak is unlike anything I have ever seen on on a model and that piece of individuality makes it all worthwhile. One has to commend @Kolderstok Hans for offering oak as an option.
 
Hallo Heinrich, je geduld word duidelijk beloont, de eiken planken zitten er perfect op!
Piet said:

Hello Heinrich, your patience is clearly rewarded, the oak planks are perfect!

Dank je wel Piet. Dit is iets waar je een voorbeeld van bent. Elke keer als ik een stap zet vraag ik me af: "zou Piet daar tevreden mee zijn?" Als het antwoord "ja" is, kan het op het model blijven - zo niet, dan probeer ik het opnieuw!

Thank you very much Piet. This is something that you are an example of. Each time I complete a step I ask myself: "would Piet be satisfied with that? If the answer is "yes", it can stay on the model - if not, I try again!
 
Heinrich, good afternoon.
Did I read correctly that you glue part of the rail, wait for it to stick together, then soak, bend and glue the other part? This method can lead to some trouble in the future. After the wood has completely dried, gaps may appear between the slats. I can offer you an alternative option: wet the rail completely and lay it at the place of future gluing. Wait until it is completely dry and takes the desired shape. And only after that glue it. Yes, this method is also not fast, but it is better. I had to use this method when I bent and glued velvet strips with a thickness of 3 mm. He works.
My dear Sasha. Thank you for suggestion - that is what I have been doing all along. However, "our" method does not work with oak. I have soaked the oak planks and left them clamped on the model for a day to dry. As soon as the pins and clamps are removed it just straightens out again and loses its curved shape. Now I wet the whole plank, glue and clamp it in place as it as far as it will go, re-wet, the rest of the plank and carry on. This method of working with wood was explained to me by one of the Dutch masters and while slow, it works perfectly. I have never had problems with gaps developing in my planking. My Batavia has been through three years of China's extreme cold and humidity with no adverse effect.
 
Thank you very much my friend! Planking is just very s-l-o-w. As you can see I can only glue portions of a strake at the time. Then it is a 3-hour wait for the glue to dry properly, wet the remainder of the plank and on to the next portion.

View attachment 320092
Funny is, this is the way I mostly glue the planks onto a model - step by step - but I never mention it in the building instructions of the Kolderstok Models. :-(
 
Funny is, this is the way I mostly glue the planks onto a model - step by step - but I never mention it in the building instructions of the Kolderstok Models. :-(
Thank you for this, Hans. It is difficult to explain to others unless you have experienced Kolderstok's wood. I keep on saying that your wood is "real" wood - I know it makes no sense to others, but Kolderstok builders will know what I mean. If I look at the planking strips supplied for Bluenose (1.5mm x 4mm Pear wood), it SHOULD be the same as your 1.5mm x 4mm walnut strips (I am purposely not even talking about the oak here), but the two are worlds apart. I can bend the Bluenose strips by waving it in the air! Try that with Kolderstok's wood.

I have very seldom had to plank the walnut in portions (only in the rarest of cases), but the oak is just uniformly "stug". However, I believe I am over the most challenging part now - below the waterline, I have my filler blocks to help. :D And, I must say, I am very happy how the above-wales part turned out. The surfaces are absolutely level, the bulwarks extend higher above the deck surface than on the previous build and I know (according to my gut feeling) that I have just built a much more accurate hull than WB #1.
Well, when sawing it, the machinery here sometimes has a hard time going through it.
The walnut are the normal one inch thick planks, of good quality, but the oak comes from a furniture/table manufacturer (pieces too short for them to use) and is really heavy stuff.
 
Well, when sawing it, the machinery here sometimes has a hard time going through it.
The walnut are the normal one inch thick planks, of good quality, but the oak comes from a furniture/table manufacturer (pieces too short for them to use) and is really heavy stuff.
I can well imagine that, Hans - that shows when working with it,
 
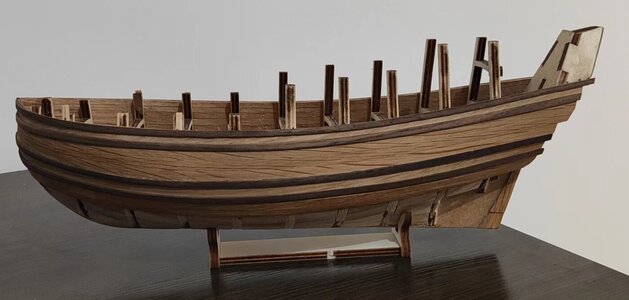
I am happy conclude a nerve-wracking few days in the shipyard.

微信图片_20220725195956.jpg

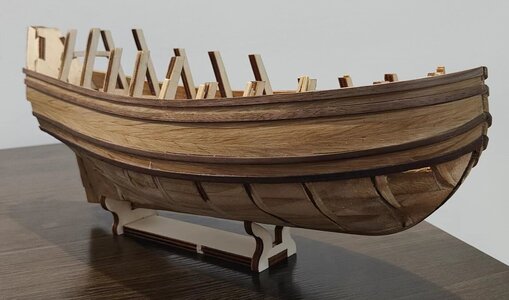
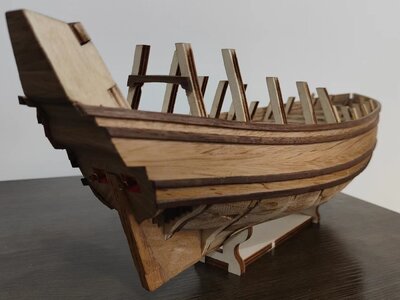
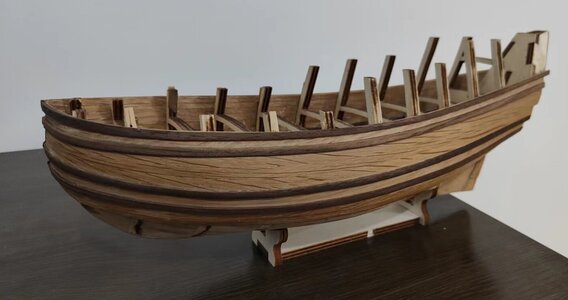
The final plank on starboard side has been laid down.

Which was then doubled as the "false wale".

微信图片_20220725204612.jpg

To say that I am happy with the way that the wales meet at the bow would be an understatement. :) (I do permit myself a small smile)

微信图片_20220725195926.jpg

微信图片_20220725195918.jpg

Port side reminder.

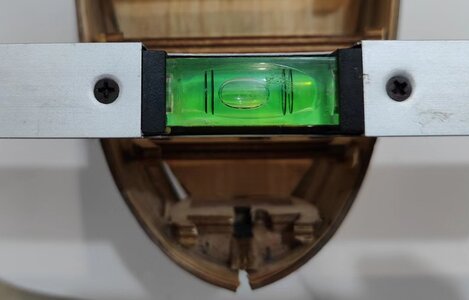
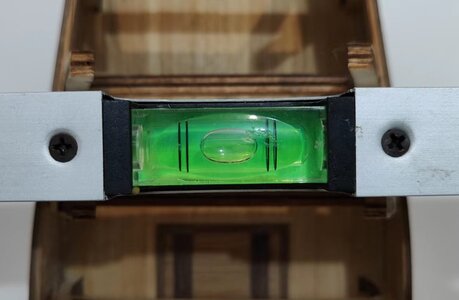
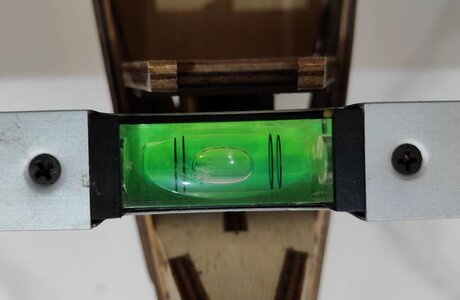
Yes, but how level are the bulwarks now after all these planks have been laid and all the conniving with hull lines ?

微信图片_20220725200009.jpg
Bow - Check.

微信图片_20220725200728.jpg
Midships - Check

微信图片_20220725200017.jpg
Stern - Check

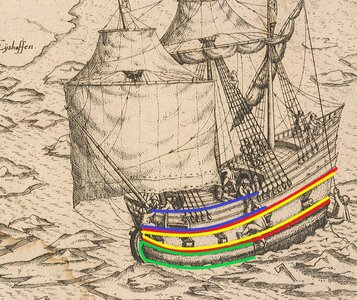
1977_65.jpg

This drawing by De Veer shows the objectives of this part of the build.

Green: The more rounded bow.
Red: The upsept wales which create a "pinched" effect of the hull (Yellow)
Blue: A more substantial (higher) buildup of the bulwarks above deck level at the bow.

微信图片_20220725195949.jpg

Have I succeeded? I leave that to you to decide.
 
Heinrich, you have succeeded! And it looks absolutely wonderful. The wood tones and the curves are a delight to the eyes. Even the heavy grain works to your advantage as it highlights the curviness rather than running against it (I trust that was intentional rather than being a happy coincidence). A one of a kind ship being built by a one of a kind builder. Who couldn't fall in love with that? Congratulations on what you have accomplished thus far.
 
Back
Top