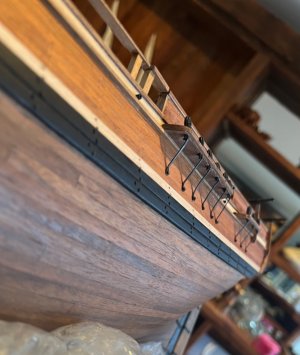
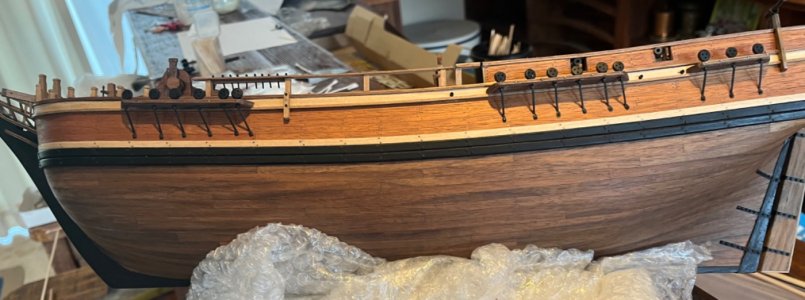
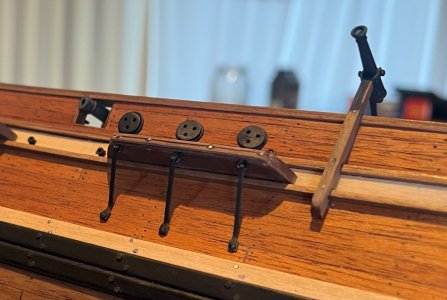
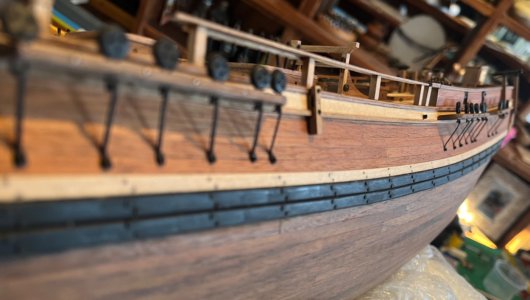
HMAV BOUNTY - A “face lift “

Consider having your Admiral buy some stuff, so you can claim not having bought anything yourself.
(Make sure to show her your appreciation by taking her on a special night out.)
The “skelem” in JohanROTF. May have to resort to this. Going to have bribe Arlene not to tell JustinSpeechless.
Not going to open this can of worms... Speechless
We will keep that can sealedROTF
 
Good morning Johan. After your stunning Fokker (spider ;)) have you started any other projects? Cheers Grant
Morning Grant,
Yes, actually I have started a new, aviation related, little project, see https://shipsofscale.com/sosforums/...ild-completed-build.13988/page-10#post-383768.
Currently I am still at the preliminary stages of the project: with Freecad I am trying to generate a 3D-model, using very vague copies of drawings/sketches I found on the web. The main reason is to eventually obtain sufficient understanding of the workings of the rotorhead and possibly using these models for 3D printing of that detail. Another reason to transfer these drawings into 3D is to have a more accurate definition of the helicopter. I already found that using these drawings/sketches might not be the best idea; the measuring accuracy is about 0,5mm at best, meaning you have a spread of about 25mm, given the scale of the prints. That's a lot. At one point in the near future I'll have to pay a visit to the Aviodrome museum, who has a Kolibrie in its collection to make some detailed pictures. In due time I'll start a build log on this little gem.
(And having the "right" configuration is also quite debatable... Fotographs from those days indicate various configurations of the same model.)

Have fun,
Johan

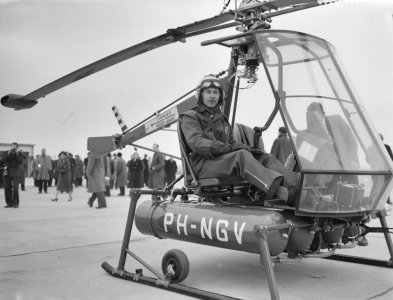
The Kolibrie N-3, mid 1950's:
IMG_1230.jpeg

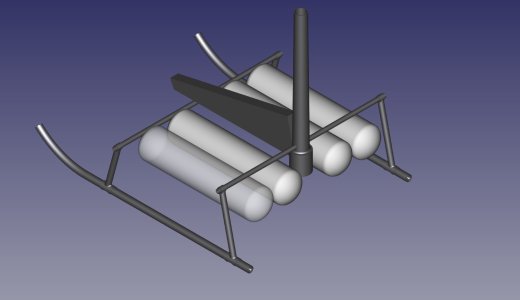
Undercarriage, fuel tanks and rotor mast (requires a hefty update) in Freecad, still a lot of backwards engineering work ahead of me:
Frame Kolibrie.jpeg
 
Last edited:
Morning Grant,
Yes, actually I have started a new, aviation related, little project, see https://shipsofscale.com/sosforums/...ild-completed-build.13988/page-10#post-383768.
Currently I am still at the preliminary stages of the project: with Freecad I am trying to generate a 3D-model, using very vague copies of drawings/sketches I found on the web. The main reason is to eventually obtain sufficient understanding of the workings of the rotorhead and possibly using these models for 3D printing of that detail. Another reason to transfer these drawings into 3D is to have a more accurate definition of the helicopter. I already found that using these drawings/sketches might not be the best idea; the measuring accuracy is about 0,5mm at best, meaning you have a spread of about 25mm, given the scale of the prints. That's a lot. At one point in the near future I'll have to pay a visit to the Aviodrome museum, who has a Kolibrie in its collection to make some detailed pictures. In due time I'll start a build log on this little gem.
(And having the "right" configuration is also quite debatable... Fotographs from those days indicate various configurations of the same model.)

Have fun,
Johan

The Kolibrie N-3, mid 1950's:
View attachment 467780

Undercarriage, fuel tanks and rotor mast (requires a hefty update) in Freecad, still a lot of backwards engineering work ahead of me:
View attachment 467781
Thanks Johan. I must learn to expand my horizon and look at other sections here. I will pull up a chair and follow. Cheers Grant
 
Morning Grant,
Yes, actually I have started a new, aviation related, little project, see https://shipsofscale.com/sosforums/...ild-completed-build.13988/page-10#post-383768.
Currently I am still at the preliminary stages of the project: with Freecad I am trying to generate a 3D-model, using very vague copies of drawings/sketches I found on the web. The main reason is to eventually obtain sufficient understanding of the workings of the rotorhead and possibly using these models for 3D printing of that detail. Another reason to transfer these drawings into 3D is to have a more accurate definition of the helicopter. I already found that using these drawings/sketches might not be the best idea; the measuring accuracy is about 0,5mm at best, meaning you have a spread of about 25mm, given the scale of the prints. That's a lot. At one point in the near future I'll have to pay a visit to the Aviodrome museum, who has a Kolibrie in its collection to make some detailed pictures. In due time I'll start a build log on this little gem.
(And having the "right" configuration is also quite debatable... Fotographs from those days indicate various configurations of the same model.)

Have fun,
Johan

The Kolibrie N-3, mid 1950's:
View attachment 467780

Undercarriage, fuel tanks and rotor mast (requires a hefty update) in Freecad, still a lot of backwards engineering work ahead of me:
View attachment 467781
ROTF. I have seen this. Maybe when they put my new knee in they can add some memory chips into my brain at the same timeROTF
 
If you want to try to use the blocks in the photo, maybe try tumbling them in a rock polisher/sander type device. I use a version that a US supplier used to offer but you can probably make a good one at home. I use an electric hand held drill. Hold the jar with the blocks inside in one hand and the drill in the other and spin away. It will take off the sharp edges and improve the shape of the blocks. The photos below are of the block sander I bought some years ago. I use 400 grit or finer and it will last a long time.

Allan
View attachment 466844View attachment 466845View attachment 466846View attachment 466847View attachment 466848
What a great trick, but does it really work? I guess so. I'll try it. Good contribution. Thank you
 
That makes 2 of us:D. Let’s see if we can make those kit blocks presentable. Allan has plenty of tricks and knowledge so always appreciate his contributions. Cheers Grant
Hello Grant! I made a similar device and it completely justified itself. By the way, Olya Batchvarov has a short video about such a thing. True, if you have not studied the Ukrainian language, you are unlikely to understand what she is saying, but it seems to me that in this video everything is clear even without words :)
 
Hello Grant! I made a similar device and it completely justified itself. By the way, Olya Batchvarov has a short video about such a thing. True, if you have not studied the Ukrainian language, you are unlikely to understand what she is saying, but it seems to me that in this video everything is clear even without words :)
Thanks Dave. Hopefully this works otherwise I’m stuck with some not so good blocks. Cheers Grant
 
Good morning Gentlemen

WIP :

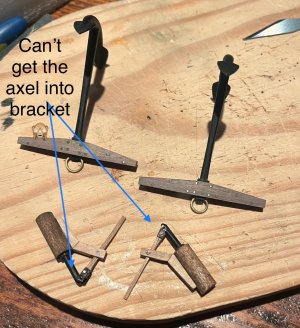
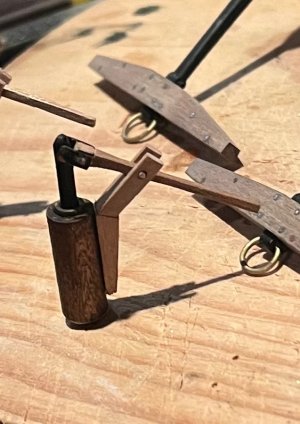
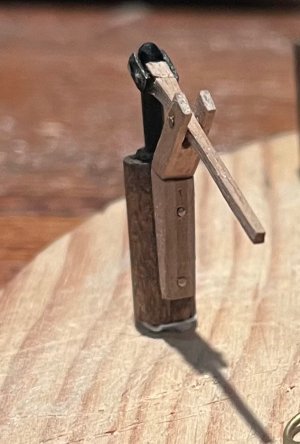
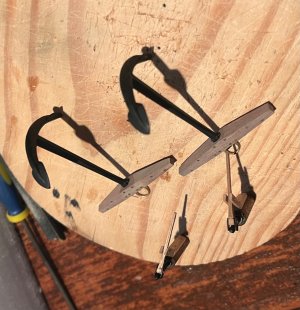
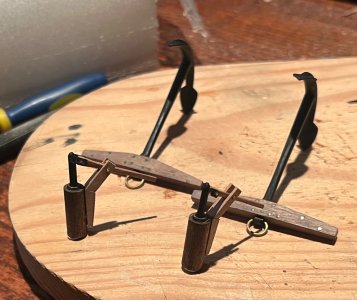
I am down to the last of my solid walnut scraps so decided I had to make the anchor stocks and pumps.

Bilge pumps: the cheeks I had to make up from scraps and are in two pieces- not exact same size, the spear from a toothpick, the brake cut from 2x2 mm walnut.

No redo even though I “cocked” up my measurements and couldn’t fit my final axel.
I will make a plan tho. Plenty still to do however it’s back to the channels.

59F02A8A-A03A-41F3-A4F6-4B5517B7B323.jpeg5BC2742E-8F9A-42B7-BFE2-08730169D3D8.jpeg3F86DF5C-7900-43E2-87C4-28DC799DE514.jpeg8EB35B36-88E4-44FD-A0B7-CE60B14FA4FF.jpeg9D61AB18-D9B0-4F36-8389-2B6B2A764D51.jpeg
Cheers Grant
 
Brilliant Grant, taking 'necessity is the mother of invention' to the next level Thumbsup
Good morning Mark. Thanks. I think I have “made it”. I have cut pieces of wood for all the parts I need (hopefully I have not missed something). Rigging and masts are going to be an issue. That is a bridge I will cross when I get there . May be a bridge too far. Cheers Grant
 
Good morning
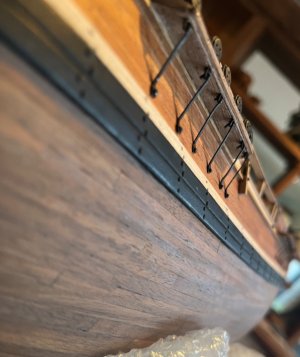
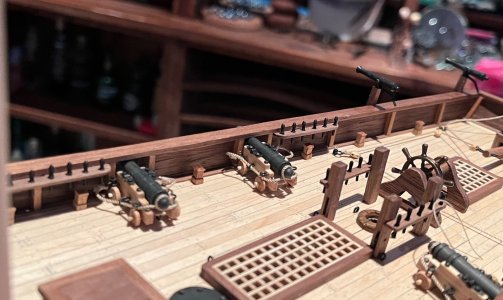
Portside channels. I added a capping strip. My cannons have not been rigged yet so are out of position in the pics.
56C03747-CB7B-4180-BFFA-2FBB402FC530.jpeg543247F6-3F97-4B7F-A2CA-BCB5A02D7618.jpeg249CA983-B473-4720-BBEB-6BF571DB6656.jpeg007FA329-9562-4528-A341-C804C2F54A25.jpeg007FA329-9562-4528-A341-C804C2F54A25.jpeg571D9037-64E6-4484-8CCE-D62455B6DF11.jpeg
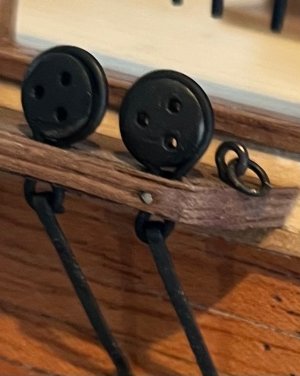
outside sheave:
53CAA9AD-B846-4074-81D2-334EF8E6E741.jpeg
Bent some 0.5mm wire to make the eyebolts and ring for the gallant back stays.
E11569E1-CF98-4617-BB3A-EB6C1DE3A303.jpeg
Procrastination is my middle name- I really have to spend time touching up the paintwork, completing the treenails, and a finishing coat of ploy….it’s like there are always for fun things to doROTF. Cheers Grant
 
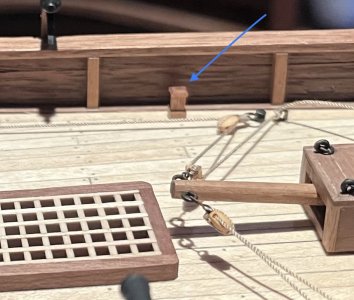
Good morning. Being temporarily incapacitated I have plenty shipyard time. So added some detail:
1: these “bits” not sure correct terminology
BA159A2B-43B7-4D38-BFCE-00A2CF35AAB3.jpeg

B743643E-AEE5-4EC2-AD1A-F373FA2DDF19.jpeg
Fun fact- The Bounty has70 belay pins and 24 of these bits. Clearly the shipwrights did not want the crew to run out of places to tie off rope…..or I have more rigging to do than expected :oops:.
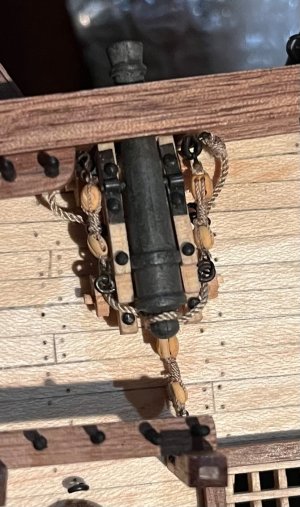
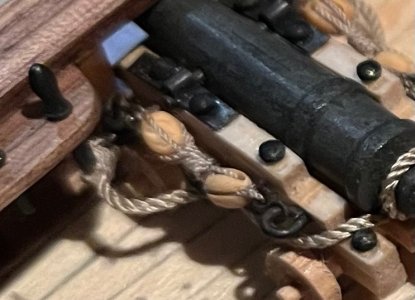
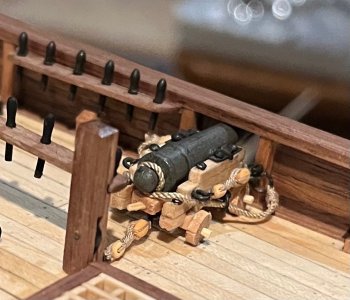
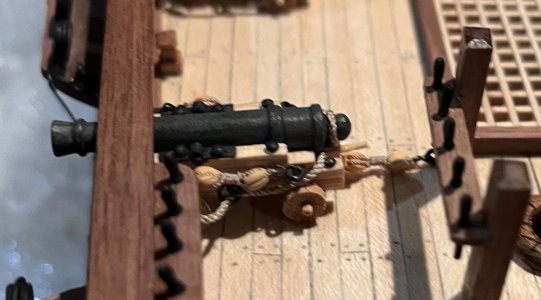
2: Finished rigging ONE of the homemade 4 pounder cannons : NOT MY FAVOURITE.
CC014DC3-C698-4435-AE70-5610699916F7.jpeg3FC2BAD3-73A3-49BD-83CE-A13C2183037F.jpeg7D0C1C7A-1FC5-4480-83DA-5B76D7B3101C.jpegF0DF9CAF-0951-4A7F-8A21-F2C41926C0D8.jpeg
Making 2mm hooks - :rolleyes:o_O:mad:Speechless.

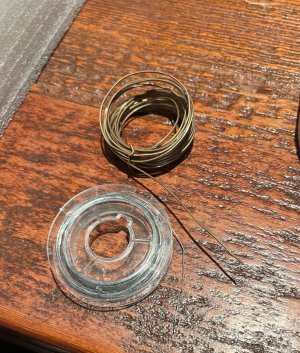
I stole some of Justin’s throttle grip wire (0.4mm) from his motocross tool box ROTF. Hey he won’t let me buy anything so it feels like sweet revenge.
1A77CCFB-E2B7-4342-9606-D6E920897CC5.jpeg
The brass wire is some 0.6mm Victory left over which I use for my eyelets, strops, etc.
Cheers Grant
 
Good morning. Being temporarily incapacitated I have plenty shipyard time. So added some detail:
1: these “bits” not sure correct terminology
View attachment 468655

View attachment 468654
Fun fact- The Bounty has70 belay pins and 24 of these bits. Clearly the shipwrights did not want the crew to run out of places to tie off rope…..or I have more rigging to do than expected :oops:.
2: Finished rigging ONE of the homemade 4 pounder cannons : NOT MY FAVOURITE.
View attachment 468656View attachment 468657View attachment 468658View attachment 468659
Making 2mm hooks - :rolleyes:o_O:mad:Speechless.

I stole some of Justin’s throttle grip wire (0.4mm) from his motocross tool box ROTF. Hey he won’t let me buy anything so it feels like sweet revenge.
View attachment 468660
The brass wire is some 0.6mm Victory left over which I use for my eyelets, strops, etc.
Cheers Grant
A good start of ‘the rigging proces’ with nice tiny iron work, Grant. And ……. The wires is not stolen ……. He forced you ….. ;)
Regards, Peter
 
Back
Top