• LUCZORAMA SHIPWRECK SCAVENGER HUNT GIVEAWAY. 4 Weeks of Fun • 1 Legendary Prize ((OcCre’s Fram Ship)) • Global Crew Welcome!
    **VIEW THREAD HERE**

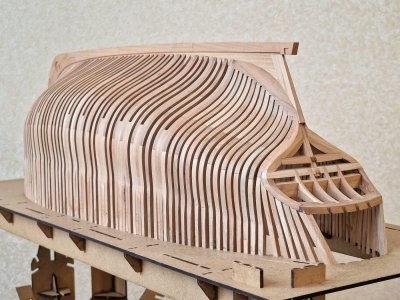
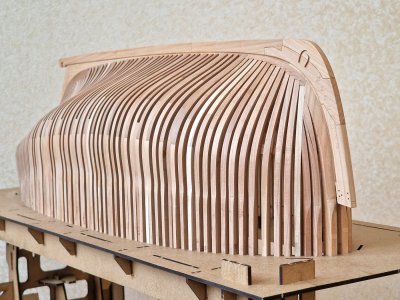
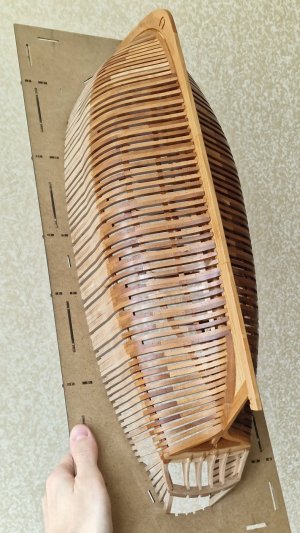
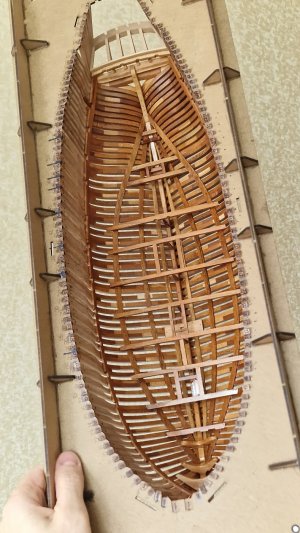
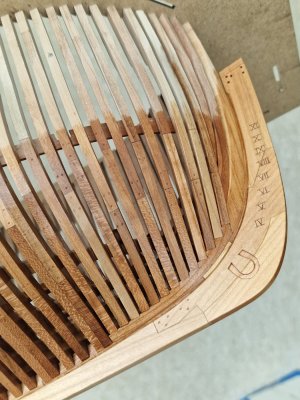
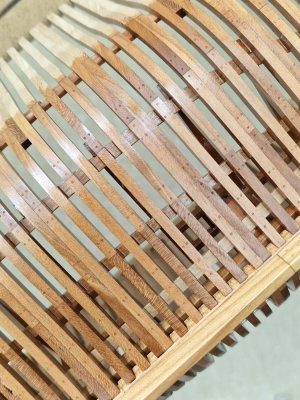
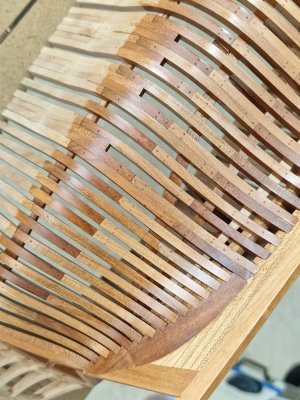
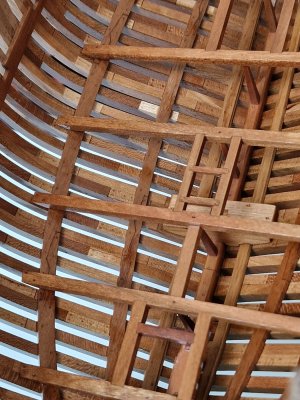
HMS Alert [1777] 1:48 POF by serikoff. (Two hulls: skeleton and fully rigged)

Well, I guess I have now seen everything... ROTF
And this is just the beginning. ROTF ROTF


Now I am actively developing the appearance of the second hull, in particular the color scheme, without using paints, but using painted hornbeam and other types of wood that give different colors. Soon I will be making samples for oil coating and checking the combination of the color scheme. I have almost cut all the slats, but first I need to make an imitation of the bolts on the first case to cover it with oil. And while it is drying, I will be actively preparing the second one. I can't wait...
 
Friends, I have already created this post for a long time, but I would like to show it (for those who have not seen it).

In order to make it easier to navigate through the review, I created a post in which the contents of the review will be presented in the table.

Here is a link to the post, (it is on the first page of the review), and here is a screenshot of what is already there.

cont.JPG
 
5.2. Imitation of bolts and fixation of keel to the 1st hull.

Before starting to fully engage in the 2nd hull, I want to cover the first with oil (there will be just time for the oil to dry). But before that, you need to make an imitation of bolts on all frames outside. I'll do that tomorrow. Also need to make an imitation of bolts on the keel, and then glue it.

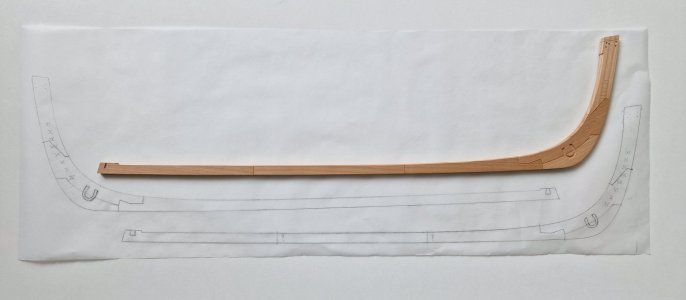
So, first I circled the geometry of the keel in order to later produce the same for the second hull...

Alert 914.jpg

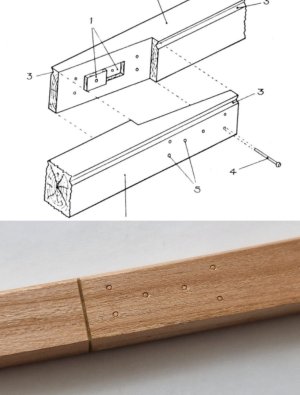
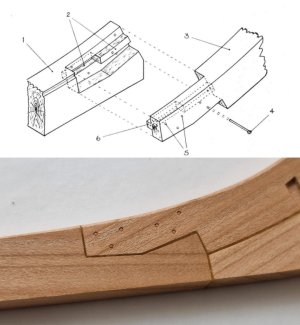
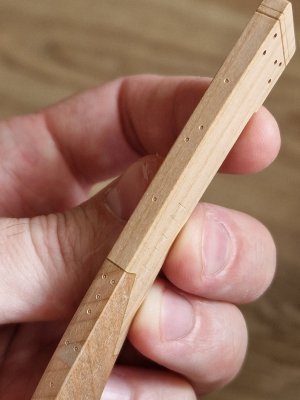
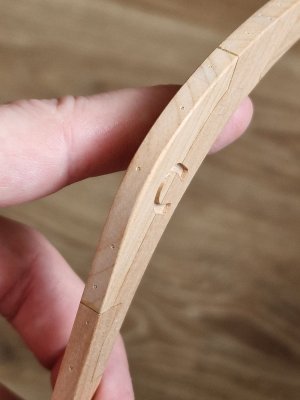
... and then guided by anatomy - made imitation bolts where it was needed.

Alert 915.jpg
Alert 916.jpg
Alert 917.jpg

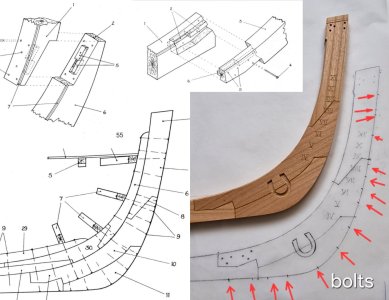
The front part did this: I enlarged the image on the phone to real size and marked all the places of the bolts through tracing paper. Then it was necessary to place them correctly. The scheme shows how in the connection nodes they were installed in a certain way, but in other places, there is not just in the center, but a little staggered so that the bar does not split from the holes in the same places. And here's the result:

Alert 918.jpg

Alert 919.jpg

After that, it was possible to glue the keel to the hull. But that's easier said than done. It is necessary to glue smoothly and reliably.
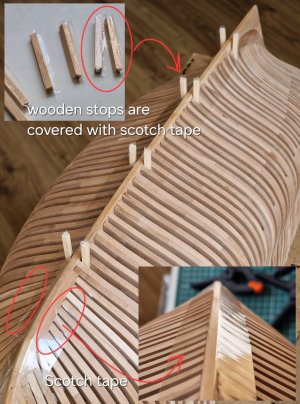
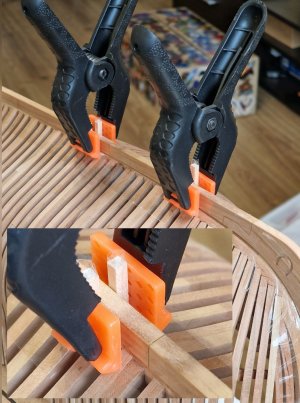
I cut into 3x3mm blocks and taped them to stop the glue sticking to them.
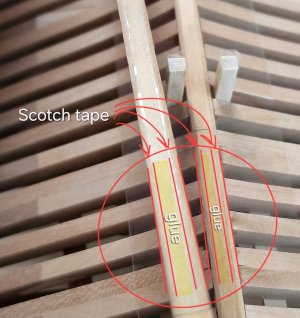
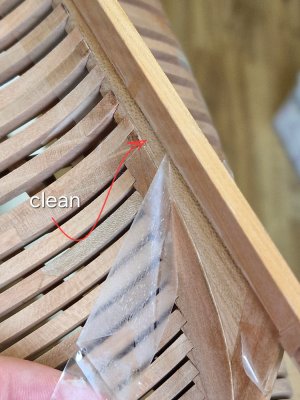
Then I taped the space near the glue seam so that only the glue seam remained.

Alert 920.jpg

Alert 921.jpg

I then applied PVA Titebond II glue (as pictured above). And with the help of clamps, I clamped the keel between the blocks, as shown below.

Alert 922.jpg

Since the keel and false keel of the same thickness, these blocks are reliable between the clamps, and most importantly, they correctly position the keel.

And the tape, which I previously glued, does not allow the body parts to be stained with glue. The glue is easily erased from the tape and makes the result clean and without leaks of glue.

Alert 923.jpg

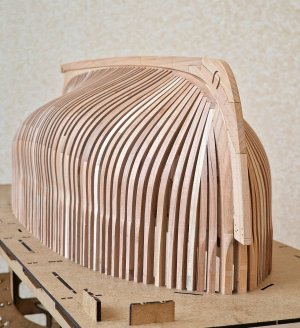
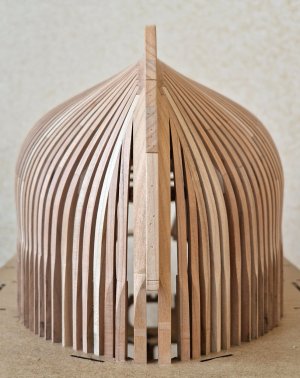
When I make an imitation of bolts on the frames and it will be a clear day, I will photograph macro photographs of the parts, but for now - general views of the hull with a keel.

Alert 924.jpg

Alert 925.jpg

Alert 926.jpg

Alert 927.jpg

Alert 928.jpg

Alert 929.jpg

Now, the case looks more complete and you only need to make imitation bolts and cover with oil. I really want to see the color of the case under the oil. :p

P.S. forgot to clarify: on board 583 details... and while for some time it will be fixed... note in the statistics, and 74 days for construction.
 
Last edited:
Congratulation for reaching this first milestone of your build. I personally do not like the arrangement of the various components, which Goodwin introduces. But your result is looking really great.
 
It is so much fun to watch your builds. Thanks again for sharing with us! Beautiful work!
Allan
Thank you for your high rating and your interest, it definitely motivates me to continue.

Congratulation for reaching this first milestone of your build. I personally do not like the arrangement of the various components, which Goodwin introduces. But your result is looking really great.
I completely agree with you. There are many mistakes, inaccuracies, contradictions and typos in the anatomy... and even more of them in the kit. But even with all this, the ship is beautiful enough to make it attractive, if possible, despite all its shortcomings. I can already see its finished result in my mind, especially the second hull, and so far I like everything very much. Soon I will be making samples of combinations of different wood colors and oil coatings and I hope that I will be able to implement everything I have planned.
 
5.2. Imitation of bolts and fixation of keel to the 1st hull.

Before starting to fully engage in the 2nd hull, I want to cover the first with oil (there will be just time for the oil to dry). But before that, you need to make an imitation of bolts on all frames outside. I'll do that tomorrow. Also need to make an imitation of bolts on the keel, and then glue it.

So, first I circled the geometry of the keel in order to later produce the same for the second hull...

View attachment 526901

... and then guided by anatomy - made imitation bolts where it was needed.

View attachment 526902
View attachment 526903
View attachment 526904

The front part did this: I enlarged the image on the phone to real size and marked all the places of the bolts through tracing paper. Then it was necessary to place them correctly. The scheme shows how in the connection nodes they were installed in a certain way, but in other places, there is not just in the center, but a little staggered so that the bar does not split from the holes in the same places. And here's the result:

View attachment 526905

View attachment 526906

After that, it was possible to glue the keel to the hull. But that's easier said than done. It is necessary to glue smoothly and reliably.
I cut into 3x3mm blocks and taped them to stop the glue sticking to them.
Then I taped the space near the glue seam so that only the glue seam remained.

View attachment 526907

View attachment 526908

I then applied PVA Titebond II glue (as pictured above). And with the help of clamps, I clamped the keel between the blocks, as shown below.

View attachment 526909

Since the keel and false keel of the same thickness, these blocks are reliable between the clamps, and most importantly, they correctly position the keel.

And the tape, which I previously glued, does not allow the body parts to be stained with glue. The glue is easily erased from the tape and makes the result clean and without leaks of glue.

View attachment 526911

When I make an imitation of bolts on the frames and it will be a clear day, I will photograph macro photographs of the parts, but for now - general views of the hull with a keel.

View attachment 526912

View attachment 526913

View attachment 526914

View attachment 526915

View attachment 526917

View attachment 526918

Now, the case looks more complete and you only need to make imitation bolts and cover with oil. I really want to see the color of the case under the oil. :p

P.S. forgot to clarify: on board 583 details... and while for some time it will be fixed... note in the statistics, and 74 days for construction.
Congratulation with this MileStone, Sergey. Now she is showing here beautiful lines.
Regards, Peter
 
5.2. Imitation of bolts and fixation of keel to the 1st hull.

Before starting to fully engage in the 2nd hull, I want to cover the first with oil (there will be just time for the oil to dry). But before that, you need to make an imitation of bolts on all frames outside. I'll do that tomorrow. Also need to make an imitation of bolts on the keel, and then glue it.

So, first I circled the geometry of the keel in order to later produce the same for the second hull...

View attachment 526901

... and then guided by anatomy - made imitation bolts where it was needed.

View attachment 526902
View attachment 526903
View attachment 526904

The front part did this: I enlarged the image on the phone to real size and marked all the places of the bolts through tracing paper. Then it was necessary to place them correctly. The scheme shows how in the connection nodes they were installed in a certain way, but in other places, there is not just in the center, but a little staggered so that the bar does not split from the holes in the same places. And here's the result:

View attachment 526905

View attachment 526906

After that, it was possible to glue the keel to the hull. But that's easier said than done. It is necessary to glue smoothly and reliably.
I cut into 3x3mm blocks and taped them to stop the glue sticking to them.
Then I taped the space near the glue seam so that only the glue seam remained.

View attachment 526907

View attachment 526908

I then applied PVA Titebond II glue (as pictured above). And with the help of clamps, I clamped the keel between the blocks, as shown below.

View attachment 526909

Since the keel and false keel of the same thickness, these blocks are reliable between the clamps, and most importantly, they correctly position the keel.

And the tape, which I previously glued, does not allow the body parts to be stained with glue. The glue is easily erased from the tape and makes the result clean and without leaks of glue.

View attachment 526911

When I make an imitation of bolts on the frames and it will be a clear day, I will photograph macro photographs of the parts, but for now - general views of the hull with a keel.

View attachment 526912

View attachment 526913

View attachment 526914

View attachment 526915

View attachment 526917

View attachment 526918

Now, the case looks more complete and you only need to make imitation bolts and cover with oil. I really want to see the color of the case under the oil. :p

P.S. forgot to clarify: on board 583 details... and while for some time it will be fixed... note in the statistics, and 74 days for construction.
My gosh, she looks perfect. Congrats!!
 
Congratulation with this MileStone, Sergey. Now she is showing here beautiful lines.
Regards, Peter
Thank you very much. Yes, now more and more future forms are visible. By the way, the translator does not translate the word "milestone", but I know this word, I once had a Motorora Milestone and I knew what it meant, cool :cool:

My gosh, she looks perfect. Congrats!!
Thank you very much. Yesterday I finished imitation of bolts everywhere and soon I will cover part of the hull with oil and I can already imagine how cool it will look.
 
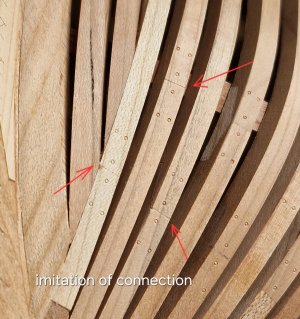
The final manipulation of the first hull prior to oil coating is simulating bolts on the frames from the outside.

Attention! In total, about 2500 imitation bolts were made (taking into account both puncture diameters). These are frames on both sides, keel, knees and all beams. I imagine how much it would take if I first pierced all these places, then drilled, then made pins from wire, then installed and polished them... The imitation took a total of a couple of days and after covering with oil I think the result will be excellent. Although with wire or insoles - more correct, I do not argue... but I am not immortal and I feel sorry for this time.

So, how exactly to make an imitation so that everything is plus minus exactly along the line.

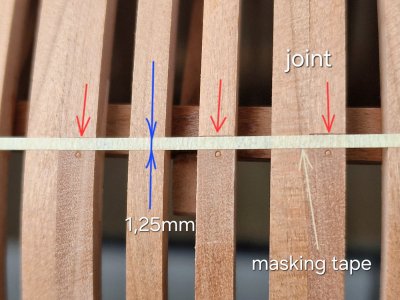
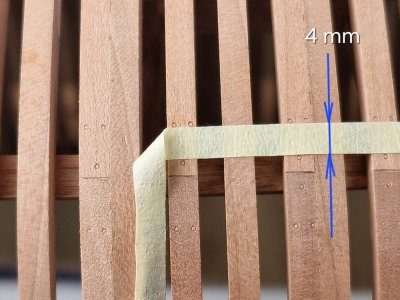
I do not like to draw on the body with a pencil (then dust, dirt from erasure elastic)... I cut a flat strip from the gauze tape (1.25 mm wide - this is half of 2.5 mm, which should be between the central bolts) and glue along the joint of the frames parts. First, under the joint, I do an imitation and then over the joint.

Alert 930.jpg

Alert 931.jpg

Then, cut the strip already 4 mm wide and glue above and below the central punctures. And I make two punctures. Thus, 4 mm is already obtained between the punctures.

Alert 932.jpg

By the way, I did this with the front frames, where the manufacturer simplified the 3 front frames without making connections in them. I previously made these connections by imitation, and now I have made imitation bolts next to them.

Alert 933.jpg

Well, here, in general, the result. I lay out close-ups, since there are practically no punctures on the general ones (only at some angles.)

I hope that after covering with oil - it will become better. But in fact, I wanted to. I didn't really like it when the wire stood out a lot with its black dots. This was the deciding factor as to why I made the imitation punctures, as they are not so much visible.

Alert 934.jpg

Alert 935.jpg

Alert 936.jpg

Alert 937.jpg

Alert 938.jpg

Alert 939.jpg

Alert 940.jpg

Finally the end! Now, I can cover the hull with oil.

I am now actively engaged in the creation of probes and tests with coating oils. And I will show you all the long-term results. This is very interesting, since not many people do it (I don't like it myself), but it is very important not to spoil the model. After all, oils in different combinations, dilutions, quantities of the layer and the wood itself behave completely differently, and sometimes unpredictably. And you need not only to have a stable color result, but also to understand the combination of colors that can be applied in combination on the model. I have an idea to beat the color palette of the second body very cool... 100500 more samples need to be taken... oh...

Ship-1
 
Tests with coated oils.

This post is only for those who like to read!


There will be (as in the next series of posts) a lot of photos, but mostly text useful information. Therefore, who wants to know about coating oils, about their combination, breeding, combination with different types of wood - then this section is exactly for you. There will be several such posts, enjoy.

And so I approached my not very favorite process - tests. Although I often do them, and many may think that I love it, but frankly - I, like everyone else - do not like to conduct tests and make probes. Rather, I like ready-made results, but the process, preparation is long and dreary, although very necessary! But unlike many, I still do it often.

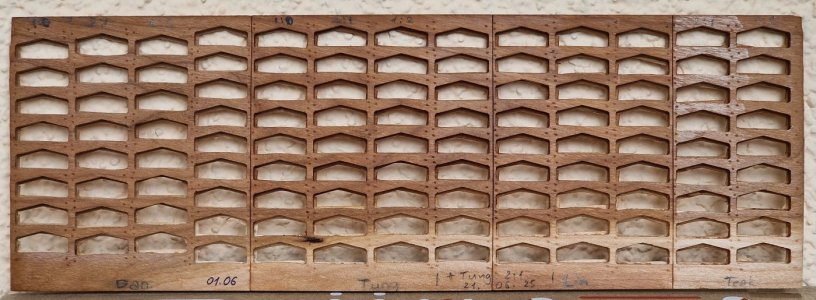
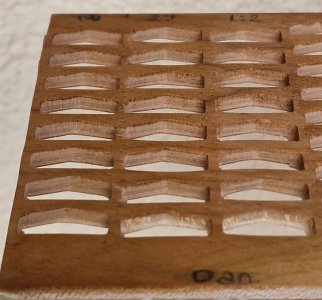
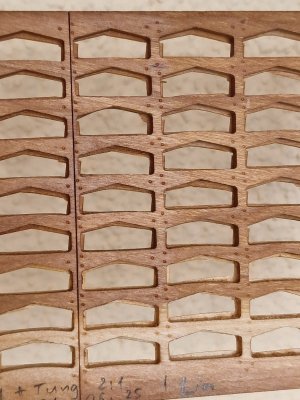
So, a little later I will talk about experiments on different species of wood in combination with different oils, but in this post I will show the results of experiments on cherries (wood from the Trident kit).

Alert 941.jpg

I specially took blanks with a color gradient from brown to light, so that the result could be seen in many shades of wood.

The photo cannot fully convey everything, so you will learn some of the information from my words and observations live.

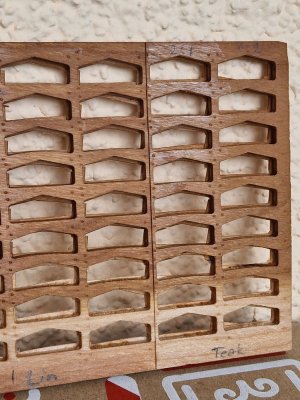
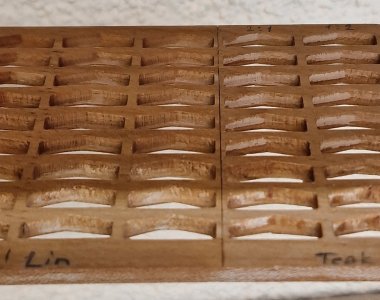
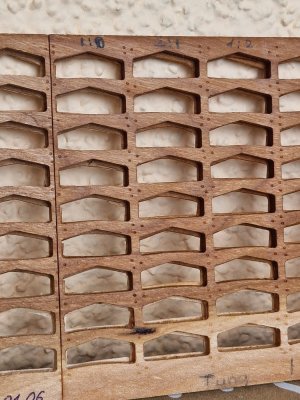
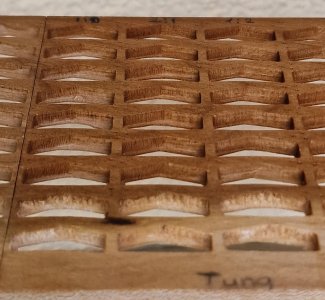
So, in order. (The entire workpiece is divided by scratches into 4 sections.
The leftmost 4 bars, this is Danish Oil Rustins. To the left of the center is Tung oil. To the right of the center is Linseed Oil. Right - Teak oil Rustins).

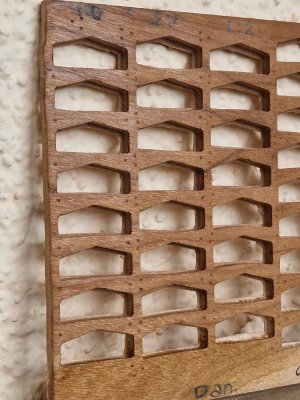
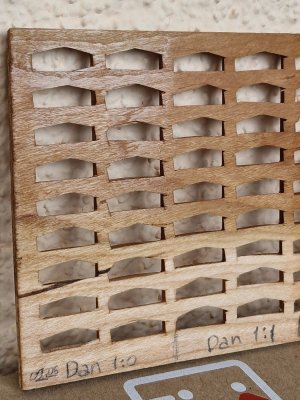
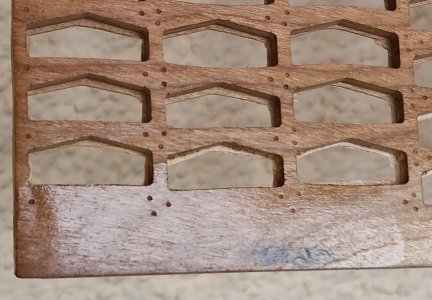
1. Danish oil Rustins. I had hopes for him, but he has a number of disadvantages for me. The photo does not show so much from above, but the tree under this oil is lighter than under others (maybe it will be a plus for someone). Secondly, the surplus must be washed. Samples of different dilutions are visible in this view (photo below).

Alert 942.jpg

In appearance, there is no difference from pure oil and diluted 2:1 and 1:2, but this is because I erased the surplus! But if you do not wash the excess and just let the oil dry, you get a shiny film on the surface. (this test was in the back of the blank).

Alert 943.jpg

This shine is very strong from pure oil, from diluted 1:1 less, but for me this is a significant disadvantage - since I will not be able to erase the excess everywhere, since there are a lot of undercuts inside the case (especially where the stairs), where not to get to remove the excess, because this oil is definitely not suitable for me. And besides, he has very little penetration. The photo below will show, and for comparison, you will open the same look in other oils, which I will describe below and compare.

Alert 944.jpg

By the way, if you apply several layers of Danish oil and do not wash the excess, you can achieve a glossy shiny surface. I will use this effect to cover the stands for models. I will talk about this later.

Alert 945.jpg

Next will be two oils at once (in the photo below, on the right - Teak oil, on the left - Linseed oil.

Alert 946.jpg

2. Teak oil Rustins. In its characteristics, it is very similar to Danish. It has a smell not like ordinary oils, rather varnishes. And both of them behave like varnishes. They dry quickly, then do not smell, but do not show the tree very much. Teak oil saturates the tree with color a little more than Danish, but cannot be compared with the same Linseed oil. The second minus, the same shiny film, if you do not remove the excess. In its pure form and small dilution is very pronounced. And if you dilute very strongly with the solvent, then the effect of the oil is even less. And for the same reason that it will not be possible to remove the surplus to me everywhere and this oil is not suitable. And by the way, even if you remove the surplus, but cover with a double layer that Teak, that Danish gives shine even on the second layer, even if they are diluted with a solvent.

3. Linseed oil. It would seem the simplest and most accessible. Does not leave shine even if you cover at least 3-4 layers, you can not dilute. BUT! There are a few downsides. One subjective - this oil after a while very stinks of salidol (or old machine oil). But the biggest minus is Linseed oil. Light woods are very yellow. After a while, instead of the white or light color of the tree, a rich yellow appears and this spoils the whole look. Be very careful with this! Below is the result of my other experience (I will talk about it in a thread about Victory), but to make it clear what I mean, here is the result a few months later.

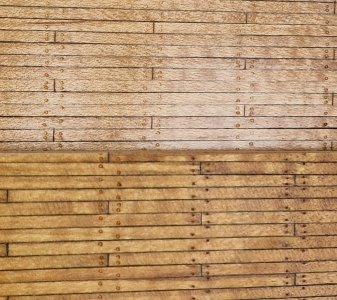
Alert 947.jpg

It's the same stuff. Only on top - this is under Teak oil (and you can see the shine that does not suit me), but the color remained as after the coating. And below - this is under Linseed oil. And the color was originally the same as the top, but over time it turned very yellow. Therefore, flaxseed oil for the deck on Victory is definitely not suitable, but for the set in question. On the one hand, yellow is better than white next to brown, but no one canceled the moment with a smell.

Oh yes, still in terms of penetrating ability. For comparison, how the oil was saturated and spread.

Alert 947а.jpg

On the right, Teak oil penetrated less than Flax (right). Why is this important? Well, at least because we apply oil for protection too. And the deeper it penetrates, the more stable the wood under it. Although, if Tick and Danish form a film, who knows, maybe it protects even better.

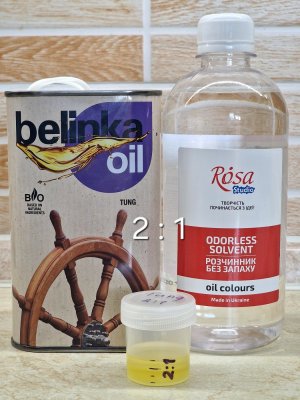
4. And finally Tung oil (Belinka).

Alert 948.jpg

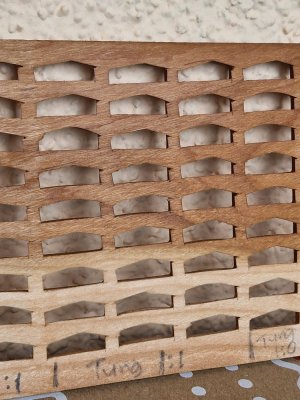
I tried to apply both pure and diluted in a ratio of 2:1 and 1:1 and 1:2 and the result was the same! The oil dried completely without glossy film without wiping the excess. This is a very huge plus if there is no way to remove the surplus from hard-to-reach places.

Alert 949.jpg

Also, to compare the penetrating power, here is the result of Tung oil.

Alert 950.jpg

And since the result of drying was the same, and the degree of penetration also did not change from dilution, I chose the optimal dilution for myself by sampling - 2:1.

I could use it clean, but application without solvent is more difficult, since the viscosity of the oil is thicker than we would like. But when diluted 2:1 with a solvent, the ideal consistency is achieved for easy application, but leaving more oil than solvent. I use an artistic solvent to dilute oil paints. It is almost odorless and quickly weathers. Teak oil use Belinka. There are good reviews of other modellers about him and it is not expensive and easily accessible (if someone cares).

Alert 951.jpg

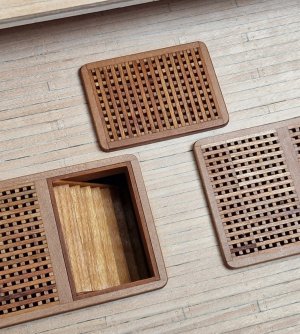
And in the end, I want to share a few more experiments. Like I said, flaxseed oil turns yellow on light woods, but it affects dark ones as well. I noticed that after a while, the dark pear under Linseed Oil is much richer and darker than under Tung Oil. Although initially after coverage they were the same. Here is an example of how the color of a dark pear changed after a few months.

Alert 952.jpg

The upper grille (under Linseed Oil) is darker than the one on the right (under Tung Oil). And the difference may not be significant, but this is due to the remoteness from each other. Look at the lower left frame. The frame around the stairs is much darker than the frame around the dark frame. And here the color is very different. Although this is the same wood and covered a few months ago, only the one that is dark is covered with flaxseed oil, and the one that is lighter is Tung.

On this I will try to play in the next experiments with a dark pear. And for the experiment he covered Linseed oil and cherries.

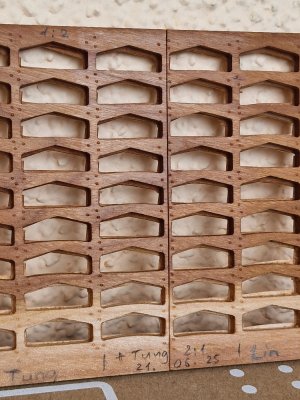
But that's not all. I covered a small area (which covered Tung and Flaxseed oils) with Tung oil again (in the second layer). As I said, flaxseed oil does not shine even from many layers, but Tung begins to shine slightly from the second layer. This is not comparable to Danish and Tikov, but still, the brilliance appears barely noticeable from some angles. Here are the results.

Alert 953.jpg

Alert 954.jpg

At the bottom of the caption + Tung 2:1 and to the left of it you can see that the shine is barely noticeable, oh it is. It is also necessary to take into account, if you accidentally cover not the entire surface twice, then there will be a spotting of zones of shine and matte coating.

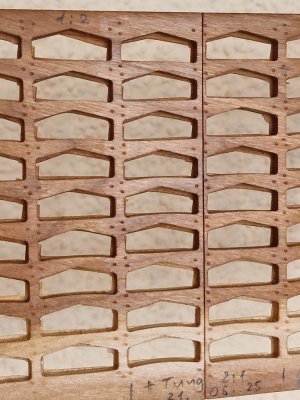
And below in the photo - the result of coating with Tung oil on top of Linseed oil.

Alert 955.jpg

The shine is even less noticeable, but here I am interested in the result of how the color of the tree under Linseed Oil, which is covered with Tung, will change. Will there be a difference in a few months, as was seen with the dark pear and light tree.

But with all this, I decided not to wait for this result and covered the first body (skeleton) with Tung oil Belinka 2:1. I will show the results in the next post, but for now I will share one life hack. So that the bright fate (light wood) does not stand out much, I break off a piece of lead from an automatic pencil and run it flat on the tree.

Alert 956.jpg

This slightly stains this area and I rub this area with a glove and it shines a little. Here without fanaticism, you just need to shade a little.

Well, the result of the oil coating will be lower in the next post.
 
So let's summarize the tests I wrote about above... P.S. Thank you @GrantTyler , for your interest and appreciation!

Why I chose Tung oil.

It does not leave shine from one layer even without dilution, (as Teak and Danish oils do. But I remind you that shine appears after the second layer). I spread it 2:1 with an odorless artistic solvent for the convenience of applying a more fluid consistency. After applying Tung oil, you can not remove the excess and the oil will not leave a glossy film. And again, with the application of the second layer - a small shine appears (half-mat, semi-gloss, satin). And with each layer, it intensifies. Therefore, ideally, for a matte effect, you need to cover once. Tung oil does not change the color of the tree over time, that is, it does not yellow a light tree or darken a dark one, as Linseed oil does. It doesn't smell as bad as Flax, but it's also not odorless like Danish and Teak oils. Plus, even PVA can be glued to tung oil, as well as to linseed oil. But because of the film that Teak and Danish Oils form, they may have problems with fixation. Well, the penetrating ability of Tung oil is one of the highest, which gives greater protection against atmospheric changes in one layer in comparison with other oils. But, again, I wouldn't rule out a combination with Linseed Oil for a darkening dark pear effect. That is, first covered with flaxseed oil, then after a couple of weeks - Tungov, but this still needs to be tested. Plus, I do not exclude two layers of Tung oil to create a semi-matte (semi-gloss, satin) coating. That is, the effect of a small shine, but not the same as from varnish. again, we will test. In the meantime, here's how the hull was covered to the upper deck. It is still wet. As it dries, I will definitely show the result, somewhere in a few weeks.

Alert 957.jpg

Alert 958.jpg

Alert 960.jpg

Alert 961.jpg

Alert 962.jpg

Alert 963.jpg

Alert 964.jpg

Alert 966.jpg

So far, I have mixed feelings... On the one hand, the tree manifested itself, was saturated with color... but most likely I expected a little lighter. Especially inside the case through the chur is dark. Most likely this is due to the fact that the oil has not yet dried (hopefully)... Plus, the imitation of nails, as I expected, is visible only at certain angles (just at such angles I photographed them), but due to the fact that the case looks down, for the most part imitation is not visible. But again, if you look from all sides, the effect is and in general I am more than satisfied with the result. I will wait for the case to dry.

Next, I will show you a lot of tests with pear, hornbeam and boxwood. And also by different methods of nailing... I don't know if this will be interesting to many, but definitely to those who approached the issue of wood and cover oils...
 
Your oiled skeleton looks fantastic! The simulated nails "pop", but not so much that they are a distraction. Well done!

All woods will darken over time. This occurs from exposure to both UV light and oxygen, neither of which Tung oil protects against. That is why wood coated in marine varnish holds its color so long, because the film it forms seals out the oxygen and UV inhibitors are usually added to the formula. Even so, wood under marine varnish will eventually darken as well, it will just take longer. The good news is that as the wood darkens under oil, it takes on a beautiful richness, so embrace it my friend, as you will not stop it. :)
 
Looks great, I love it when you oil the wood and it shows its character. Well done and great explanations. So far I have always used Danish Oil will give Tung Oil a try. Thank you!

Dirk
And did you dilute Danish place and in what ratio, and wipe off the excess? And what company? I had hopes for it, but in comparison with Tung oil there were more minuses. Thank you for your assessment.


Your oiled skeleton looks fantastic! The simulated nails "pop", but not so much that they are a distraction. Well done!

All woods will darken over time. This occurs from exposure to both UV light and oxygen, neither of which Tung oil protects against. That is why wood coated in marine varnish holds its color so long, because the film it forms seals out the oxygen and UV inhibitors are usually added to the formula. Even so, wood under marine varnish will eventually darken as well, it will just take longer. The good news is that as the wood darkens under oil, it takes on a beautiful richness, so embrace it my friend, as you will not stop it. :)
Thank you for your assessment. But I would like to object. Under linseed oil, the wood darkens and yellows much more. But tung oil has an ultraviolet filter and it stops this process. Teak and Danish oil create a film and it also protects against fading or, conversely, darkening. Yes, of course, time takes its toll and there will be changes over many years, but at home, if the model is not placed directly in the open sun (and I will put it in a display case with ultraviolet museum film ... then I think this process will stop. But with linseed - none of this will help, since it does not protect from light and darkens the wood even more. something like that ;)
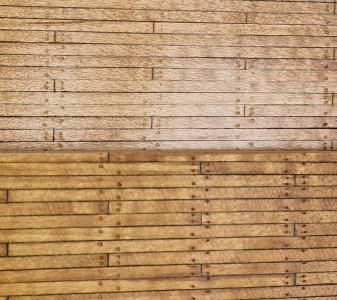
Alert 947.jpg
Here is the difference between Linseed Oil and Tik oil. The tree was also covered almost simultaneously. And the difference is colossal.
 
Last edited:
Thank you for your assessment. But I would like to object. Under linseed oil, the wood darkens and yellows much more. But tung oil has an ultraviolet filter and it stops this process. Teak and Danish oil create a film and it also protects against fading or, conversely, darkening. Yes, of course, time takes its toll and there will be changes over many years, but at home, if the model is not placed directly in the open sun (and I will put it in a display case with ultraviolet museum film ... then I think this process will stop. But with linseed - none of this will help, since it does not protect from light and darkens the wood even more. something like that ;)

My good friend, I completely agree that tung oil is a superior finish, which is why I use it in my own finish formulation for woodturnings. However, at the risk of sounding argumentative, tung oil alone provides minimal UV protection. From Google AI:

--------------------------------------------------
Pure tung oil provides minimal UV protection on its own. However, polymerized tung oil, which is tung oil that has been cooked into a varnish, can offer excellent UV protection when combined with UV inhibitors, according to a wood finishing forum. Some tung oil products specifically designed for outdoor use include UV protection.

Here's a more detailed explanation:

Pure Tung Oil:
Raw tung oil, in its pure form, does not offer significant UV protection and is better suited for indoor applications according to a wood finishing forum.

Polymerized Tung Oil:
When tung oil is polymerized (cooked into a varnish), it can be formulated with UV inhibitors to create a finish that effectively protects against UV damage, says a wood finishing forum.

Tung Oil Finishes with UV Protection:
Some manufacturers create specialized tung oil finishes with added UV protection, making them suitable for outdoor applications.
-----------------------------------------------------
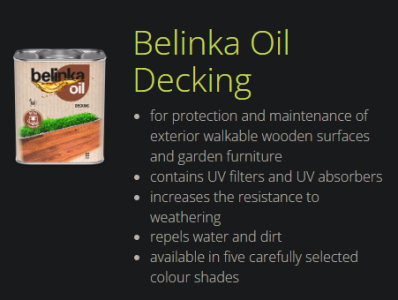
From Belinka:

1750876424319.png

No other ingredients are listed.

From their SDS:

1750876487301.png
1750876869697.png
UV inhibitors and driers would be toxic.

Their products that contain UV inhibitors are labeled as such:

1750876567348.png

All that notwithstanding, I fully agree that tung is the best choice and kept out of the sun in a protective case will age and darken on its own quite beautifully.

:)
 
My good friend, I completely agree that tung oil is a superior finish, which is why I use it in my own finish formulation for woodturnings. However, at the risk of sounding argumentative, tung oil alone provides minimal UV protection. From Google AI:

--------------------------------------------------
Pure tung oil provides minimal UV protection on its own. However, polymerized tung oil, which is tung oil that has been cooked into a varnish, can offer excellent UV protection when combined with UV inhibitors, according to a wood finishing forum. Some tung oil products specifically designed for outdoor use include UV protection.

Here's a more detailed explanation:

Pure Tung Oil:
Raw tung oil, in its pure form, does not offer significant UV protection and is better suited for indoor applications according to a wood finishing forum.

Polymerized Tung Oil:
When tung oil is polymerized (cooked into a varnish), it can be formulated with UV inhibitors to create a finish that effectively protects against UV damage, says a wood finishing forum.

Tung Oil Finishes with UV Protection:
Some manufacturers create specialized tung oil finishes with added UV protection, making them suitable for outdoor applications.
-----------------------------------------------------
From Belinka:

View attachment 528156

No other ingredients are listed.

From their SDS:

View attachment 528157
View attachment 528161
UV inhibitors and driers would be toxic.

Their products that contain UV inhibitors are labeled as such:

View attachment 528158

All that notwithstanding, I fully agree that tung is the best choice and kept out of the sun in a protective case will age and darken on its own quite beautifully.

:)
Yes, you are right that there is no pure ultraviolet filter in Tung oil specifically (it often comes in teak), but there are additives that suspend the yellowing of the tree. The manufacturer himself writes this phrase everywhere (my jar also has this phrase) that this oil prevents the yellowing of the tree. Most likely this is not an ultraviolet filter, but something else that they add to the oil, since Belinka is not pure tung oil but oil based on tung oil, there are several components, but it is difficult to find what these components are. Probably marketing so as not to make fakes, but I can be wrong. But in any case, I myself checked, in comparison with linseed oil, the color remains the original as much as possible. But, for how long... I think at home most likely for a long time. And if you take the model outside, nothing will help there ROTF

There is an ultraviolet filter in the Danish oil based on tung. I got it mixed up with it. But there is something in the tung from Belinka, since it also does not turn yellow.
 
Last edited:
Back
Top