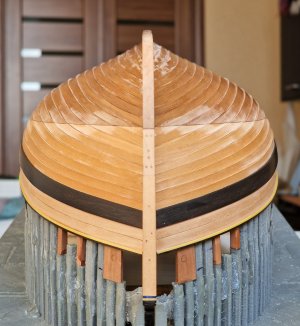
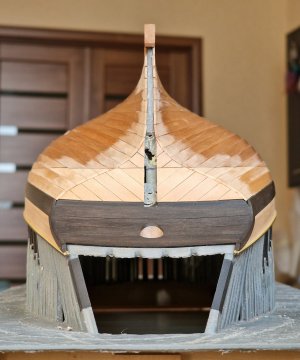
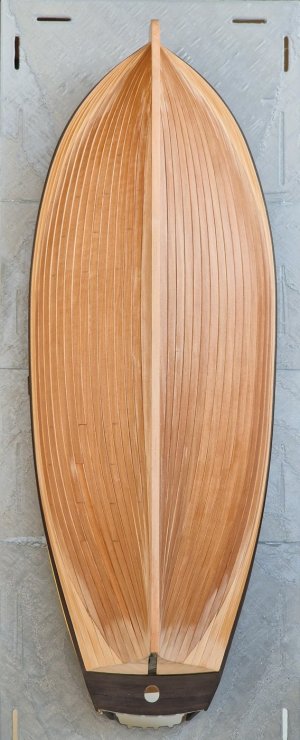
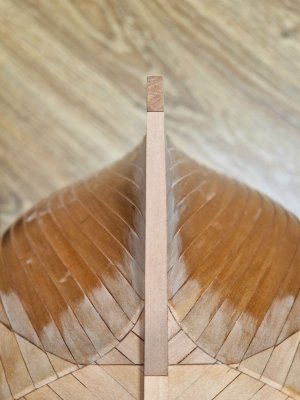
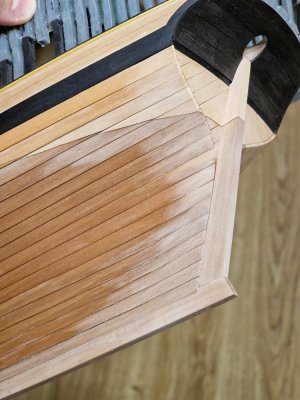
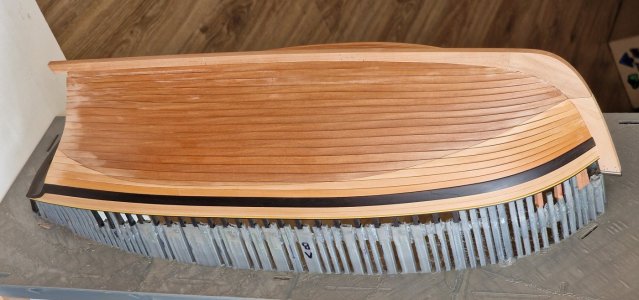
Finally, the day has come... I've finished the planking!
Over 120 elements and the hull is finally completely covered, with plastic now only on the top, and of course, the inside. There's still a lot of work to do on the planking, but it's nothing compared to the work already done... not without flaws and not without losses... today, for the first time in all my years of building ships, I cut my index finger pretty badly... I'm glad it was on my left hand. This is extremely undesirable for me, since I'm a doctor and always wear gloves, and wounds heal very poorly with them... but as it is, I rushed it - here's the result.
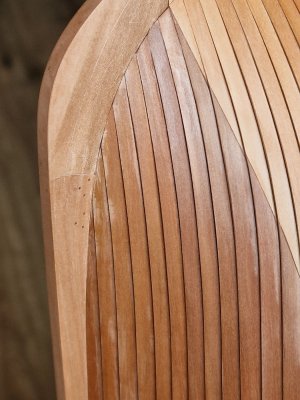
So! As I already mentioned, due to the asymmetry of the hull, an extra 1 mm appeared. And I thought about cutting the new strip from the plank not along the edge, but along the plane... and here's what happened:
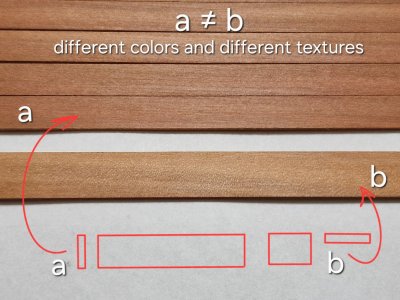
The photo above shows that different cutting angles produce different wood grain patterns and, most importantly, different colors! It might have seemed like the previously coated wood had changed color, but I deliberately cut and coated the new strip the same way, and the color was similar to the previously prepared ones. The cut at a different angle produced differences that I wasn't happy with. So, I decided to glue two strips together with PVA glue, using a minimal glue line, hoping it wouldn't be noticeable.
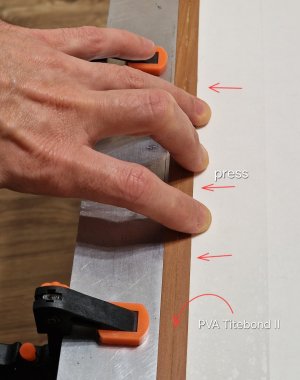
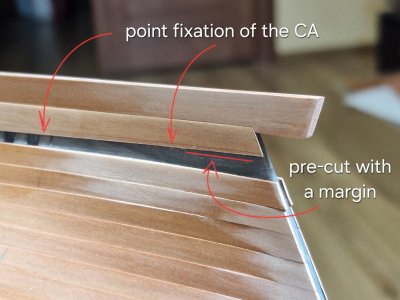
After sanding (it lightened the color a bit) and adjusting the width, I spot-glued it with liquid CA. This is the 17th and final belt, which contacts the keel.
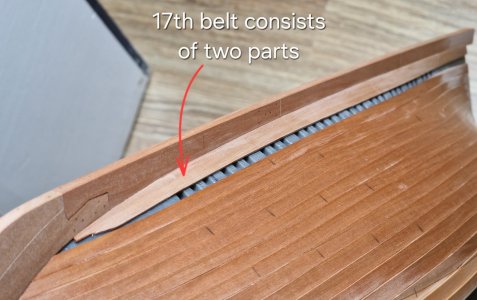
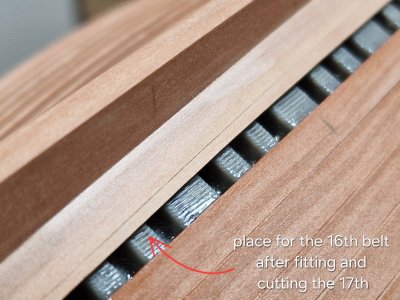
At high magnification, the glue seam is visible, but later we'll see how much camouflage it will provide.
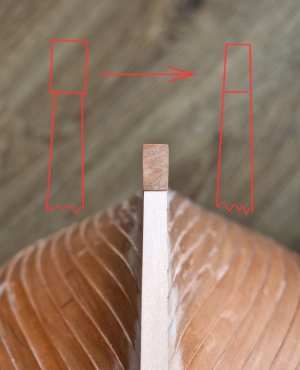
Then I cut and calibrated the 16th (second-to-last) belt and traced the cutting line on the 17th belt using its profile with a blade.
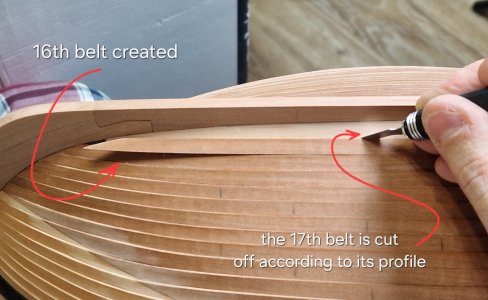
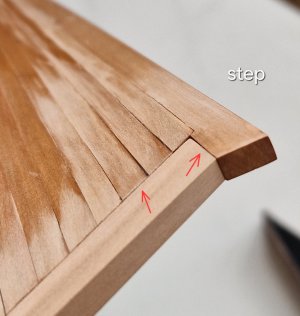
Here you can clearly see:
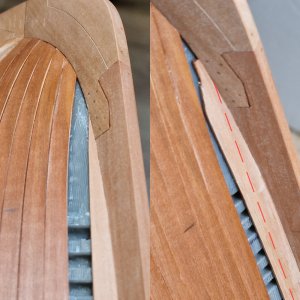
As a result, I got a clear groove, after which I glued the 17th belt with liquid CA (since before this I glued it spot-on so that the glue would not interfere with the cut.
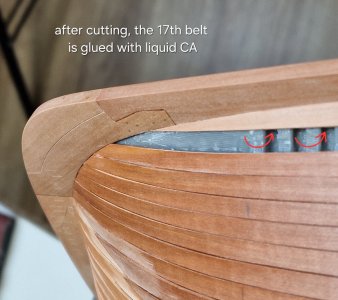
Then I glued the 16th belt into the groove with CA gel and poured liquid CA over the joints.
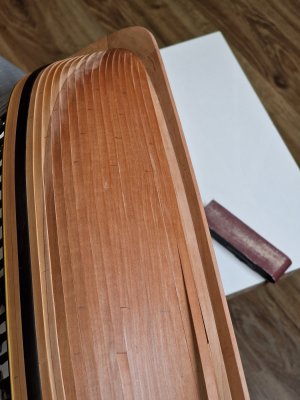
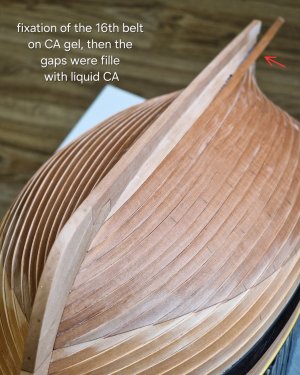
Now let's check how visible the glue seam will be.
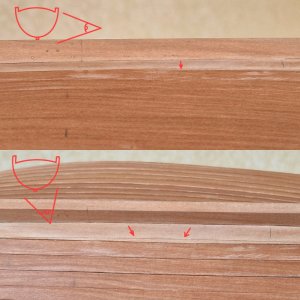
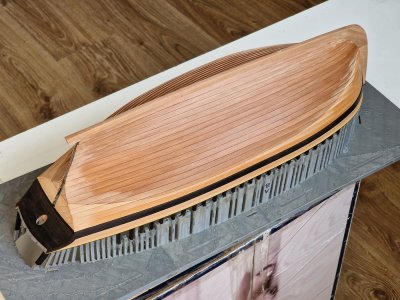
If you look at the hull up close and turn it over, you'll barely see the glue line in the middle section. But please note that from this angle, the hull will only be visible during construction. Once it's mounted on the stand, the step from the top chord will almost completely cover this line. Not to mention that the ship's bottom is completely in the shadows, to put it mildly, but oh well
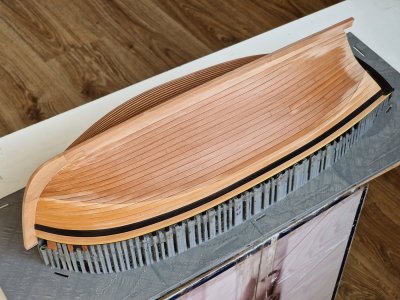
And from the other side, everything is the same, except everything is perfect, just the way I like it (and without any unnecessary millimeters
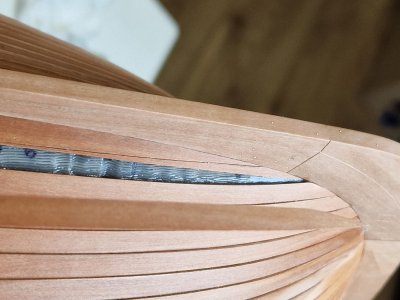
Using the profile of the finished 16th belt, I cut off the excess from the 17th belt with a scalpel...
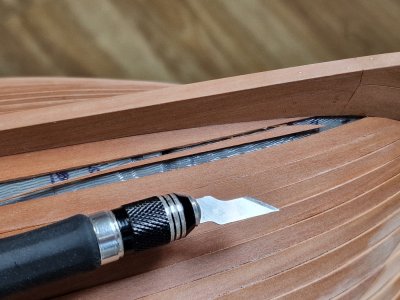
Well, I glue the closing 16th trim belt into the finished groove.
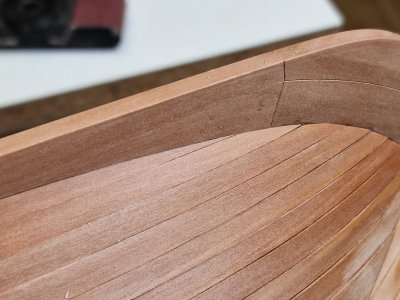
I like how it turned out here! I initially thought the front side of the model would be on the right, but now... I'm thinking I'll change it to the left... if I don't screw it up
I'll show the result in the next post...
Over 120 elements and the hull is finally completely covered, with plastic now only on the top, and of course, the inside. There's still a lot of work to do on the planking, but it's nothing compared to the work already done... not without flaws and not without losses... today, for the first time in all my years of building ships, I cut my index finger pretty badly... I'm glad it was on my left hand. This is extremely undesirable for me, since I'm a doctor and always wear gloves, and wounds heal very poorly with them... but as it is, I rushed it - here's the result.
So! As I already mentioned, due to the asymmetry of the hull, an extra 1 mm appeared. And I thought about cutting the new strip from the plank not along the edge, but along the plane... and here's what happened:

The photo above shows that different cutting angles produce different wood grain patterns and, most importantly, different colors! It might have seemed like the previously coated wood had changed color, but I deliberately cut and coated the new strip the same way, and the color was similar to the previously prepared ones. The cut at a different angle produced differences that I wasn't happy with. So, I decided to glue two strips together with PVA glue, using a minimal glue line, hoping it wouldn't be noticeable.

After sanding (it lightened the color a bit) and adjusting the width, I spot-glued it with liquid CA. This is the 17th and final belt, which contacts the keel.


At high magnification, the glue seam is visible, but later we'll see how much camouflage it will provide.
Then I cut and calibrated the 16th (second-to-last) belt and traced the cutting line on the 17th belt using its profile with a blade.

Here you can clearly see:

As a result, I got a clear groove, after which I glued the 17th belt with liquid CA (since before this I glued it spot-on so that the glue would not interfere with the cut.

Then I glued the 16th belt into the groove with CA gel and poured liquid CA over the joints.


Now let's check how visible the glue seam will be.

If you look at the hull up close and turn it over, you'll barely see the glue line in the middle section. But please note that from this angle, the hull will only be visible during construction. Once it's mounted on the stand, the step from the top chord will almost completely cover this line. Not to mention that the ship's bottom is completely in the shadows, to put it mildly, but oh well
And from the other side, everything is the same, except everything is perfect, just the way I like it (and without any unnecessary millimeters


Using the profile of the finished 16th belt, I cut off the excess from the 17th belt with a scalpel...

Well, I glue the closing 16th trim belt into the finished groove.

I like how it turned out here! I initially thought the front side of the model would be on the right, but now... I'm thinking I'll change it to the left... if I don't screw it up

I'll show the result in the next post...


