



Fantastic information, as always, Sergey! Thank you and continue to be safe!

 |
The beloved Ships in Scale Magazine is back and charting a new course for 2026! Discover new skills, new techniques, and new inspirations in every issue. NOTE THAT OUR NEXT ISSUE WILL BE July/August 2026 |
|
 |
As a way to introduce our brass coins to the community, we will raffle off a free coin during the month of August. Follow link ABOVE for instructions for entering. |
|

Danke, Charlie.Tolles Ergebnis. Gratulation
I fully support.What I learned from this lesson is not to get hung up on the materials, but to focus on achieving the right shape and the final visual effect.
Glad I was helpful.Fantastic information, as always, Sergey! Thank you and continue to be safe!

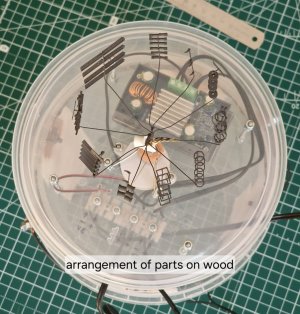
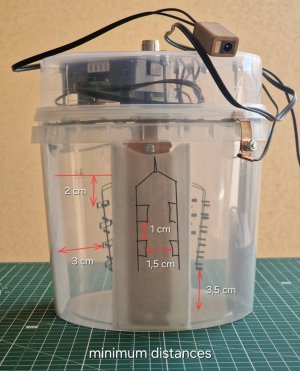

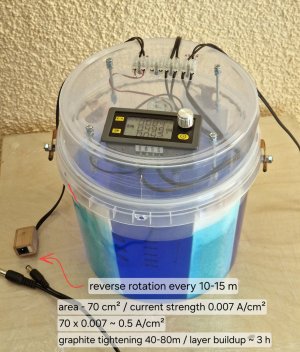
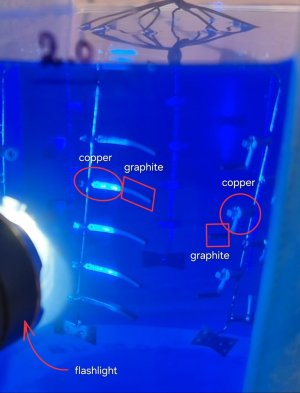
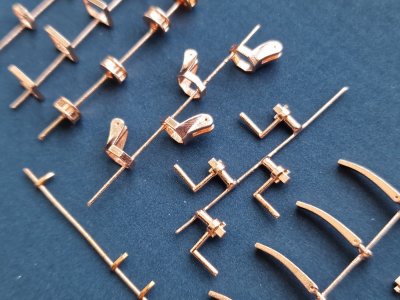


It’s a lot of work, but it gives nice results, Sergey. For sure with such amount of small parts.COPPER PLATING. Galvanizing.
*I duplicated this article on the topic of galvanization.
So, my galvanizing experiments have finally come to an end. In this article, I'll explain in detail how to copper-plat plastic (SLA, 3D printed), where and how to avoid mistakes, and how to make this process repeatable and, most importantly, effective. Let's get started.
I'll reiterate, this isn't a guide, and I can't guarantee you'll get it right the first time. I'll simply show you how I achieved the result, which is as close as possible to what I originally wanted. (Naturally, based on the trial and error I've made while building my experience.)
View attachment 620253
0. Safety!
View attachment 620258
Always wear gloves! This applies to both plastic, to avoid leaving hand marks on the parts, and copper, to prevent it from oxidizing during all stages of the process, including blackening and beyond.
1. Cathode. Details to be copper-plated.
These parts were modeled in Blender 3D. Incidentally, you can also use it to find the exact area of each part. This is necessary to set the correct current (amperes). This is important, as the result depends on it! Don't confuse volume and area; we need area!
See point 7 for the dimensions and shape of the wood with holders!
View attachment 620260
2. Graphite.
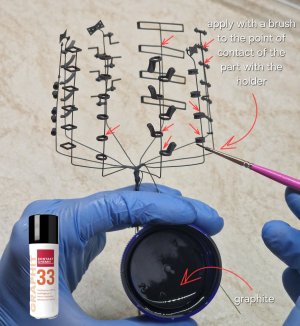
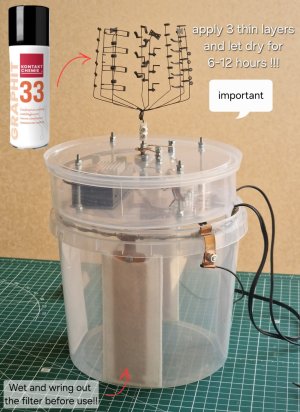
Since plastic doesn't conduct electricity, we need to create a conductive coating using graphite varnish. Apply three very thin layers. Then, use a brush to touch up the connection points between the part and the holders. This will speed up the bonding process between the graphite and the copper and prevent any gaps between the part and the holders.
3. Anode. Copper plates.
View attachment 620261
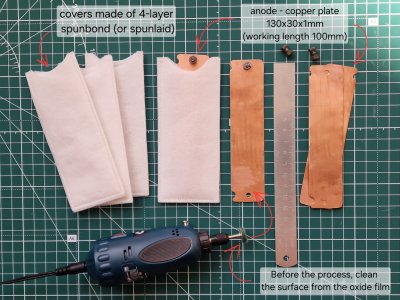
Ideally, you can find special copper for anodes with phosphorus. Regular copper will do, but a filter is a must!
The anode area (copper plates on both sides!) should be twice the area of the parts with the holders. However, the copper ratio shouldn't be too high, no more than 2.5:1. It's best to make the plates narrow (2-3 cm) and they should be above the liquid level (but only the area in the solution is taken into account!) Before use, be sure to remove the oxide layer on the copper. This can be done with steel wool, sandpaper, or a drill attachment.
4. Filters. Non-woven material.
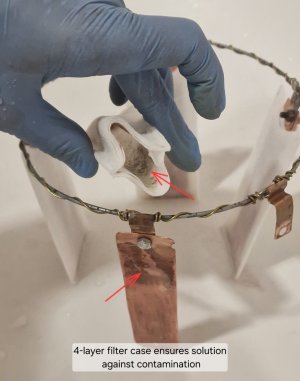
You need to sew covers from four layers. And be sure to wet them with water and wring them out before use. This material doesn't absorb water well and will stay dry for a long time in the bath.
5. Location and quantity.
View attachment 620262
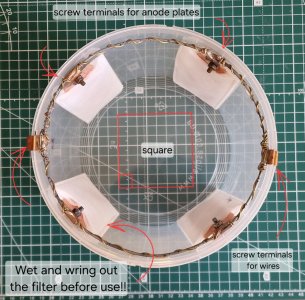
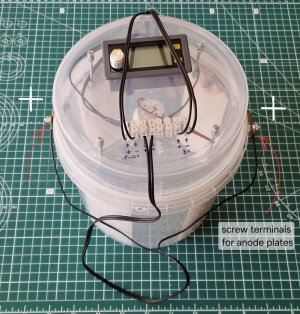
The anodes should be positioned either opposite each other (2) in long, narrow baths, or in a square (4) in round baths. The terminals should be designed so that the wires do not come into contact with the solution. It's best to use screw-type terminals with quick-release (dovetail) connections.
6. Electronics. Power supplies and step-down control unit.
View attachment 620269
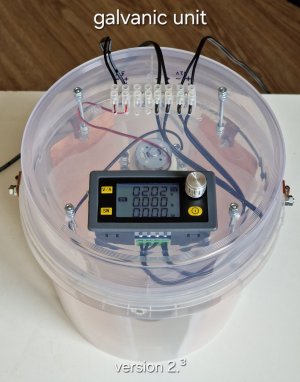
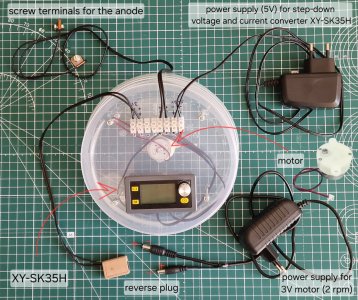
For galvanic applications, you need a step-down converter that can be used to set the current (amps) and volts (volts are set between 2-3V and the converter will automatically control this value depending on the amps). We're only interested in amps; that's the most important thing! This unit, the XY-SK35H, can be purchased on AliExpress. It's inexpensive.
This converter connects the positive terminal (Plus) to the anode (copper plates). I connected it to a terminal inside the case.
View attachment 620272
And the negative contact (Minus) - to the Cathode (parts).
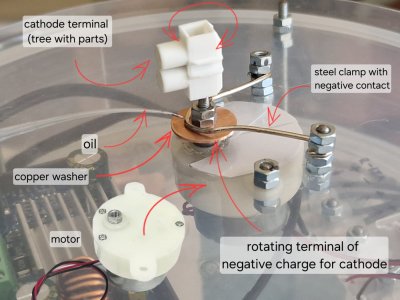
I connected this contact to the motor's rotation axis. I also bought the motor on AliExpress. It's powered by a 3V power supply, which gives it 2 revolutions per minute. In the first versions, I used a bearing in the sliding contact area (a big mistake, as there were huge voltage surges due to uneven ball contact. Then I used a washer, which turned out to be zinc-coated, and when the steel bracket gnawed a groove in it, the contact also began to fail). So I replaced the washer with a copper one and lubricated the contact with sewing machine oil, and the voltage surges have been gone!
View attachment 620273
The circuit is simple. I connected the negative terminal to a steel clamp. It rubs against a copper washer, which is screwed to the motor's axis of rotation. A regular wire clamp is screwed to this axis. One side of this clamp holds the axis, and the other side holds the wood components.
View attachment 620274
View attachment 620275
View attachment 620276
7. Distances, dimensions, and shape.
The photo shows the minimum acceptable values. However, it's better to either use a larger tank and liquid, or make the tree smaller. The recommended distance from the bottom is 4.5-5 cm (this is the most important, by the way). From the parts to the plates, 4-5 cm, and between rows and tiers, 2.5-3 cm. However, with these values, I end up with a very small tree and very few parts. I found the minimum value through trial and error. But it's still best to leave at least 4-4.5 cm from the bottom!
So... the tree of parts is installed, the copper plates are polished, washed, dried, and put on damp covers! The tank is washed with soap, dried, clean, and free of streaks and dust. Everything is ready; you just need to add the solution and set the correct voltage.
8. Solution. Ready-made liquid for bright copper plating (acidic).
View attachment 620279
As I've said many times, it's better to buy a ready-made copper plating solution. Making your own is both difficult and expensive, and there's a high risk of getting the proportions wrong and ruining everything. Not to mention, there are many chemicals on the market, and they're not always good or suitable for our purposes. And considering that 2 liters of solution cost 12 euros, I don't see the point in risking making it myself. I bought it at a specialty galvanizing store, and I recommend you look for similar ones. How to store the solution is described below, in section 10.
9. Settings. Current (Amps).
This is perhaps the most important thing after the solution itself.
View attachment 620280
A few words about the motor and rotation. To ensure the copper lays flat and avoids shielding, the wood must rotate. This is achieved with a motor running at two revolutions per minute. Reverse is crucial. Ideally, it should have automatic reverse, but I was only able to make two plugs with different contact polarities, so I reconnect the other contact every 10-15 minutes, thus changing the direction of rotation.
Calculating area and current.
To accurately determine the area of the parts, you can find this value when modeling in Blender, and be sure to add the area of all holders! If the parts weren't modeled, you need to calculate them as accurately as possible using AI.
You need 0.007 A per 1 cm². (The value 0.01 A/cm² is often quoted everywhere, but lower current means denser and stronger copper, longer process times, and less stress on the solution. That's why I derived this value for myself.)
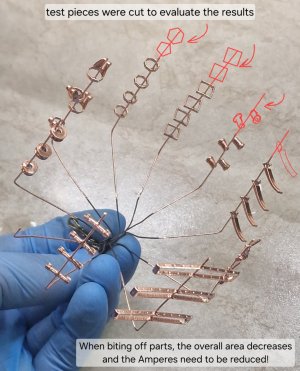
In this case, with an area of 70 cm² (all parts and holders), I set the copper flow rate to 0.5 A, and the copper coated parts up to 1 cm thick in 40 minutes and parts 1.5 cm long in 80 minutes. The copper layer continued to build up for about another 3 hours. The total copper plating time was exactly 4 hours.
View attachment 620281
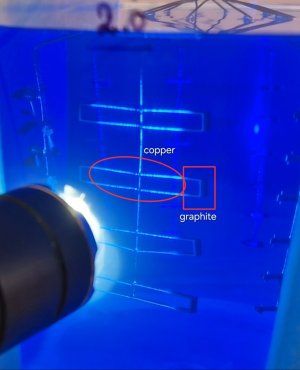
If you shine a flashlight through the solution, the graphite will appear dark, and the areas where copper has formed will be shiny. The area between the graphite and copper (1.5 mm) will be less shiny, as the copper layer there is still minimal.
It is not recommended to remove the parts from the solution. One-time, very brief inspections are permitted. The main thing is to prevent the solution from drying on the parts, otherwise oxidation will occur!
View attachment 620282
The copper shouldn't be too dull (matte), and it shouldn't have any dark spots or roughness. There also shouldn't be any threads, spikes, or "pimples."
Also, don't partially remove the wood while the unit is running, otherwise the entire stress will fall only on the parts submerged in the liquid!
Copper grows stronger and faster on the lower tiers. Therefore, it's necessary to arrange parts of the same shape on the same holder (vertically), and as the layer increases on the lower tiers, you can cut off the lower parts, leaving the upper ones to continue to be coated with copper.
View attachment 620283
10. Cleaning and storage.
This is a crucial step, as the subsequent results will depend on it.
As you can see, the 4-layer filters worked and prevented the bathtub from becoming dirty. The filter plates should be removed from the solution very slowly and carefully.
View attachment 620284
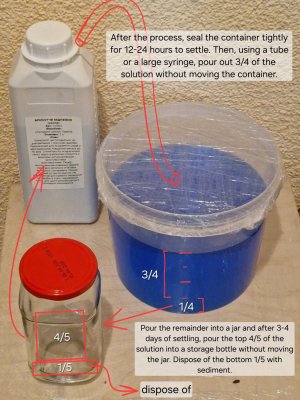
Do not disturb the container containing the liquid during the entire process and after its completion. After removing the parts, seal the container tightly and allow the sediment to settle for 12-24 hours.
View attachment 620285
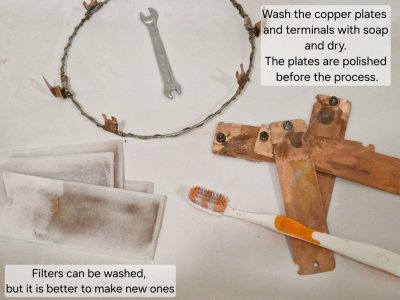
The filters can be washed, but I recommend making new ones and disposing of the old ones!
The copper plates should be washed with soap and a brush and dried. The oxide film should only be removed before next use, not before storage!
View attachment 620286
The next day, drain the top three-quarters of the liquid using the suction method, without tilting or moving the container! This can be done with a large syringe or tube. Then, pour the remainder into a jar for 3-4 days and leave it there without moving it. During this time, the sediment will settle further, and you need to suck out the top four-fifths of the solution again with a syringe or tube, without moving the jar. Dispose of anything that remains at the bottom.
This sediment will contain the spent organic matter of the brightener and, more importantly, large copper particles (copper dust). When this dust gets on the part, it creates an uneven surface, making the copper rough and brittle. No home filters can stop such small particles, so it's easier to let them settle and discard them.
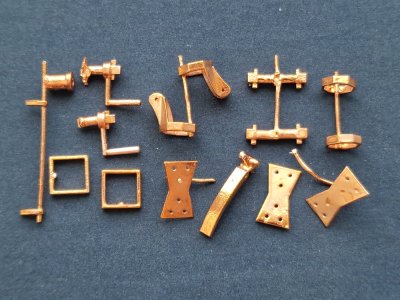
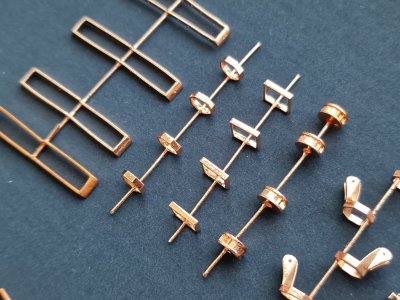
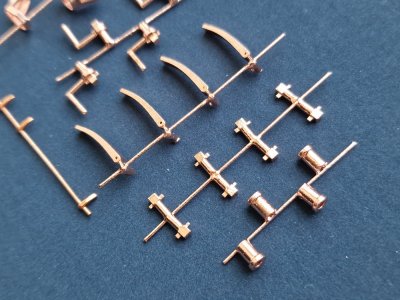
And here's the result immediately after copper plating. This is before any finishing, grinding, and polishing. In the first photo, this is the very bottom tier (it’s a test tier, but it will also turn out great).
View attachment 620287
View attachment 620288
View attachment 620289
View attachment 620290
This copper is extremely durable, easy to process, and can be drawn perfectly. Most importantly, using galvanic processing, you can create metal parts of any complexity and in any quantity with a high degree of repeatability!
At first, it seems like a lot of work, but once you've prepared everything once, you can plate new parts over and over again. Besides these, you'll also need to make rigging parts, railings, cannons, anchors, falconets, and rims in huge quantities. So, if you consider the balance of work required for all the parts—building a galvanic installation once and then producing parts on an "industrial scale"—the advantage certainly becomes obvious. Thank you for your feedback.It’s a lot of work, but it gives nice results, Sergey. For sure with such amount of small parts.
Regards, Peter

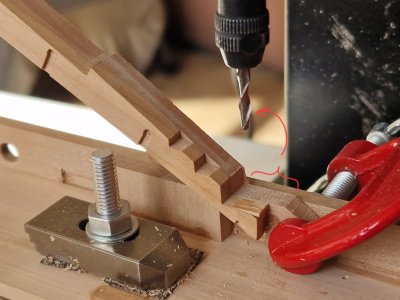
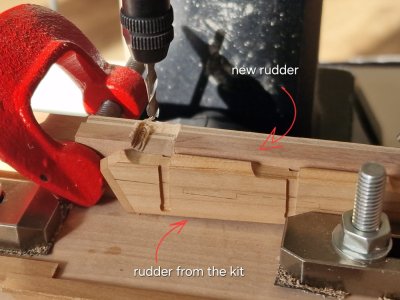
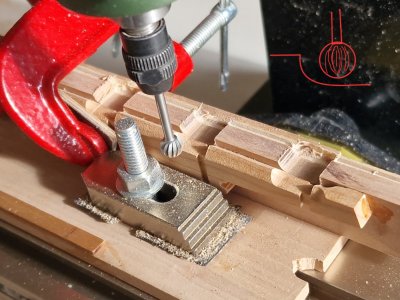
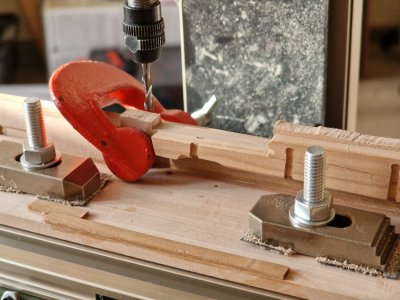
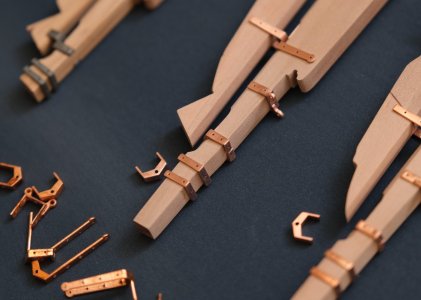
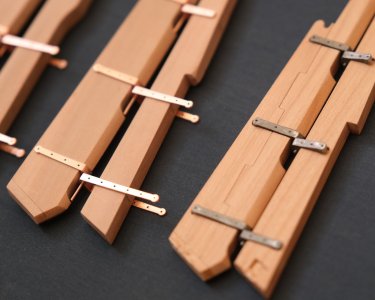
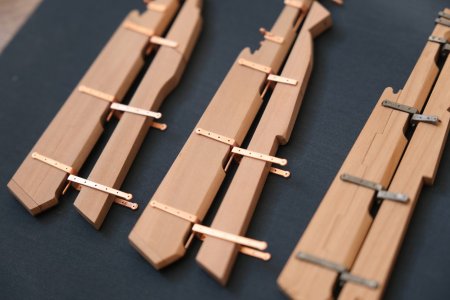
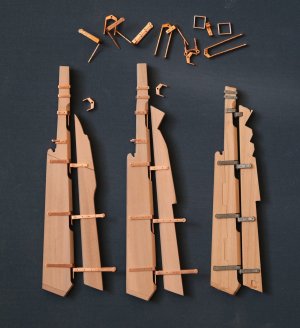

Das ist mit einem Wort beschrieben „ Handwerkskunst „ auf allerhöchstem Niveau. Fantastisch erklärt. Präzise und durchdacht gefertigt. Klasse !Ruder . Erster Rumpf.
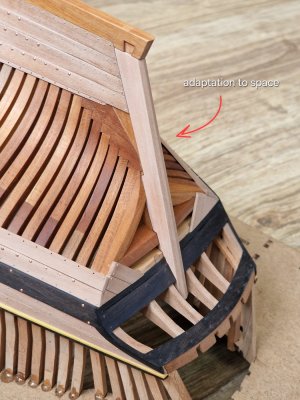
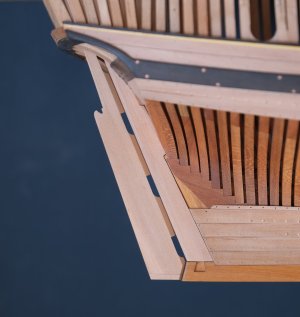
Als ich mit dem Projekt begann, dachte ich, der Schwerpunkt würde auf dem zweiten Rumpf liegen, und der erste (da er aus einem Bausatz stammt) würde als Basis für den zweiten dienen. Doch während der Arbeit stellte ich fest, dass der Bausatzrumpf recht gut aussah (Spaten, Decksteile; schade, dass ich den Kiel, einschließlich des Bugs, nicht gleich komplett neu konstruiert habe).
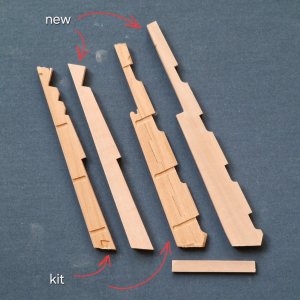
Während ich neue Ruderscharniere (mittels Galvanisierung) anfertigte, merkte ich, dass ich die Scharniere aus dem Bausatz nicht für den ersten Rumpf verwenden konnte. Optisch und in Authentizität ist das ein himmelweiter Unterschied. Deshalb beschloss ich, Ruder und Heckspiegel komplett neu zu konstruieren (ich bedauere es sehr, dass ich den Kiel nicht komplett neu gestalten kann, aber ich verwende den vorhandenen).
View attachment 620433
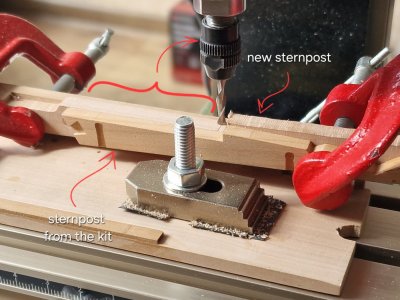
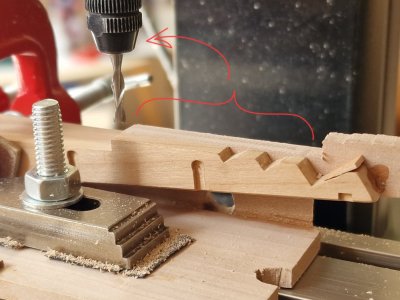
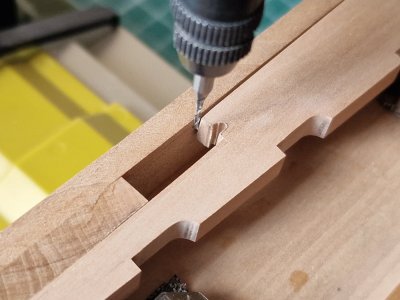
Dies ist noch ein Zwischenstadium (siehe Foto zur Verdeutlichung), und so habe ich es überarbeitet. Die Methode ist einfach: Ich habe die alten Teile wie für ein Kabelrohr kopiert und das neue Teil auf deren Maße gefräst.
View attachment 620434
View attachment 620435
View attachment 620436
View attachment 620437
View attachment 620438
View attachment 620442
View attachment 620443
Da ich bereits ein ähnliches Set für den zweiten Fall erstellt habe, werde ich die übrigen Arbeitsschritte nicht wiederholen.
View attachment 620444
View attachment 620445
Nun, hier ein Vergleich. (Lenkrad und Scharniere sind noch nicht fertig! Es müssen noch Anpassungen, Schleifarbeiten und Schwärzungen vorgenommen werden, aber zur Verdeutlichung hier das Ergebnis.)
View attachment 620446
View attachment 620447
View attachment 620448
View attachment 620450
View attachment 620451
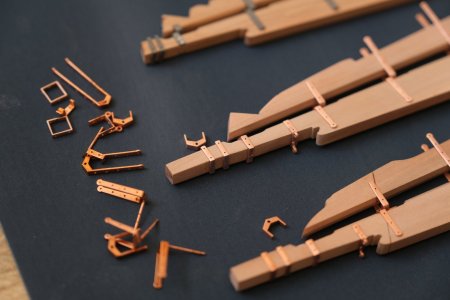
Auf dem Foto oben: Links ist ein Set für den zweiten Fall zu sehen, in der Mitte für den ersten, rechts stammt es aus einem Set (es war für den ersten Fall gedacht, wurde aber neu angefertigt).


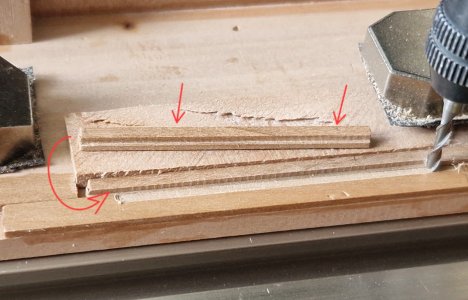
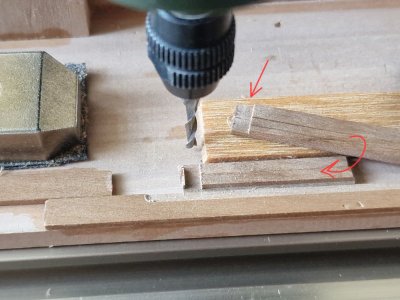
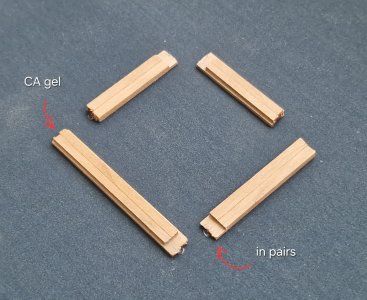
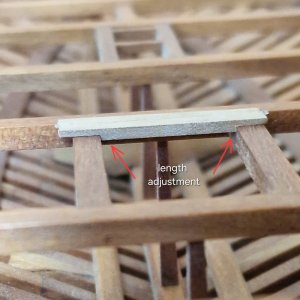
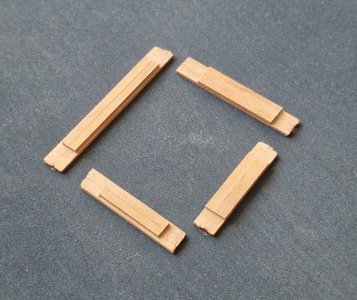
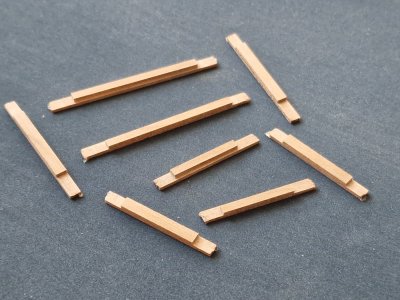
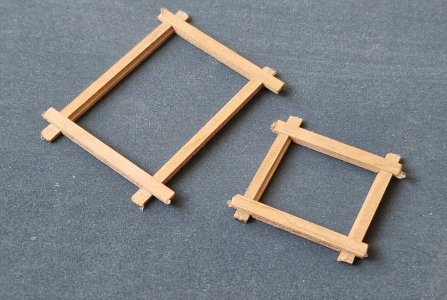
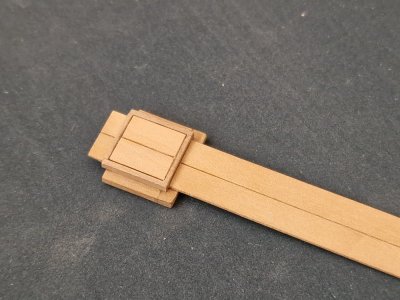
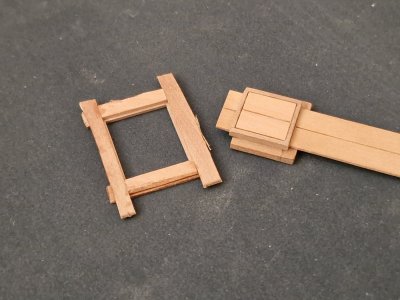
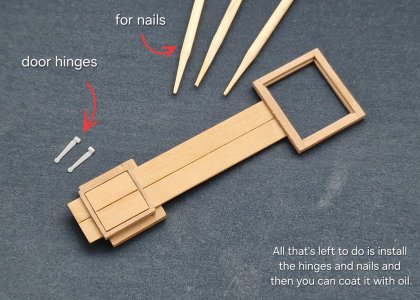
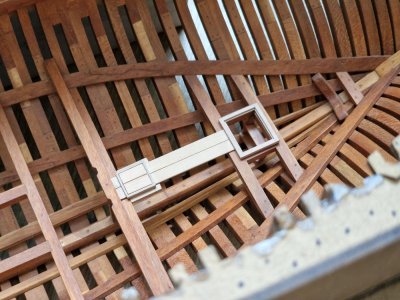
Sehr gute und schöne Darstellung der Vorgehensweise. Schritt für Schritt. Das Ergebnis spricht für sich.
Kapitel 20. Decks (1. Rumpf).
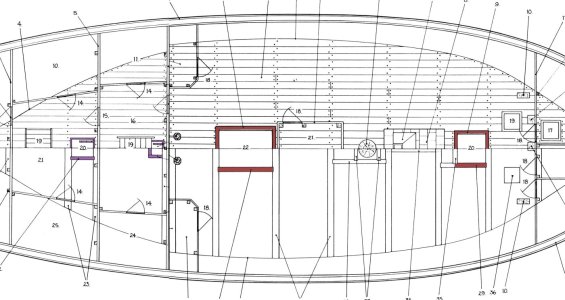
Unterdeck. Gitterrostrahmen.
View attachment 621056
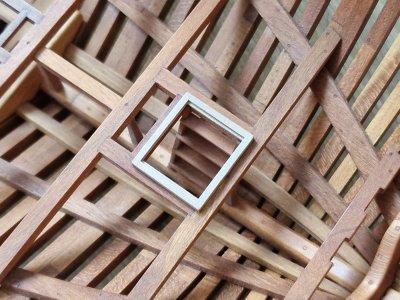
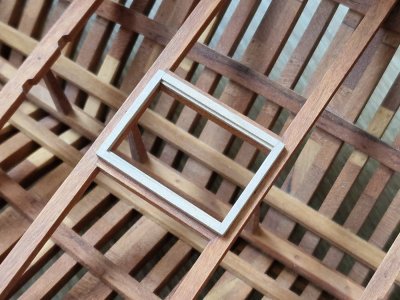
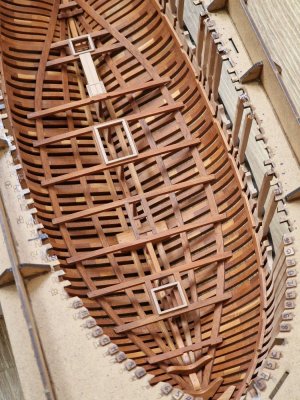
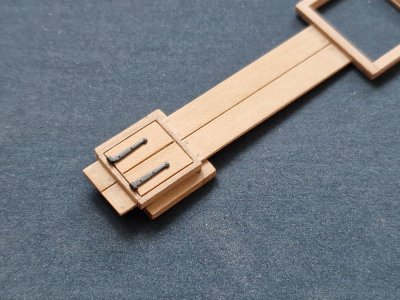
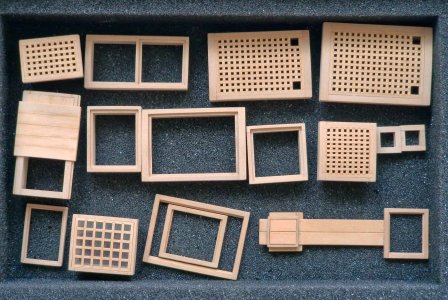
Das gesamte Unterdeck wird so frei wie möglich gestaltet, damit alle Rahmenteile deutlich sichtbar sind. Daher werden keine Gitterroste in den Rahmen eingebaut. Auch Planken werden – mit Ausnahme von zwei Planken zwischen den beiden hinteren Rahmen – nicht vorhanden sein.
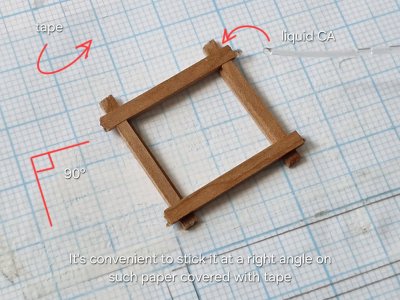
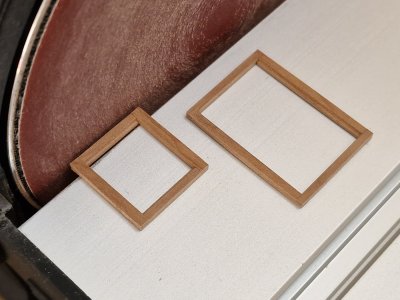
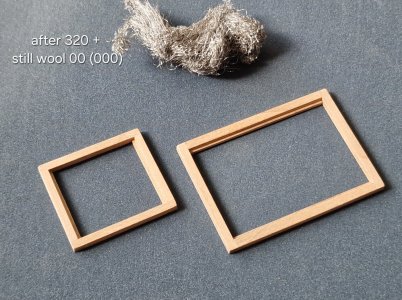
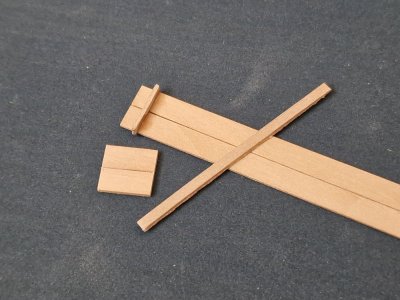
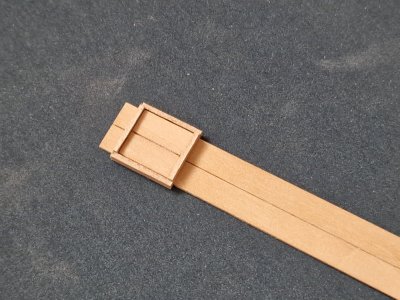
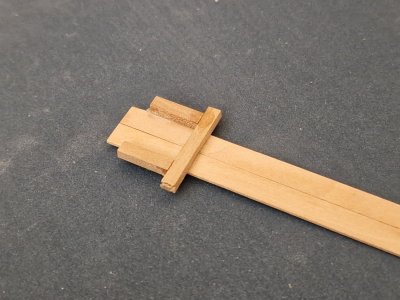
Die Herstellung solch einfacher Teile ist nicht schwierig, aber hier ist eine Schritt-für-Schritt-Anleitung.
View attachment 621057
View attachment 621058
View attachment 621059
View attachment 621060
View attachment 621061
View attachment 621062
View attachment 621063
View attachment 621064
View attachment 621065
View attachment 621066
View attachment 621067
View attachment 621068
View attachment 621069
View attachment 621070
View attachment 621071
View attachment 621072
View attachment 621074
View attachment 621075
View attachment 621076
View attachment 621090
Vielen Dank, Sie sind mein treuester Leser.Sehr gute und schöne Darstellung der Vorgehensweise. Schritt für Schritt. Das Ergebnis spricht für sich.
Thank you very much for your rating.Always such amazing detail and craftsmanship ! Beautiful !
Thank you, that's partly what I planned, I'm glad it's working out.Thank you Sergey. It is like an on line modelling school. Cheers Grant
Ich liebe das Projekt und deine Arbeit!. Einfach fantastischVielen Dank, Sie sind mein treuester Leser.
Vielen Dank für Ihre Bewertung.
Danke, das hatte ich zum Teil auch so geplant, ich bin froh, dass es so gut klappt.
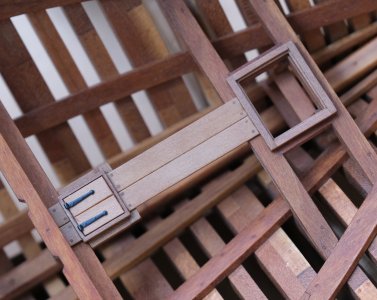
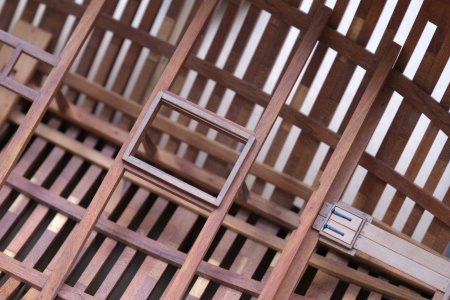
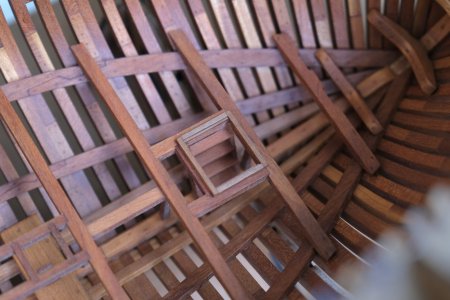
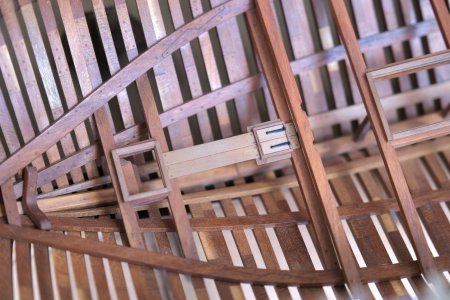
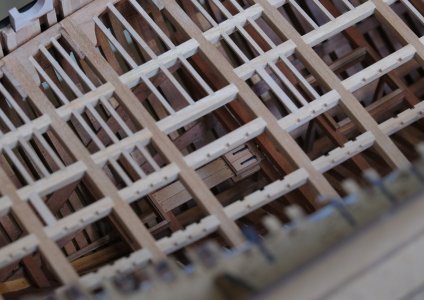
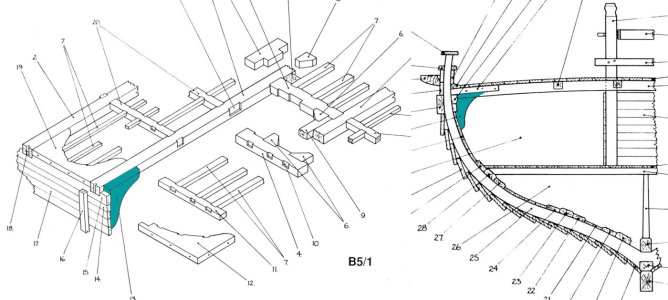
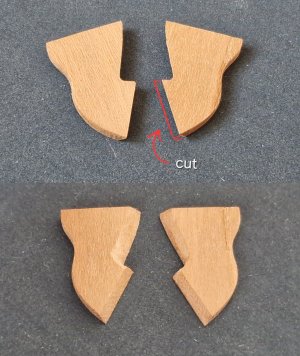
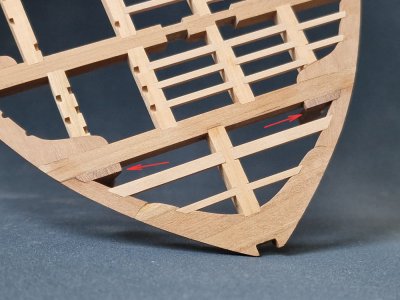
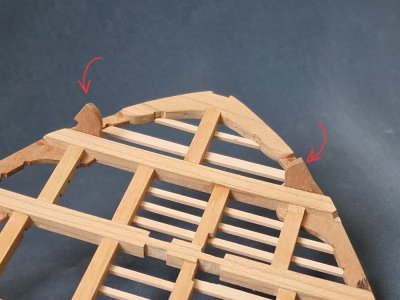
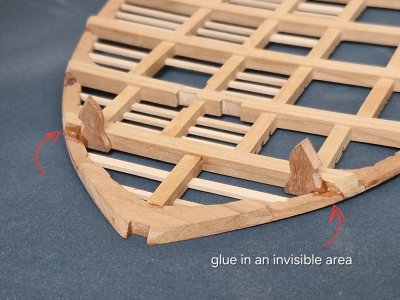
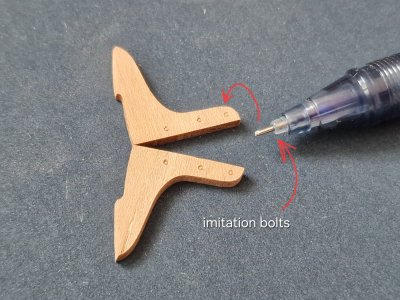
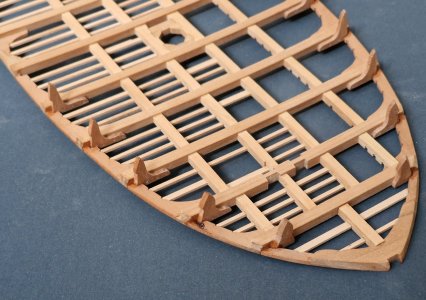
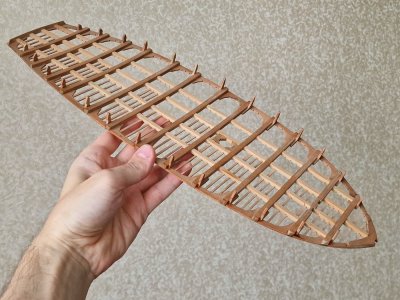
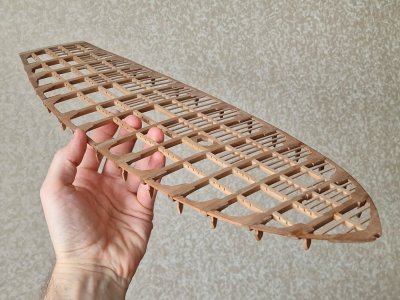
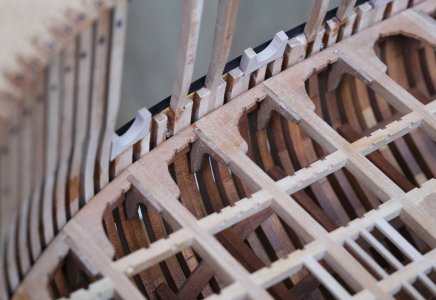
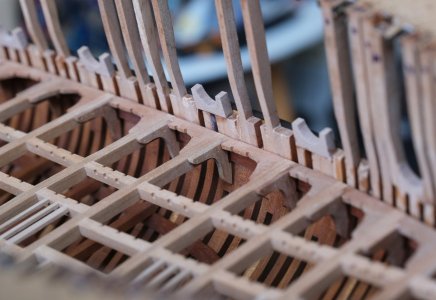
That free deck looks very special, Sergey. Nicely done and with a beautiful fit.Knees.
View attachment 621478
View attachment 621479
I made it so the deck could still be removed even after the knees were installed. Since they are secured over the boards, I have just enough clearance to keep the knees out of the way.
View attachment 621480
View attachment 621481
View attachment 621482
View attachment 621483
View attachment 621484
View attachment 621485
View attachment 621486
View attachment 621487
View attachment 621488
Next up are the window sills, a tedious process of fitting them into place. But this is the most challenging part, and I spent weeks pondering how to implement it. Especially considering that it will be different on the two models.
Die Oberflächenbearbeitung ist perfekt. Die Luken und Rahmen sind absolut stimmig. Wird das Öl verdünnt oder mehrfach aufgetragen?Das Teil ist fertig.
View attachment 621470
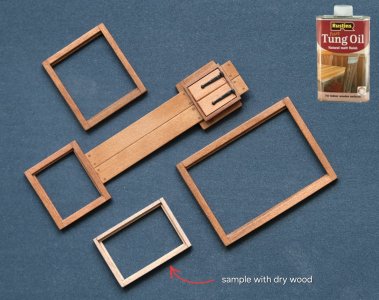
Unten sind alle Rahmen für die beiden Modelle abgebildet, einige davon werden aber bald an eines der Modelle geklebt...
View attachment 621471
Zuvor werden die Teile jedoch mit Tungöl beschichtet.
View attachment 621472
Um einen Farbkontrast zu erzeugen, wechsle ich zwischen Tung- und dänischem Öl ab, damit die einzelnen Stücke nicht zu einem einzigen Klecks verschmelzen.
Die endgültige Anpassung erfolgt, und die Teile werden mehrere Wochen lang trocknen, bevor ich sie auf das Deck klebe.
View attachment 621473
View attachment 621474
View attachment 621475
View attachment 621476
Bevor ich das Oberdeck befestige, möchte ich unbedingt mit einer guten Kamera ein Video aufnehmen, das die Struktur des Unterdecks und die inneren Spanten detailliert zeigt. Obwohl ich noch nicht alle Schotten verklebt habe, ist die Sicht – gelinde gesagt – immer noch so schlecht, dass man nicht alles deutlich erkennen kann.
View attachment 621477
Ein wunderschönes Zimmerwerk. Ein fantastischer Gesamteindruck der Konstruktion. Das wird ein „ Lehrmodell „ . Einfach Klasse Sergey. Danke fürs Zeigen.Knie.
View attachment 621478
View attachment 621479
Ich habe die Konstruktion so gestaltet, dass die Terrasse auch nach dem Einbau der Kniestützen noch abgenommen werden kann. Da die Kniestützen über den Dielen befestigt sind, habe ich gerade genug Freiraum, um sie aus dem Weg zu räumen.
View attachment 621480
View attachment 621481
View attachment 621482
View attachment 621483
View attachment 621484
View attachment 621485
View attachment 621486
View attachment 621487
View attachment 621488
Als nächstes stehen die Fensterbänke an, deren Einbau ein mühsames Unterfangen ist. Das ist aber der schwierigste Teil, und ich habe wochenlang darüber nachgedacht, wie ich das am besten angehe. Vor allem, weil es bei den beiden Modellen unterschiedlich sein wird.



