This is great news, Shota. Now you have the tool that will help you. Unfortunately, I can't 'picture' how the tool should work. Can you make a small video of the bending process, possibly?
-

Win a Free Custom Engraved Brass Coin!!!
As a way to introduce our brass coins to the community, we will raffle off a free coin during the month of August. Follow link ABOVE for instructions for entering.
-

PRE-ORDER SHIPS IN SCALE TODAY!
The beloved Ships in Scale Magazine is back and charting a new course for 2026!
Discover new skills, new techniques, and new inspirations in every issue.
NOTE THAT OUR FIRST ISSUE WILL BE JAN/FEB 2026
- Home
- Forums
- Ships of Scale Group Builds and Projects
- HMS Alert 1777 1:48 PoF Group Build
- HMS Alert 1777 1:48 Group Build Logs
You are using an out of date browser. It may not display this or other websites correctly.
You should upgrade or use an alternative browser.
You should upgrade or use an alternative browser.
HMS ALERT 1777 cutter POF by shota70 [COMPLETED BUILD]
Yes Shota, do a short video please. I was not able to follow the explanation. Or a picture sequence. The final result looks fantastic and I have a friend too, that if I ask him a million times, he can do something similar  .
.
Do we need to pay copyright???????
Hahaha
Cheers !!!
Daniel
Do we need to pay copyright???????
Hahaha
Cheers !!!
Daniel
- Joined
- Apr 20, 2020
- Messages
- 6,257
- Points
- 738

I promise to try to present detailed documentation in photos of the process on a brass board or a short video during the weekend
But now I want to celebrate Golden State's victory in the NBA Finals, a team that will be remembered for many years to come thanks to the fighting spirit and team spirit and also because of the legendary Steph Kerry


But now I want to celebrate Golden State's victory in the NBA Finals, a team that will be remembered for many years to come thanks to the fighting spirit and team spirit and also because of the legendary Steph Kerry


- Joined
- Apr 20, 2020
- Messages
- 6,257
- Points
- 738

hello dear friends
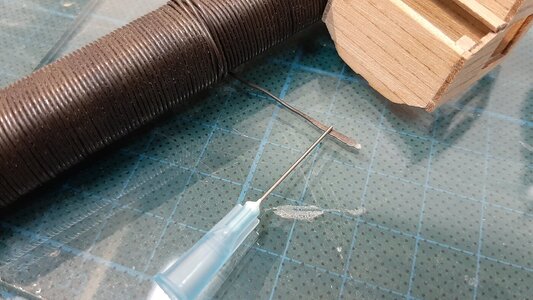
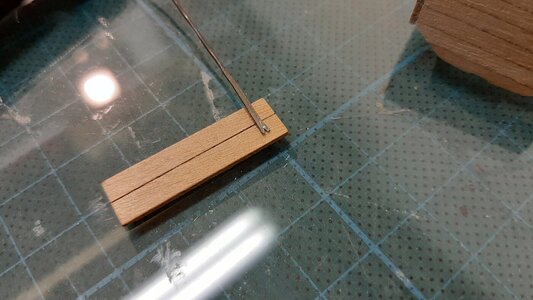
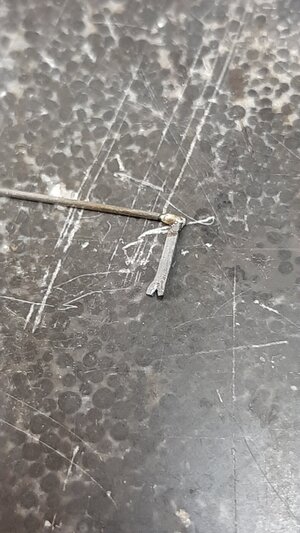
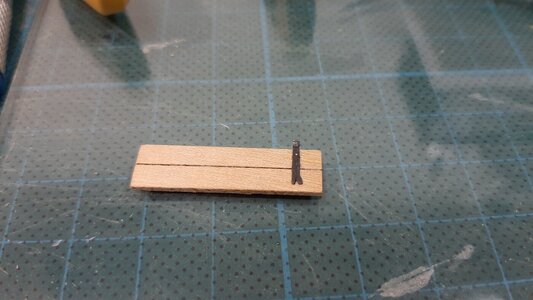
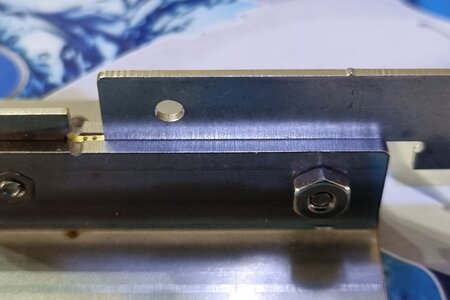
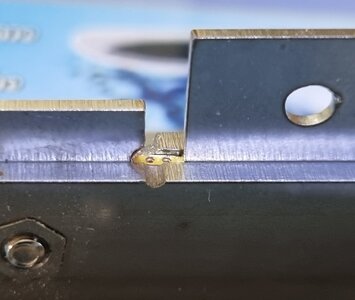
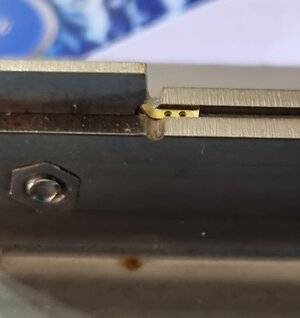
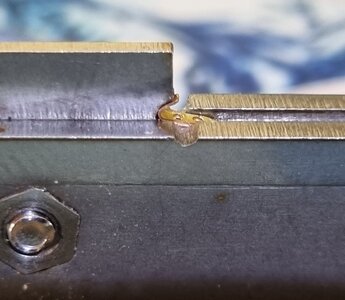
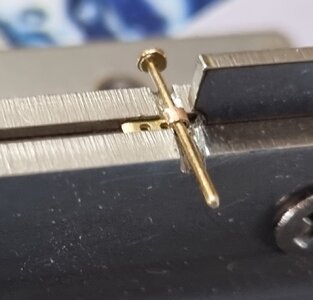
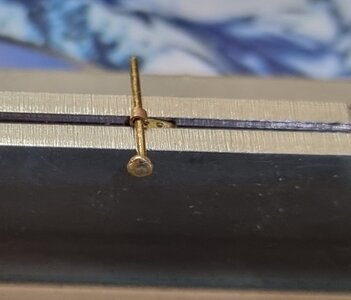
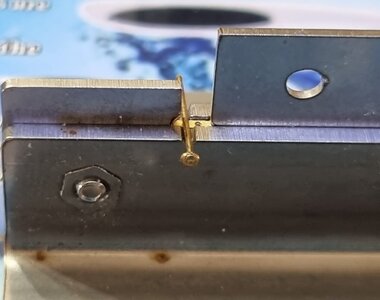
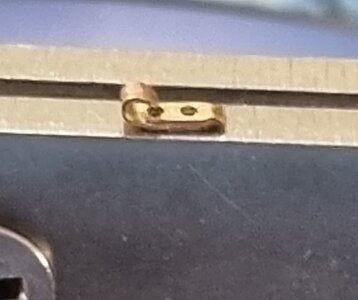
As I was asked by you I sat down today and simulated the process of working with the devices designed to create the circle at the end of the brass board into which the hinges are inserted.
I make pictures of each step in the process as well as a short video.
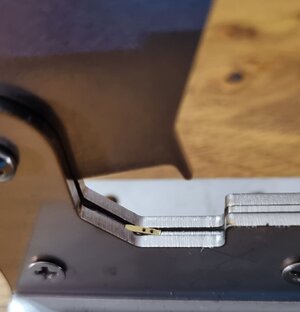 H
H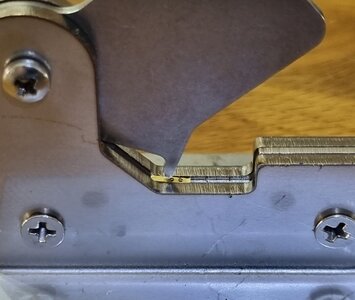

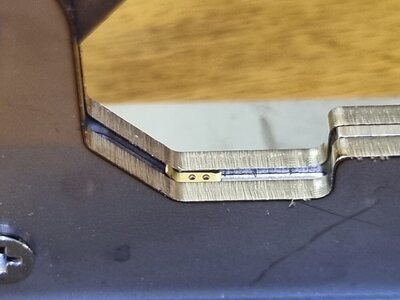

View attachment VID-20220618-WA0014.mp4
I hope this will help in understanding the process in the right way, wish us all a pleasant and enjoyable weekend

As I was asked by you I sat down today and simulated the process of working with the devices designed to create the circle at the end of the brass board into which the hinges are inserted.
I make pictures of each step in the process as well as a short video.
 H
H


View attachment VID-20220618-WA0014.mp4
I hope this will help in understanding the process in the right way, wish us all a pleasant and enjoyable weekend
Ah..., I get it. Great engineering behind this tool. Many thanks for the step-by-step detailed explanations, mon ami.
- Joined
- Apr 20, 2020
- Messages
- 6,257
- Points
- 738

Ah..., I get it. Great engineering behind this tool. Many thanks for the step-by-step detailed explanations, mon ami.
Thanks Shota, smart engineering. They make hinges of doors on the same way. This one for the small ones.
Very ingenious my friend. That is an excellent piece of engineering.
Dear FriendsWow... I would never imagine something like that. Nice !!!!
Daniel
Thank you so much for the compliment, hope it helps everyone who needs it among the members on the site in creating hinges for ships
- Joined
- Sep 3, 2021
- Messages
- 5,199
- Points
- 738

Now I've seen a couple of methods to create working hinges, meaning I'm out of excuses not to go ahead and equip the wheel house and the windlass engine box with opening covers.hello dear friends
As I was asked by you I sat down today and simulated the process of working with the devices designed to create the circle at the end of the brass board into which the hinges are inserted.
I make pictures of each step in the process as well as a short video.
View attachment 314513HView attachment 314512View attachment 314511
View attachment 314503View attachment 314509View attachment 314508View attachment 314510View attachment 314506View attachment 314504View attachment 314505View attachment 314507View attachment 314502
View attachment 314505
View attachment 314514
I hope this will help in understanding the process in the right way, wish us all a pleasant and enjoyable weekend

Very nice job, by the way.
- Joined
- Apr 20, 2020
- Messages
- 6,257
- Points
- 738

thank you very much for the information, my Dear friendHi Shota,
The easiest way to make a working hinge is just use some very small brass tube or seringe and solder it to brass plate or flattened anealed wire. In this way you get the strongest hinges.
View attachment 315189View attachment 315190View attachment 315191View attachment 315192View attachment 315193View attachment 315194
- Joined
- Apr 20, 2020
- Messages
- 6,257
- Points
- 738

good evening dear friends
After some days of not working on the ship and in the midst of waiting for guidance from my dear friend Maarten,
I decided to work On to the rudder.
The kit rudder contains three parts, the fwd and aft part and the heel.
I have done some filing, scraping and sanding to get a proper fit.
Using blackened pva glue I glued the 3 parts and sanded a bit and cleaned of the glue residue.
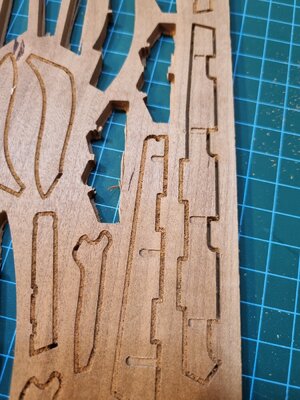
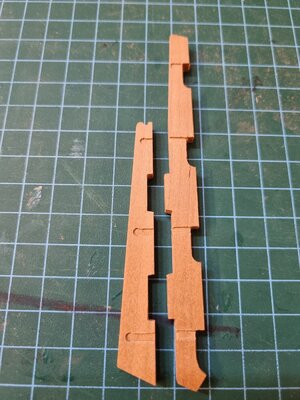
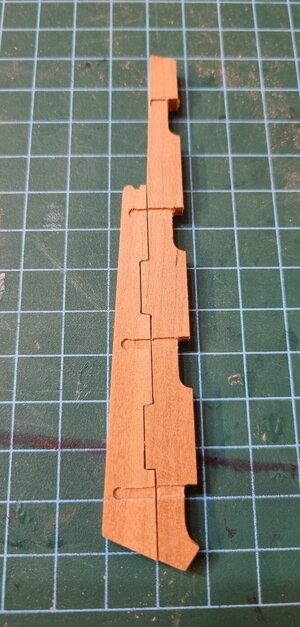
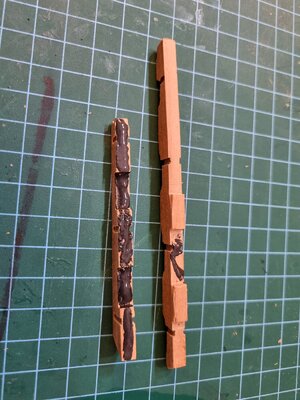
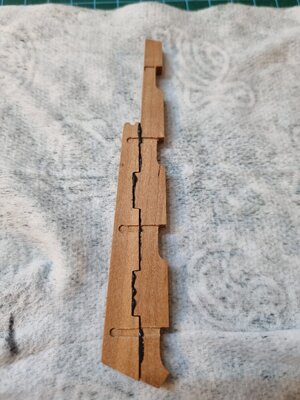
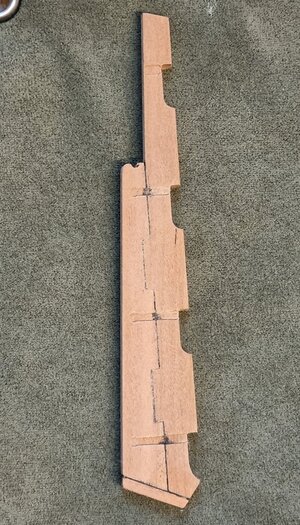
In the coming weekend I will try to finish the rudder and then I will return to the track of the gun powder room through the guidance of dear Maarten.
Good night
After some days of not working on the ship and in the midst of waiting for guidance from my dear friend Maarten,
I decided to work On to the rudder.
The kit rudder contains three parts, the fwd and aft part and the heel.
I have done some filing, scraping and sanding to get a proper fit.
Using blackened pva glue I glued the 3 parts and sanded a bit and cleaned of the glue residue.


In the coming weekend I will try to finish the rudder and then I will return to the track of the gun powder room through the guidance of dear Maarten.
Good night
- Joined
- Apr 20, 2020
- Messages
- 6,257
- Points
- 738

good evening dear friends
It's just fun to go back to the creation sequence of the ship model.
Thanks to guidance from Maarten, I went back to making order in the creation of the lower deck, first I arranged the beams of the deck - width, length and support columns for the deck. I worked on sanding, smoothing and adjusting the beams to the sockets to which they fit.
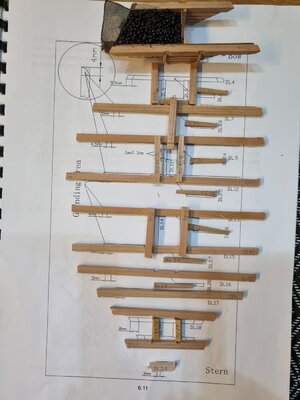

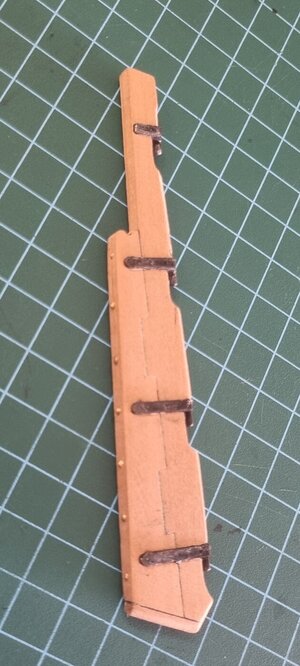
That’s looking a very nice ‘old fashion’ rudder, Shota. With the bolts and the blackened hinges.hello dear friends
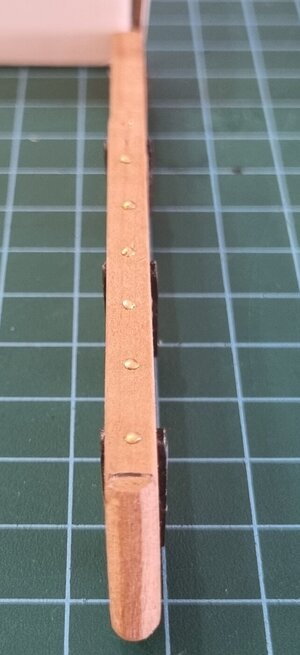
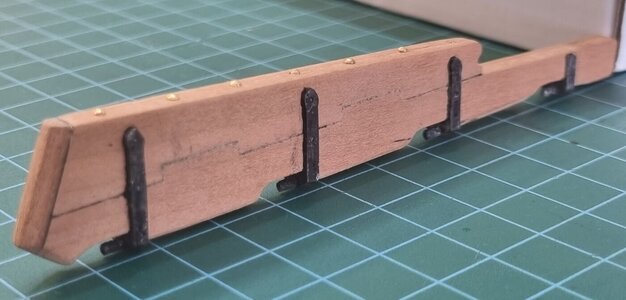
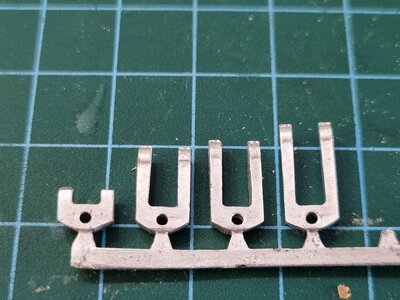
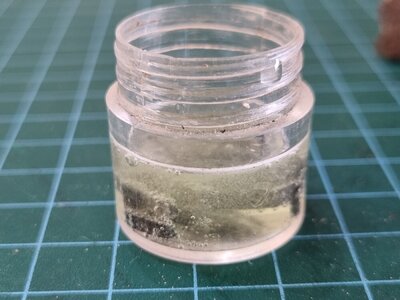
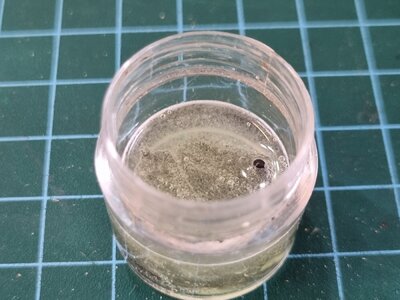
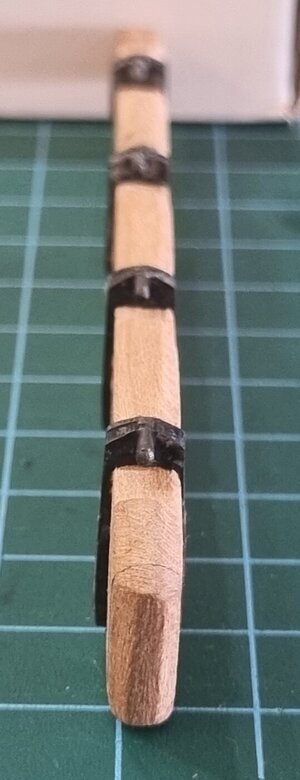
Today I continued to prepare the rudder of the ship, sanded the inside and bottom at 40 degrees and also blackened the hinges and this is the result
Wishing us all a pleasant and enjoyable weekend
View attachment 315456View attachment 315457View attachment 315458View attachment 315459View attachment 315460View attachment 315461
View attachment 315468
Regard, Peter
- Joined
- Apr 20, 2020
- Messages
- 6,257
- Points
- 738

Dear friends, I invite you to join a new topic I have developed in the field of carving, I would love to read your recommendations for promoting the project
A new carving project - a lion figurehead of the ship la Belle Poule
good evening dear friends Today I decided that in order to advance in the development of my carving skills and especially after seeing at a conference in Augsburg and here on the site. After some deliberation, I perused the monographs I had at home, and chose the figurehead of the ship la Belle...
shipsofscale.com
- Joined
- Sep 3, 2021
- Messages
- 5,199
- Points
- 738

Nice work on the rudder, Shotahello dear friends
Today I continued to prepare the rudder of the ship, sanded the inside and bottom at 40 degrees and also blackened the hinges and this is the result
Wishing us all a pleasant and enjoyable weekend
View attachment 315456View attachment 315457View attachment 315458View attachment 315459View attachment 315460View attachment 315461
View attachment 315468


