Very nice result, I hope you have a seat free at your table, then I'll come to the BBQ 
-

Win a Free Custom Engraved Brass Coin!!!
As a way to introduce our brass coins to the community, we will raffle off a free coin during the month of August. Follow link ABOVE for instructions for entering.
-

PRE-ORDER SHIPS IN SCALE TODAY!
The beloved Ships in Scale Magazine is back and charting a new course for 2026!
Discover new skills, new techniques, and new inspirations in every issue.
NOTE THAT OUR FIRST ISSUE WILL BE JAN/FEB 2026
- Home
- Forums
- Ships of Scale Group Builds and Projects
- HMS Alert 1777 1:48 PoF Group Build
- HMS Alert 1777 1:48 Group Build Logs
You are using an out of date browser. It may not display this or other websites correctly.
You should upgrade or use an alternative browser.
You should upgrade or use an alternative browser.
HMS ALERT 1777 cutter POF by shota70 [COMPLETED BUILD]
Shana Tova U'Metukah Shota!
- Joined
- Apr 20, 2020
- Messages
- 6,257
- Points
- 738

you are most welcomeVery nice result, I hope you have a seat free at your table, then I'll come to the BBQ

- Joined
- Sep 3, 2021
- Messages
- 5,199
- Points
- 738

Very nice detailing, Shota!good evening dear friends
Today I dedicated about six hours to the construction process of the oven. First I read the explanation in the booklet attached to the model as well as the documentation that Maarten uploaded. After understanding the construction steps, I started by inserting the 6 rings that are inserted into the sides of the oven. pay attention that one of them is incomplete. This is the upper ring that connects to the inner rack of the pots and is at an angle of 90 degrees.
Later I made the small side doors on both sides as well as the handles and their locking mechanism.
I also created the width slots in the lower grill of the oven.
Once the sides and interior parts were ready I glued them to the back of the oven where I had initially attached the oven chimney.
When the structure was dry, I painted the stove black, this is the first layer, on which the second layer will join to get perfect uniformity.
I try to give a detailed explanation as much as possible and accompanied by many pictures, because experience has taught me that those who come in the construction process will be able to use them.
I wish you all a pleasant weekend and a happy and sweet new year
View attachment 330389View attachment 330390View attachment 330391View attachment 330392View attachment 330393View attachment 330394View attachment 330395View attachment 330396View attachment 330397View attachment 330398View attachment 330399View attachment 330400View attachment 330401View attachment 330402View attachment 330403View attachment 330404View attachment 330405View attachment 330406

- Joined
- Apr 20, 2020
- Messages
- 6,257
- Points
- 738

Shana Tova U'Metukah Shota!
Very nice detailing, Shota!
thank you very much my dear friends for the blessings and Compliments.Happy new year with your family my friend. You did a very good job on the oven.
I wish you continued enjoyment of building ship models and a happy new year
- Joined
- Apr 20, 2020
- Messages
- 6,257
- Points
- 738

good evening dear friends
Today I put the tile floor under the oven on the begging deck. I checked how it looks, and to be honest it doesn't look bad at all. I have not yet glued the oven to the floor In practice, I glued the rectangular container that is adjacent to it under the grill skewer.
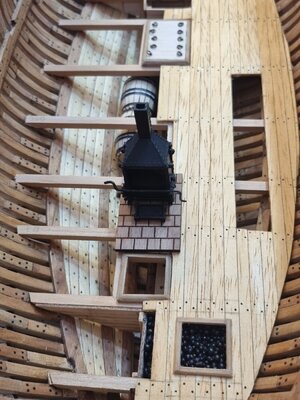
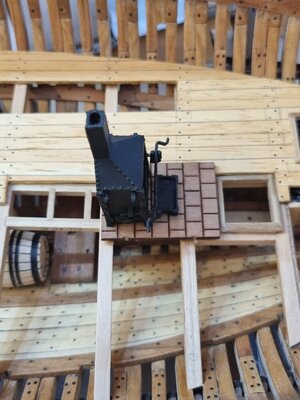
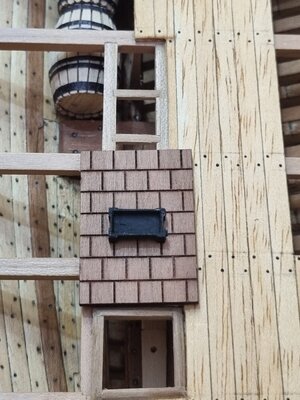
After that I started working on the continuation of the internal planking between the lower and upper deck. This is just the beginning as I said.
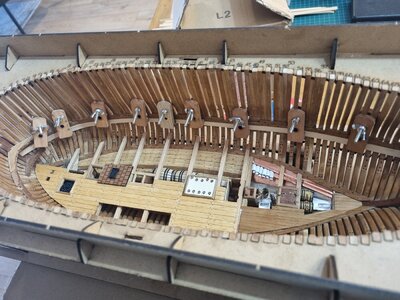
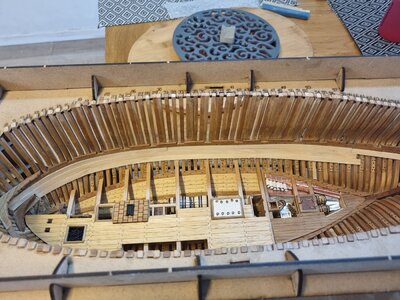
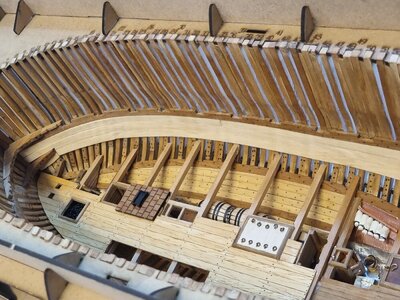
Good night everyone and sweet dreams
Today I put the tile floor under the oven on the begging deck. I checked how it looks, and to be honest it doesn't look bad at all. I have not yet glued the oven to the floor In practice, I glued the rectangular container that is adjacent to it under the grill skewer.


After that I started working on the continuation of the internal planking between the lower and upper deck. This is just the beginning as I said.


Good night everyone and sweet dreams
Too early for bed - still at workGood night everyone and sweet dreams
 ...
...
Last edited:
- Joined
- Apr 20, 2020
- Messages
- 6,257
- Points
- 738

good evening dear friends
Today, after 4 days of work I finished installing the inner panels of the wall (the side of the ship) between the lower and upper deck.
Since I have previously explained the steps of the work, I will let the pictures speak for themselves.
I wish you all a pleasant and enjoyable weekend
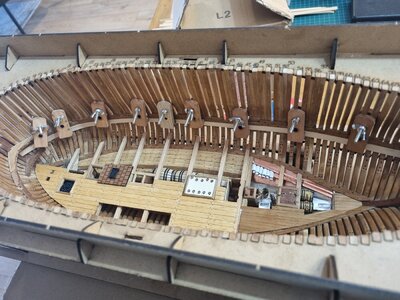
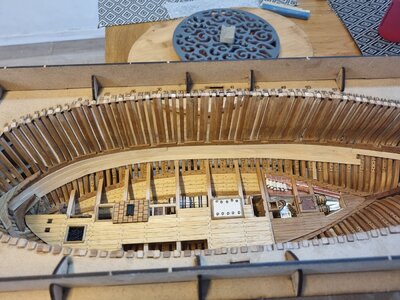
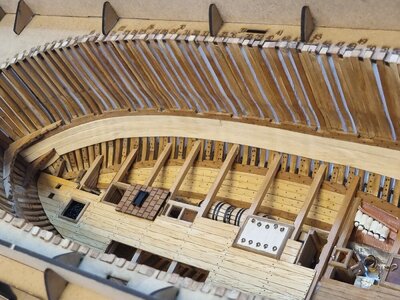
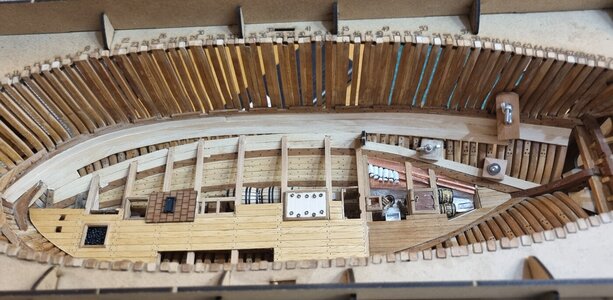
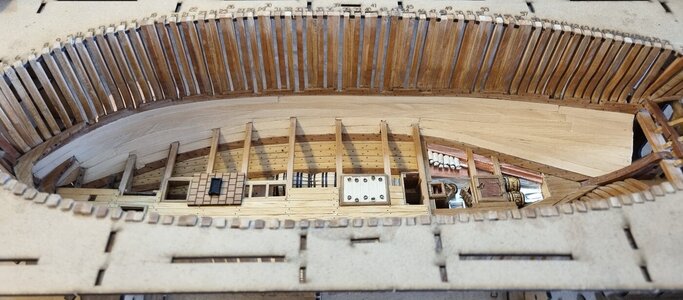
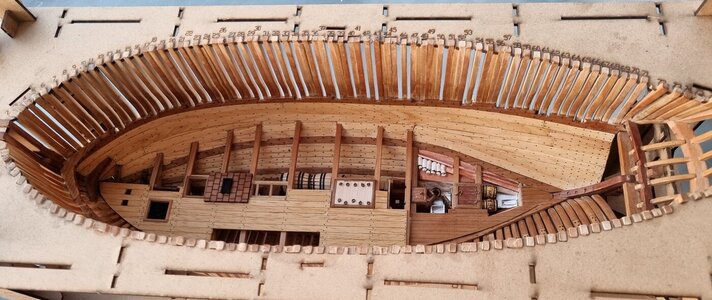
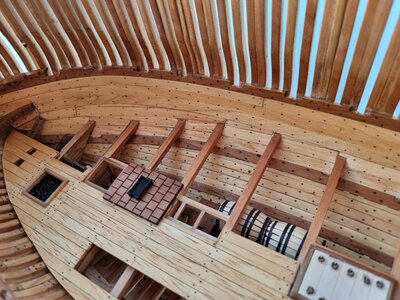
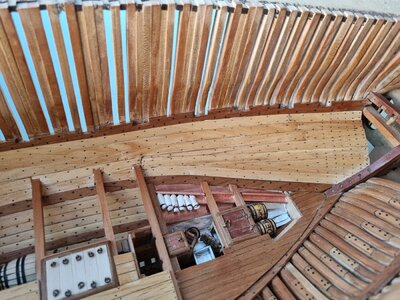
Today, after 4 days of work I finished installing the inner panels of the wall (the side of the ship) between the lower and upper deck.
Since I have previously explained the steps of the work, I will let the pictures speak for themselves.
I wish you all a pleasant and enjoyable weekend


Hello my friend, this looks really good.
- Joined
- Apr 20, 2020
- Messages
- 6,257
- Points
- 738

good evening dear friends
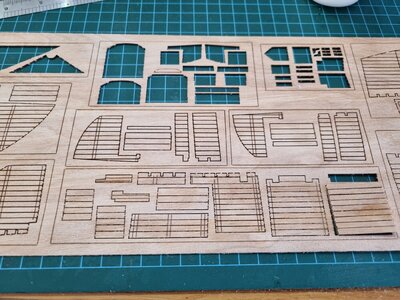
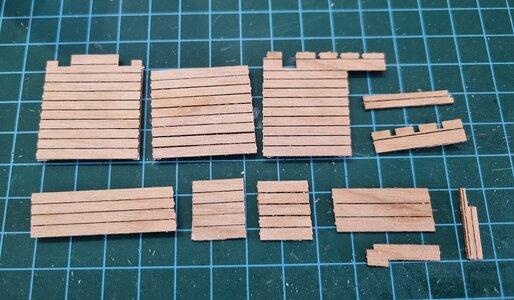
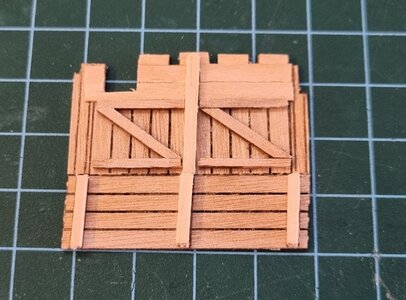
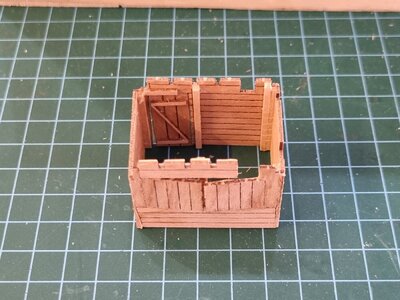
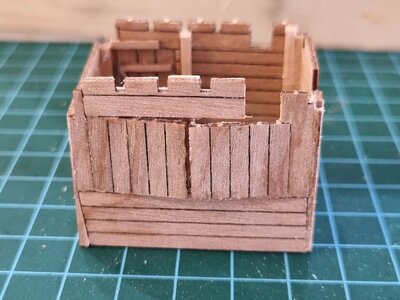
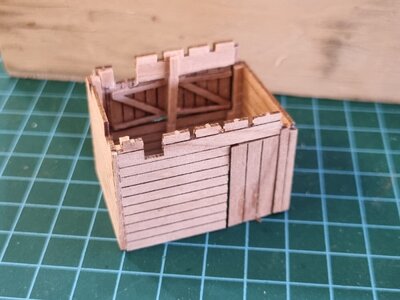
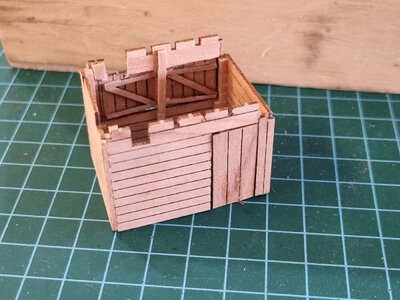
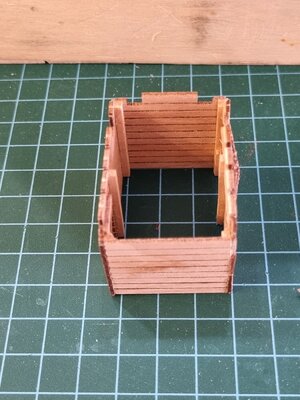
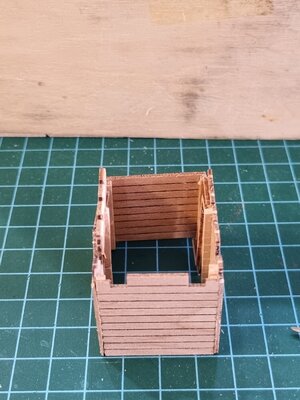
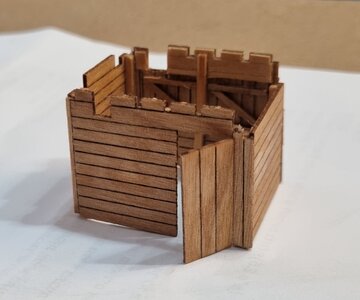
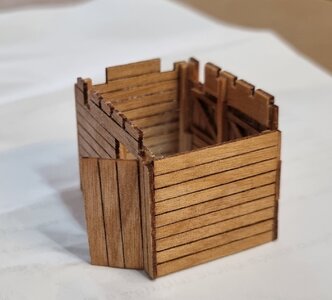
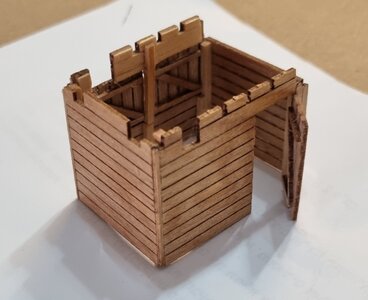
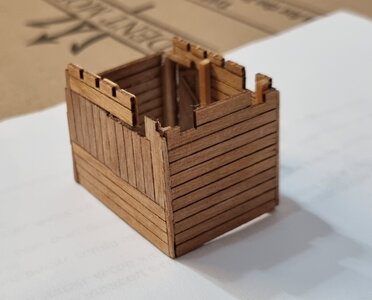
Today I started working on the sail room. I started by removing the pieces from the laser burned pear board pattern. I made each side separately, while the back wall where two adjoining windows are installed required investment and precision. After all the sides were ready I glued them to each other making sure to have 90 degree angles in the corners of the room.
After the whole room was stable, I applied a layer of natural wax/dong and this gave the pear tree a nicer depth and shade.
I still need to prepare and install the door and window hinges, as well as the interior furniture of the room, I will do it with Maarten's documentation.
wish you all a pleasant and enjoyable weekend


- Joined
- Apr 20, 2020
- Messages
- 6,257
- Points
- 738

good evening dear friends
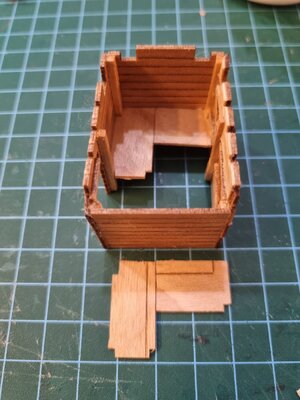
Today I continued working on the sail room. I made the shelves and the support columns for the shelves. Initially I created the two parts that make up the shelf, these parts were connected to each other. After the glue dried I installed the lower shelf as well as the upper one. On the walls of the adhesive room are supports (laterally) on which the shelves were placed. At the same time I also glued the two support columns, so that all the components created a structure of fairly stable shelves. after the. Yes, I applied natural wax dong to the shelves.
In the coming days I will install the hinges, produce fabrics/folded sheets for the sails, and more parts for the sails.
All this means that I have a lot of work waiting for me and it's fun at the same time and that's what's fun.
good night friends
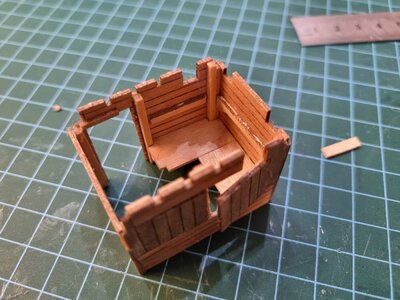
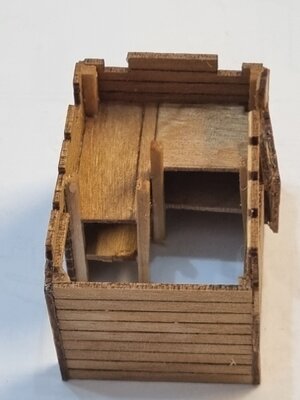
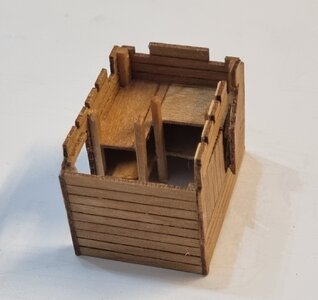
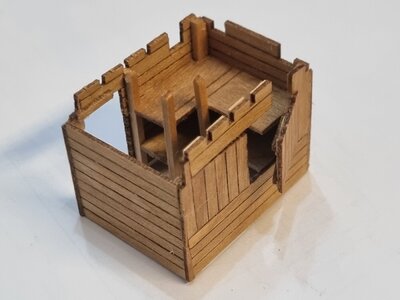
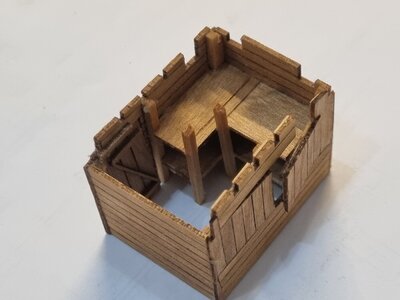
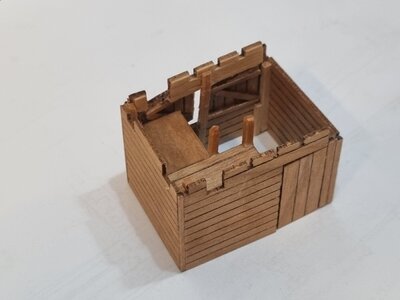


Looks good shota.good evening dear friends
Today I continued working on the sail room. I made the shelves and the support columns for the shelves. Initially I created the two parts that make up the shelf, these parts were connected to each other. After the glue dried I installed the lower shelf as well as the upper one. On the walls of the adhesive room are supports (laterally) on which the shelves were placed. At the same time I also glued the two support columns, so that all the components created a structure of fairly stable shelves. after the. Yes, I applied natural wax dong to the shelves.
In the coming days I will install the hinges, produce fabrics/folded sheets for the sails, and more parts for the sails.
All this means that I have a lot of work waiting for me and it's fun at the same time and that's what's fun.
good night friends
View attachment 332041View attachment 332042View attachment 332043View attachment 332044View attachment 332045View attachment 332046View attachment 332047
Wonderful work Shota, I am very impressed.
- Joined
- Apr 20, 2020
- Messages
- 6,257
- Points
- 738

Looks good shota.
Wonderful work Shota, I am very impressed.
Thank you very much dear friends for the words of encouragement, compliments, likes and smiles. All of this gave me a pleasant feeling along with the pleasure of Creative work with wood.Good to see the development of skills and obvious fun you have in building the model
- Joined
- Apr 20, 2020
- Messages
- 6,257
- Points
- 738

Dear Shota. Your oven and floor and the inner planking looks great. I anxiously await to see how the sail room is going to installed and finished.
thank you very much my dear friend HeinrichGood going Shota. I keep following you!
- Joined
- Sep 3, 2021
- Messages
- 5,199
- Points
- 738

Very nice!good evening dear friends
Today I continued working on the sail room. I made the shelves and the support columns for the shelves. Initially I created the two parts that make up the shelf, these parts were connected to each other. After the glue dried I installed the lower shelf as well as the upper one. On the walls of the adhesive room are supports (laterally) on which the shelves were placed. At the same time I also glued the two support columns, so that all the components created a structure of fairly stable shelves. after the. Yes, I applied natural wax dong to the shelves.
In the coming days I will install the hinges, produce fabrics/folded sheets for the sails, and more parts for the sails.
All this means that I have a lot of work waiting for me and it's fun at the same time and that's what's fun.
good night friends
View attachment 332041View attachment 332042View attachment 332043View attachment 332044View attachment 332045View attachment 332046View attachment 332047
Now waiting for some hinges and other hardware to appear...


