HMS ALERT 1777 cutter POF by shota70 [COMPLETED BUILD]

Your pictures from some distance do your trennels justice. Very nice indeed.
Looking amazing! But can’t help thinking of the word Bling
Shota my friend, this is fantastic work. You did it great.
I agree with Tobias, your skills are definitely improved in a short time. Great work
What a impressive amount of work, Shota. It must be a relief to have this done.
Regards, Peter
thank you very much my dear friend's for the compliment, kind words and the support:)
 
good morning my friend's
yesterday evening I found
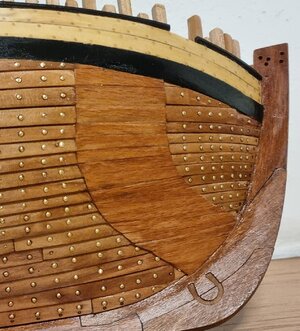
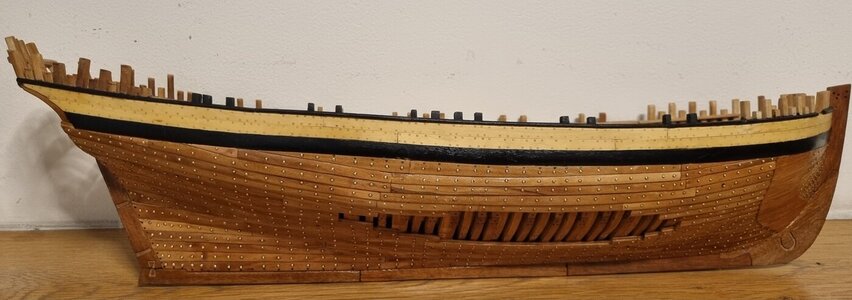
a spare hour to sheet and cleaned the planking of wood residue and glue and then applied wood oil and this is what came out.
20230225_213754.jpg20230225_213854.jpg20230225_213926.jpg
In general, I'm quite satisfied, but I have two points for improvement as part of learning lessons for the future:
the proportion of the nail head created is slightly out of scale in reality, the only consolation is that it adds presence and beauty.
the second point that is different from the drawing, I decided to raise the installation point to the center of the board, originally it should be in the lower quarter of the board (strengthens the joining point between the staggered boards).

good day everybody
 
Didn't you just miss a couple of nails?

View attachment 359472
Only Johan…..he has that eye for those little details we miss. That’s why it is compulsory for him to view my builds…. ;)
hello dear friends
I am happy to announce that today I finished installing the screws/nails of the planking in the ship.
As I mentioned the last few times, there are many hundreds of nails and according to "Murphy's Laws" I ran out of nails right towards the end, so my good friend stuglo gave me several dozen and with his help I was able to finish the Sisyphean work. After that, with the help of the special soldering iron head that I made about two months ago, I created round marks for round pegs/nails at the edges of the boards as you will see in the picture of the stern area.
after that I started installing the wooden panels for the anchor covering on the planking in the bow area.
I wish you all a pleasant and enjoyable weekend :)

View attachment 359388View attachment 359389View attachment 359390View attachment 359391View attachment 359392View attachment 359393View attachment 359394
Good morning Shota. Brilliant!!! Fantastic work…..I assume you must be “all nailed out”…500+ nails. Cheers Grant
 
Only Johan…..he has that eye for those little details we miss. That’s why it is compulsory for him to view my builds…. ;)

Good morning Shota. Brilliant!!! Fantastic work…..I assume you must be “all nailed out”…500+ nails. Cheers Grant
Wow what a great job, beautiful
thank you very much my dear friend's for
the kind words and compliments,
your opinion is appreciated :)
 
good evening dear friends
These days I was very busy at work and in my personal life, and only today I was able to spare a few hours to work on the ship.
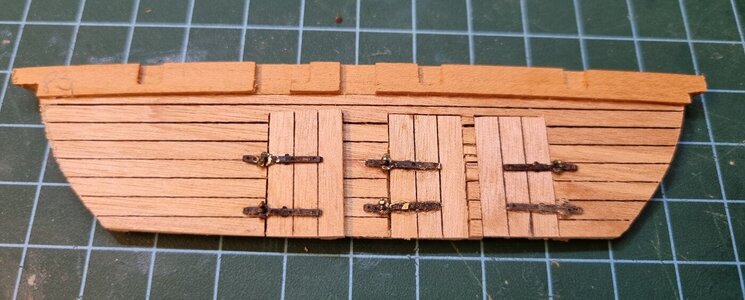
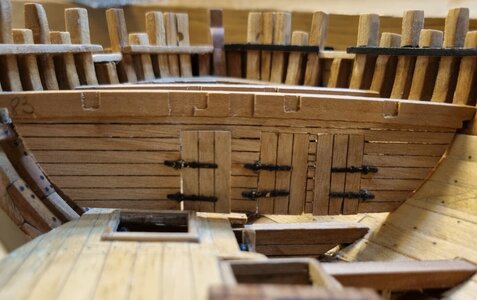
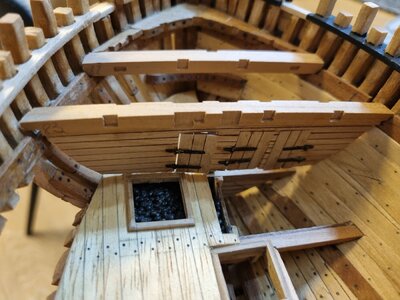
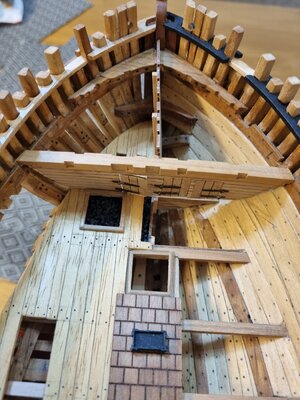
I Back to work on the deck. I am contn on the spaces in front the ship. 3 rooms from PS to SB the boatswain store, stewards room and again a store.
It is important to match the walls and partitions to the beams of the deck above and to the bow.
now I am in the middle of a process and have not yet done the gluing.

good night my friends
20230304_213904.jpg20230304_213618.jpg20230304_213645.jpg20230304_220718.jpg
 
That bulkhead and partition wall are nasty bits of modeling. It's a though job getting all the bits and pieces joined nicely and tightly togheter, all the while trying to maintain all interfaces. Personally I might be tempted to try and have the port door fitting its coaming a little bit better, but the macro pictures might be rather misleading in this case.
Step by step, Shota, she's definitely becoming a nicely crafted, one of a kind Alert.
It is really coming along nicely , beautiful lines ,precision cuts you are doing a great job
thank you very much my dear friend's for kind words and compliments, I appreciate it :)
 
good morning dear friends
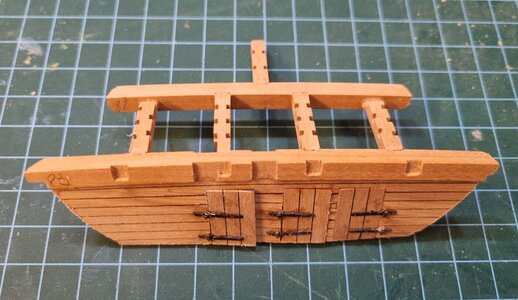
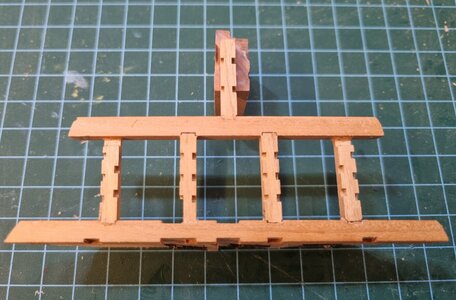
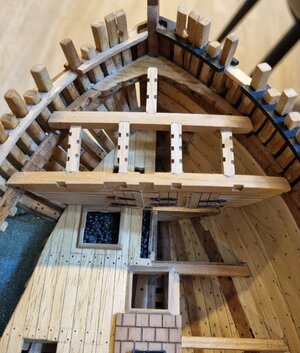
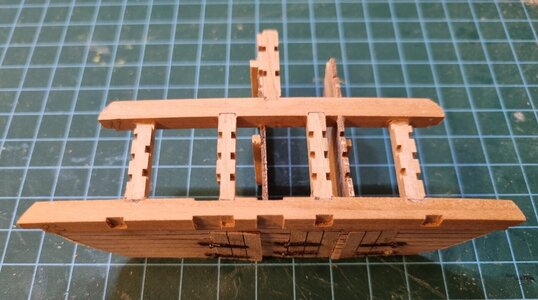
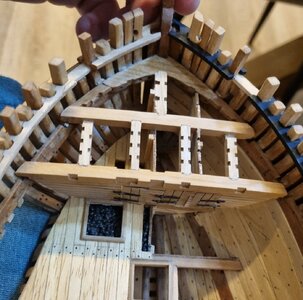
Yesterday evening I continued working on the adjustment of the bulkheads on the lower deck that connecting to the bow of the ship and connect to the two front beams.
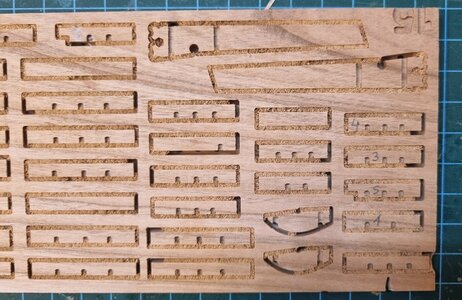
This time I applied a different work approach, I made the coordination and adjustments of the partitions, the width and length beams outside the model (dry adjustment) and every part that was added to the assembly, I tested them inside the model to make sure that an optimal balance and adjustment is optimal.
I started by removing the longitudinal beams of the bow deck (El 1-5) and from there I continue with slow and measured work until I reached a balance and correct fit to the hull of the ship.
I still have to adjust the thin width beams (you will surely help me remember the professional name of the parts). What makes me laugh is that in some of the photos I took, I didn't ensure balance in the shooting angle :D:eek:, but don't worry that the parts themselves are balanced at the required angles
We have Purim today, so I wish everyone a happy and joyful holiday:cool::D20230306_205654.jpg20230306_223323.jpg20230306_223451.jpg20230306_231052.jpg20230307_000325.jpg20230307_000422.jpg
 
Back
Top