You owned this Shota. Brilliant.good evening dear friends
today I continued working on the Work on the chain wale. First I modified the dead eyes by changing the rope holes. next I connected the metal rings I clamp around them squeezing the ends gently to lock them around the dead eye. the next step is to Followed by fitting the 3 parts to chain wale. It should be noted that I connected the lower part of the chain plates (in the form of a round disk with a hole) to the ship's hull with a blackened nail.
good night dear friends
View attachment 388948View attachment 388949View attachment 388950View attachment 388951View attachment 388952View attachment 388953View attachment 388954
-

Win a Free Custom Engraved Brass Coin!!!
As a way to introduce our brass coins to the community, we will raffle off a free coin during the month of August. Follow link ABOVE for instructions for entering.
-

PRE-ORDER SHIPS IN SCALE TODAY!
The beloved Ships in Scale Magazine is back and charting a new course for 2026!
Discover new skills, new techniques, and new inspirations in every issue.
NOTE THAT OUR FIRST ISSUE WILL BE JAN/FEB 2026
- Home
- Forums
- Ships of Scale Group Builds and Projects
- HMS Alert 1777 1:48 PoF Group Build
- HMS Alert 1777 1:48 Group Build Logs
You are using an out of date browser. It may not display this or other websites correctly.
You should upgrade or use an alternative browser.
You should upgrade or use an alternative browser.
HMS ALERT 1777 cutter POF by shota70 [COMPLETED BUILD]
- Joined
- Apr 20, 2020
- Messages
- 6,242
- Points
- 738

good evening dear friends
First I would like to thank you all for the compliments, words of support and likes. It's nice to know that you like my work, the comments help me to improve my abilities and to achieve better quality results.
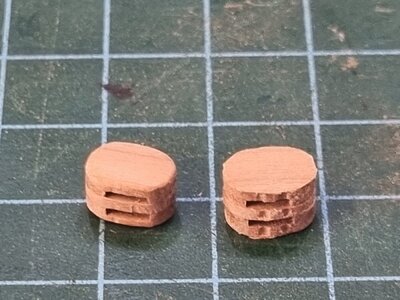
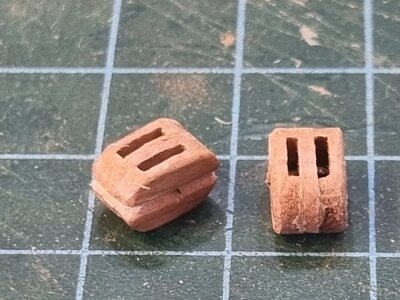
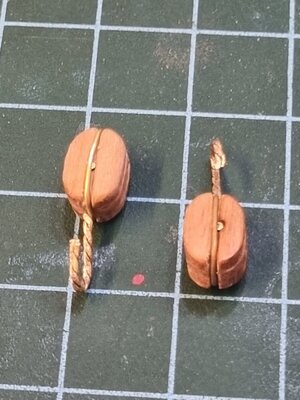
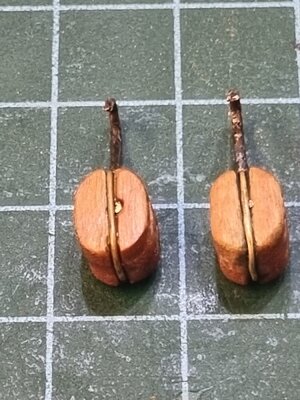
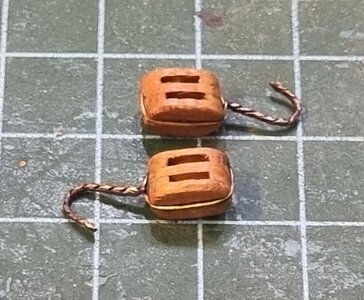
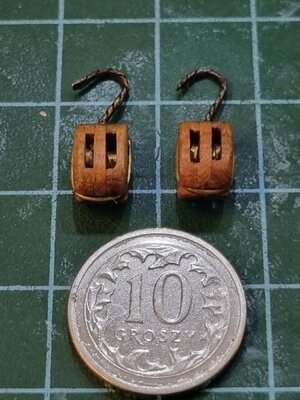
Today I dedicated several hours to create the Two blocks for the cat heads that assembled each from three milled cherry parts and glued with PVA.
Unfortunately, I did not find an explanation in the model's booklet how to build and where the 3 pieces of wood are for each block, nor in other blogs I didn't find a detailed explanation and photos documenting the construction process of these blocks.
Therefore, dedicate a few lines today to documenting each step so that the next in line can benefit from it:
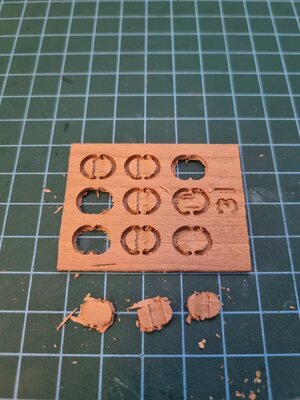
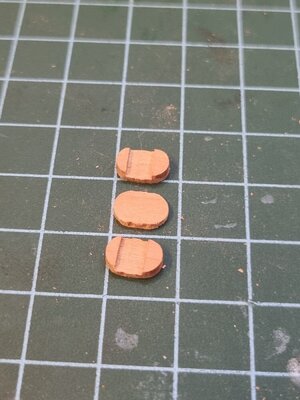
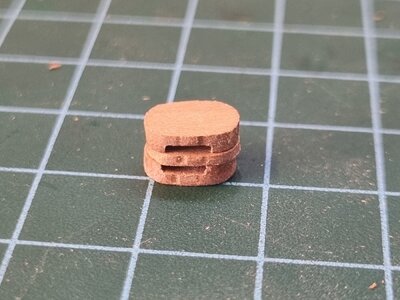
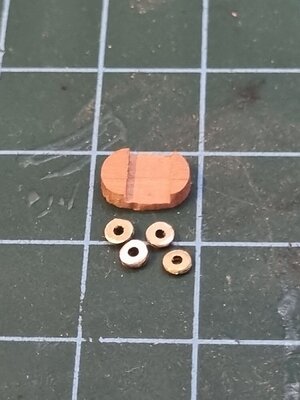
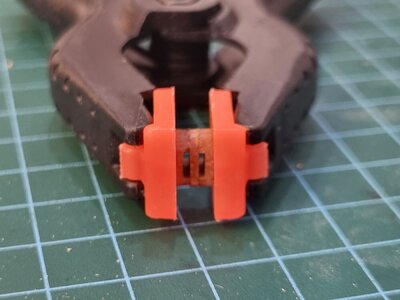
First step: the parts for the blocks are located in the small board with the number 31. I took them out, sanded them to get clean lines. Note that the straight board fits between two boards that have a wide groove, also the rounded quarter smaller by tenths of a millimeter than the one corresponding to it should be glued to the same small quarter on the other side. When everything is ready and polished, stick with pva.
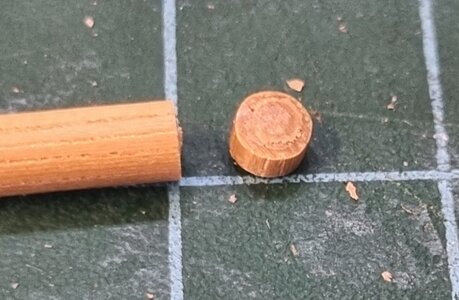
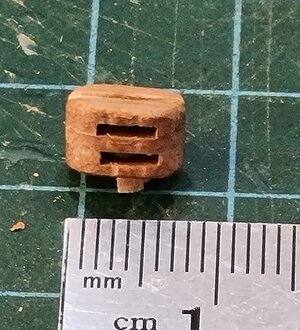
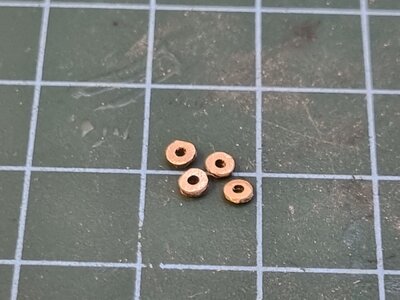
Second step preparation of the round disks located inside the center of the block. At first I tried to make them out of wood but I didn't succeed because it broke very quickly. So I made them from a 2.8 mm diameter brass tube that already came with a 1mm inner hole.
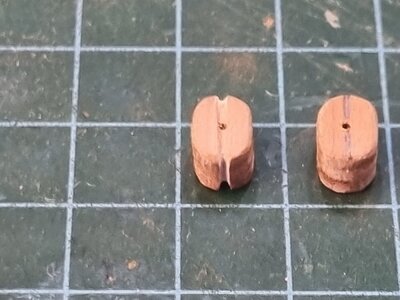
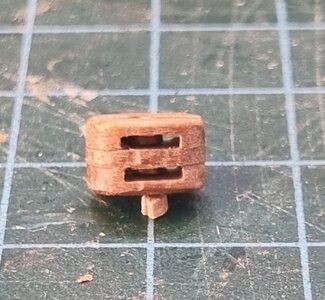
Third step: After the block dried, I created a hole in the center where the hinge will be inserted into the round disks and I also gently sanded the block to create rounded/slanted lines. then I installed the rounded discs with their pivot.
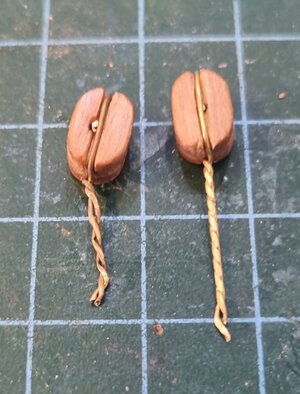
Fourth step: Around the block I made a brass hook from 0.5 mm brass.
Unfortunately, I have not yet learned the possibilities of silver soldering even though I have already purchased the necessary materials. Therefore I make the following method, I shaped hat wraps the block with the brass wire and then I left about a centimeter and a quarter of wire that I wrapped in the form of a braid. At first I did not achieve a satisfactory result, but in the second and third round I reached a situation where the wires integrated into each other also by pressing pliers and heating the wires with a soldering iron at 450 degrees Celsius and finally I wrapped them in a light layer of tin and bent them into the shape of a hook. Of course, I made fine sanding with nails as well as browning the hook.
Final step: cleanings and smoothing of the surface of the blocks and hooks and application of teak oil.
I am quite satisfied that the investment and patience I gave to this "small" part resulted in a nice result for me. Because one of the challenges I face is restraining the production to achieve progress in the process, which sometimes brings results that are not satisfactory to me.
wish you all a pleasant week
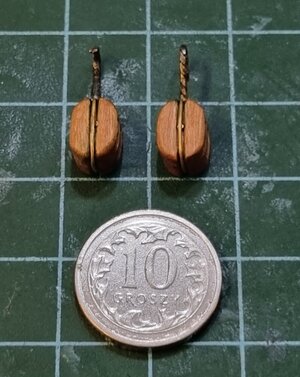


This is absolutely fantastic Shota! Bravo!good evening dear friends
First I would like to thank you all for the compliments, words of support and likes. It's nice to know that you like my work, the comments help me to improve my abilities and to achieve better quality results.
Today I dedicated several hours to create the Two blocks for the cat heads that assembled each from three milled cherry parts and glued with PVA.
Unfortunately, I did not find an explanation in the model's booklet how to build and where the 3 pieces of wood are for each block, nor in other blogs I didn't find a detailed explanation and photos documenting the construction process of these blocks.
Therefore, dedicate a few lines today to documenting each step so that the next in line can benefit from it:
First step: the parts for the blocks are located in the small board with the number 31. I took them out, sanded them to get clean lines. Note that the straight board fits between two boards that have a wide groove, also the rounded quarter smaller by tenths of a millimeter than the one corresponding to it should be glued to the same small quarter on the other side. When everything is ready and polished, stick with pva.
Second step preparation of the round disks located inside the center of the block. At first I tried to make them out of wood but I didn't succeed because it broke very quickly. So I made them from a 2.8 mm diameter brass tube that already came with a 1mm inner hole.
Third step: After the block dried, I created a hole in the center where the hinge will be inserted into the round disks and I also gently sanded the block to create rounded/slanted lines. then I installed the rounded discs with their pivot.
Fourth step: Around the block I made a brass hook from 0.5 mm brass.
Unfortunately, I have not yet learned the possibilities of silver soldering even though I have already purchased the necessary materials. Therefore I make the following method, I shaped hat wraps the block with the brass wire and then I left about a centimeter and a quarter of wire that I wrapped in the form of a braid. At first I did not achieve a satisfactory result, but in the second and third round I reached a situation where the wires integrated into each other also by pressing pliers and heating the wires with a soldering iron at 450 degrees Celsius and finally I wrapped them in a light layer of tin and bent them into the shape of a hook. Of course, I made fine sanding with nails as well as browning the hook.
Final step: cleanings and smoothing of the surface of the blocks and hooks and application of teak oil.
I am quite satisfied that the investment and patience I gave to this "small" part resulted in a nice result for me. Because one of the challenges I face is restraining the production to achieve progress in the process, which sometimes brings results that are not satisfactory to me.
wish you all a pleasant week
View attachment 389156View attachment 389158View attachment 389159View attachment 389160View attachment 389163View attachment 389164View attachment 389165View attachment 389166View attachment 389167View attachment 389168View attachment 389169View attachment 389170View attachment 389171View attachment 389172View attachment 389173View attachment 389174View attachment 389175View attachment 389176View attachment 389162
View attachment 389177
- Joined
- Apr 20, 2020
- Messages
- 6,242
- Points
- 738

thank you very much my dear friend, it's my pleasureThis is absolutely fantastic Shota! Bravo!
Wonderful Shota! Congratulations on making such fine blocks from the (very) rough-looking kit parts...
Good morning Shota. Man those are tiny and what a wonderful job you have done making them. Cheers Grantgood evening dear friends
First I would like to thank you all for the compliments, words of support and likes. It's nice to know that you like my work, the comments help me to improve my abilities and to achieve better quality results.
Today I dedicated several hours to create the Two blocks for the cat heads that assembled each from three milled cherry parts and glued with PVA.
Unfortunately, I did not find an explanation in the model's booklet how to build and where the 3 pieces of wood are for each block, nor in other blogs I didn't find a detailed explanation and photos documenting the construction process of these blocks.
Therefore, dedicate a few lines today to documenting each step so that the next in line can benefit from it:
First step: the parts for the blocks are located in the small board with the number 31. I took them out, sanded them to get clean lines. Note that the straight board fits between two boards that have a wide groove, also the rounded quarter smaller by tenths of a millimeter than the one corresponding to it should be glued to the same small quarter on the other side. When everything is ready and polished, stick with pva.
Second step preparation of the round disks located inside the center of the block. At first I tried to make them out of wood but I didn't succeed because it broke very quickly. So I made them from a 2.8 mm diameter brass tube that already came with a 1mm inner hole.
Third step: After the block dried, I created a hole in the center where the hinge will be inserted into the round disks and I also gently sanded the block to create rounded/slanted lines. then I installed the rounded discs with their pivot.
Fourth step: Around the block I made a brass hook from 0.5 mm brass.
Unfortunately, I have not yet learned the possibilities of silver soldering even though I have already purchased the necessary materials. Therefore I make the following method, I shaped hat wraps the block with the brass wire and then I left about a centimeter and a quarter of wire that I wrapped in the form of a braid. At first I did not achieve a satisfactory result, but in the second and third round I reached a situation where the wires integrated into each other also by pressing pliers and heating the wires with a soldering iron at 450 degrees Celsius and finally I wrapped them in a light layer of tin and bent them into the shape of a hook. Of course, I made fine sanding with nails as well as browning the hook.
Final step: cleanings and smoothing of the surface of the blocks and hooks and application of teak oil.
I am quite satisfied that the investment and patience I gave to this "small" part resulted in a nice result for me. Because one of the challenges I face is restraining the production to achieve progress in the process, which sometimes brings results that are not satisfactory to me.
wish you all a pleasant week
View attachment 389156View attachment 389158View attachment 389159View attachment 389160View attachment 389163View attachment 389164View attachment 389165View attachment 389166View attachment 389167View attachment 389168View attachment 389169View attachment 389170View attachment 389171View attachment 389172View attachment 389173View attachment 389174View attachment 389175View attachment 389176View attachment 389162
View attachment 389177
- Joined
- Apr 20, 2020
- Messages
- 6,242
- Points
- 738

Good morning Shota. Man those are tiny and what a wonderful job you have done making them. Cheers Grant
Very very good results with those blocks, my friend! I do not know how you did that.
thanks my dear friend'sWonderful Shota! Congratulations on making such fine blocks from the (very) rough-looking kit parts...
- Joined
- Jan 26, 2017
- Messages
- 1,338
- Points
- 493

Dear Uwe and Shota,so much cannonballs for this small ship - I do not know how many shots they made during the action against the Le Coureur.....
One question, because I can not recognize this detail - on some it is visible on some not - What we can see here?
View attachment 388685
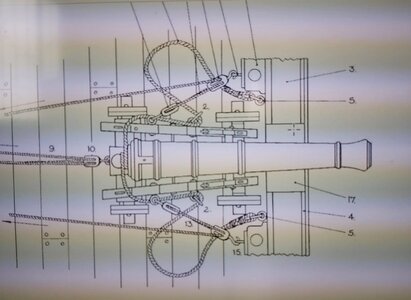
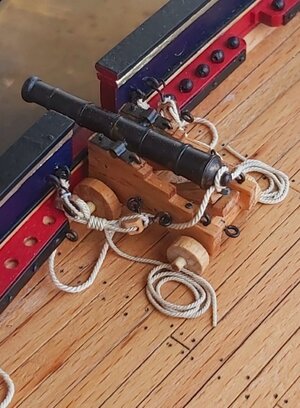
In response to your previous discussion. The illustration below is from the book Anatomy of the ship Alert. Obviously these eyebolts are for attaching the gun tackles. But I'm not sure if it's correct. In my own Alert build, I tied the tackles to the eyebolts at bulwark.
Last edited:
- Joined
- Apr 20, 2020
- Messages
- 6,242
- Points
- 738

thanks my friend for the explanation, I will do it in your wayDear Uwe and Shota,
In response to your previous discussion. The illustration below is from the book Anatomy of the ship Alert. Obviously these eyebolts are for attaching the gun tackles. But I'm not sure if it's correct. In my own Alert build, I tied the tackles to the eyebolts at bulwark.
View attachment 389895
View attachment 389896
- Joined
- Jan 26, 2017
- Messages
- 1,338
- Points
- 493

I attached the tackles to the eyebolts on the bulwark because i didn't think the ball racks would be strong enough for the job.thanks my friend for the explanation, I will do it in your way
By the way, You did a very good job on the blocks Shota.
- Joined
- Apr 20, 2020
- Messages
- 6,242
- Points
- 738

Hello dear friends
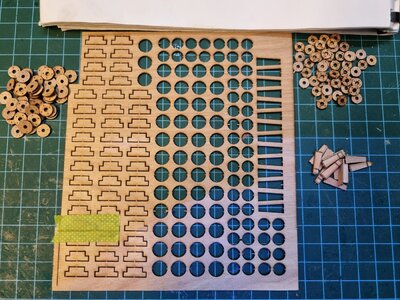
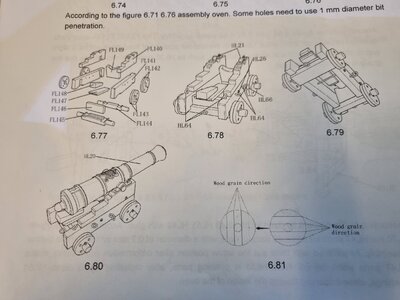
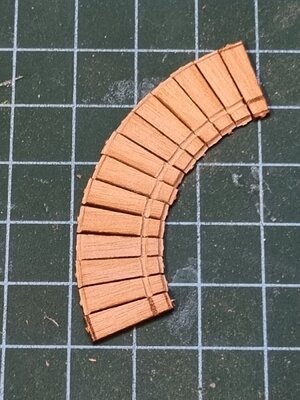
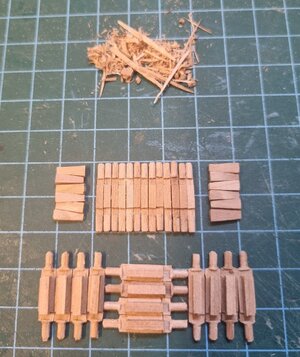
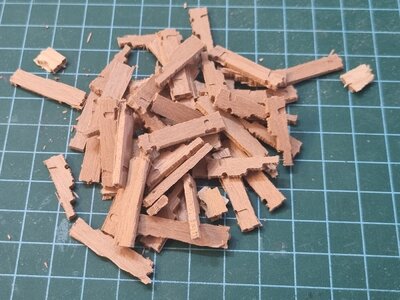
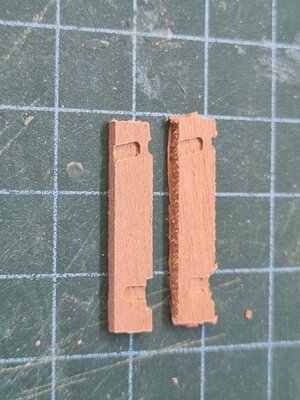
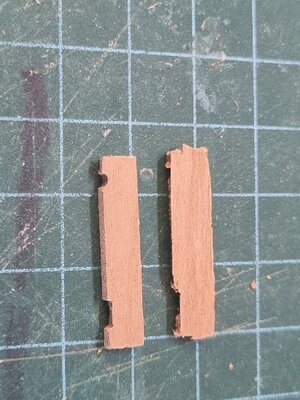
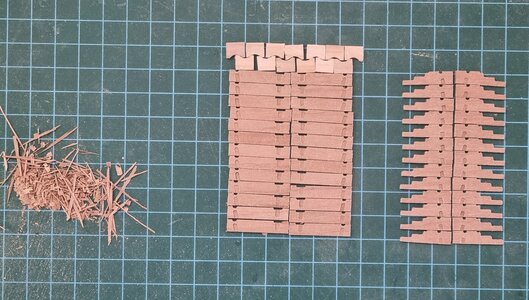
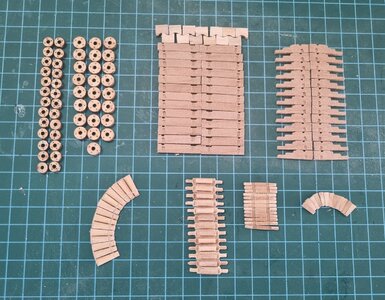
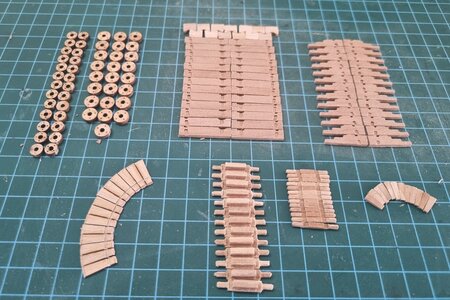
In the Last week I started working on the creation of the cannon carts. Most of the work I have done so far has focused on removing the various parts from the of the three panels that make up the cart (10 wooden parts), and a lot of delicate manual sanding work.
It was monotonous and Sisyphus work, but important because it will give the carts the right finish and beauty.
I will try to be as detailed as possible in the stages of the work so that the next modelers will help with convenient explanations and detailed pictures as much as possible.
After preparing the wood parts in the coming week I will focus on the various metal parts and blackening them.
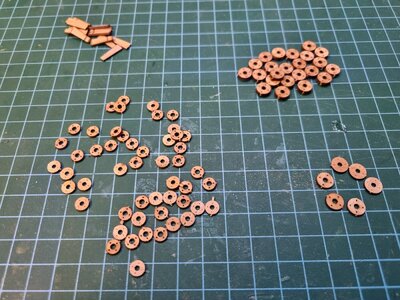
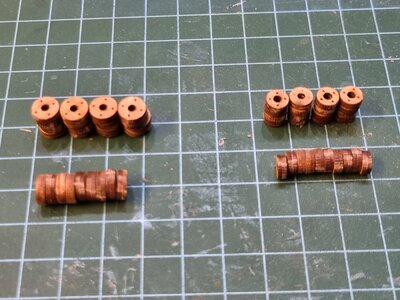
meantime, I am attaching photos of the work,
wishing us all a pleasant and enjoyable weekend


Those CNC parts clean up nicely, you've got your work cut out for you now Ha! Pun intended Shota.
Evrything well prepared - it is the beginning of mass production.
With this number of guns a template for the fixing of the wooden parts is maybe helpful.....
With this number of guns a template for the fixing of the wooden parts is maybe helpful.....
- Joined
- Apr 20, 2020
- Messages
- 6,242
- Points
- 738

you are right, I am intending to create a jig for thetEvrything well prepared - it is the beginning of mass production.
With this number of guns a template for the fixing of the wooden parts is maybe helpful.....
I have caught up with your build log again, must have missed a notification. You have made very good progress in the meantime and added so many nice details  .
.
 .
.Hello Shota, you did a fine job on those blocks. Your patience and attention to detail will pay off doing those guns.


