Hms Alert by Maarten [COMPLETED BUILD]

Excellent handicraft as always.
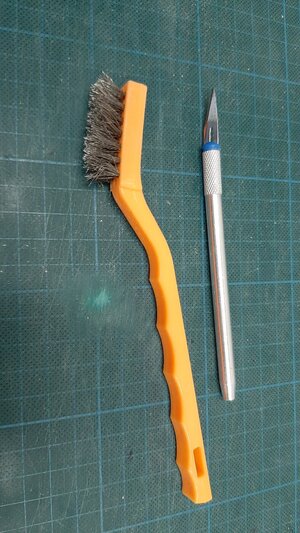
Fiercely, was the first word that came to my mind when I read the words "steel brush". When I sanded the inner planks in my Coureur the surface became far to "polished" for my liking. I assume the steel brush treatment is too avoid such a glossy surface? I would have thought a steel brush would bring it to the opposite extreme though.
Sensei, please tell me more about this treatment. I guess it cannot be an ordinary steel brush?
Thx gents.

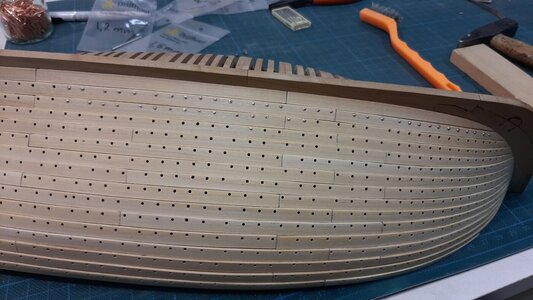
The steel brush is a small toothbrush size soft steel brush, also have this in a brass version.
20210216_091245.jpg

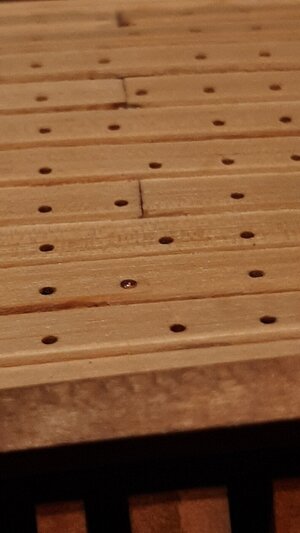
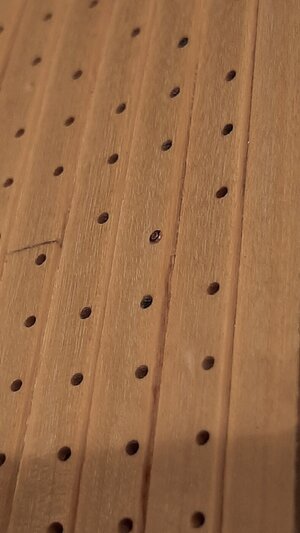
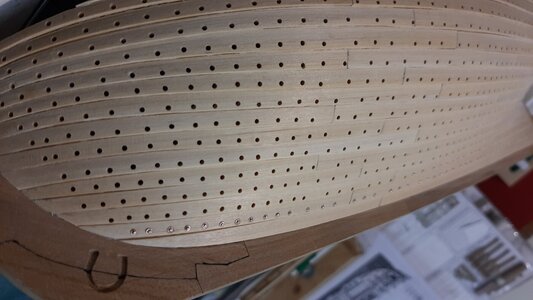
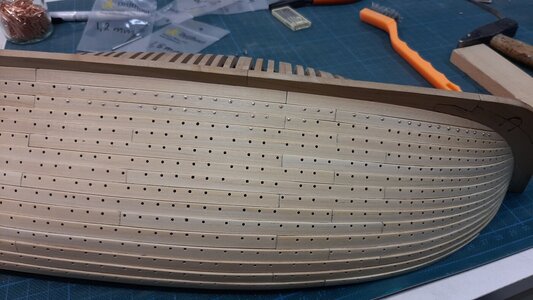
Used this tom remove the wood remnants of the drilling. The wood surface gets a nice not glossy appearence.
20210214_231030.jpg20210214_230955.jpg
 
Last edited:
Hallo my friend - very good work and progress

and so mayn questions, especially because I am also now starting the excercise and trials with the nailing of the clinker planking of my Le Coureur (I will show in short time my problem with the nails and the burr(s) in my building log of the Le Coureur.

But first of all some questions related to your work:

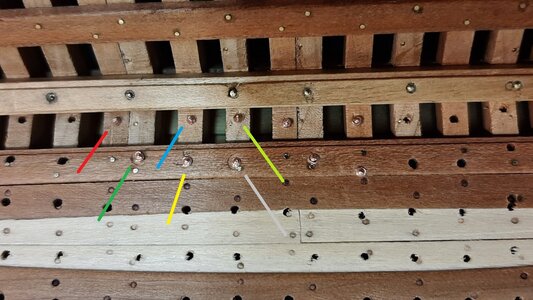
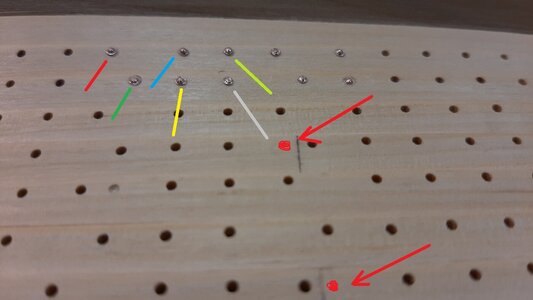
1) I took your photos and mirrored one (the first one) to get the correct information
20210215_212324.jpg

20210215_212254.jpg

I marked the bolts with different colors so we can see the same bolt going through the outside planking, through the frame ans also the inside planking.
The drilled hole has the same diameter like the wire, or?
How you fix it? do you use glue? If it is not fixed, with some preasure from one side, latest when you use the burr, the wire will be pressed and slip through the hole, or?
Which diameter has the hole and / or wire?

Your heads are looking very good - I am until now not able to get such good result on my heads - therefore this question:
You wrote: Cut it of and shape first with a 2,1 mm cup burr followed by a 1,2 mm.

You are using two different sizes of burr, which is making maybe the difference to my disaster.......
Can you maybe show this single steps in a sequence of photos? and maybe you also describe axactly the type of burr you are using?

Sorry for all these questions, but I am stuck with my bolting works in moment.......

And a last question - once more looking at the second photo:
I marked two dotts with red colour on the other side of the butt joints of the planks ....... I think, there should be also bolts, or?

Many thanks in advance
 
Hallo my friend - very good work and progress

and so mayn questions, especially because I am also now starting the excercise and trials with the nailing of the clinker planking of my Le Coureur (I will show in short time my problem with the nails and the burr(s) in my building log of the Le Coureur.

But first of all some questions related to your work:

1) I took your photos and mirrored one (the first one) to get the correct information
View attachment 213790

View attachment 213789

I marked the bolts with different colors so we can see the same bolt going through the outside planking, through the frame ans also the inside planking.
The drilled hole has the same diameter like the wire, or?
How you fix it? do you use glue? If it is not fixed, with some preasure from one side, latest when you use the burr, the wire will be pressed and slip through the hole, or?
Which diameter has the hole and / or wire?

Your heads are looking very good - I am until now not able to get such good result on my heads - therefore this question:
You wrote: Cut it of and shape first with a 2,1 mm cup burr followed by a 1,2 mm.

You are using two different sizes of burr, which is making maybe the difference to my disaster.......
Can you maybe show this single steps in a sequence of photos? and maybe you also describe axactly the type of burr you are using?

Sorry for all these questions, but I am stuck with my bolting works in moment.......

And a last question - once more looking at the second photo:
I marked two dotts with red colour on the other side of the butt joints of the planks ....... I think, there should be also bolts, or?

Many thanks in advance
Hi Uwe,

The bolts are indeed all the way through as these in reality are clenched on a rove. The diameter of my wire is 1,2 mm. The holes are also 1,2 mm and I tap the wire in with a hammer, no glue as it is a tight fit.

After tapping in the wire I cut of the end with a flush cutting wire cutter which creates a flat cutting surface. The wire after cutting is protruding like something of a 0,5 mm above the planking.

Then I use the first cup burr of 2,1 mm. The burr has to be bigger than the wire otherwise it doesn't center. With the first burr I create a convex surface, this convex surface helps you to center the second burr which in my case is 1,2 mm. With this second burr I create the bolt head and the flat surface of the simulated rove.

Without using the two sizes of burrs your small burr will not center on the wire and will ruin your bolt.

After every use of the burr on a bolt I clean it with the tip of a knive. This as the copper is soft and clogging the burr.

My progress is slowly towards finishing the first plank, but sofar happy with the results.
20210216_204925.jpg
20210216_210438.jpg

Hope it helps.

The bolts you are missing are on the double frames, here the planks are diagonally bolted and treenailed. So the missing spots will be treenailed.
 
Last edited:
Your bolts are impressive!
One thing I don't understand: These ships were built for speed. On one hand the ancient shipbuilders tried to get a smooth hull surface, on the other hand they used these bolts which cause drag and give a good place for water creatures to settle down which cause even more drag?
That is what you would expect but it is part of the clincker build construction with it's clenched bolts to create a watertight hull.
Maybe also the copper bolts help to reduce the amount of outside fouling of the hull which was a much greater issue reducing the ships speed.

On the Alert it are bolts with rings (roves) behind them. you can still buy these for clicker build boats today.

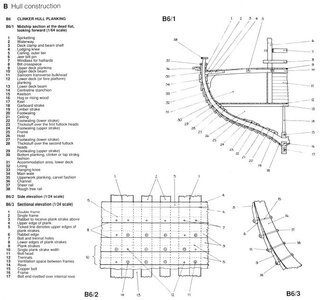
On Alert it looks like this on the drawings in the AOTS book. On the double frames you can see the bolts (B6/2 - #11) are diagonally placed with treenails (B6/2 - #12) in the opposite diagonal.
Bolts alert.JPG

compared to the model
20210216_210438.jpg
 
Hi Maarten
Looking fantastic, i think i read somewhere on SOS (but cant remember where!) somebody using some gold type pins found inside parts of an old computer to use as bolts, have you or anyone else seen same message? Regards
 
Hi Maarten
Looking fantastic, i think i read somewhere on SOS (but cant remember where!) somebody using some gold type pins found inside parts of an old computer to use as bolts, have you or anyone else seen same message? Regards
It’s on the alert Chinese build logs, been looking for them too
 
Hi Maarten
Looking fantastic, i think i read somewhere on SOS (but cant remember where!) somebody using some gold type pins found inside parts of an old computer to use as bolts, have you or anyone else seen same message? Regards
Yes I have seen this indeed in one of the Chinese blogs. I actually don't see the need for these as we can use copper or brass wire.
 
It’s on the alert Chinese build logs, been looking for them too
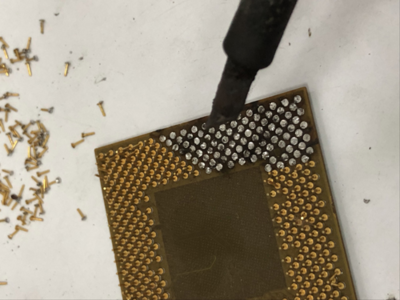
I believe both of you @Chello and @kidsgalore referring to the image below

1613587937142.png

found on build log of HongBing


However, those are microprocessor (CPU) pins, they are relatively small 0.3mm and have a flat head :)
 
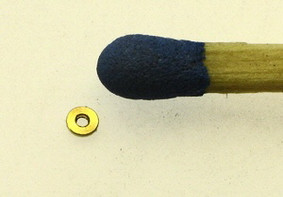
I considered to use proper brass washers on my model (I think also Wang have done that on his build). Knupfer in Germany makes some really tiny brass washers:
1613591483554.png
Unfortunately the cost of 1000 brass washers is more than the cost of the whole kit so I think I'll rethink.
 
I considered to use proper brass washers on my model (I think also Wang have done that on his build). Knupfer in Germany makes some really tiny brass washers:
View attachment 214153
Unfortunately the cost of 1000 brass washers is more than the cost of the whole kit so I think I'll rethink.
What could make a tiny washer is the eye of an photoetched eyebolt (1:72 or 1:96 scale). Installing them is different story. Just a thought. Did not mean to steal Maarten's thread. Stunning work as always.
 
Maarten, I see that the holes that you make in the planks are very clean. Can you tell me what type of drill bit you use? I always seem to get rough edges around the holes I drill. Your work is exceptional.
 
That's how we will find new ideas. Brilliant, did you order them already?
No, I did not order yet. I'll do some experiments first. I do not have any 0.2 mm brass plate in da house but I have 0.1 and 0.3 mm. I'll try to cut a 1x1 mm piece of each, drill a 0.45 mm hole in both and see if it is possible to squeeze a small 0.5 mm brass pin through the hole. Alternatively I'll buy some 0.4 mm brass wire amd try how much head size it will make to "cut"it by rolling it with a 45 degree edge. For different reasons it will take some time before I can make such experiments but I guess it will also take months before I get to this point of the build.
I noticed RB Motion also sells button head brass pins but that way will also be rather expensive (almost unbelievable BTW that they also have hexagon bolt pins and nuts where the diameter of the hexagon is only 0.63 mm)
 
Maarten, I see that the holes that you make in the planks are very clean. Can you tell me what type of drill bit you use? I always seem to get rough edges around the holes I drill. Your work is exceptional.
Thbis is done with just a plain spiral drill of 1,2 mm, nothing special. After drilling I brushed the surface with a small steel brush to remove any fuzz.
 
Back
Top