This is the last one from me about tiny bolts/washers. There was a great Scale Hardware company number of years ago, went down and - yesterday, I learned they are still around, different name. Check this out: https://model-motorcars.myshopify.com/collections/small-parts-hardwareNo, I did not order yet. I'll do some experiments first. I do not have any 0.2 mm brass plate in da house but I have 0.1 and 0.3 mm. I'll try to cut a 1x1 mm piece of each, drill a 0.45 mm hole in both and see if it is possible to squeeze a small 0.5 mm brass pin through the hole. Alternatively I'll buy some 0.4 mm brass wire amd try how much head size it will make to "cut"it by rolling it with a 45 degree edge. For different reasons it will take some time before I can make such experiments but I guess it will also take months before I get to this point of the build.
I noticed RB Motion also sells button head brass pins but that way will also be rather expensive (almost unbelievable BTW that they also have hexagon bolt pins and nuts where the diameter of the hexagon is only 0.63 mm)
-

Win a Free Custom Engraved Brass Coin!!!
As a way to introduce our brass coins to the community, we will raffle off a free coin during the month of August. Follow link ABOVE for instructions for entering.
-

PRE-ORDER SHIPS IN SCALE TODAY!
The beloved Ships in Scale Magazine is back and charting a new course for 2026!
Discover new skills, new techniques, and new inspirations in every issue.
NOTE THAT OUR FIRST ISSUE WILL BE JAN/FEB 2026
- Home
- Forums
- Ships of Scale Group Builds and Projects
- HMS Alert 1777 1:48 PoF Group Build
- HMS Alert 1777 1:48 Group Build Logs
You are using an out of date browser. It may not display this or other websites correctly.
You should upgrade or use an alternative browser.
You should upgrade or use an alternative browser.
Great parts and made with precision...but somewhat expensive! 50 rivets, cost $8.00This is the last one from me about tiny bolts/washers. There was a great Scale Hardware company number of years ago, went down and - yesterday, I learned they are still around, different name. Check this out: https://model-motorcars.myshopify.com/collections/small-parts-hardware
In between adding all bolts to my hull I worked also on adding a hull protection doubling for the anchor.
In the AOTS book you can t find it but I have seen it on the contemporary model of HMS Hawk which is of the same building programm as the Alert.
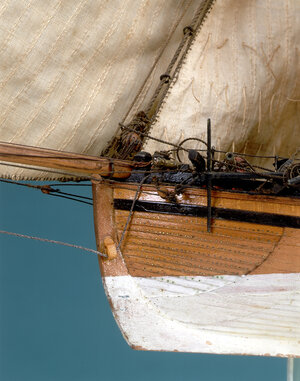
I expect Alert had this also. These cutters had rather large anchor and when hauling an anchor at sea with a light swell there was definately the risk of the anchor hitting the hull. A clinker build ship with it plank edges exposed will be more vulnerable in this aspect.
So time to add this second layer and smooth out the clinker construction.
First I determine where to fit it, it is not mentioned on the drawings. But it is there to protect the hul when getting the anchor from the cat head to the side.
First I hang the anchor from the cat head.
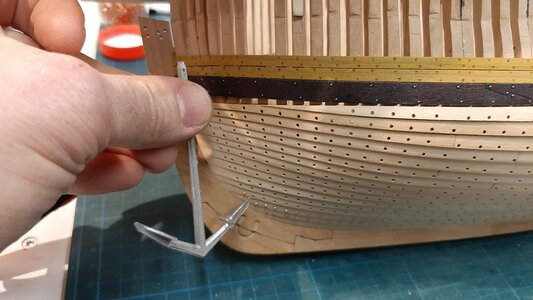
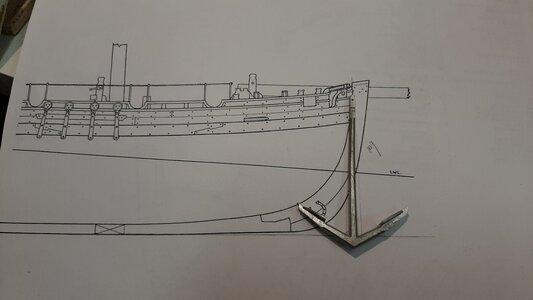
Then swing it to the side.
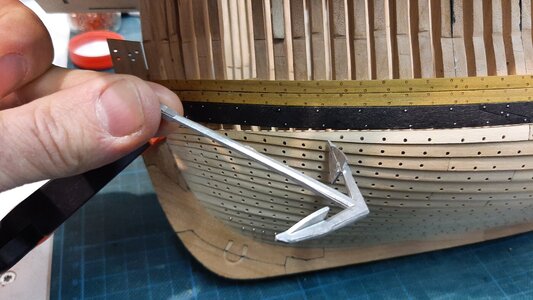
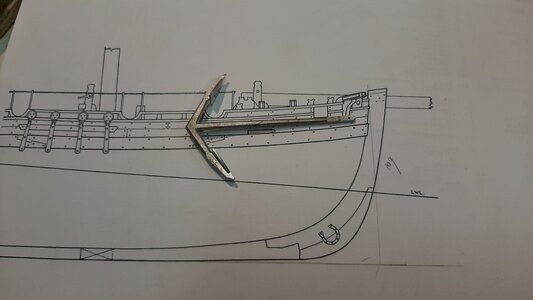
This determines the place for the doubling.
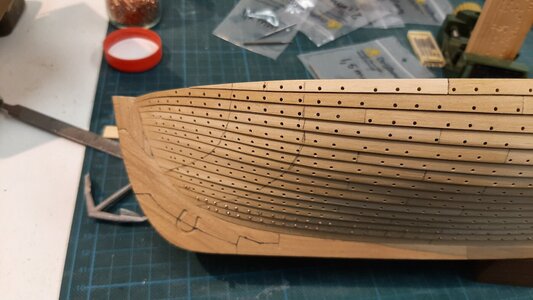
The doubling I make with the same wood as my hull planks and add a layer on top of the planks.
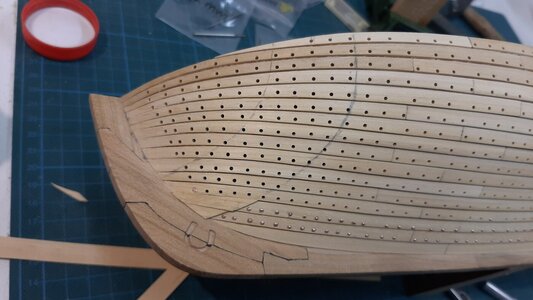
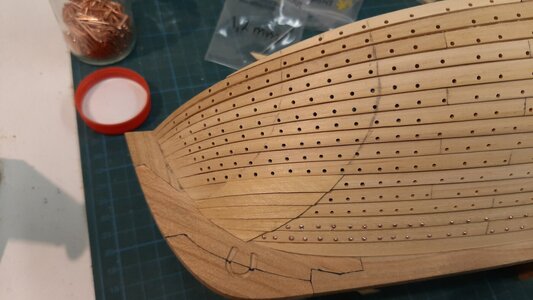
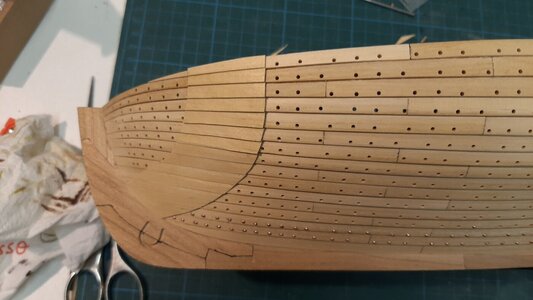
Now I file the planks to a smooth surface.
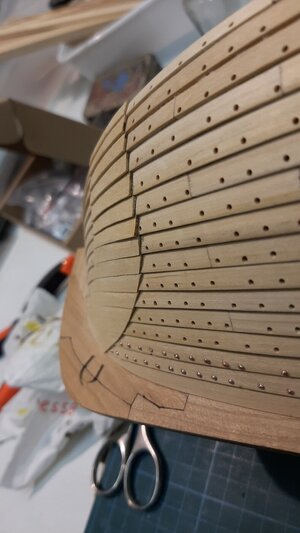
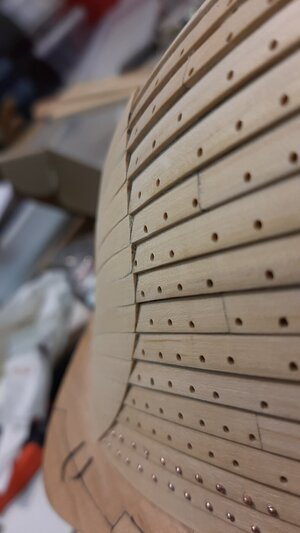
The doubling is nailed to the hull planks, for this I use 0,35 mm steel wire pressed into pre drilled holes.
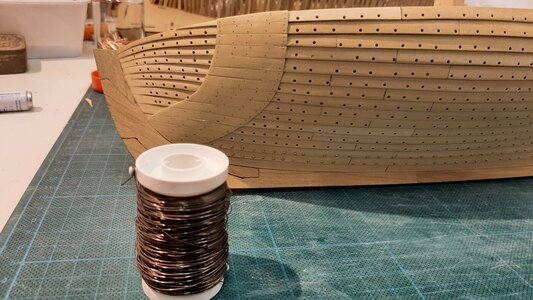
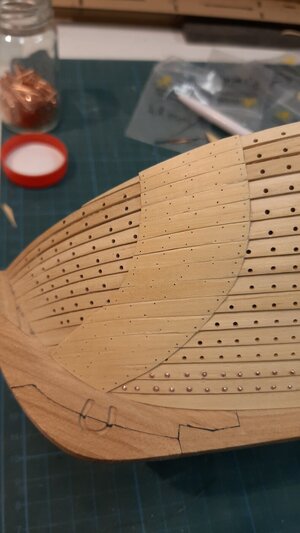
After cutting of the wire ends, I file and sand the surface and continue with the bolts on the bow section.
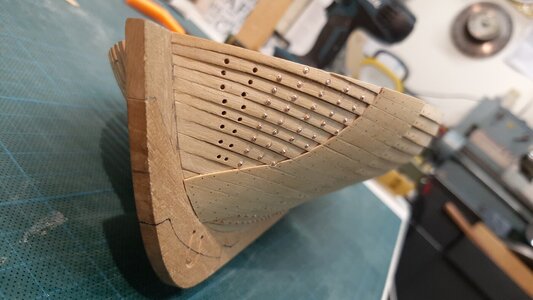
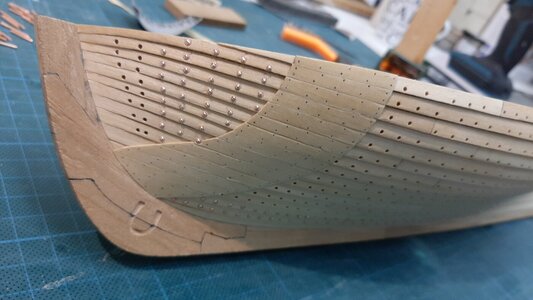
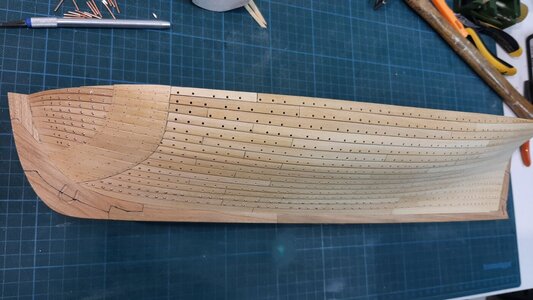
Finall finishing I do when the outer hull is oiled.
In the AOTS book you can t find it but I have seen it on the contemporary model of HMS Hawk which is of the same building programm as the Alert.

I expect Alert had this also. These cutters had rather large anchor and when hauling an anchor at sea with a light swell there was definately the risk of the anchor hitting the hull. A clinker build ship with it plank edges exposed will be more vulnerable in this aspect.
So time to add this second layer and smooth out the clinker construction.
First I determine where to fit it, it is not mentioned on the drawings. But it is there to protect the hul when getting the anchor from the cat head to the side.
First I hang the anchor from the cat head.


Then swing it to the side.


This determines the place for the doubling.

The doubling I make with the same wood as my hull planks and add a layer on top of the planks.


Now I file the planks to a smooth surface.


The doubling is nailed to the hull planks, for this I use 0,35 mm steel wire pressed into pre drilled holes.


After cutting of the wire ends, I file and sand the surface and continue with the bolts on the bow section.


Finall finishing I do when the outer hull is oiled.
Very good idea and execution of this detail - and good to see the method you made the doubling - a very good way to pimp once more such a good kit
- Joined
- Mar 19, 2020
- Messages
- 206
- Points
- 213

Hoi Maarten,In between adding all bolts to my hull I worked also on adding a hull protection doubling for the anchor.
In the AOTS book you can t find it but I have seen it on the contemporary model of HMS Hawk which is of the same building programm as the Alert.
View attachment 215055
I expect Alert had this also. These cutters had rather large anchor and when hauling an anchor at sea with a light swell there was definately the risk of the anchor hitting the hull. A clinker build ship with it plank edges exposed will be more vulnerable in this aspect.
So time to add this second layer and smooth out the clinker construction.
First I determine where to fit it, it is not mentioned on the drawings. But it is there to protect the hul when getting the anchor from the cat head to the side.
First I hang the anchor from the cat head.
View attachment 215056
View attachment 215058
Then swing it to the side.
View attachment 215057
View attachment 215059
This determines the place for the doubling.
View attachment 215060
The doubling I make with the same wood as my hull planks and add a layer on top of the planks.
View attachment 215061View attachment 215062View attachment 215063
Now I file the planks to a smooth surface.
View attachment 215064
View attachment 215065
The doubling is nailed to the hull planks, for this I use 0,35 mm steel wire pressed into pre drilled holes.
View attachment 215067
View attachment 215068
After cutting of the wire ends, I file and sand the surface and continue with the bolts on the bow section.
View attachment 215069
View attachment 215070View attachment 215071
Finall finishing I do when the outer hull is oiled.
ive been following your blog with great interest, particularly around how to get the best results in terms of clinker planking and nailing. I’ll make up my mind what I think is best for my coureur, which is my learning project in model ship building but also my passion.
I could not help noticing that the planks on your alert have colour differences. I have got the same issue with the kit supplied planking on the port side hull. The cherry wood ranges from dark brown (almost purple) to a light pink. I’m not too bothered about it as I presume the old shipwrights didn’t consider matching colours in planks a priority but I was wondering what your opinion was on this.
Hoi Marcel,
I wont be bothered to much about the difference in colour of planking as long as you can mix it a little and spread it over the whole hull. What I mean is that you don t end up with a model which is dark in the front and light coloured in the rear.
The differences in colour is depending also on type of wood you use. Cherry has quite a big variation whereas pear for instance is much more homogenous in colour as long as you don t use steamed and usteamed pear mixed up.
On my Alert the frames are coming from the kit, so I had to deal with the colour variations as provided but I think they where ok. For the outside planking I have sawn three billets to planks and mixed them up to spread the colour differences.
Keep in mind that also uv light will change the colour of your model over time, most probably bringing the different shades closer together.
Finally we are working with natural material wood bringing your model to live. In the end every model will be different with its own finger print. The difference in wood colours will help you achieving this.
Like Maarten wrote in my building lof of the Coureur, that the planking of the Alert and the Coureur is hard to compare, more or less impossible.Hoi Maarten,
ive been following your blog with great interest, particularly around how to get the best results in terms of clinker planking and nailing. I’ll make up my mind what I think is best for my coureur, which is my learning project in model ship building but also my passion.
I could not help noticing that the planks on your alert have colour differences. I have got the same issue with the kit supplied planking on the port side hull. The cherry wood ranges from dark brown (almost purple) to a light pink. I’m not too bothered about it as I presume the old shipwrights didn’t consider matching colours in planks a priority but I was wondering what your opinion was on this.
And not only because the planking here is pure scratch and the planks of the Coureur are kit elements.
The biggest difference in my opinion is the fact, that on the Coureur you have much more rows of planks, than on the Alert, which is resulting in wider planks - and with this a complete different appearance.
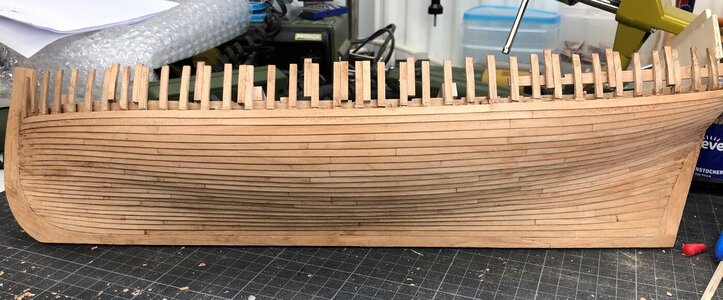
So f.e. the nails size is maybe good for one model, but not for the other one - and also the same with the color differences in the planks
Both models are showing different colors and I think, that this is the salt in the soup, showing that we are working with a natural product
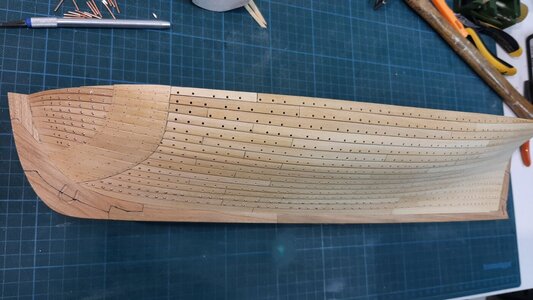
In the mean time more then 400 copper bolts are in my hull. Just over 1/3 is finished.
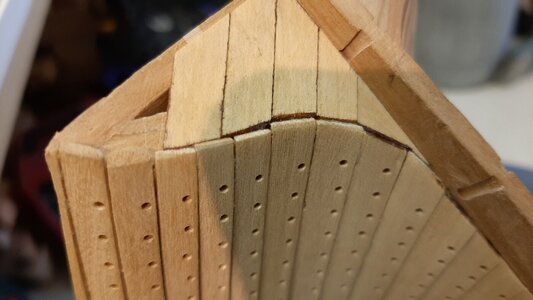
To avoid getting bored by hammering and cup burr drilling I took a small side step to plank the lower stern.
This is the planking at a 45 deg angle with 4 planks in the top row and 3 along the stern downwards.
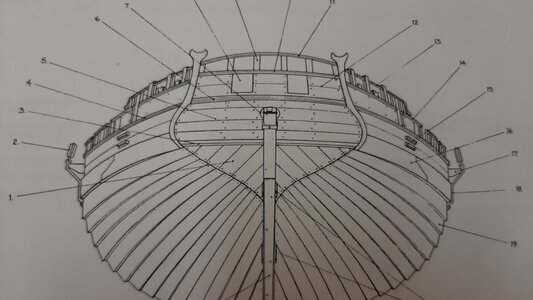
As the planks have to join the hull planks I have to trim a lot to get all angles correct. The first one to fit in is the bottom one. Before fitting the planks the edges are painted with dark brown ink.
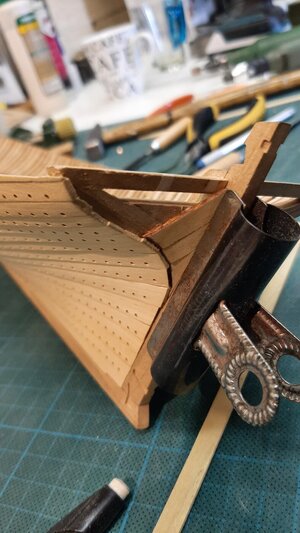
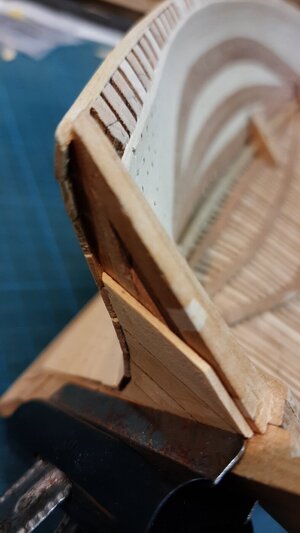
For every plank I first tailor the free end at the correct angle. Then I roughly write off the size and shape.
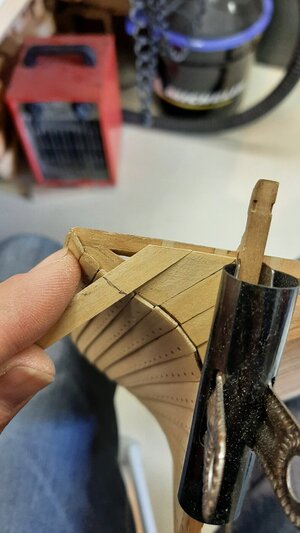
Saw it and fit and sand and fit etc till it properly fits.
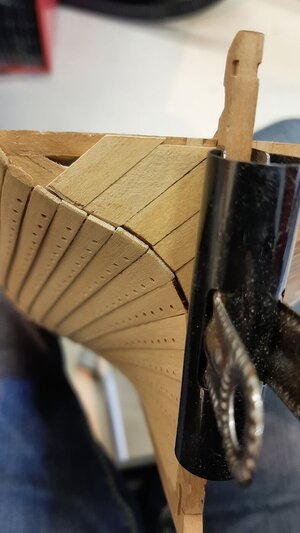
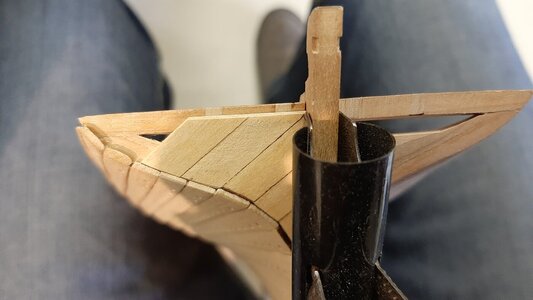
Untill all planks are fitted. And the surface flattened with a file.
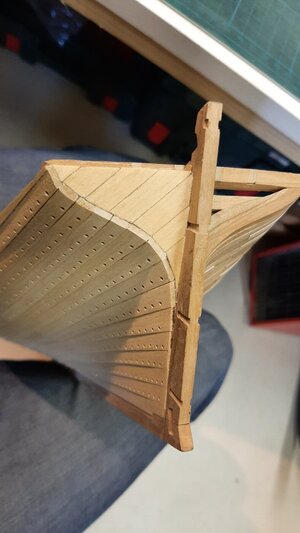
On the top I make a freeze separating the lower and upper transome.
This freeze I make from a strip of 2,2 mm square cherry which I cut from a cherry billet.
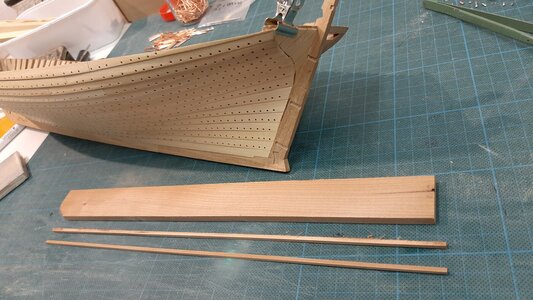
The freeze I scrape with a profile I cut into a razor blade.
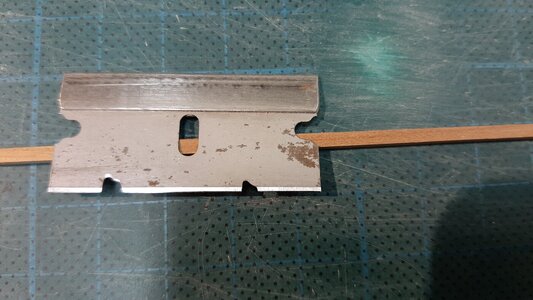
Then tap the strip with double sided tape to a flat surface and scrape it untill you have the preffered shape.
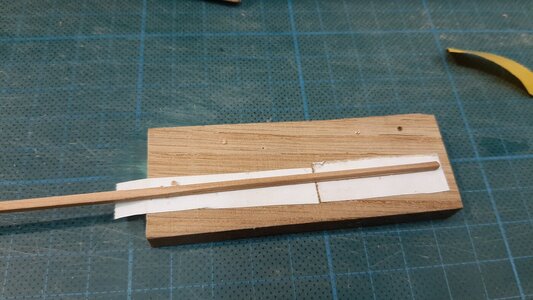
The freeze is glued in place.
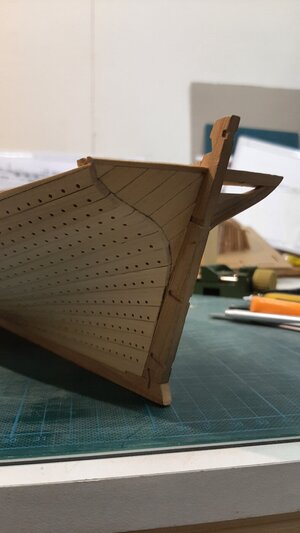
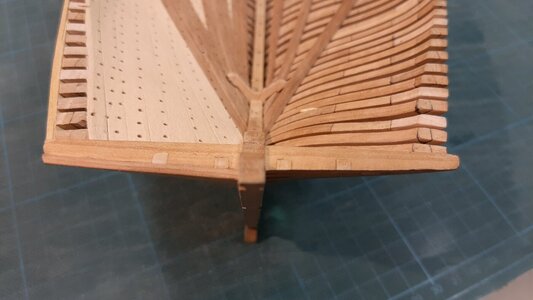
The stern planks are not bolted, so these I treenail.
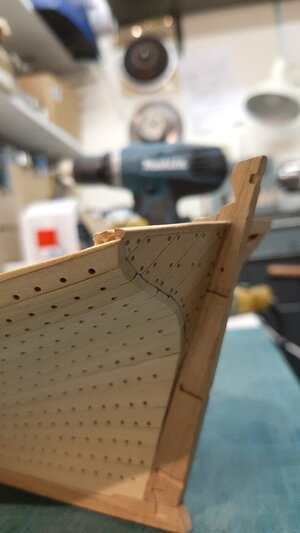
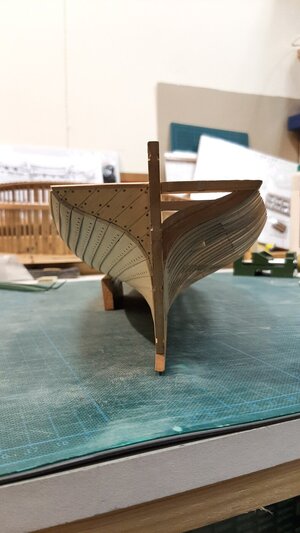
And the bolts, thats still work in progress.
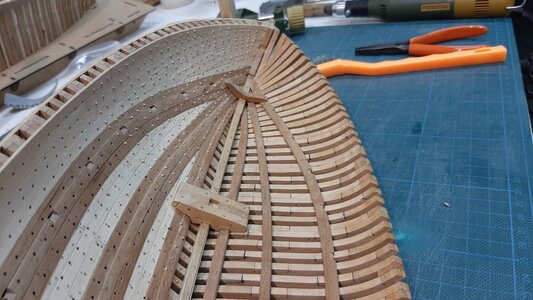
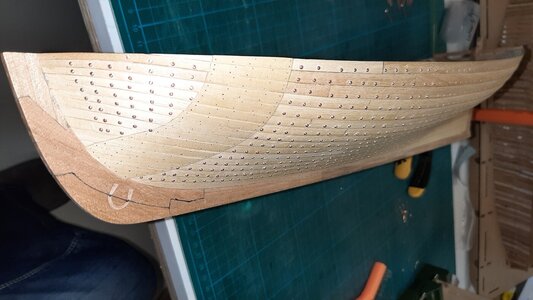
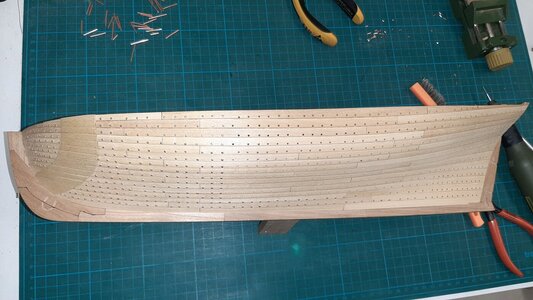
To avoid getting bored by hammering and cup burr drilling I took a small side step to plank the lower stern.
This is the planking at a 45 deg angle with 4 planks in the top row and 3 along the stern downwards.

As the planks have to join the hull planks I have to trim a lot to get all angles correct. The first one to fit in is the bottom one. Before fitting the planks the edges are painted with dark brown ink.


For every plank I first tailor the free end at the correct angle. Then I roughly write off the size and shape.

Saw it and fit and sand and fit etc till it properly fits.


Untill all planks are fitted. And the surface flattened with a file.


On the top I make a freeze separating the lower and upper transome.
This freeze I make from a strip of 2,2 mm square cherry which I cut from a cherry billet.

The freeze I scrape with a profile I cut into a razor blade.

Then tap the strip with double sided tape to a flat surface and scrape it untill you have the preffered shape.

The freeze is glued in place.


The stern planks are not bolted, so these I treenail.


And the bolts, thats still work in progress.


The bolts are beautifying her but I guess, making more weight.  As for the transom caulking you are still using 'black' PVA?
Oh my. That's a lot of cup burr work... Lovely beginning on the stern.In the mean time more then 400 copper bolts are in my hull. Just over 1/3 is finished.
To avoid getting bored by hammering and cup burr drilling I took a small side step to plank the lower stern.
This is the planking at a 45 deg angle with 4 planks in the top row and 3 along the stern downwards.
View attachment 217078
As the planks have to join the hull planks I have to trim a lot to get all angles correct. The first one to fit in is the bottom one. Before fitting the planks the edges are painted with dark brown ink.
View attachment 217082
View attachment 217083
For every plank I first tailor the free end at the correct angle. Then I roughly write off the size and shape.
View attachment 217085
Saw it and fit and sand and fit etc till it properly fits.
View attachment 217086
View attachment 217087
Untill all planks are fitted. And the surface flattened with a file.
View attachment 217091
View attachment 217092
On the top I make a freeze separating the lower and upper transome.
This freeze I make from a strip of 2,2 mm square cherry which I cut from a cherry billet.
View attachment 217095
The freeze I scrape with a profile I cut into a razor blade.
View attachment 217097
Then tap the strip with double sided tape to a flat surface and scrape it untill you have the preffered shape.
View attachment 217098
The freeze is glued in place.
View attachment 217099
View attachment 217100
The stern planks are not bolted, so these I treenail.
View attachment 217101View attachment 217102
And the bolts, thats still work in progress.
View attachment 217103
View attachment 217104
View attachment 217105
Thx gents.The bolts are beautifying her but I guess, making more weight.As for the transom caulking you are still using 'black' PVA?
No the caulking is done with dark brown ink.
Using black pva here offers insufficient control on the result, it will mess up the surrounding wood of the stern.
In the mean time more then 400 copper bolts are in my hull. Just over 1/3 is finished.
To avoid getting bored by hammering and cup burr drilling I took a small side step to plank the lower stern.
This is the planking at a 45 deg angle with 4 planks in the top row and 3 along the stern downwards.
View attachment 217078
As the planks have to join the hull planks I have to trim a lot to get all angles correct. The first one to fit in is the bottom one. Before fitting the planks the edges are painted with dark brown ink.
View attachment 217082
View attachment 217083
For every plank I first tailor the free end at the correct angle. Then I roughly write off the size and shape.
View attachment 217085
Saw it and fit and sand and fit etc till it properly fits.
View attachment 217086
View attachment 217087
Untill all planks are fitted. And the surface flattened with a file.
View attachment 217091
View attachment 217092
On the top I make a freeze separating the lower and upper transome.
This freeze I make from a strip of 2,2 mm square cherry which I cut from a cherry billet.
View attachment 217095
The freeze I scrape with a profile I cut into a razor blade.
View attachment 217097
Then tap the strip with double sided tape to a flat surface and scrape it untill you have the preffered shape.
View attachment 217098
The freeze is glued in place.
View attachment 217099
View attachment 217100
The stern planks are not bolted, so these I treenail.
View attachment 217101View attachment 217102
And the bolts, thats still work in progress.
View attachment 217103
View attachment 217104
I had forgotten about shaping a razor blade for a molding scraper. I don't need one right now but am going to give it a try as the Amati scrapers that I have don't have some of the shapes/sizes that I needed in the past. Nice filing work bringing the siding and transom planking together with those difficult angled edges. Rich (PT-2)Nice work again, I like the razorblade as shaper. I never think about to use these things for the job.
There are also people using old saw blades and knife blades.Nice work again, I like the razorblade as shaper. I never think about to use these things for the job.
I like the razor blade as they are rather thin and easy to shape in every shape you want.
Wow - Great appearance
my friend - this is very good work
and I am positively surprised about the appearance of the bolts at the inside planking - I was afraif, that it is getting a mess there, but NO
Congrats already for the actual step - very well done - and you are fast
my friend - this is very good work
and I am positively surprised about the appearance of the bolts at the inside planking - I was afraif, that it is getting a mess there, but NO
Congrats already for the actual step - very well done - and you are fast
Your spacing of the interior and exterior bolts is very consistent and well done. I have not been able to achieve that level of consistency and have more out-liers than I would like but once punched or mis-drilled they are where they end up. RichWow - Great appearance
my friend - this is very good work
and I am positively surprised about the appearance of the bolts at the inside planking - I was afraif, that it is getting a mess there, but NO
Congrats already for the actual step - very well done - and you are fast
I guess in reality that would have been the same.Your spacing of the interior and exterior bolts is very consistent and well done. I have not been able to achieve that level of consistency and have more out-liers than I would like but once punched or mis-drilled they are where they end up. Rich
They were also drilling these by hand amd due to the curvature of the frames these were not in straight lines.
So I would not bother too much about that.
And what happens in the meantime.
One guess, yes still putting bolts in.
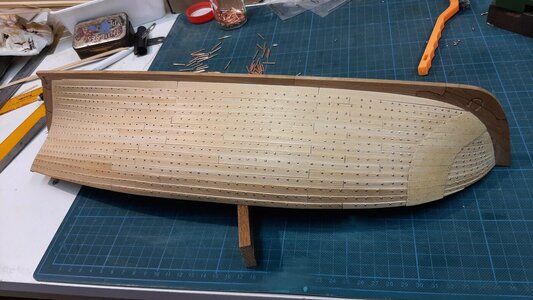
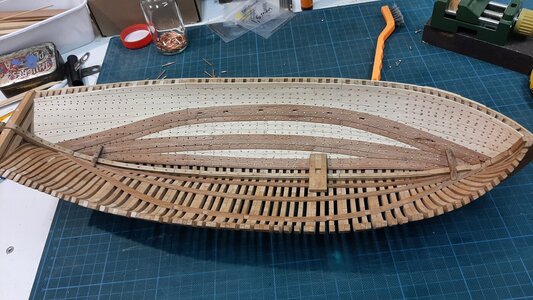
To just do also something else I started with the internal structure.
The coal and spirit room in the bow are the first.
This is part of the additional SOS part of this kit thx to @Trident Model .
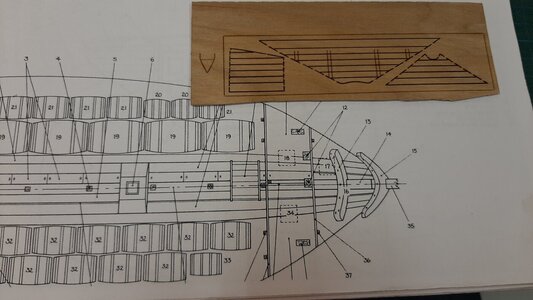
I sanded the planks before cutting them out of the board, this is easier as the parts are so small and fragile. The parts are lasered, I leave the char on the edges on the planks giving a nice effect while finished. The planks I simply glue with PVA on the edges.
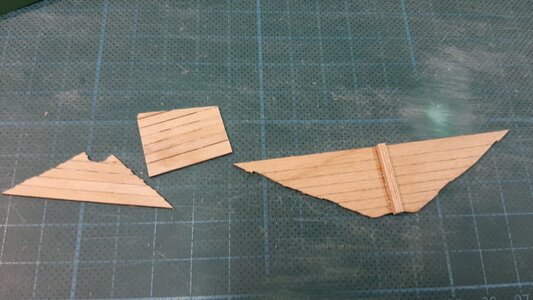
Shaping the edges to match my planked hull and dry fit to the deck beams. Fitting is best checked with some light from the rear.
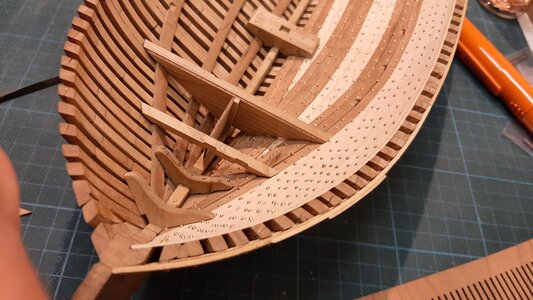
Dry fitting the fwd bulkhead.
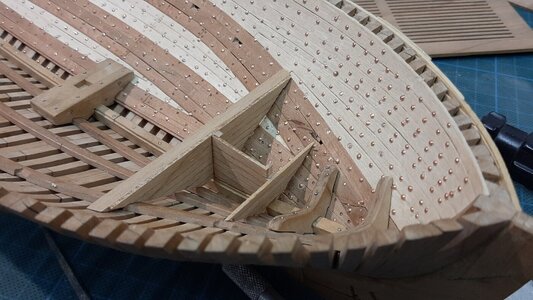
The deck beam will fit on top of the fwd bulkhead.
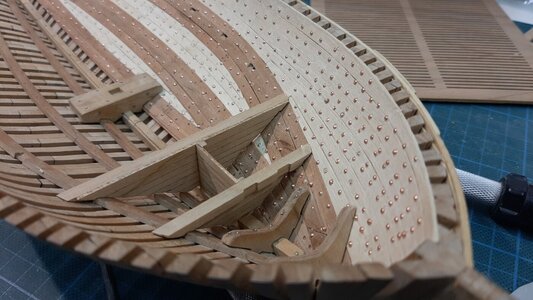
Adding some stanchions to the rear completes the construction.
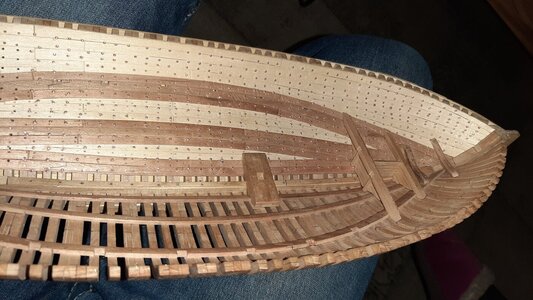
I only have to add the nails to the planks and then this part is finished. It will only be fitted after the hull is fully bolted to avoid damage to these fragile parts.
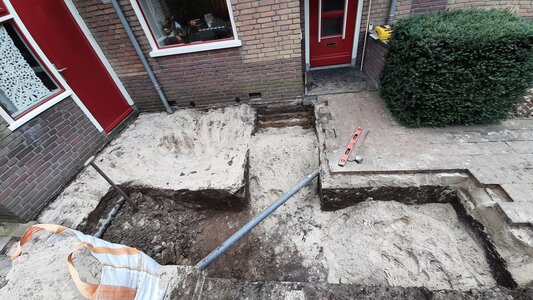
The coming 4 months I will have lesshobby tume as we will build an extensiin to our kitchen.
Just started with the fundation works this weekend.
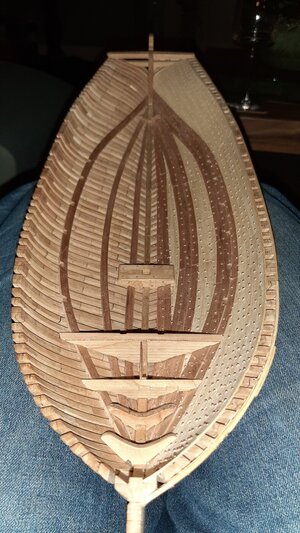
One guess, yes still putting bolts in.


To just do also something else I started with the internal structure.
The coal and spirit room in the bow are the first.
This is part of the additional SOS part of this kit thx to @Trident Model .

I sanded the planks before cutting them out of the board, this is easier as the parts are so small and fragile. The parts are lasered, I leave the char on the edges on the planks giving a nice effect while finished. The planks I simply glue with PVA on the edges.

Shaping the edges to match my planked hull and dry fit to the deck beams. Fitting is best checked with some light from the rear.

Dry fitting the fwd bulkhead.

The deck beam will fit on top of the fwd bulkhead.

Adding some stanchions to the rear completes the construction.

I only have to add the nails to the planks and then this part is finished. It will only be fitted after the hull is fully bolted to avoid damage to these fragile parts.

The coming 4 months I will have lesshobby tume as we will build an extensiin to our kitchen.
Just started with the fundation works this weekend.

Great progress, my friend. Little by little she is coming up beautiful  Cannot wait to start the internal structure.


 Cannot wait to start the internal structure.
What do you plan to use as nails: brass, copper, wood, or hot needle processing?I only have to add the nails to the planks and then this part is finished
Are you sure it will be a kitchen extension and not your shipyard? Please start a new build log for this project to avoid false alerts.The coming 4 months I will have lesshobby tume as we will build an extensiin to our kitchen.
Just started with the fundation works this weekend.
Ha ha you got me, it is a new slipway, planning to build this.Great progress, my friend. Little by little she is coming up beautifulCannot wait to start the internal structure.
What do you plan to use as nails: brass, copper, wood, or hot needle processing?
Are you sure it will be a kitchen extension and not your shipyard? Please start a new build log for this project to avoid false alerts.
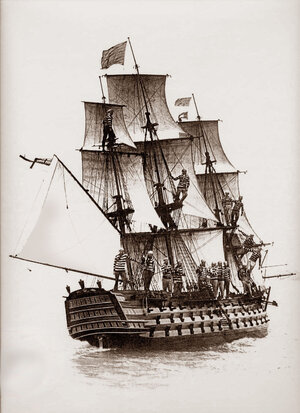
The internal structure is a lot of fun with plenty options to add.
For nails I will use 0,3 mm steel wire or indeed a hot needle point. Test what will offer best scale option.


