WOW! I could expect anything but this... It is the best inquisition I've ever hear! Obviously, it is for someone with a good nerve system. Bravo, Mon Amie!!
-

Win a Free Custom Engraved Brass Coin!!!
As a way to introduce our brass coins to the community, we will raffle off a free coin during the month of August. Follow link ABOVE for instructions for entering.
-

PRE-ORDER SHIPS IN SCALE TODAY!
The beloved Ships in Scale Magazine is back and charting a new course for 2026!
Discover new skills, new techniques, and new inspirations in every issue.
NOTE THAT OUR FIRST ISSUE WILL BE JAN/FEB 2026
- Home
- Forums
- Ships of Scale Group Builds and Projects
- HMS Alert 1777 1:48 PoF Group Build
- HMS Alert 1777 1:48 Group Build Logs
You are using an out of date browser. It may not display this or other websites correctly.
You should upgrade or use an alternative browser.
You should upgrade or use an alternative browser.
Thx gents for all your comments.While I am still in the process of recovering from the fact you just cut your ship in half - I wonder if you could explain how you established the lower curvature of the plank in posting #211.
I know its sort of like asking Michelangelo how he sharpens his chisels after seeing the David but that's where I am at in this hobby... Thanks much.
Actually shaping the planks is not so difficult.
In this case I just sand them on my disc sander which is a proces of sanding, fitting, sanding etc, you get the idea until you have a proper fit. This is most times after 3 or 4 times and yes sometimes you screw up one.
For more intricate shapes you can use a piece of paper which you press with your fingers over the edge of the adjacent plank. The edge of the plank will leave a line in the paper which you can then copy to the plank you need to shape.
Hallo Maarten,
I have looking your reply with the pictures of the sawing now more then ones. I gaves me chickenskin!
When you has that in mind for so long, it must have been a great moment. And the Japanese saw did his/her work very well. Of course with your leading hands.
Building such a open-view model is on my list. There was also a POF-model on. I nice combinaties!
But I have the beautifull BN to start, after the now finished Lee.
Regards, Peter
- Joined
- Aug 8, 2019
- Messages
- 5,571
- Points
- 738

Goosebumps.chickenskin!
 lol dat is kechelpipe engels chickenskin Maar ik begrijp je, vond het ook heel wat. Maar heb ook vertrouwen in wat het gaat worden.
- Joined
- Sep 28, 2020
- Messages
- 287
- Points
- 168

Aaaargh, cutting your ship in two is crazy. Dutch chainsaw massacre  .
.
But it was worth it, great, clean result!
BTW do you have horses (hoof tar spray)????
Christian
 .
.But it was worth it, great, clean result!
BTW do you have horses (hoof tar spray)????
Christian
Hi Peter,Hallo Maarten,
I have looking your reply with the pictures of the sawing now more then ones. I gaves me chickenskin!
When you has that in mind for so long, it must have been a great moment. And the Japanese saw did his/her work very well. Of course with your leading hands.
Building such a open-view model is on my list. There was also a POF-model on. I nice combinaties!
But I have the beautifull BN to start, after the now finished Lee.
Regards, Peter
Thx for the comment, you can cut your bluenose in two
Hi Christian,Aaaargh, cutting your ship in two is crazy. Dutch chainsaw massacre.
But it was worth it, great, clean result!
BTW do you have horses (hoof tar spray)????
Christian
You have eagle eyes, or a good zoom function
The hoof tar spray I use for tarring my ropes. Hoof tar spray is Stockholmer tar dilluted in a spray can. Works perfect for realistic tarred rope, you only have to keep your ropes ventilated for a while otherwise the smell is pretty heavy like you are living in a 17th century shipyard.
- Joined
- Sep 28, 2020
- Messages
- 287
- Points
- 168

Thats a good idea, tarring with hoof tar. And I like the smell of 17th century shipyards!Hi Christian,
You have eagle eyes, or a good zoom function
The hoof tar spray I use for tarring my ropes. Hoof tar spray is Stockholmer tar dilluted in a spray can. Works perfect for realistic tarred rope, you only have to keep your ropes ventilated for a while otherwise the smell is pretty heavy like you are living in a 17th century shipyard.
Today I am catching up the building logs - and you prepared for me a very big surprise.
I like your idea of presentation very much especially because I like the Granado model you showed and f.e. also the Salamandre, which is in exhibtion in Hamburg museum
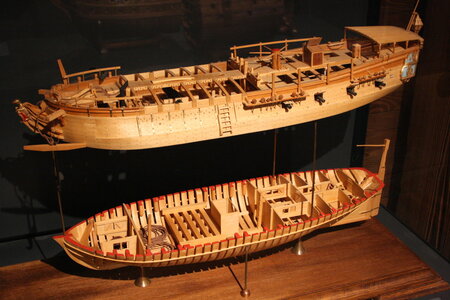
more photos here:
I have a new love now - your model
and once I will try something else....... but not the Coureur ..... but maybe once the Granado ........
I like your idea of presentation very much especially because I like the Granado model you showed and f.e. also the Salamandre, which is in exhibtion in Hamburg museum

more photos here:
LA SALAMANDRE - bomb ketch in 1:48 - in Maritime Museum Hamburg
A very interesting version of the bomb ketch La Salamandre in scale 1:48 is on permanent display in the Maritime Museum in Hamburg. The model is cut horizontal, parallel to waterline, into the hold and the upper structure. In this way the interiour of the hold is completely visible. Model based...
shipsofscale.com
I have a new love now - your model
and once I will try something else....... but not the Coureur ..... but maybe once the Granado ........
Last edited:
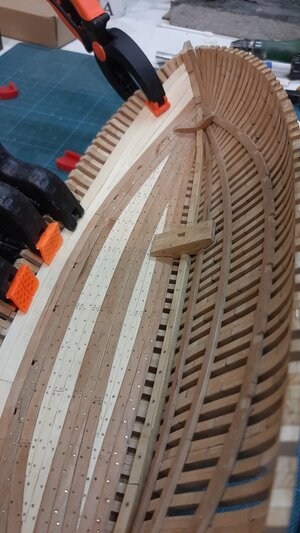
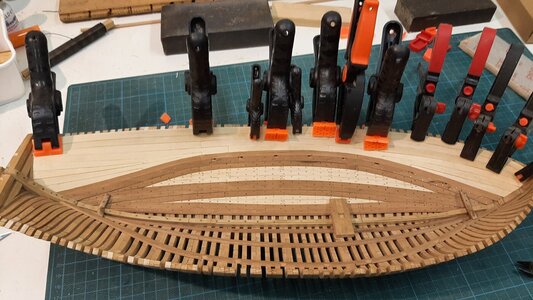
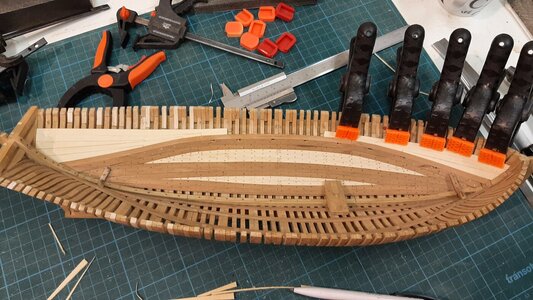
Now the saw dust of the sawing exercise has settled I get back to work on the ceiling.
I still had one strake of thickstuff to go and the good thing of cutting your ship in half is that you can easily clamp your planks now.
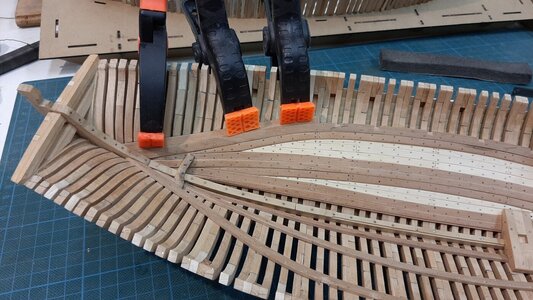
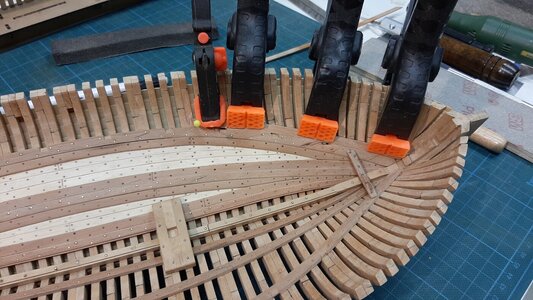
Above the last strake of 1,5mm thickstuff the rest will be 1mm ceiling planks.
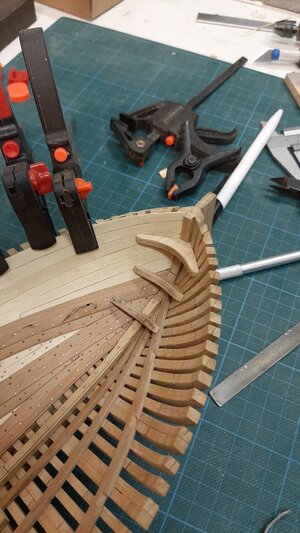
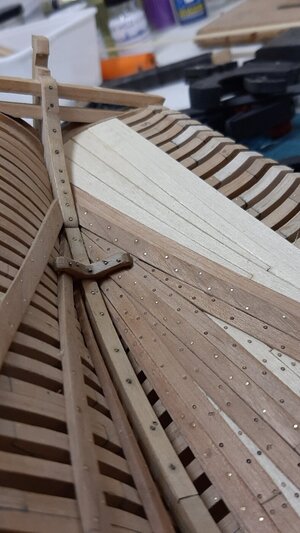
To start in the stern with extra wide planks to fill up the space. For glueing these I use CA on every third frame between the pva, in this way you can speed up the process.
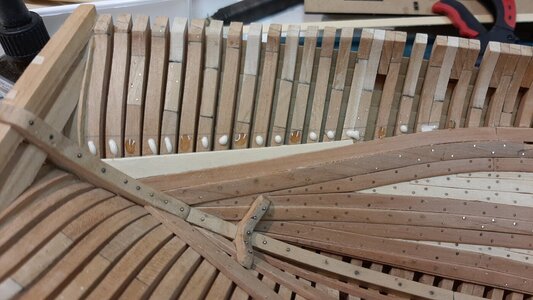
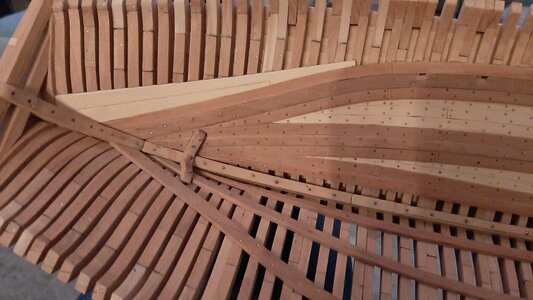
Now the stern is filled and the next strake can be a full one towards the bow.
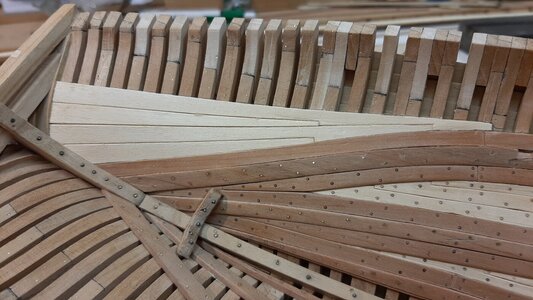
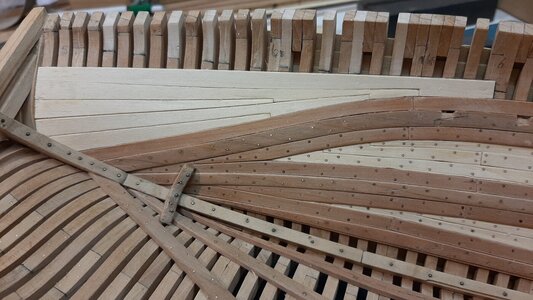
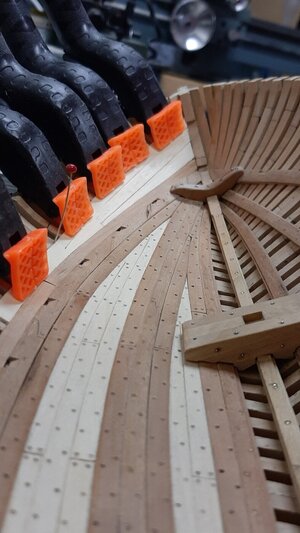
In the bow als filler strakes are needed.
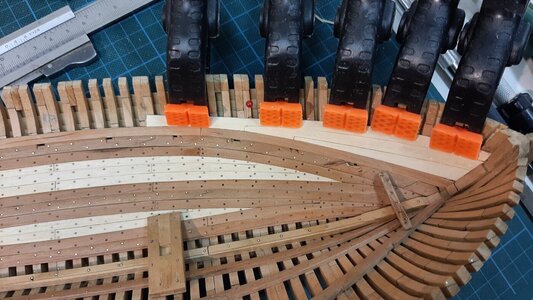
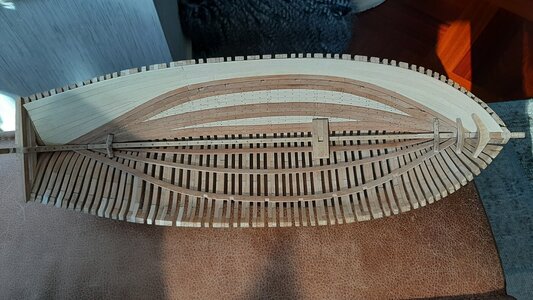
The last plank to be added wil finish the first full strake, then three mor full strakes to add and the ceiling will be finished.
I still had one strake of thickstuff to go and the good thing of cutting your ship in half is that you can easily clamp your planks now.


Above the last strake of 1,5mm thickstuff the rest will be 1mm ceiling planks.
To start in the stern with extra wide planks to fill up the space. For glueing these I use CA on every third frame between the pva, in this way you can speed up the process.


Now the stern is filled and the next strake can be a full one towards the bow.


In the bow als filler strakes are needed.

The last plank to be added wil finish the first full strake, then three mor full strakes to add and the ceiling will be finished.


- Joined
- Mar 19, 2020
- Messages
- 206
- Points
- 213

Seems to me a typical case of half a job Maarten ;-)Now the saw dust of the sawing exercise has settled I get back to work on the ceiling.
I still had one strake of thickstuff to go and the good thing of cutting your ship in half is that you can easily clamp your planks now.
View attachment 212112
View attachment 212114
Above the last strake of 1,5mm thickstuff the rest will be 1mm ceiling planks.
To start in the stern with extra wide planks to fill up the space. For glueing these I use CA on every third frame between the pva, in this way you can speed up the process.
View attachment 212115
View attachment 212117
Now the stern is filled and the next strake can be a full one towards the bow.
View attachment 212118
View attachment 212119
In the bow als filler strakes are needed.
View attachment 212120
The last plank to be added wil finish the first full strake, then three mor full strakes to add and the ceiling will be finished.
View attachment 212121
View attachment 212122View attachment 212123
Very good work
We should also cut all our models in half - so that the clamping is much easier
I am also making the same gluing technique - appr. 2/3 wood glue and 1/3 CA - working well also for me
I realized some small openings on top of the thick stuff inner planks - what are these for?
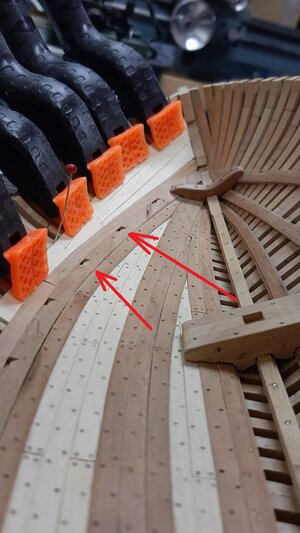
Is it for ventilation between the frames to get the hummidity out...... do you know the idea behind?
We should also cut all our models in half - so that the clamping is much easier
I am also making the same gluing technique - appr. 2/3 wood glue and 1/3 CA - working well also for me
I realized some small openings on top of the thick stuff inner planks - what are these for?

Is it for ventilation between the frames to get the hummidity out...... do you know the idea behind?
Hi Uwe,Very good work
We should also cut all our models in half - so that the clamping is much easier
I am also making the same gluing technique - appr. 2/3 wood glue and 1/3 CA - working well also for me
I realized some small openings on top of the thick stuff inner planks - what are these for?
View attachment 212306
Is it for ventilation between the frames to get the hummidity out...... do you know the idea behind?
The small openings are for the deck beams, before fitting the ceiling I trimmed the clamp shelf to properly centre the deck beams.
Now the last strake of thickstuff is fitted I can further trim these to properly fit the beams.
The ventilation opening is at the top of the ceiling below the topdeck clamp shelf, but that is where I cut my ship in half so wont be clearly visible.
Now it is clear - I should have started thinking before I ask.......Hi Uwe,
The small openings are for the deck beams, before fitting the ceiling I trimmed the clamp shelf to properly centre the deck beams.
Now the last strake of thickstuff is fitted I can further trim these to properly fit the beams.
The ventilation opening is at the top of the ceiling below the topdeck clamp shelf, but that is where I cut my ship in half so wont be clearly visible.
Good morning from snowy New York, my friend! How did you determine the ceiling and thickstuff planks layout? Do you have any plans?
Hi Jim,Good morning from snowy New York, my friend! How did you determine the ceiling and thickstuff planks layout? Do you have any plans?
We can shake hands, just cleared our driveway from 25 cm of snow that fell last Sunday and Monday.
The ceiling planks is by gut feeling. You can only bend planks by a limited amount and that will be the same in reality. Crooked wood was much more expensive so I would expect these less critical planks were filled with the best but cheapest option available, this would lead to first fill in the wedge shaped areas at the stern and bow to create a possibilty to use more or less straight planks above that.
Now to the outside, adding the last two strakes of outside planking, followed by drilling the holes for the copper bolts.
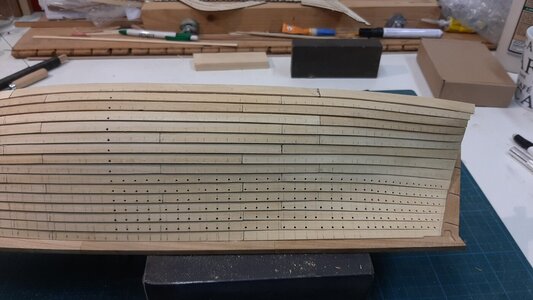
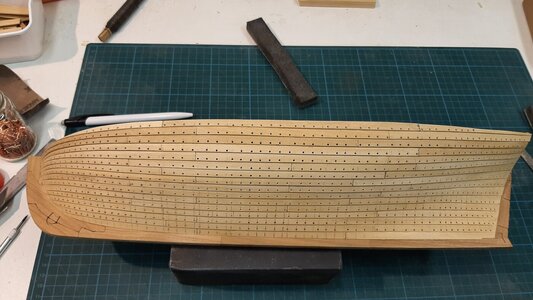
After sanding and brushing with a steel brush inside and outside.
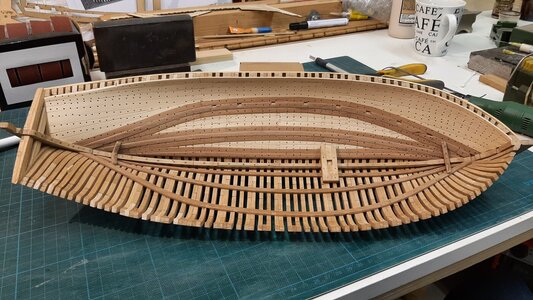
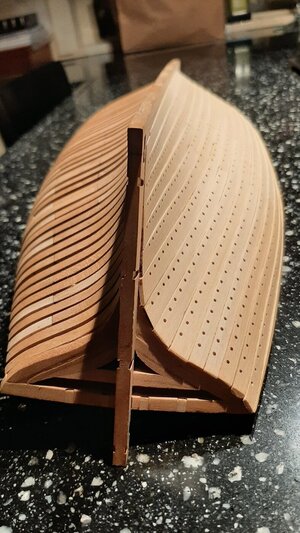
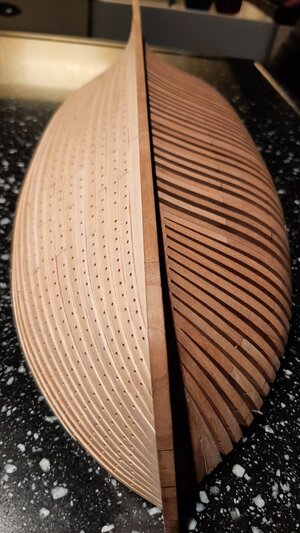
Also the top of the frames is sanded.
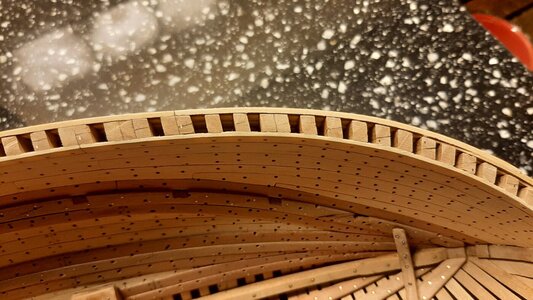
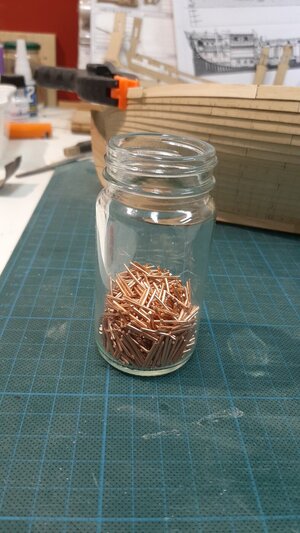
Time to add the first bolts.
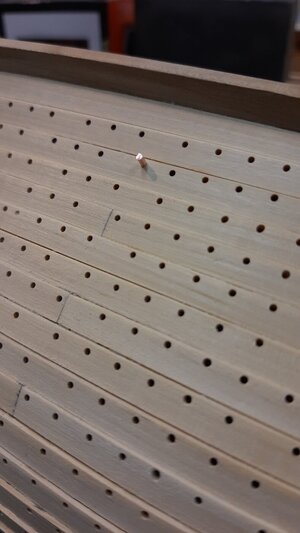
Cut it of and shape first with a 2,1 mm cup burr followed by a 1,2 mm.
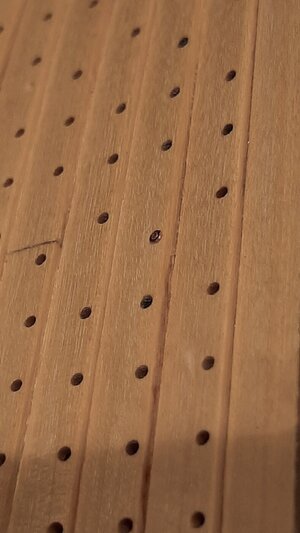
And the start is there, although many many many to follow.
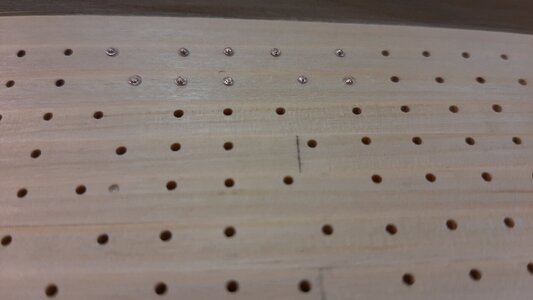
I decided to put the bolts all the way through, so on the inside they look much more messy due to the changing curvature of the hull and the difference in positiin of the drill. But I think the more messy inside is realistic to the actual ships.
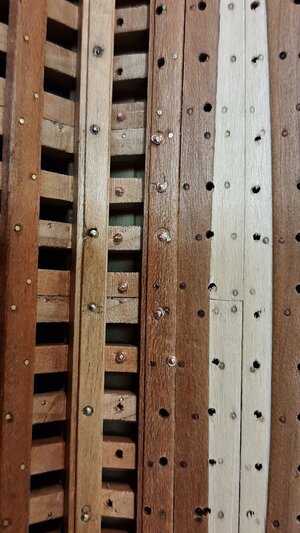
Even the drilling through treenails or on edges of ceiling planks I have seen in reality so I wasn't afraid that this happens. See below the inside hull of Willem Barentz ship replica currently build here in Harlingen.
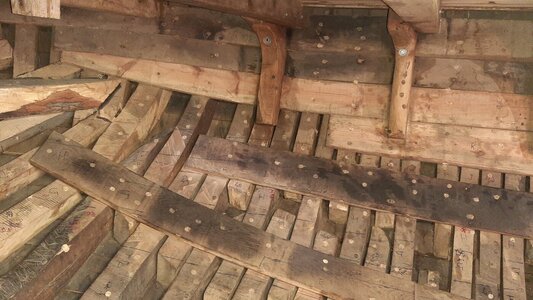
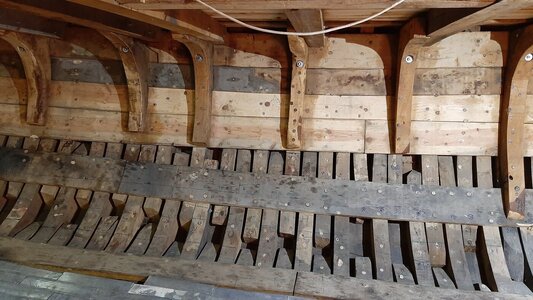
The coming weeks I will double the weight of the hull with copper bolts.


After sanding and brushing with a steel brush inside and outside.


Also the top of the frames is sanded.

Time to add the first bolts.

Cut it of and shape first with a 2,1 mm cup burr followed by a 1,2 mm.

And the start is there, although many many many to follow.

I decided to put the bolts all the way through, so on the inside they look much more messy due to the changing curvature of the hull and the difference in positiin of the drill. But I think the more messy inside is realistic to the actual ships.

Even the drilling through treenails or on edges of ceiling planks I have seen in reality so I wasn't afraid that this happens. See below the inside hull of Willem Barentz ship replica currently build here in Harlingen.


The coming weeks I will double the weight of the hull with copper bolts.
What an awesome\wondeful mess inside!!! WOW!
- Joined
- Oct 26, 2020
- Messages
- 38
- Points
- 78

...a mediocre modeller like me, is overwhelmed. Very best work! And thanks for your precise explanations und pictures.


