Hms Alert by Maarten [COMPLETED BUILD]

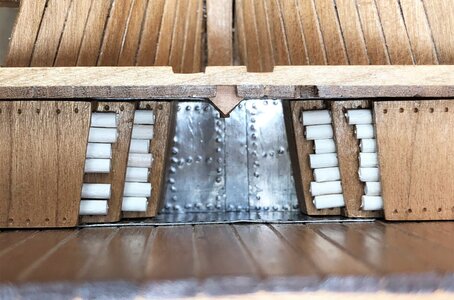
...being toilet paper a deficit, my Admiral will not be happy with this idea. ;) But...I do love your and Uwe's ideas and the results out of them! Your creativity doesn't know the borders, and imagination non-stoppable.
Haha, most probably you have some additional left from your covid lockdown stash. :cool:
And otherwise used paper? uhhhhh, maybe not a good idea.
 
Small update. I am now working on the limber strake, the thickstuff and the shelf clamp. These provide rigidity in the frame structure.

First I put in some clamps marking the positions of these timbers, again a handy tool of Trident.
View attachment 202170
View attachment 202171

The first is the limber strake along the keel.
In the kit these are one piece of cherry timber, I have carved scarph joints in these to make them look as three parts as mentioned in the AOTS.
View attachment 202168
The carved scarph joint I fill with a pencil to accentuate the scarph joint
View attachment 202169

The second strake is called the thickstuff, in the kit 2mm thick. Here also I simulated the scarphs. These are the first to glue into the hull. First I steam it to twist and bend to a fit. For this I use a simple household steam cleaner and a copper pipe. Put the strake in the pipe and steam it.
View attachment 202172
As the copper pipe gets hot you can directly use it to bend the wood on top of it.
View attachment 202177

The dry fit the strake, file it to a perfect fit on both ends. When finally dry fitting I pull a knive along the stroke to mark the area for the glue. It leaves a very subtle mark.
View attachment 202173

Then glue with a small drop of Pva on frame 1 CA on frame 2 and so on. Put in the stroke and clamp it.
View attachment 202174
View attachment 202176
View attachment 202175

This process should be repeated for all. For the shelf clamps I use the positions of the slots for the deck beams to position the correctly along the hull. You can easily take the correct position and frame number from the drawing and mark it inside your hull. Now the limber strakes, thickstuff and shelf clamp for the lower deck is fitted. The small white plank is a limber board sample.
View attachment 202178
View attachment 202179
View attachment 202180
Is this part as confusing as it seems?
 
Back to Alert, which also had a sister called Rattlesnake :) , to make it more complex.

Stil working on the ceiling, laying planks in the second part.
View attachment 203785

second part finished, time for making treenails.
View attachment 203787

Treenails before sanding.
View attachment 203789

And after sanding.
View attachment 203791

Compared to actual birchwood treenails on my Royal Caroline which is I think 50 x the work.
View attachment 203793

And finished, one more to go.
View attachment 203800View attachment 203801
View attachment 203802
This is your add-on to the kit? If so, it is excellent!!!
 
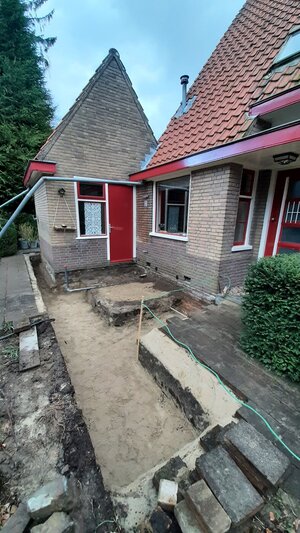
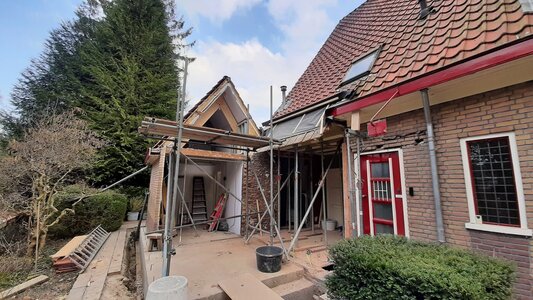
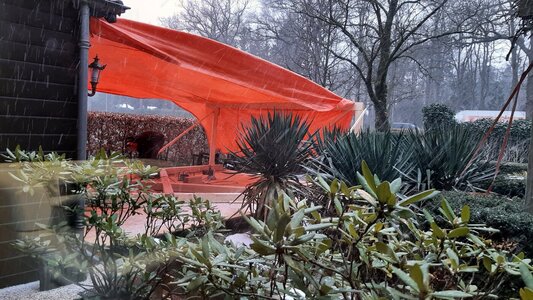
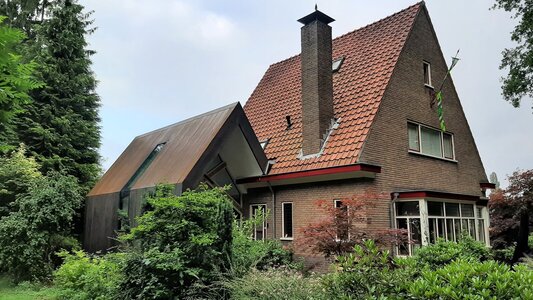
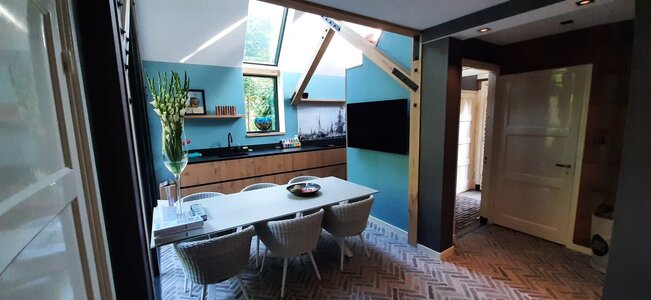
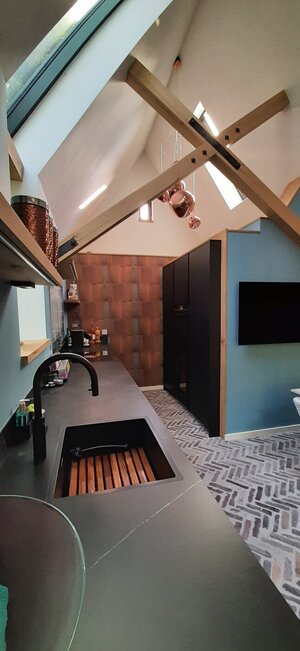
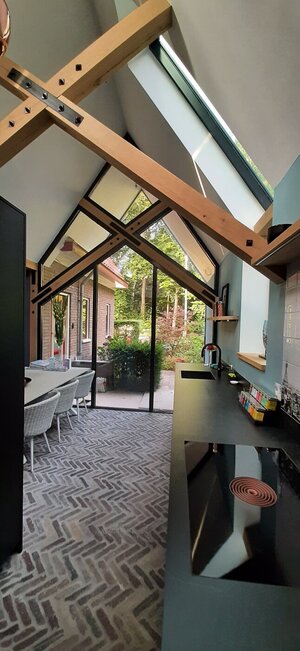
Finally after 6 months of diy and construction work our kitchen is nearly finished and as of tomorrow I will have some time again to restart my Alert build.
At request of Paul @dockattner here a brief overview.

How it was 6 months ago starting with the foundation works.
20210314_173353.jpg

Demolition works
20210325_162358.jpg

Making the oak frames while it was still snowing in April.
20210406_114753.jpg

After 6 months sweat and tears.
The outside is cortensteel.
20210701_192946.jpg
20210902_082523.jpg
20210902_082325.jpg
20210902_082409.jpg

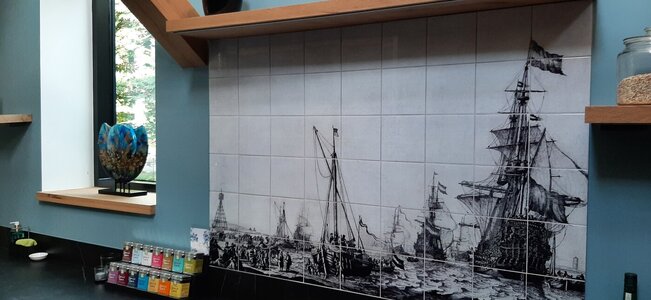
Above the stove we have a Van de Velde printed and baked onto tiles, a facinating new technique.
20210902_082438.jpg

We still have a lot of details to do like making a new dining table as we currently use the garden set. This will be a wooden slap which we cast in Epoxy.

As of tomorrow new Alert postings.
 
Last edited:
Finally after 6 months of diy and construction work our kitchen is nearly finished and as of tomorrow I will have some time again to restart my Alert build.
At request of Paul @dockattner here a brief overview.

How it was 6 months ago starting with the foundation works.
View attachment 253741

Demolition works
View attachment 253754

Making the oak frames while it was still snowing in April.
View attachment 253755

After 6 months sweat and tears.
The outside is cortensteel.
View attachment 253756
View attachment 253750
View attachment 253751
View attachment 253752

Above the stove we have a Van de Velde printed and baked onto tiles, a facinating new technique.
View attachment 253753

We still have a lot of details to do like making a new dining table as we currently use the garden set. This will be a wooden slap which we cast in Epoxy.

As of tomorrow new Alert postings.
The results of the renovations looks very beautiful, good luck with the Alert Thumbsup :)
 
Wonderful Maarten! I love the combination of wood and steel and brick. A slab table will be a nice upgrade to the patio table ;) . I'll be over for dinner at 18:00...I'll bring the wine!
Paul, the food is getting cold. It is 18.15 CET.
We have canard a l orange, so please bring a nice Bourgogne. 8-)
 
Finally after 6 months of diy and construction work our kitchen is nearly finished and as of tomorrow I will have some time again to restart my Alert build.
At request of Paul @dockattner here a brief overview.

How it was 6 months ago starting with the foundation works.
View attachment 253741

Demolition works
View attachment 253754

Making the oak frames while it was still snowing in April.
View attachment 253755

After 6 months sweat and tears.
The outside is cortensteel.
View attachment 253756
View attachment 253750
View attachment 253751
View attachment 253752

Above the stove we have a Van de Velde printed and baked onto tiles, a facinating new technique.
View attachment 253753

We still have a lot of details to do like making a new dining table as we currently use the garden set. This will be a wooden slap which we cast in Epoxy.

As of tomorrow new Alert postings.
You have a very creative and exciting addition with the excellent view from inside to out. Very neatly done with your combination of materials and colors. Rich
 
Back
Top