-

Win a Free Custom Engraved Brass Coin!!!
As a way to introduce our brass coins to the community, we will raffle off a free coin during the month of August. Follow link ABOVE for instructions for entering.
-

PRE-ORDER SHIPS IN SCALE TODAY!
The beloved Ships in Scale Magazine is back and charting a new course for 2026!
Discover new skills, new techniques, and new inspirations in every issue.
NOTE THAT OUR FIRST ISSUE WILL BE JAN/FEB 2026
You are using an out of date browser. It may not display this or other websites correctly.
You should upgrade or use an alternative browser.
You should upgrade or use an alternative browser.
HMS Blandford 1:48 POF Modelship Dockyard [COMPLETED BUILD]
- Joined
- Jun 17, 2021
- Messages
- 3,202
- Points
- 588

I admire your dissatisfaction and your considerable effort to achieve the quality of results set to your own high standard. Rock on!
Pete
Pete
Ken,
"it’s knowing that it’s wrong and every time that you see the model you just know that you should have made more of an effort to properly correct it." I struggle with this concept, and I need to rethink it. Thank you.
Happy New Year...
BMT
And that is the bane of many modelers, myself included... nearly every model I've ever built has some sort of mistake. A couple of them were pretty egregious, and that is all I see whenever I look at them, even though to anyone viewing them, they're not bad looking models... but we are typically our own worst critics. I learned long ago that you need to make a decision at that point in time as to whether you can "live with it", or is it going to nag you forever. IMO, it may be a setback in time, but correcting a mistake if possible is worth it, or just make the mental commitment to live with it. One of the best quotes I've ever seen - "Be decisive... the road of life is littered with squirrels who couldn't make up their minds."
- Joined
- Dec 16, 2016
- Messages
- 1,192
- Points
- 493

Hi Frank. What a great reply, how true, those were my exact sentiments. Your quote put a smile on my face, thanks for that. KenAnd that is the bane of many modelers, myself included... nearly every model I've ever built has some sort of mistake. A couple of them were pretty egregious, and that is all I see whenever I look at them, even though to anyone viewing them, they're not bad looking models... but we are typically our own worst critics. I learned long ago that you need to make a decision at that point in time as to whether you can "live with it", or is it going to nag you forever. IMO, it may be a setback in time, but correcting a mistake if possible is worth it, or just make the mental commitment to live with it. One of the best quotes I've ever seen - "Be decisive... the road of life is littered with squirrels who couldn't make up their minds."
- Joined
- Dec 16, 2016
- Messages
- 1,192
- Points
- 493

Hi Peter, and Frank. Thanks for that. The redo wasn’t really about setting myself any high standards, I just didn’t like the way it looked. It appeared out of proportion and spoiled the aesthetic lines of the ship, and I wouldn’t have felt right in myself if I just left it that way. KenI admire your dissatisfaction and your considerable effort to achieve the quality of results set to your own high standard. Rock on!
Pete
Good morning Ken. I hope you had a wonderful Xmas and in 2 days I wish an awesome 2024. Wonderful progress as always she is a beauty. For me Redo’s are mostly build faults however those design faults are always the most satisfying Redo’s….just go for it and get is accurate. Your model is stunning. Awesome Xmas present BTW. Cheers GrantHello, Again welcome and thanks for your continued interest.
Today I’m telling you about the beginning of a redo, two steps back but going forward in the right direction. You know of my issue regarding the quarter deck walls and my attempt at a compromise. That compromise was ok and would have done but as many of you will understand it’s not that it’s wrong that causes a problem, it’s knowing that it’s wrong and every time that you see the model you just know that you should have made more of an effort to properly correct it. I was fitting the channels when on the spur of the moment I just ripped out my recently fitted rails which forced me to re build that section properly and not just to ponder on it. The picture shows the start of the process, wish me luck.
View attachment 417253
View attachment 417254
- Joined
- Dec 16, 2016
- Messages
- 1,192
- Points
- 493

Hello shipmates.
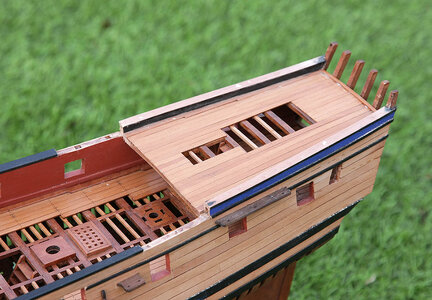
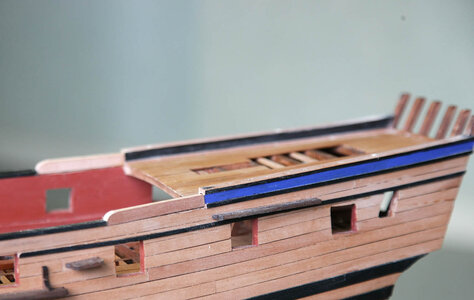
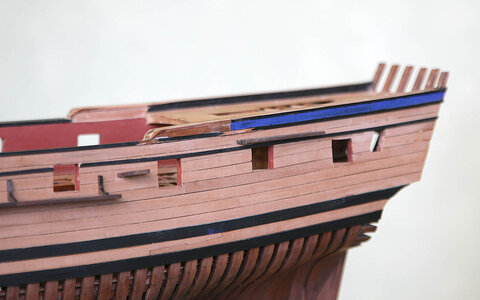
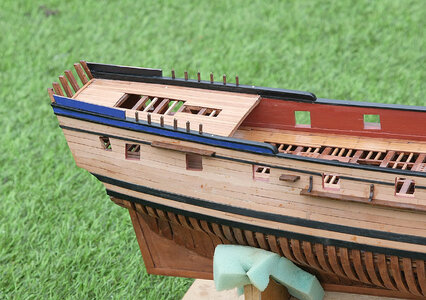
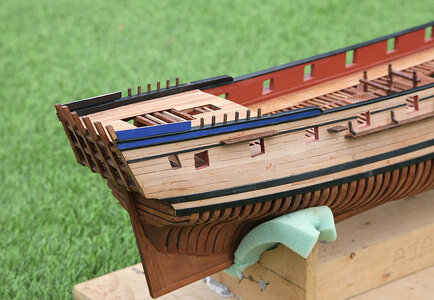
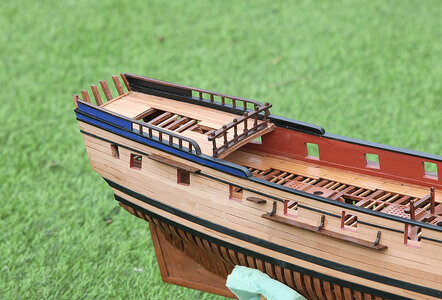
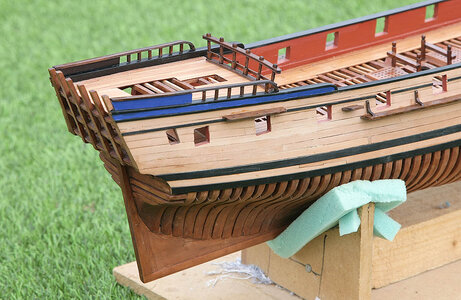
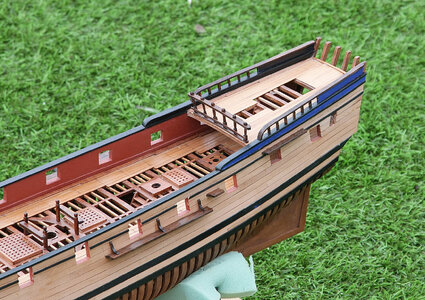
The redo is now complete and I’m rather pleased, my Blandford is now a one off and I think much improved. It only set me back a couple of days and I think it was time well spent.
I cut away part of the wall to extend the raised part by nearly two inches, I put in and shaped a piece to the height and length needed. I fitted the extra top rails as well as the side trim blending them in as best I could before sealing and painting them. I re made the quarter deck handrail and the uprights. The previous uprights I thought looked too heavy so I used thinner stock and made them a little taller, also this time rather than paint them and the hand rail black I stained and oiled them. I changed the design by having the rear third a solid wall and by painting it blue it added a bit of colour. Whilst I was doing all this I made up and fitted the breast rail, I stained and oiled it to match the other rails.
I found that rather than being annoyed at needing a redo I really enjoyed doing it and felt a great deal of satisfaction.


Ken, I love the corrections you made! It does look so much better. Nicely done, Magic Mike
- Joined
- Jan 10, 2022
- Messages
- 862
- Points
- 403

Looking really nice Ken. Mine is full of errors, but l think it looks OK and as l'm the only one who really sees it, for me it's no problem. I love that Sopwith Camel kit. Planes are my real passion and would love to build thatHello shipmates.
The redo is now complete and I’m rather pleased, my Blandford is now a one off and I think much improved. It only set me back a couple of days and I think it was time well spent.
I cut away part of the wall to extend the raised part by nearly two inches, I put in and shaped a piece to the height and length needed. I fitted the extra top rails as well as the side trim blending them in as best I could before sealing and painting them. I re made the quarter deck handrail and the uprights. The previous uprights I thought looked too heavy so I used thinner stock and made them a little taller, also this time rather than paint them and the hand rail black I stained and oiled them. I changed the design by having the rear third a solid wall and by painting it blue it added a bit of colour. Whilst I was doing all this I made up and fitted the breast rail, I stained and oiled it to match the other rails.
I found that rather than being annoyed at needing a redo I really enjoyed doing it and felt a great deal of satisfaction.
View attachment 417503
View attachment 417505
View attachment 417506
View attachment 417507
View attachment 417508
View attachment 417509
View attachment 417510
View attachment 417511
- Joined
- Dec 16, 2016
- Messages
- 1,192
- Points
- 493

Hi Keith, Thanks for that. On this type of build I don’t think that there are real errors but just a different interpretation of the build. I studied yours before I built mine and nothing stood out as wrong, re visiting from time to time it still looks great and would inspire anyone as it did me. KenLooking really nice Ken. Mine is full of errors, but l think it looks OK and as l'm the only one who really sees it, for me it's no problem. I love that Sopwith Camel kit. Planes are my real passion and would love to build that
- Joined
- Jun 17, 2021
- Messages
- 3,202
- Points
- 588

Great work. Well worth the time and effort!Hello shipmates.
The redo is now complete and I’m rather pleased, my Blandford is now a one off and I think much improved. It only set me back a couple of days and I think it was time well spent.
I cut away part of the wall to extend the raised part by nearly two inches, I put in and shaped a piece to the height and length needed. I fitted the extra top rails as well as the side trim blending them in as best I could before sealing and painting them. I re made the quarter deck handrail and the uprights. The previous uprights I thought looked too heavy so I used thinner stock and made them a little taller, also this time rather than paint them and the hand rail black I stained and oiled them. I changed the design by having the rear third a solid wall and by painting it blue it added a bit of colour. Whilst I was doing all this I made up and fitted the breast rail, I stained and oiled it to match the other rails.
I found that rather than being annoyed at needing a redo I really enjoyed doing it and felt a great deal of satisfaction.
View attachment 417503
View attachment 417505
View attachment 417506
View attachment 417507
View attachment 417508
View attachment 417509
View attachment 417510
View attachment 417511
- Joined
- Dec 16, 2016
- Messages
- 1,192
- Points
- 493

Hello friends. Thanks for all the thumbs up on my redo effort, appreciated.
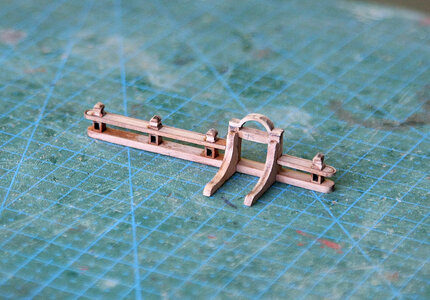
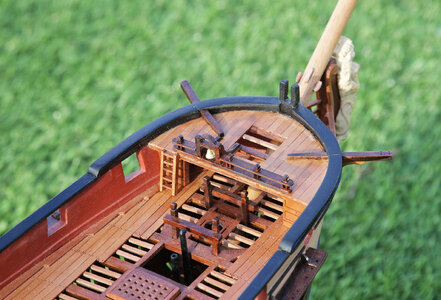
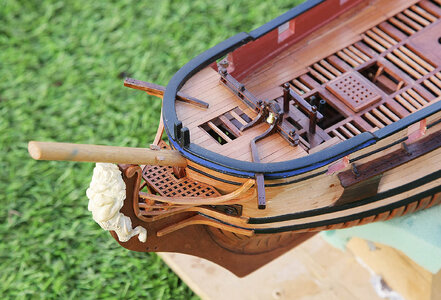
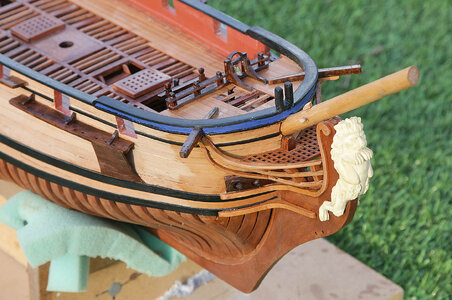
Continuing with the build, I’ve made up, stained and oiled the forecastle breast rail which includes the belfry. I’ve done the same with the anchor billboards and all the channels are now finished. I couldn’t resist oiling the bow and head rail area, I just wanted to see how the hull would eventually look when done, I’m rather pleased with the finish. The figurehead is only pressed on at the moment, I’m undecided how to finish it. A test shows that it doesn’t take very well to being stained, I don’t particularly like the whitish colour, I’m thinking maybe painting it gold with a darker wash, the jury is out on this one.
The build is coming along rather quickly, I haven't rushed it but have spent long hours at the bench and to my surprise I think that the finished build will only have taken me under five months, I'll just have to slow down a bit.


- Joined
- Aug 14, 2018
- Messages
- 829
- Points
- 403

All looking very good Ken. My best wishes for the New Year and looking forward to your next build. Jack.
- Joined
- Jun 17, 2021
- Messages
- 3,202
- Points
- 588

Me too!
- Joined
- Dec 16, 2016
- Messages
- 1,192
- Points
- 493

Hello once more and a happy new year to you all. Thanks Jack and Peter for your kind comments and to all who have given likes.
Today’s post shows the fitting of the side steps and fenders, a simple make, again stained a dark colour. I’ve made a tentative start on the transom area, the manual showed the pieces needed, 24 without the mouldings, but not how to construct it, for this you look at the built model, again I don’t think good enough as it only shows one view from the rear on how it should end up looking, no doubt I’ll be able to work something out. I’ve shown a picture of the figurehead, I decided to stain it, I used a teak colour, I thought that if it didn’t suit I could always paint it gold.
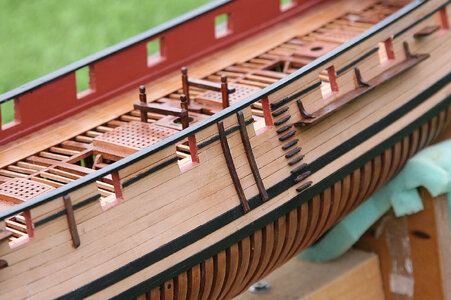
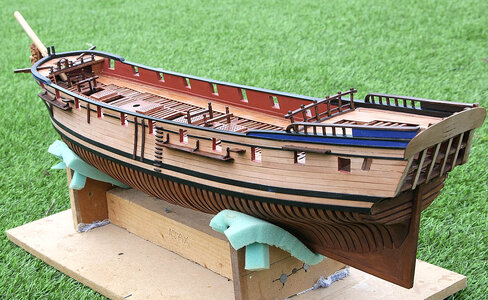
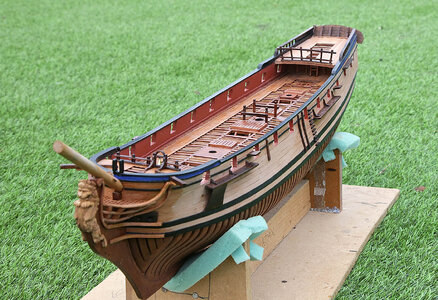
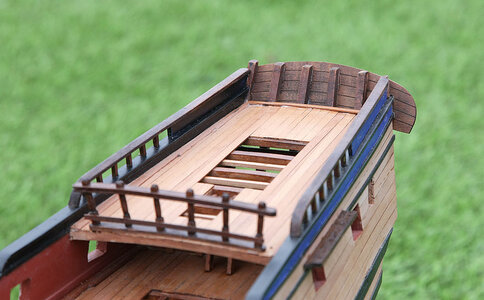
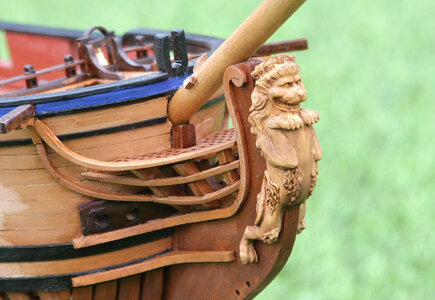
Today’s post shows the fitting of the side steps and fenders, a simple make, again stained a dark colour. I’ve made a tentative start on the transom area, the manual showed the pieces needed, 24 without the mouldings, but not how to construct it, for this you look at the built model, again I don’t think good enough as it only shows one view from the rear on how it should end up looking, no doubt I’ll be able to work something out. I’ve shown a picture of the figurehead, I decided to stain it, I used a teak colour, I thought that if it didn’t suit I could always paint it gold.


I like the stained lion very much Ken! IMHO gold rarely turns out looking as good as people imagine it will...
Ken, love the dark stain on the steps, fenders and railings. Magic Mike
- Joined
- Jun 17, 2021
- Messages
- 3,202
- Points
- 588

I like the stain solution for the lion figurehead. Believable, unobtrusive, yet distinctive enough to stand out. It still looks as though the ship is wearing the figurehead and not the other way around, good solution!
- Joined
- Dec 16, 2016
- Messages
- 1,192
- Points
- 493

Hi Paul, Along with others I tend to agree and the colour stays, do you think though that it needs its teeth whitened.I like the stained lion very much Ken! IMHO gold rarely turns out looking as good as people imagine it will...
- Joined
- Dec 16, 2016
- Messages
- 1,192
- Points
- 493

Hi Peter. A very good reply, I never thought of the colour in those terms, you’ve hit the nail on the head with your well chosen words. KenI like the stain solution for the lion figurehead. Believable, unobtrusive, yet distinctive enough to stand out. It still looks as though the ship is wearing the figurehead and not the other way around, good solution!


