• Win a Free Custom Engraved Brass Coin!!!
    As a way to introduce our brass coins to the community, we will raffle off a free coin during the month of August. Follow link ABOVE for instructions for entering.

HMS Enterprise 1774 POF 1:48.

...Thanks I think
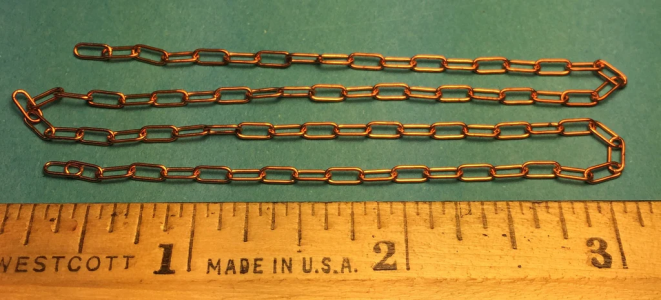
Maybe it would be better to keep it simple and use brass chain with elongated links. There are other sizes, the one below is just as an example. If you decide to duplicate the actual shapes I hope you show us how you do it, be it photo etched metal or plastic links or whatever you wind up with. This is getting really interesting..... :)
Allan

1762425537897.png
 
Last edited:
Maybe it would be better to keep it simple and use brass chain with elongated links. There are other sizes, the one below is just as an example. If you decide to duplicate the actual shapes I hope you show us how you do it, be it photo etched metal or plastic links or whatever you wind up with. This is getting really interesting..... :)
Allan

View attachment 555001
Thanks Allan.
 
Good morning. Ricochet rabbit at it again. My cad design for the chain pumps and my wood supply for the wales is taking a while so I decided to do some wood work again.

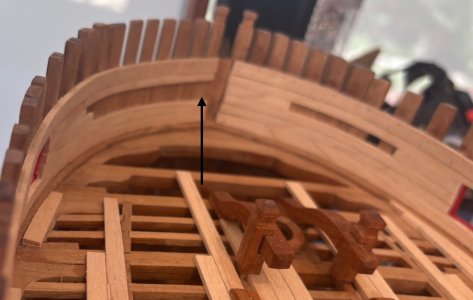
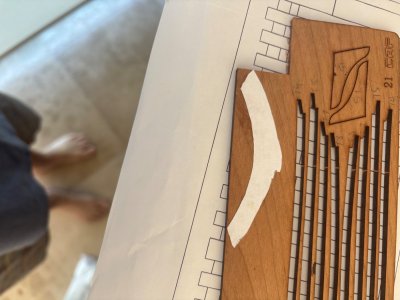
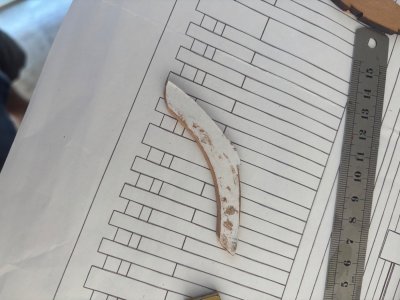
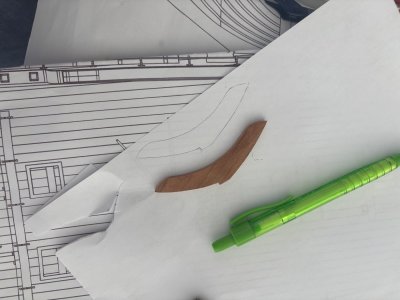
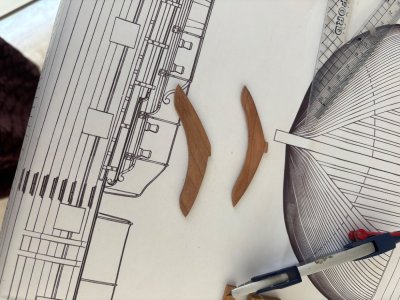
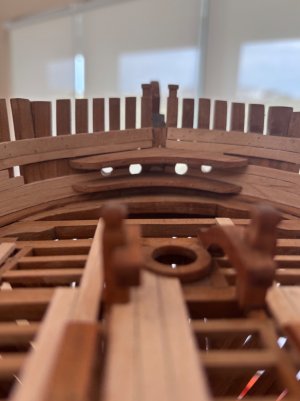
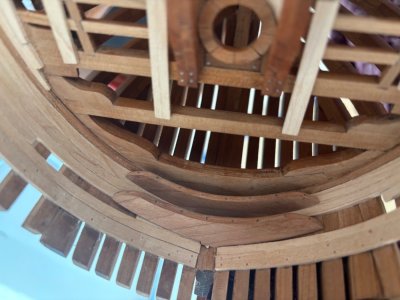
The kit does not have the upper breast hook and bolster so I decided to try and make these.

Trying to find scraps of cherry wood is the problem.

My design leaving gaps etc (as shown by the arrow) made this a little bit of a challenge as I had to make each side differently so it fits.
IMG_6911.jpeg
The upper breast hook.
IMG_6907.jpeg

IMG_6908.jpegIMG_6909.jpeg
Now to try and find thinner wood for the bolster…..hmmm. I may have to glue some pieces together. Let’s see…
Cheers Grant
 
Good morning from a wonderful summers day in Cape Town. The weather must also be celebrating our rugby win over France last night…..my head not so muchROTF.

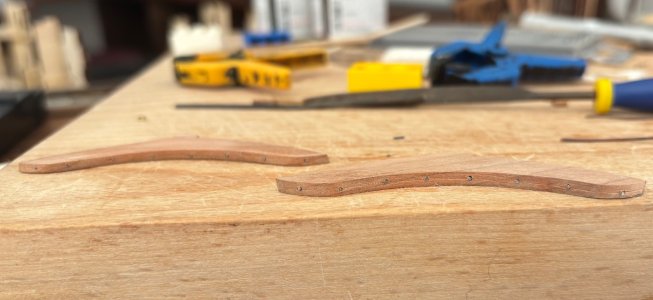
I did manage some more work on the Hawes holes, upper breast hook and bolster. It Was rather fun - being very tool inefficient I cut and shaped these with my dremel. Was interesting getting the symmetry. To reduce the width of the bolster I did some fun sanding by hand. They turned out not bad.
IMG_6929.jpegIMG_6930.jpeg
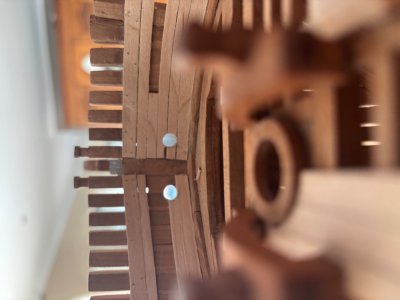
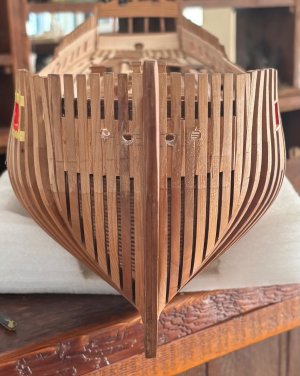
Hawes holes I took a big drill to my ship- full throttle Grant. I’m still busy so all looks a bit of a mess.
WIP photos: - nothing fitted.
IMG_6924.jpegIMG_6926.jpeg
IMG_6932.jpegIMG_6936.jpeg
The Hawes holes are not sized yet and the outer ones still need another size up drilling.
Cheers Grant
 
Good morning from a wonderful summers day in Cape Town. The weather must also be celebrating our rugby win over France last night…..my head not so muchROTF.

I did manage some more work on the Hawes holes, upper breast hook and bolster. It Was rather fun - being very tool inefficient I cut and shaped these with my dremel. Was interesting getting the symmetry. To reduce the width of the bolster I did some fun sanding by hand. They turned out not bad.
View attachment 555768View attachment 555769
Hawes holes I took a big drill to my ship- full throttle Grant. I’m still busy so all looks a bit of a mess.
WIP photos: - nothing fitted.
View attachment 555770View attachment 555771
View attachment 555772View attachment 555773
The Hawes holes are not sized yet and the outer ones still need another size up drilling.
Cheers Grant
I always enjoy looking at your work. I know what taking a 3/8's drill to a ship model feels like, one slip and all that power could do some real damage.
 
Good morning from a wonderful summers day in Cape Town. The weather must also be celebrating our rugby win over France last night…..my head not so muchROTF.

I did manage some more work on the Hawes holes, upper breast hook and bolster. It Was rather fun - being very tool inefficient I cut and shaped these with my dremel. Was interesting getting the symmetry. To reduce the width of the bolster I did some fun sanding by hand. They turned out not bad.
View attachment 555768View attachment 555769
Hawes holes I took a big drill to my ship- full throttle Grant. I’m still busy so all looks a bit of a mess.
WIP photos: - nothing fitted.
View attachment 555770View attachment 555771
View attachment 555772View attachment 555773
The Hawes holes are not sized yet and the outer ones still need another size up drilling.
Cheers Grant
That’s the way we do it, the power and the glory. When you marked the wanted place for the holes, what can go wrong ……..
:rolleyes:
And I loves that related Floydian-quote from Jim: :)
One slip, and down the hole we fall
It seems to take no time at all…
Regards, Peter
 
Good afternoon.

My company turned 21 on Thursday so we celebrated this milestone with our clients. There were plenty sore heads on Friday.Sick.

A few pics :
View attachment 552719View attachment 552720View attachment 552721View attachment 552722View attachment 552723View attachment 552724
View attachment 552726
View attachment 552727
View attachment 552728
I had to include the last pic to show our wonderful mountain- excuse the clown spoiling it ROTF.
Cheers Grant
PS: Excuse the pic quality these were snaps on my phone. We did have photographers these but I don’t have these yet.
Grant! Congratulations!!!!!

Blessings.
Chuck
 
I always enjoy looking at your work. I know what taking a 3/8's drill to a ship model feels like, one slip and all that power could do some real damage.
I also know how scary it is taking a powered drill bit to the model for the hawse. I’ve used the highly technical term “hit or miss” before but you’ve certainly made this a “hit” Grant.
Well, that's an understatement, Grant. Very nice indeed.

I'll not share my thoughts about using a full-size hand-held drill on a ship model Speechless :)...
As always, great job! As for the full-size drill bit, as my favorite band said in their song:
One slip, and down the hole we fall
It seems to take no time at all…

It’s from the 1987 album A Momentary Lapse of Reason.
That’s the way we do it, the power and the glory. When you marked the wanted place for the holes, what can go wrong ……..
:rolleyes:
And I loves that related Floydian-quote from Jim: :)

Regards, Peter
Good morning Gentlemen. I don’t like doing a group response however I will just respond to each of you the same. Thank you kindly for the compliments. I delayed making the Hawes holes for a long time as I was a little nervous about messing these up. Firstly the measurements as I had a chance of getting these out by even a half a mm. No electronic tools in Grants shipyard…..I also traced the the holes from the drawings but had to adjust for curve of the bow vs a flat drawing. I started with a small drilled hole and needle files however this became a “watching paint dry” experience. So…..boom the big drill came out. It did damage my inner planks a little bit but nothing I can’t fix.The final finishing will be done with files and sand paper. Maybe I got lucky;).
Cheers Grant
 
IMG_6926.jpeg

IMG_6932.jpeg
Turned out very good. It looks like a work of professional modelerThumbsup
 
My humble apology for posting yet another incomplete item. I have more incomplete parts on this ship than completedRedface:eek:.

“If you don’t know me by now….”ROTF

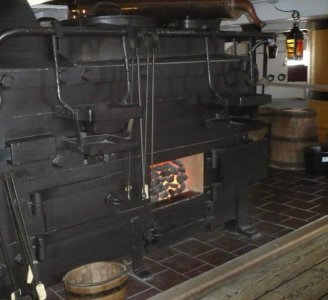
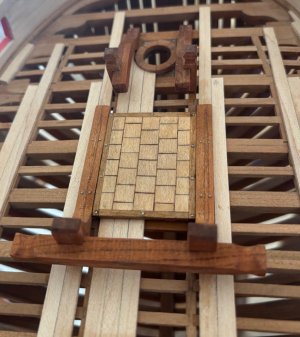
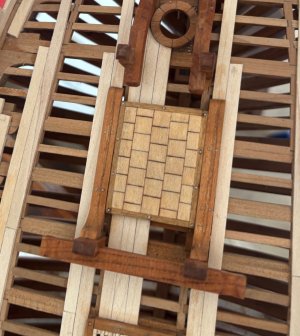
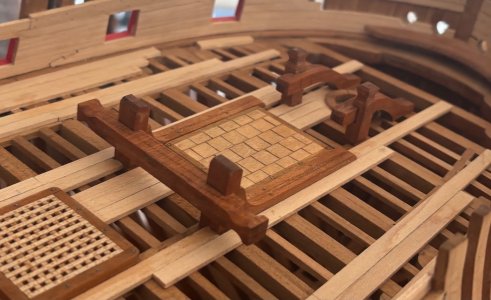
The heat tiles/bricks for the stove. I used the picture below as a reference.
IMG_6939.jpeg
I scratch build this and had to use walnut instead of cherry wood for the frame as the kit is really stingy with the wood supplied. It is not glued in yet.

I was going to stain the tiles a clay colour however they jump out at you too much.
IMG_6958.jpegIMG_6959.jpegIMG_6960.jpeg
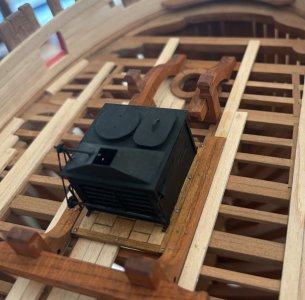
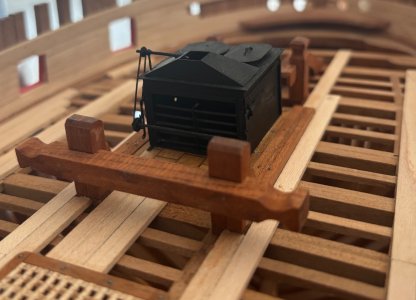
I put the INCOMPLETED ROTF stove on :
IMG_6965.jpegIMG_6964.jpeg
Gentlemen I promise one day I will put ricochet rabbit away and finish up something for you to view.:cool:.
Cheers Grant
 
Back
Top