- Joined
- Jan 10, 2022
- Messages
- 860
- Points
- 403

Thank you Grant. Sorry not got round to peeking into your build log. Will remedy that later today. Hope all is going wellDitto. All looks fantastic Keith. Cheers Grant
 |
As a way to introduce our brass coins to the community, we will raffle off a free coin during the month of August. Follow link ABOVE for instructions for entering. |
 |
 |
The beloved Ships in Scale Magazine is back and charting a new course for 2026! Discover new skills, new techniques, and new inspirations in every issue. NOTE THAT OUR FIRST ISSUE WILL BE JAN/FEB 2026 |
 |

Thank you Grant. Sorry not got round to peeking into your build log. Will remedy that later today. Hope all is going wellDitto. All looks fantastic Keith. Cheers Grant
NP Keith. I have not contributed much lately.Thank you Grant. Sorry not got round to peeking into your build log. Will remedy that later today. Hope all is going well
Are you going to install the optional nails at the keel joints? Or have you already?The stern deadwood is now finished and attached to the keel. It all fits the drawing perfectly, which I am taking as a good sign and fits into the jig as well. When the glue is dry, I shall remove the keel from the jig to add the photo etch bracket ties front and back and do a little cleaning up of the top of stern deadwood and where the fore apron is attached. That will be the keel complete and on to the next stage . . . the construction of the ribs
View attachment 514274
View attachment 514275
View attachment 514276
View attachment 514277
View attachment 514278
View attachment 514279
View attachment 514280
When making up my false keel I made stepped scarf joints. Only took about 15 or 20 minutes to make up with an x-acto knife and a file. As you can see though I installed them upside down. As an old friend once told me; “a dumb man won’t notice and a smart man won’t tell”.Thank you Jeff. As is yours. Have you decided how you are going to prepare your false keel joints. I'm just making a 45 degree scarf at each joint for ease. After sanding nobody is going to see it. I build for pleasure and not worried about 100% historical accuracy, as long as l think it looks OK

Easy is probably not best.Also does anyone out there know of an easy way to remove the laser char from all those hundreds of parts and pieces? Besides old fashioned elbow grease I mean.
It goes pretty fast with 100 grit foam sanding sticks with a plus being you can easily see if you’re sanding flat. The chocks, I lightly touch on the disc sander, keeps all surfaces pristine. All frames, when built get hit with spindle sander, very quick.Also does anyone out there know of an easy way to remove the laser char from all those hundreds of parts and pieces? Besides old fashioned elbow grease I mean.

Kakistocracy,Keith,
I was on a bike trip across Andalusia October 15-30 2024, lots of climbing. Then drove across Spain to Madrid for another week. ! On my father's side, my family lived in Sevilla until they went to the new world in the early 1500's. They were conversos. I have a lot of family history and data, a lot of it from the Archivo de Indias in Seville. I love Andalusia, and could live in Sevilla (and may do so), if the current Kakistocracy in the USA continues with the wrecking ball.-ok, no politics-shipbuilding....
Malagueña Salerosa......
AR

Looks very good thoughWhen making up my false keel I made stepped scarf joints. Only took about 15 or 20 minutes to make up with an x-acto knife and a file. As you can see though I installed them upside down. As an old friend once told me; “a dumb man won’t notice and a smart man won’t tell”.
View attachment 514332

No l don't think so. Although not decided yet. Are you?Are you going to install the optional nails at the keel joints? Or have you already?
nobody askedNo l don't think so. Although not decided yet. Are you?
yes, I think so.No l don't think so. Although not decided yet. Are you?

I have now decided that l will include the nails but will tackle some of the ribs first and dry fit them to the keel to see how they fit. I have found all the pieces for number 7 which l have decided to do first, not for any specific reason other than it is a full height frame without gun port and have started to clean the mating surfaces and assemble. Photos to follow tomorrow. Not too difficult as long as you keep an eye on the futtock step downs. l think it would be good to establish a routine of locating the parts in order of the board thicknessesyes, I think so.

Careful sanding is the only way. I know a lot of people find this a chore but I myself don't mind it. It's a necessary part of the hobbyAlso does anyone out there know of an easy way to remove the laser char from all those hundreds of parts and pieces? Besides old fashioned elbow grease I mean.
Some on the forum has shown good results with using airbrush eraser material, a fine blast grit. You need to buy one of the special blast units designed for this process, not to much more than standard air brush, and photos show good results with no loss of wood base underneath.Also does anyone out there know of an easy way to remove the laser char from all those hundreds of parts and pieces? Besides old fashioned elbow grease I mean.
If the bow is to the left, it is right side upAs you can see though I installed them upside down.
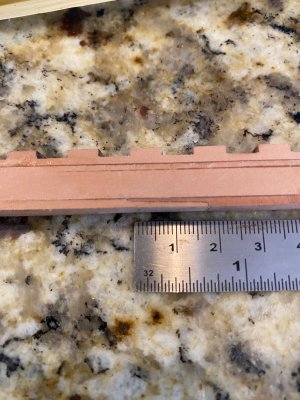
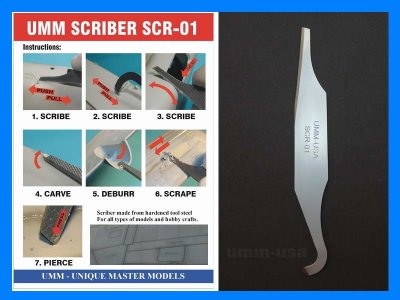
Here is what I stumbled onto that was a pleasant surprise. Since I do a fair amount of other modeling I used this on a couple test pieces and it works nicely, started to cut rabet and it goes very well using light passes until it deepens a bit. Hooked end removes wood cleanly.Thank you. I cut the rabet into the lower keel piece just by filing at a 45 degree angle to the laser cut guide line and cleaning up by gently side scraping with a sharp craft knife blade. I have been busy, the last few days, fine tuning the keel pieces and tomorrow hope to show some pics of the finished keel in position inside the jig

Also here the big step of making the first frame. Yours is also looking very promising, Keef.some photos of my first frame (no. 7). To protect the drawing which has to be used for both side A and side B, I have used clingfilm to cover it. The photo shows side A complete and side B pieces just laid over the drawing before gluing
View attachment 514604
View attachment 514605
View attachment 514606
View attachment 514607
View attachment 514608
She is looking wonderful !some photos of my first frame (no. 7). To protect the drawing which has to be used for both side A and side B, I have used clingfilm to cover it. The photo shows side A complete and side B pieces just laid over the drawing before gluing
View attachment 514604
View attachment 514605
View attachment 514606
View attachment 514607
View attachment 514608
