• LUCZORAMA SHIPWRECK SCAVENGER HUNT GIVEAWAY. 4 Weeks of Fun • 1 Legendary Prize ((OcCre’s Fram Ship)) • Global Crew Welcome!
    **VIEW THREAD HERE**

HMS ENTERPRISE by Keith 1:48 scale. New Kit from M.D.

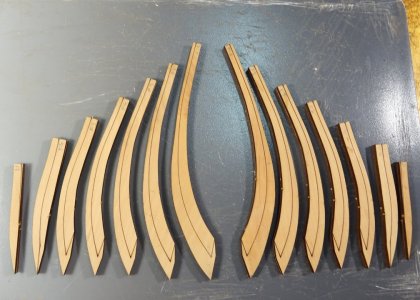
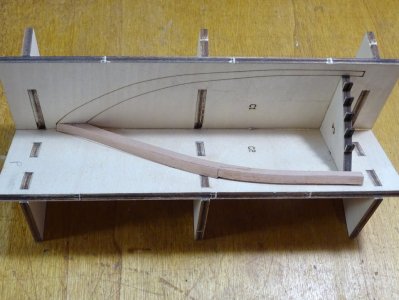
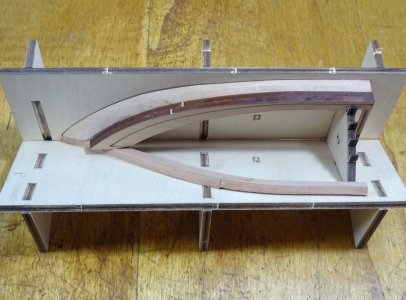
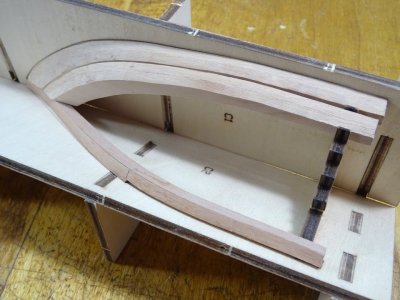
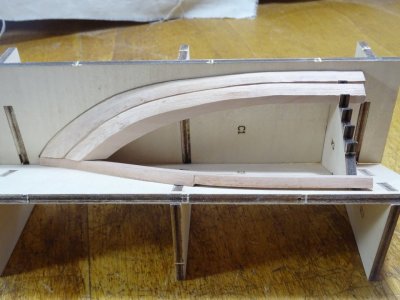
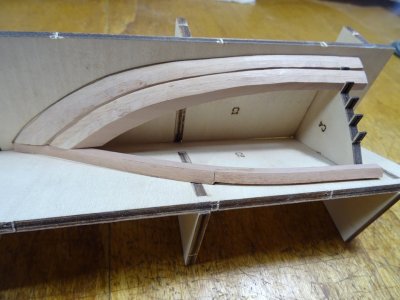
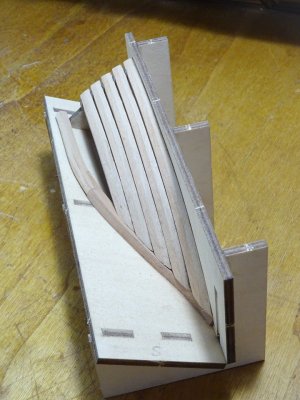
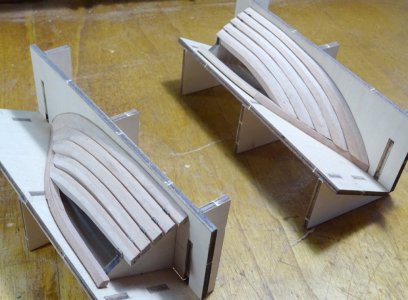
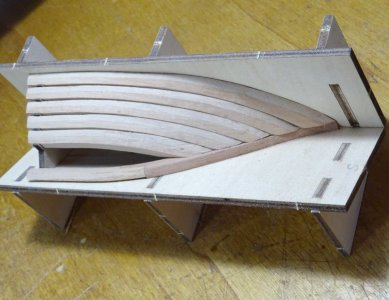
I have not seen anywhere written details of the building process for the hawse pieces for this kit, so l will give my interpretation of how l think it should be done over the next few days, going by the 3D drawings in the pdf manual. I hope it will work out OK, but only time will tell. I have started by making the 2 jigs supplied with the kit which support and accurately place the parts during the building process. The parts making up the jig are a really tight fit so a little cleaning of the char is necessary in all the joints. The next step is dentifying the components, and making up the last of the bow cant frames, x8A and B. The hawse pieces adjoin to x8A. The hawse pieces themselves consist of 28 seperate parts (F1 to F7) that join together making 7 port and 7 starboard frames as shown in the photos . The weather here, over the last week or so has been extremely hot, 37 deg C outside and 31 in my workshop, so am calling it a day for now. I shall continue over the next few days detailing the process as l understand it, so until the next time . . .

View attachment 533360

View attachment 533361

View attachment 533362

View attachment 533363

View attachment 533364

View attachment 533366

View attachment 533367

View attachment 533368

View attachment 533370

View attachment 533371
This YouTube video might help you. This video is for the 1/96 kit, but the concept is the same. :)
Link to Hawse video
 
Too many pages to copy here as it is copyrighted but the best explanation on making, shaping (inside and out), and setting up the bollards and hawse pieces that I have used is the description by David Antscherl in The Fully Framed Model, Volume I, pages 106-111. The way it is described can be used on any model.
Allan
 
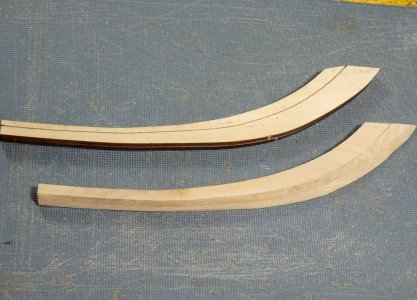
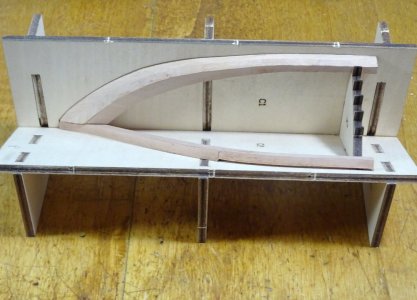
Coming along with the construction of the hawse pieces. x8A and B have been faired. x8B is in its position on the keel, while x8A is placed in the jig for the hawse pieces as all the frames will attach to it. The first piece, F1 is sanded to shape, inside and out. This is the piece that attaches vertically to the hull and is the longest of the 7 frames making up the hawse pieces. It is dry fitted to the cant frame x8A and fits very nicely. F2 is also sanded to shape and takes up its position in the jig next to F1. I must be doing something right as it fits on x8A and the shape forming is instantly recognizable. All good so far

DSC00634.JPG

DSC00636.JPG

DSC00639.JPG

DSC00641.JPG

DSC00644.JPG

DSC00648.JPG

DSC00649.JPG

DSC00650.JPG
 
The jig fixture is ingenious. Can someone please explain what is meant by the following in bold type from the contract for Enterprise's sister ship Aurora? A sketch would be great. Thank you kindly.
Allan

To have proper Bollard Timbers for Security of the Bowspriet sided one foot & on each Side 4 hawse pieces, the foremost & aftermost sided at the upper part 14 ins each, no boxing as was usual to be left in them but the stuff to run thro both within & without, & two middle 13 ins each
 
Keith,

Nice start, with the jig it becomes pretty intuitive.
One tip, make sure the foot of X8 goes into the hole and sits proud of the main bollard. This so when complete, there remains a "foot" to locate on the first step of the keel where all can't frames locate.
 
Hi TRS
Finishing the inboard side of the frames is a chore and yours looks really good! Seeing the port and starboard limber strakes in place, do the plans show or does the kit provide material with the mortise in the inboard top edge to accept the limber boards? This area will be out of sight in the end, but it does make it easier to set the limber boards neatly in place if you are going to add them.
Thanks

Allan
Got most of the high low spots evened out so beams flow….almost there but man is it boring work.

The kit does not.
Still scratching my head as to whether to cut/ bevel some without morticing which , although a compromise, as you said with three decks above, not a lot to see.

Tim
 
Hi Corsair, Just a question or three. Would you recommend this sander for doing frames? What grit would you recommend using?
There is a lot of variables there. Much depends on the builder, but also the kit needs to be taken into account as well as the quality of assembly. I'm only using it for the general shaping of the outside of the frames. and I'm using 150 grit with a very soft hand (meaning I'm not pushing the wood into the sander with much pressure). For the inside of the frames on my kit, I'm using a sanding drum on a drill press and I can turn down the speed a lot and be more careful. I'll do the finish sanding once the frames are all assembled.
 
Hi Corsair, Just a question or three. Would you recommend this sander for doing frames? What grit would you recommend using?FWIW that is a fine choice.
That is a fine choice.Myself, I’ve used the 2”drum with 180,
Don’t touch frames until paired and I then hold the paired frames frreehand off the table to bevel inside and out. Using the lines and char allows you to keep things nice and even. 5 minutes to bevel a full frame,
Tip: as you progress, take the bevels right down to the lines, without knowing exactly what my margin for error might be I left several just off the line but that resulted in more sanding……those lines are accurate.
My images show this result so you be the judge on process.
 
Last edited:
The jig fixture is ingenious. Can someone please explain what is meant by the following in bold type from the contract for Enterprise's sister ship Aurora? A sketch would be great. Thank you kindly.
Allan

To have proper Bollard Timbers for Security of the Bowspriet sided one foot & on each Side 4 hawse pieces, the foremost & aftermost sided at the upper part 14 ins each, no boxing as was usual to be left in them but the stuff to run thro both within & without, & two middle 13 ins each
has anybody answered this please
 
Coming along with the construction of the hawse pieces. x8A and B have been faired. x8B is in its position on the keel, while x8A is placed in the jig for the hawse pieces as all the frames will attach to it. The first piece, F1 is sanded to shape, inside and out. This is the piece that attaches vertically to the hull and is the longest of the 7 frames making up the hawse pieces. It is dry fitted to the cant frame x8A and fits very nicely. F2 is also sanded to shape and takes up its position in the jig next to F1. I must be doing something right as it fits on x8A and the shape forming is instantly recognizable. All good so far

View attachment 533450

View attachment 533451

View attachment 533452

View attachment 533453

View attachment 533454

View attachment 533455

View attachment 533456

View attachment 533457
This really is incredibly helpful
Just need to remember where it is when i get to the Hawse in about 2 years !!

THANKS
 
Last edited:
Back
Top