Thanks for posting this, it's great to see how other do this. Much appreciated info.I would guess everybody knows how to attach a block to a mast or spar so this will be old hat to most folks. I thought I’d show the process I use as the tools are a little bit different.
1. Make a figure eight in the line to be tied.
2. Then clamp the ends between a fly-tying vice and a pair of hemostats secured in a vice.
3. Take another piece of line and tie a standard sizing knot around the middle of the lines.
4. I usually do five wraps checking between each wrap to make sure all the wraps are snugged up to each other.
5. Release the vice and insert a block leaving the loop in the jaws and tighten the vice.
6. Slide the knot down the line and push it tight to the block.
7. Take the assembly from the vice and hemostats and place the other loop on the mast or spar and pulling the other tag end close the loop over the mast.
8. Apply a small drop of CA to the knot and trim the tags. I use a small pair of fly-tying scissors that are great for getting close to the knot.
9. Trimmed and secured to the mast.
View attachment 200902
-

Win a Free Custom Engraved Brass Coin!!!
As a way to introduce our brass coins to the community, we will raffle off a free coin during the month of August. Follow link ABOVE for instructions for entering.
-

PRE-ORDER SHIPS IN SCALE TODAY!
The beloved Ships in Scale Magazine is back and charting a new course for 2026!
Discover new skills, new techniques, and new inspirations in every issue.
NOTE THAT OUR FIRST ISSUE WILL BE JAN/FEB 2026
You are using an out of date browser. It may not display this or other websites correctly.
You should upgrade or use an alternative browser.
You should upgrade or use an alternative browser.
Thanks. I'll try to put together another photo spread when I do the deadeyes and shrouds. I do that a little different too.Thanks for posting this, it's great to see how other do this. Much appreciated info.
Greetings everyone.
I have finished the lower shroud lines and getting ready to install the rat lines. Some use a natural rope color for the rats however I prefer the look of black rat lines. I will assume the keel line is parallel to the waterline and so the rat lines will be parallel as well. With the help of STGCS, and TechTrek, I am now confident with knot tying and setting the various shive blocks. I was a little concerned with tying the upper and lower deadeyes on the mizzen mast together because of the very small size (3mm deadeyes) and (1mm thread) but they were not any more difficult than their larger counterparts on the fore and main mast. Looking forward to completing the lower rigging in this phase!
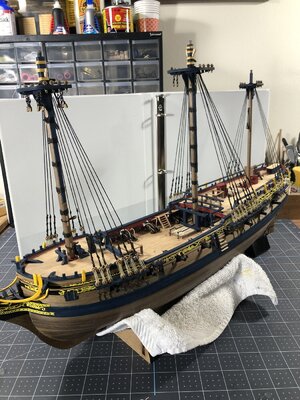
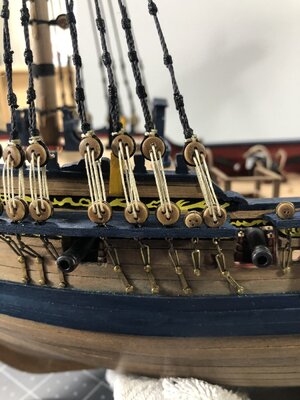
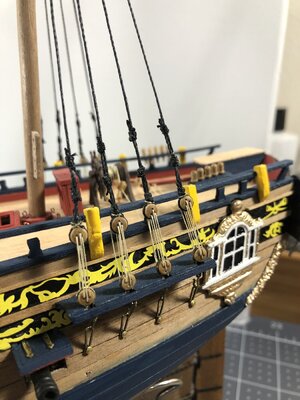
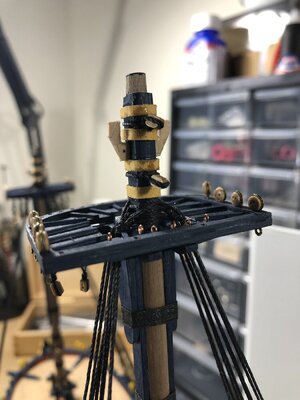
I have finished the lower shroud lines and getting ready to install the rat lines. Some use a natural rope color for the rats however I prefer the look of black rat lines. I will assume the keel line is parallel to the waterline and so the rat lines will be parallel as well. With the help of STGCS, and TechTrek, I am now confident with knot tying and setting the various shive blocks. I was a little concerned with tying the upper and lower deadeyes on the mizzen mast together because of the very small size (3mm deadeyes) and (1mm thread) but they were not any more difficult than their larger counterparts on the fore and main mast. Looking forward to completing the lower rigging in this phase!


Excellent work, very well done. I’m chomping at the bit to get into my HMS Fly. I’m hoping to have the Bluenose done in another week or so. I’ve never done sails before so maybe my estimate is off but we’ll see.
Thanks Chris, the rate of progress on your awesome bluenose is amazing as well.
Hi Daniel. I just spent a most enjoyable hour catching up on your build here. I think you have playing coy. I think your work here is marvelous! The upper decks look fantastic, the wax finish on the hull has a lovely natural sheen, all the deck fittings and accessories turned out great, and your rigging is very tidy and clean. Bravo my friend! I am a fan! Looking forward to now charting your progress...
Thank you for the kind words Doc. This hobby and the people on this forum are simply the best.Hi Daniel. I just spent a most enjoyable hour catching up on your build here. I think you have playing coy. I think your work here is marvelous! The upper decks look fantastic, the wax finish on the hull has a lovely natural sheen, all the deck fittings and accessories turned out great, and your rigging is very tidy and clean. Bravo my friend! I am a fan! Looking forward to now charting your progress...
Agree, definitely gets me to try and up my game. Been helped out quite a few times and always able to find answer or just ask. 

That's a keen observation Daniel. Perhaps part of it comes from the fact that the masters are humble so that breeds humility among the rest of us. Or maybe it's that we all know what it feels like to snatch defeat from the jaws of success. Anyone who tries to build a scale model had better become good friends with frustration (or at least that's my observation as a newcomer). It takes a blend of persistence and the encouragement of others to rally when things seem hopeless. I believe that makes us better human beings.
Whew, that's a lots of philosophizing so early in the morning. Back to tiny nails...much less neuron activity with tiny nails.
Whew, that's a lots of philosophizing so early in the morning. Back to tiny nails...much less neuron activity with tiny nails.
The Admiral calls my workshop the swearing room.That's a keen observation Daniel. Perhaps part of it comes from the fact that the masters are humble so that breeds humility among the rest of us. Or maybe it's that we all know what it feels like to snatch defeat from the jaws of success. Anyone who tries to build a scale model had better become good friends with frustration (or at least that's my observation as a newcomer). It takes a blend of persistence and the encouragement of others to rally when things seem hopeless. I believe that makes us better human beings.
Whew, that's a lots of philosophizing so early in the morning. Back to tiny nails...much less neuron activity with tiny nails.
Greetings everyone.
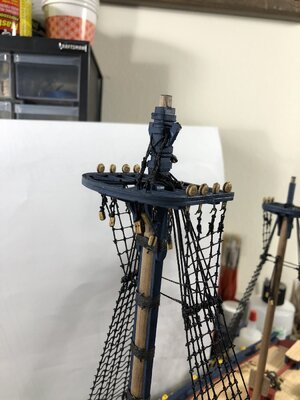
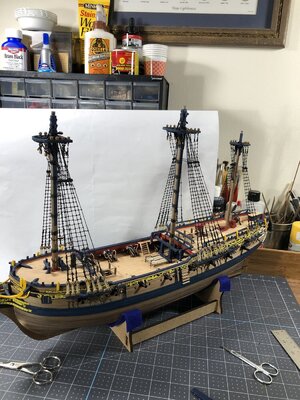
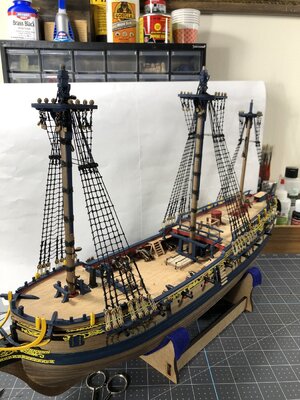
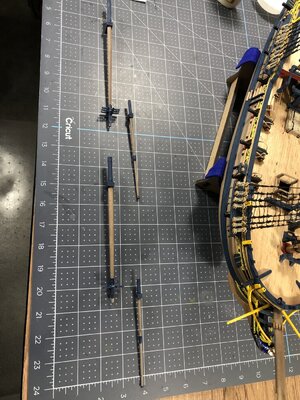
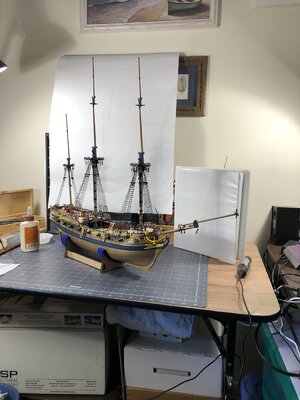
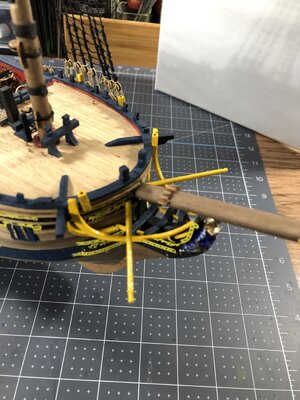
My excitement is building now that I'm firmly into the rigging phase. I have fabricated all the spars and mast pieces with the aid of my bench lathe. In one of the attached photos I show a dry fit of the upper mast pieces and will be attaching all the pullies and cleats prior to permanent installation. The bowsprit and jibboom assemblies with there respective hardware are glued in place. Attaching the rat lines to the shroud lines was a fascinating learning experience. It is very easy to put too much pull for several iterations and when you stand back and look you have a terrible distortion which required redoing. After reading others comments about rat lines I realize the 'scale' of mine are off a bit. Anyways I counted 810 +- knots so far. By the way I want to thank everyone who follows my build log, your comments and suggestions mean a lot to me.
Enjoy the photos (more to come later).and happy modeling!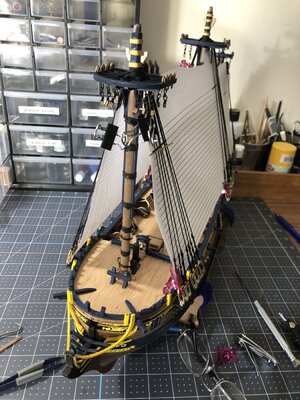


Hey Dan. Saw this idea on another build. Drill a hole for a small pin in a spar and on the mast where the spar will mount to the mast. I drilled the holes on the masts before I mounted them. Will do the spars as I build them. Sounds like a great way to hold things together during assembly.Greetings everyone.
My excitement is building now that I'm firmly into the rigging phase. I have fabricated all the spars and mast pieces with the aid of my bench lathe. In one of the attached photos I show a dry fit of the upper mast pieces and will be attaching all the pullies and cleats prior to permanent installation. The bowsprit and jibboom assemblies with there respective hardware are glued in place. Attaching the rat lines to the shroud lines was a fascinating learning experience. It is very easy to put too much pull for several iterations and when you stand back and look you have a terrible distortion which required redoing. After reading others comments about rat lines I realize the 'scale' of mine are off a bit. Anyways I counted 810 +- knots so far. By the way I want to thank everyone who follows my build log, your comments and suggestions mean a lot to me.
Enjoy the photos (more to come later).and happy modeling!View attachment 204516View attachment 204517View attachment 204518View attachment 204519View attachment 204520View attachment 204521View attachment 204522
You know I hadn't thought about holding the spar in place while trying to 'rig' it up. I will probably try once without the pin holding it and if it becomes too difficult then yes definitely will use the pins. I have used the pins on the channels, boomkins, and the belaying racks. In my mind it would work.Hey Dan. Saw this idea on another build. Drill a hole for a small pin in a spar and on the mast where the spar will mount to the mast. I drilled the holes on the masts before I mounted them. Will do the spars as I build them. Sounds like a great way to hold things together during assembly.
Lovely work Daniel. Very ship-shape. Clever 'jig' for the ratlines!Greetings everyone.
My excitement is building now that I'm firmly into the rigging phase. I have fabricated all the spars and mast pieces with the aid of my bench lathe. In one of the attached photos I show a dry fit of the upper mast pieces and will be attaching all the pullies and cleats prior to permanent installation. The bowsprit and jibboom assemblies with there respective hardware are glued in place. Attaching the rat lines to the shroud lines was a fascinating learning experience. It is very easy to put too much pull for several iterations and when you stand back and look you have a terrible distortion which required redoing. After reading others comments about rat lines I realize the 'scale' of mine are off a bit. Anyways I counted 810 +- knots so far. By the way I want to thank everyone who follows my build log, your comments and suggestions mean a lot to me.
Enjoy the photos (more to come later).and happy modeling!View attachment 204516View attachment 204517View attachment 204518View attachment 204519View attachment 204520View attachment 204521View attachment 204522
Hi Doc,
I got the idea for the shroud jig from STGCS (Charlie) on his Pegasus build. He has taught me several tricks of the trade.
I got the idea for the shroud jig from STGCS (Charlie) on his Pegasus build. He has taught me several tricks of the trade.
Daniel, I just started reading your Fly build and am impressed. Nice work. Between all of your comments and those of others I have learned a number of new techniques. Keep up the good work.
Last edited:
Looking amazing Daniel.Greetings everyone.
My excitement is building now that I'm firmly into the rigging phase. I have fabricated all the spars and mast pieces with the aid of my bench lathe. In one of the attached photos I show a dry fit of the upper mast pieces and will be attaching all the pullies and cleats prior to permanent installation. The bowsprit and jibboom assemblies with there respective hardware are glued in place. Attaching the rat lines to the shroud lines was a fascinating learning experience. It is very easy to put too much pull for several iterations and when you stand back and look you have a terrible distortion which required redoing. After reading others comments about rat lines I realize the 'scale' of mine are off a bit. Anyways I counted 810 +- knots so far. By the way I want to thank everyone who follows my build log, your comments and suggestions mean a lot to me.
Enjoy the photos (more to come later).and happy modeling!View attachment 204516View attachment 204517View attachment 204518View attachment 204519View attachment 204520View attachment 204521View attachment 204522

Well thank you Shimsham. I will be posting another set of photo updates some time today.
Hello everyone,
I have a few update photos to show here. I'm certainly glad the ratlines are finished. After the last ratline was in place I was like YEA! I can finally move on to the rest of the standing rigging. I've completed the mizzen royal stay and top mast stay (which I had to do twice due to attaching the lines to the wrong locations). For me the rigging is one area where if you leave out a step, then it can become very unforgiving trying to insert the oversight. An example would be placing an drill hole for a pin in the lower mast with all the standing rigging in place. I am really enjoying seeing the symmetry and scale of this ship come to life! Hope you enjoy the photos and happy modeling.

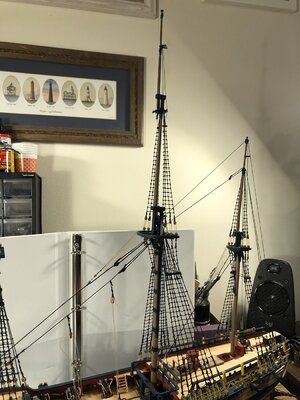
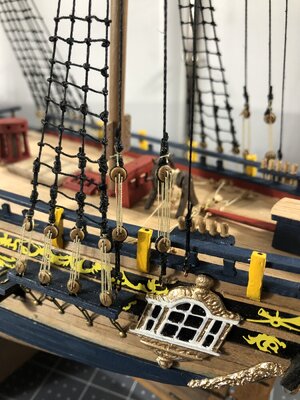
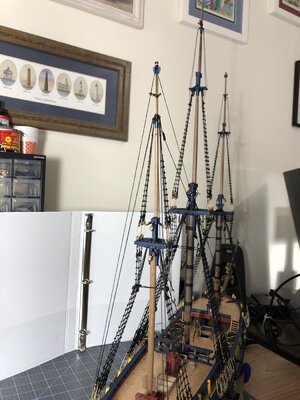
I have a few update photos to show here. I'm certainly glad the ratlines are finished. After the last ratline was in place I was like YEA! I can finally move on to the rest of the standing rigging. I've completed the mizzen royal stay and top mast stay (which I had to do twice due to attaching the lines to the wrong locations). For me the rigging is one area where if you leave out a step, then it can become very unforgiving trying to insert the oversight. An example would be placing an drill hole for a pin in the lower mast with all the standing rigging in place. I am really enjoying seeing the symmetry and scale of this ship come to life! Hope you enjoy the photos and happy modeling.


