HMS Fly - Amati 1:64 - by Daniel20 [COMPLETED BUILD]

Greetings all.
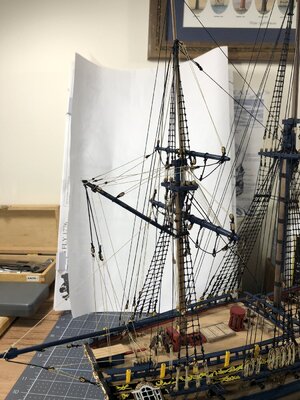
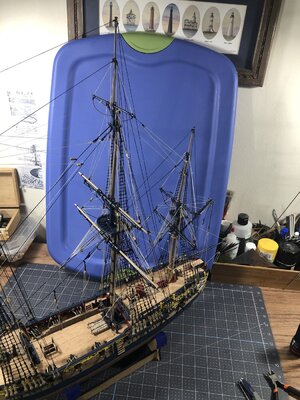
I finally have an update with a little meat in it. I began placing the running rigging on the mizzen and completed it.
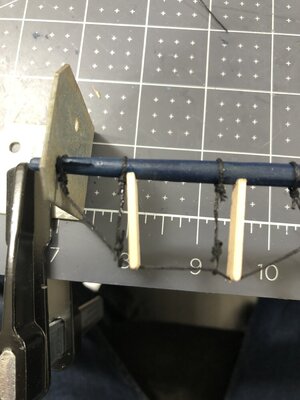
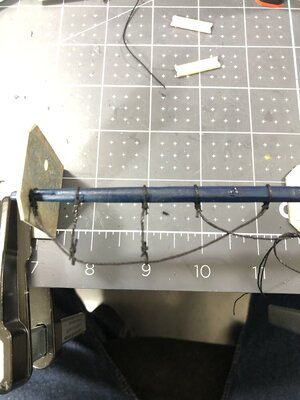
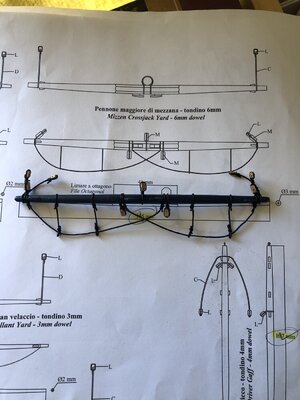
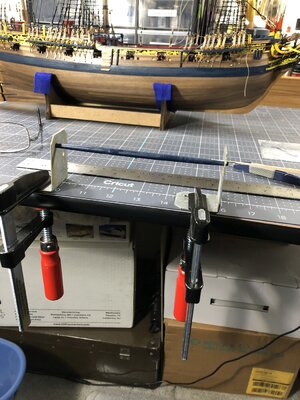
First is the jig rig up for the Mizzen Crossjack and Topsail yards.
IMG_0741.jpgIMG_0760.jpgIMG_0761.jpgIMG_0762.jpgIMG_0764.jpg

Next are the rigging photos which for me was a significant challenge. The Driver Boom and Driver Gaff required a lot of study to understand exactly how to run the line work, pull the right amount of tension for symmetry. I actually ended up pulling some of the eyelets out not realizing how much tension I had applied. Of course that produced some minor birds nest to untangle.
IMG_0766.jpgIMG_0771.jpg
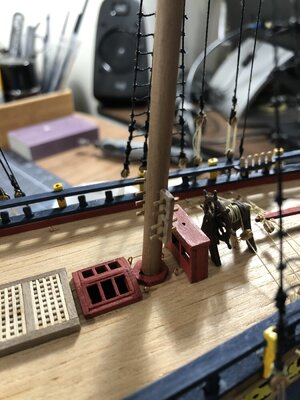
And finally installation of the vertical (home made) belaying pins.

IMG_0767.jpgIMG_0768.jpg


Until next time
Happy modeling!
 
Many thanks @dockattner ,@Tony H , @Shimsham for you kind words and Norway & Jimsky. One thing I'm learning about is how important thread quality and size is for rigging. In particular the thread one uses for seizing and its relative diameter to the line being seized. While I have come a long way with the mechanics of tying, I'm somewhat satisfied but not totally with the appearance or consistency of these various knots and seizing. I shall continue to experiment with this area of model ship building.
 
This is the glue up of the prow, forward keel, aft keel, and rudder post. I'm not completely sure these go on at this time but it seems logical as my next step is to start sanding in prep for planking. Notice the prow key way is tight but just to its left is a small gap. I will use wood putty then sand it out.View attachment 171243View attachment 171244View attachment 171245View attachment 171246
Finally, I see a build, where False Keel, Stern Post and Bow ****** before `lanking. It will help you a lot during planking. DO NOT FORGET TO ADD A STERN AND BOW FILLER NOW, before you sand a little. Until now a GREAT BUILD.Bottle:cool:Thumbsup.Will follow your build.
 
I've just finished planking the gun deck fore and aft and I'm not really happy with it. This view is just a dry fit for now. I think I accidentally achieved a weathered look but I desire more of a pristine look. These decks will be covered by the upper decks so I shall try a little cleaner approach to them.View attachment 172085
View attachment 172086 I need to visit some more planking videos. I stacked a group of planks on end and burnished them with artist black pastel chalk. Once you let go of em the chalk dust goes everywhere. I figured I could sand most of it out after glue down and this is the result.
I always did my deck planking out of the ship. had the plan, below a Doppel side cell-type. When done, with a piece cristalglas or a sharp razor blade, I run this always in the same direction. after medium grade sandpaper with finally a fine. then two to three layer of wood fillers- to close all the mini pores in the wood. very fine sanding now. The plank that covers later the two halt, I did inside the ship
 
Greetings all.
I finally have an update with a little meat in it. I began placing the running rigging on the mizzen and completed it.
First is the jig rig up for the Mizzen Crossjack and Topsail yards.
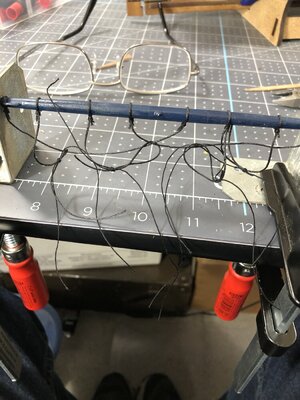
View attachment 216724View attachment 216725View attachment 216726View attachment 216727View attachment 216729

Next are the rigging photos which for me was a significant challenge. The Driver Boom and Driver Gaff required a lot of study to understand exactly how to run the line work, pull the right amount of tension for symmetry. I actually ended up pulling some of the eyelets out not realizing how much tension I had applied. Of course that produced some minor birds nest to untangle.
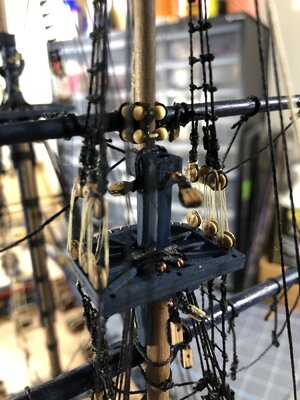
View attachment 216732View attachment 216733
And finally installation of the vertical (home made) belaying pins.
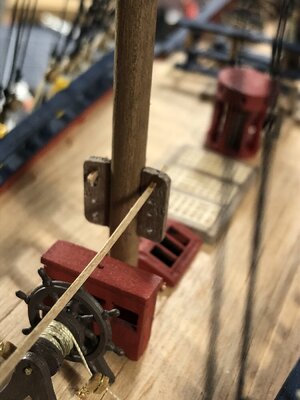
View attachment 216730View attachment 216731


Until next time
Happy modeling!
GREAT BUIL. THE OTHER FYY nor BAD EITHER
 
Ken, Heinrich, Chris,
Thank you gentlemen for your kind words of encouragement. To me part of the fun of building this ship is imagining what it must have been like as a sailor onboard. I'm reading a book called the 'The Great Clippers' by Jane D. Lyon who gives historical accounts of the very subject. When various parts of the ships are described I actually know what they are!
Happy modeling to you all.
Try to read " Great Tales from Sea" Two books with some very interesting readings, as the one who sales around the world alone, Joshu Slob.a copy of his sent to me from Australia.
 

Attachments

  • 91083676_10157576993686523_6912468284856074240_o.jpg
    91083676_10157576993686523_6912468284856074240_o.jpg
    135.1 KB · Views: 4
Try to read " Great Tales from Sea" Two books with some very interesting readings, as the one who sales around the world alone, Joshu Slob.a copy of his sent to me from Australia.
Thank you for the review and comments El Capi. I will check out your book suggestions. The HMS Fly is my first major build and what an experience it is!
I'm almost half finished with the running rigging then i will make a display case as well.
 
Good afternoon everyone.
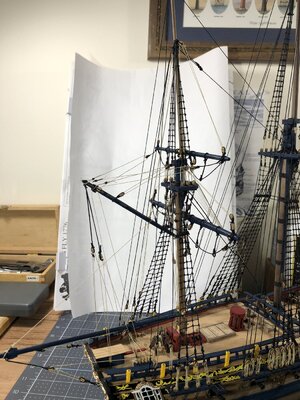
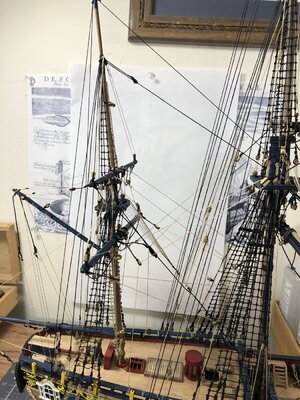
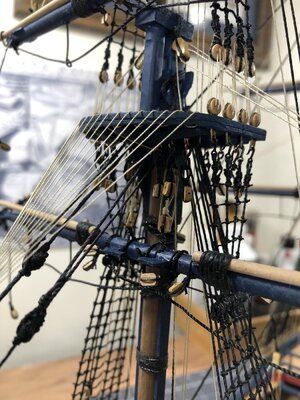
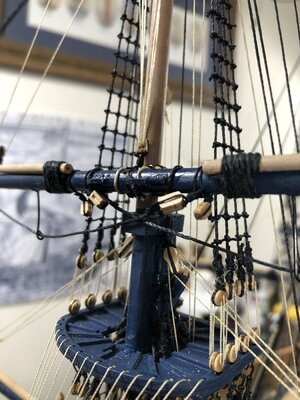
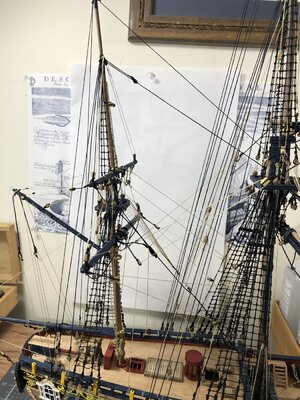
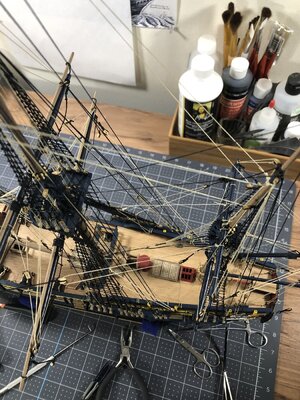
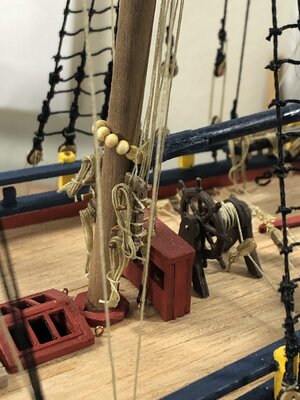
I have a running rigging update. The line work is slow for me but still very challenging. I began by setting all the various yards from bow to stern then at the stern began placing the stabilization lines generally from top to bottom and working towards the bow.

IMG_0771.jpgIMG_0793.jpgIMG_0795.jpgIMG_0799.jpg

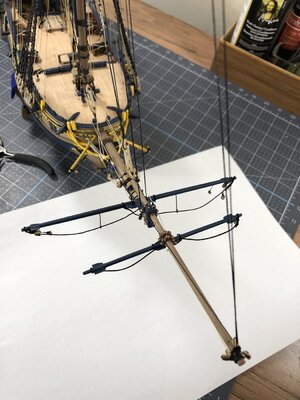
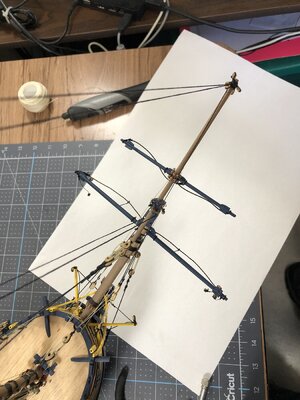
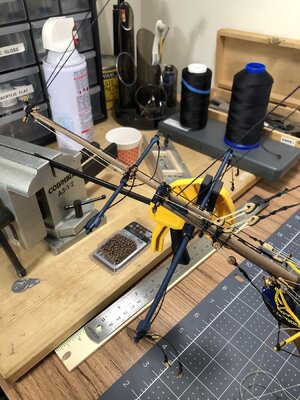
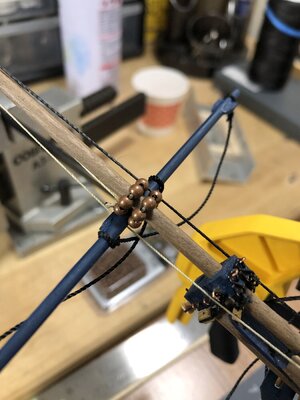
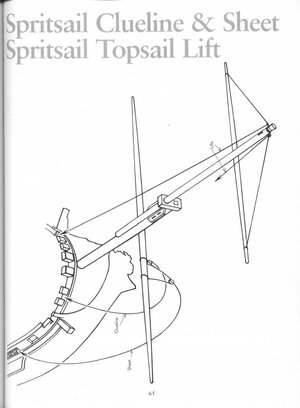
In the second and third photos above I ran out of peril beads for the sprit topsail yard and found some brown beads at the hobby store which I think are presentable. I held the spritsail yard in a friction grip which was held in a vise then I just scooted the ship with the bowsprit up to the jig
and did the attachment.

IMG_0789.jpgIMG_0790.jpg

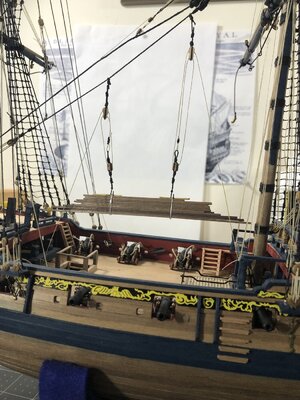
How about a temporary lumber holder. I just got tired of the two hoisting rigs just sitting there doing nothing:)

IMG_0803.jpg

All I need to do now is finish the stabilization rigging from the main mast thru the bowsprit so I'm getting close. Of course I need to make a display case.

IMG_0791.jpgIMG_0792.jpgIMG_0799.jpgIMG_0804.jpgIMG_0805.jpgIMG_0807.jpg

I sure thank all of you following this build. Your comments and suggestions truly do add inspiration to my efforts.
Until next update happy modeling!
 
Thank you for the review and comments El Capi. I will check out your book suggestions. The HMS Fly is my first major build and what an experience it is!
I'm almost half finished with the running rigging then i will make a display case as well.

Good afternoon everyone.
I have a running rigging update. The line work is slow for me but still very challenging. I began by setting all the various yards from bow to stern then at the stern began placing the stabilization lines generally from top to bottom and working towards the bow.

View attachment 222958View attachment 222959View attachment 222960View attachment 222961

In the second and third photos above I ran out of peril beads for the sprit topsail yard and found some brown beads at the hobby store which I think are presentable. I held the spritsail yard in a friction grip which was held in a vise then I just scooted the ship with the bowsprit up to the jig
and did the attachment.

View attachment 222963View attachment 222964

How about a temporary lumber holder. I just got tired of the two hoisting rigs just sitting there doing nothing:)

View attachment 222967

All I need to do now is finish the stabilization rigging from the main mast thru the bowsprit so I'm getting close. Of course I need to make a display case.

View attachment 222968View attachment 222969View attachment 222970View attachment 222971View attachment 222972View attachment 222973

I sure thank all of you following this build. Your comments and suggestions truly do add inspiration to my efforts.
Until next update happy modeling!
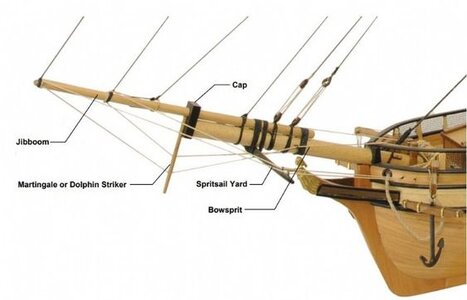
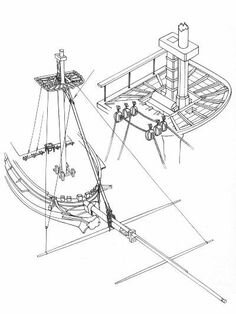
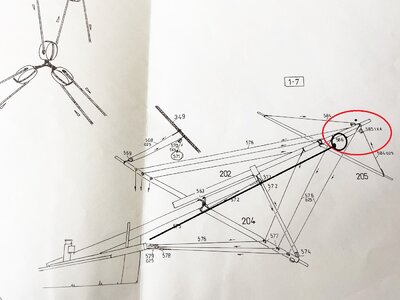
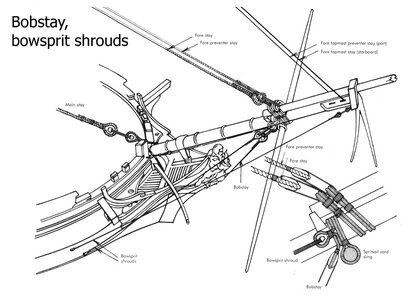
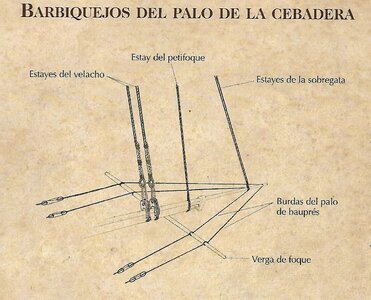
Hi, just a question?? Are yiu finished with the Bowsprit?? I miss some Standing Riggen mainly on the JIB. General two on each side from the far end of the JIB and fasten to either side on the Bow. I think too, that mainly somwe of the Footrope are out of scale-Sorry
 

Attachments

  • 2fcd0f4061b71511fe32c27a53d19461.jpg
    2fcd0f4061b71511fe32c27a53d19461.jpg
    23.2 KB · Views: 18
  • 574c6175488a6fdd25eef39ad2f415b0.jpg
    574c6175488a6fdd25eef39ad2f415b0.jpg
    59.9 KB · Views: 18
  • 00490cbc26bdf93cbe86dd4d123bb6ec.jpg
    00490cbc26bdf93cbe86dd4d123bb6ec.jpg
    12.4 KB · Views: 17
  • 87FFA3AE-2BDF-4B74-A662-A02C57D3434F - Copy.jpeg
    87FFA3AE-2BDF-4B74-A662-A02C57D3434F - Copy.jpeg
    305.5 KB · Views: 16
  • 985-BAUPRESS-BOWSPRIT-JARCIA- RIGNING (16).jpg
    985-BAUPRESS-BOWSPRIT-JARCIA- RIGNING (16).jpg
    141.2 KB · Views: 15
  • 1496-baupres 3.jpg
    1496-baupres 3.jpg
    546.1 KB · Views: 16
Hi, just a question?? Are yiu finished with the Bowsprit?? I miss some Standing Riggen mainly on the JIB. General two on each side from the far end of the JIB and fasten to either side on the Bow. I think too, that mainly somwe of the Footrope are out of scale-Sorry
Hi Capi,
your observations are correct I have not finished the bow section yet. This last set of photos are just interim and I'm still working my way back to the bow section. I still have all the foremast yard bracing as well as bowlines and a lot to do on the bowsprit it's self. Thanks for your keen eye.
 
I really like the rigging on your ship it'll be my inspiration as I'm not looking forward to starting mine.
Thank you Tony. Being the novice I am, I'm humbled and glad to be an inspiration. It has been a steep learning curve for me mainly in the sequencing of the line work. there are some steps I could have taken sooner that would have made threading the rigging much easier but I just couldn't foresee them. One big mistake I made was not ordering upgraded shive blocks. I would highly recommend you do that. I can't tell you how many times I've had to drill out the holes of the kit supplied blocks after they were in place because I could not get a needle threader through them.
 
Good afternoon everyone.
I have a running rigging update. The line work is slow for me but still very challenging. I began by setting all the various yards from bow to stern then at the stern began placing the stabilization lines generally from top to bottom and working towards the bow.

View attachment 222958View attachment 222959View attachment 222960View attachment 222961

In the second and third photos above I ran out of peril beads for the sprit topsail yard and found some brown beads at the hobby store which I think are presentable. I held the spritsail yard in a friction grip which was held in a vise then I just scooted the ship with the bowsprit up to the jig
and did the attachment.

View attachment 222963View attachment 222964

How about a temporary lumber holder. I just got tired of the two hoisting rigs just sitting there doing nothing:)

View attachment 222967

All I need to do now is finish the stabilization rigging from the main mast thru the bowsprit so I'm getting close. Of course I need to make a display case.

View attachment 222968View attachment 222969View attachment 222970View attachment 222971View attachment 222972View attachment 222973

I sure thank all of you following this build. Your comments and suggestions truly do add inspiration to my efforts.
Until next update happy modeling!
Looking very good Daniel! Excellent job!
 
Back
Top