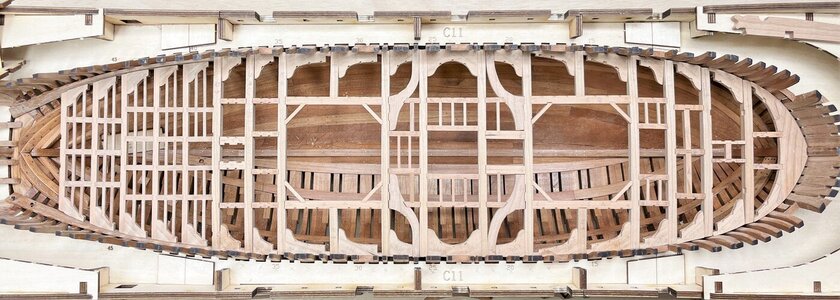
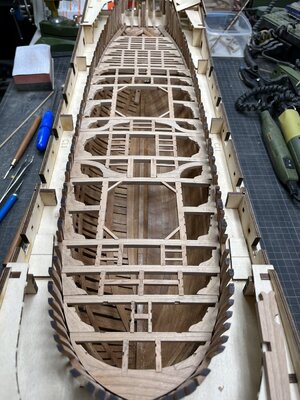
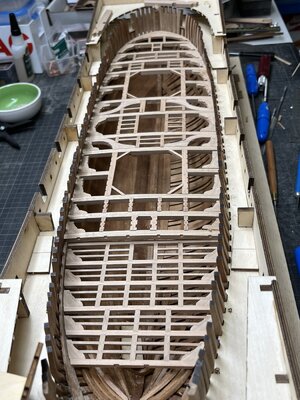
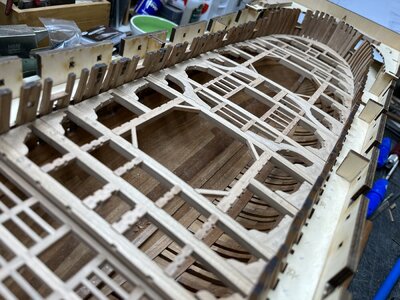
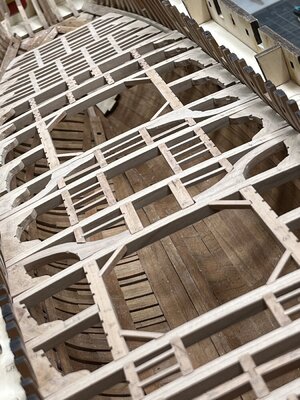
I'm amazed that you can get it to stay together with no glue. And you bench is immaculate compared to mine. 
-

Win a Free Custom Engraved Brass Coin!!!
As a way to introduce our brass coins to the community, we will raffle off a free coin during the month of August. Follow link ABOVE for instructions for entering.
-

PRE-ORDER SHIPS IN SCALE TODAY!
The beloved Ships in Scale Magazine is back and charting a new course for 2026!
Discover new skills, new techniques, and new inspirations in every issue.
NOTE THAT OUR FIRST ISSUE WILL BE JAN/FEB 2026
You are using an out of date browser. It may not display this or other websites correctly.
You should upgrade or use an alternative browser.
You should upgrade or use an alternative browser.
HMS GRANADO - full hull - POF kit by CAF in 1:48 - by Uwe
Very impressive Uwe,step by step - still everything dry fitted and not glued - aim is that all element are getting the more or less correct fit
View attachment 336271
btw this is the original photo showing the obligatory and usual mess on my table
View attachment 336270
View attachment 336272
View attachment 336273
the recess on the lodging knees are still not prepared - important is here a parallel orientation of the carlings and ledges
View attachment 336274
all carlings are prepared
View attachment 336275
some of the carlings are still too high, so the recesses have to be overworked
View attachment 336276
the recesses for the ledges have to be prepared by fine chisels (see on the left one reccess in original round shape caused by the normal cnc machine - a time consuming work
View attachment 336277
View attachment 336278
View attachment 336279
View attachment 336280
still a lot of work in front of me ..... many thanks for your interest
Cheers,
Stephen.
Very nice fitment Uwe. Like the way you first dry fit everything so you can finetune to get a perfect result.
Hallo Uwe, as always, looks stunning, clean, accurate, precise. Simply beautiful.
Hallo friends,
many many thanks for all your kind words and comments - and also for all the likes received - it is a great community here in SOS
the deck structure works is like making the frames or hull planking - it seems, that it is never ending
Today some (maybe boring) photos of the ongoing beams, carlings, ledges, lodging knees work .....
at the end there will be around 300 wooden parts installed with appr. 300 copper "bolts" inserted
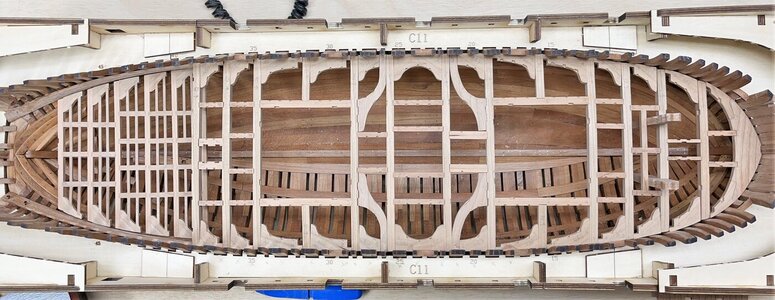
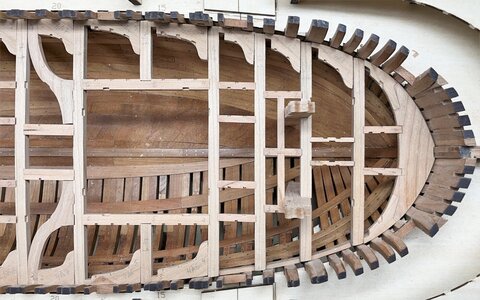
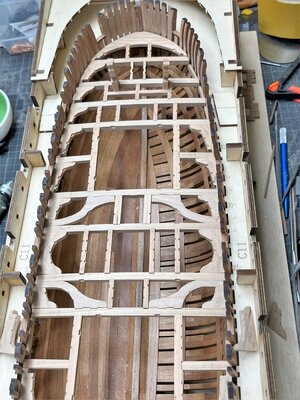
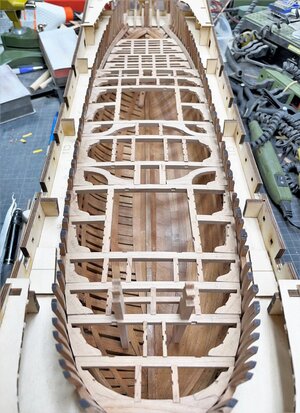
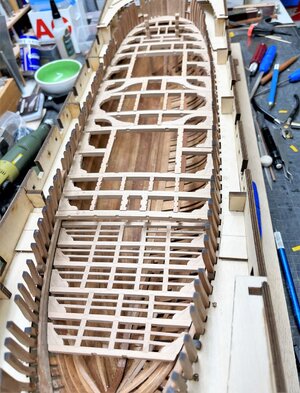
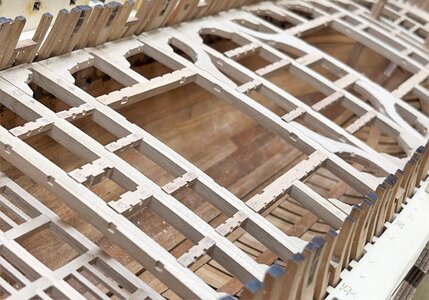
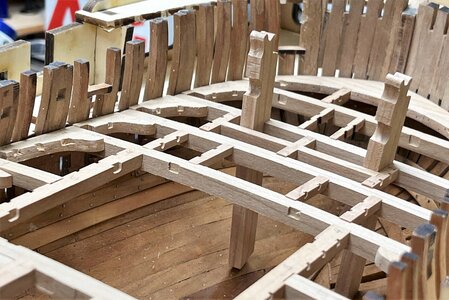
Many Thanks for your interest ...... to be continued ....
many many thanks for all your kind words and comments - and also for all the likes received - it is a great community here in SOS
the deck structure works is like making the frames or hull planking - it seems, that it is never ending
Today some (maybe boring) photos of the ongoing beams, carlings, ledges, lodging knees work .....
at the end there will be around 300 wooden parts installed with appr. 300 copper "bolts" inserted


Many Thanks for your interest ...... to be continued ....
I can only agree with Xander.
I think that you can and should show every progress. Everyone is helped who also builds this ship. I would be happy to have more information, tricks, etc. about La Palme (Amatante). I've enjoyed it at Le Coureur before.
I think that you can and should show every progress. Everyone is helped who also builds this ship. I would be happy to have more information, tricks, etc. about La Palme (Amatante). I've enjoyed it at Le Coureur before.
Certainly not boring Uwe! Indeed, it is rather interesting that he whole thing holds together without glue at this point. A testimony to the skill of the designer as well as the builder.
That's a lot of parts Uwe,Hallo friends,
many many thanks for all your kind words and comments - and also for all the likes received - it is a great community here in SOS
the deck structure works is like making the frames or hull planking - it seems, that it is never ending
Today some (maybe boring) photos of the ongoing beams, carlings, ledges, lodging knees work .....
at the end there will be around 300 wooden parts installed with appr. 300 copper "bolts" inserted
View attachment 336704
View attachment 336701
View attachment 336702
View attachment 336705
View attachment 336706
View attachment 336707
View attachment 336703
Many Thanks for your interest ...... to be continued ....
Defiantly not boring but, great work.
Cheers,
Stephen.
- Joined
- Oct 23, 2018
- Messages
- 886
- Points
- 403

Really nice photos, Uwe.
How do you keep track of where all the pieces go when you tear it apart to glue it? Seriously 
Terrific Uwe and those photos are incredibly helpful to those of us who are inspired by your knowledge and workmanship.
- Joined
- Aug 8, 2019
- Messages
- 5,585
- Points
- 738

The result of that are the same boring photos again. But then with glue. I can't wait to see the difference of thatThe next working step will be the permanent installation


