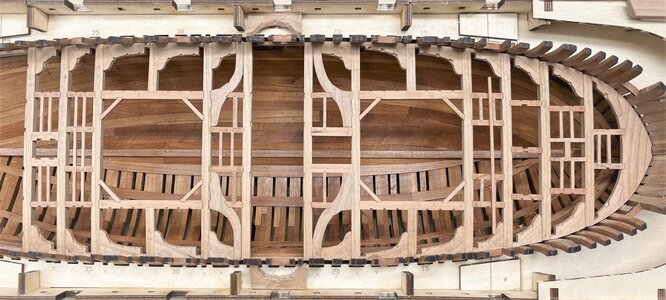
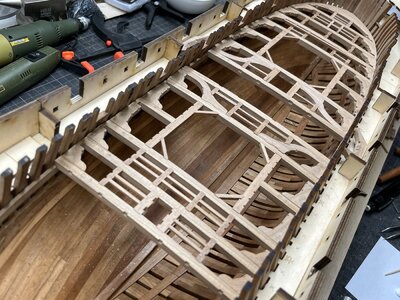
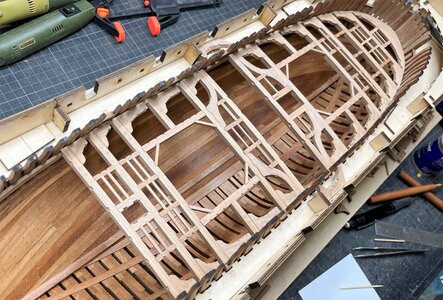
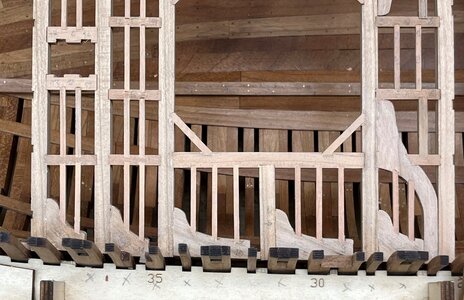
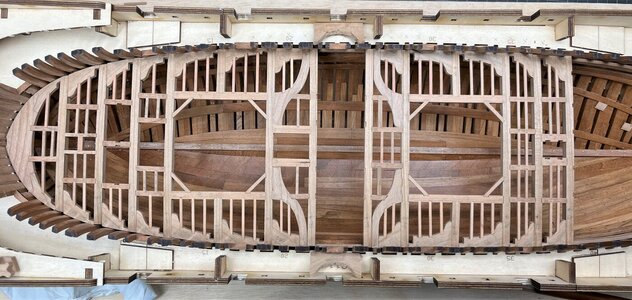
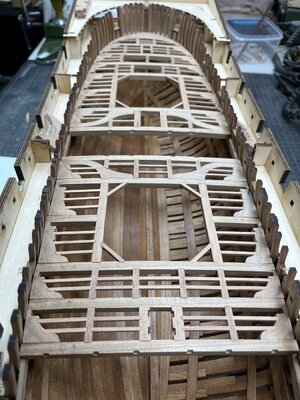
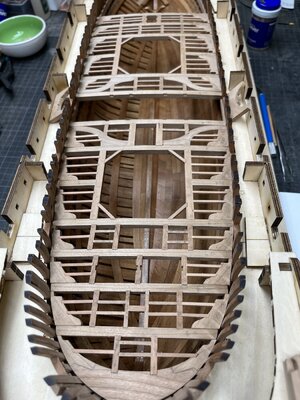
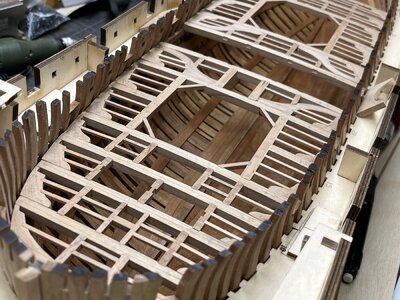
HMS GRANADO - full hull - POF kit by CAF in 1:48 - by Uwe

How do you keep track of where all the pieces go when you tear it apart to glue it? Seriously :)
Seriously.....
I am marking the pieces with a pencil according a numbering system - and everytime from the same side, so that port and starport are clear

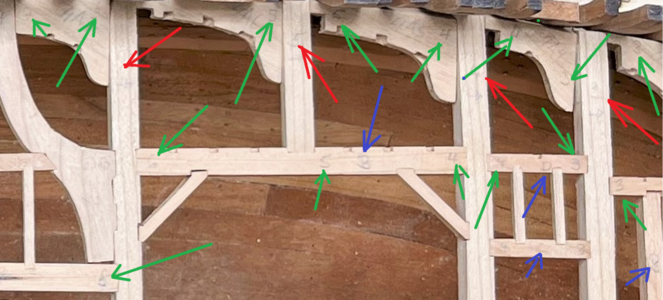
Take a look at this excerpt photo
Screenshot 2022-10-30 173822.png

The beams are numbered from 0,1, 2 etc. from bow to stern (red arrows)
all carlings and lodging knees are marked with the same numbers defining the beam, so f.e. the main carling between beam 4 and 6 passing the half beam 5 - so I know in which orientation this carling has to lay (green arrows)
and the blue arrows are showing marks A, B, C, D - so I know where these carlings are laying related to port and starport

This is my system, but there are several different possible

In addition I will not remove all before glueing - I will make it step by step, only these which are next for fixing with glue

The next boring photos will be with glue ;)
 
Seriously.....
I am marking the pieces with a pencil according a numbering system - and everytime from the same side, so that port and starport are clear

Take a look at this excerpt photo

View attachment 337368

The beams are numbered from 0,1, 2 etc. from bow to stern (red arrows)
all carlings and lodging knees are marked with the same numbers defining the beam, so f.e. the main carling between beam 4 and 6 passing the half beam 5 - so I know in which orientation this carling has to lay (green arrows)
and the blue arrows are showing marks A, B, C, D - so I know where these carlings are laying related to port and starport

This is my system, but there are several different possible

In addition I will not remove all before glueing - I will make it step by step, only these which are next for fixing with glue

The next boring photos will be with glue ;)
Good morning Uwek- I’m looking forward to being bored some more;). Cheers Grant
 
Hallo friends,
many many thanks for all your kind words and comments - and also for all the likes received - it is a great community here in SOS

the deck structure works is like making the frames or hull planking - it seems, that it is never ending

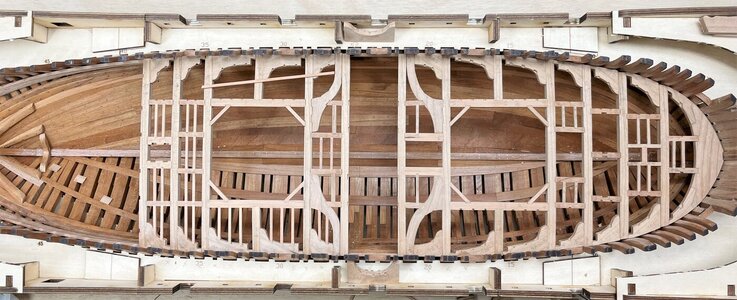
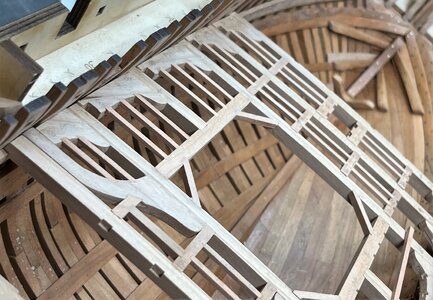
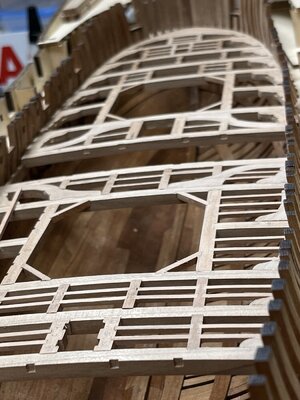
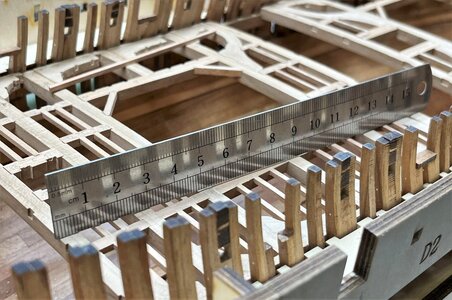
Today some (maybe boring) photos of the ongoing beams, carlings, ledges, lodging knees work .....
at the end there will be around 300 wooden parts installed with appr. 300 copper "bolts" inserted

View attachment 336704

View attachment 336701

View attachment 336702

View attachment 336705

View attachment 336706

View attachment 336707

View attachment 336703

Many Thanks for your interest ...... to be continued ....
If you think this tedious work was boring, imagine doing in for real in full size time and time again, ship after ship for the old shipwrights in the ship yards.
 
Many Thanks for all comments related to my "boring" photo report and the work behind with the model.
90% of the work was done already by CAF, working on a very good kit you will get minimum a good model (if you are not too.....)

Now the same photos just with glue and fixed (hopefully permanently)

IMG_1312.jpg

I do not know exactly, if it makes a difference in accuracy, but I worked here from midship towards the bow and also from midship towards the stern

IMG_1313.jpg

IMG_1314.jpg

Many Thanks for your interest .... to be continued ....
 
Bonjour Uwek, super réalisation. Bravo...
En parcourant le site je ne vois que des compliments sur ce Kit.
A votre avis est ce que ce kit n'est pas trop difficile pour un débutant en modélisme naval ? (J'ai un peu d'expérience en modélisme ferroviaire car je monte des locomotives à vapeurs vives).
Avec tous les article sur ce Kit HMS Granado POF sur le site pourquoi ne montez vous pas un Group build comme sur le HMS Blandford ?

Hello Uwek, great achievement. Cheer...
By browsing the site I see only compliments on this Kit.
In your opinion is this kit not too difficult for a beginner in ship modeling? (I have some experience in model railroading as I ride live steam locomotives).
With all the articles on this HMS Granado POF Kit on the site why don't you set up a Group build like on HMS Blandford?
 
Hallo @Cathber
many thanks for your interest in this building log and in general for the kit.

In your opinion is this kit not too difficult for a beginner in ship modeling? (I have some experience in model railroading as I ride live steam locomotives).
Maybe not "too" difficult, but it is definietly a difficult and complex POF kit
What is definitely necessary is the possibility to think in 3 dimensions and to understand a technical drawing - with patience, three times thinking before cutting and some wish of accuracy such a model should be possible.
If a complete beginner in ship modeling should immediately start with such a POF-kit? I would say maybe best not to start with the Granado full hull ship. Maybe it would be good start ship modeling, if it should be POF-models with a cross section or a smaller model

With all the articles on this HMS Granado POF Kit on the site why don't you set up a Group build like on HMS Blandford?
For a real working group build you need 8 to 10 active modelers in the group..... there is an interest in this kit, yes, but we would need some more members building this interesting kit......
 
Nice work, somehow the glue brings more excitement in these photos.
Many thanks for these words - this means a lot for me !!!!
Now much more glue - and never look back
With this model, glueing the deck structure means definitely, that I have to cut my hull horizontaly, because there is no other way to install the interior like the mortar beds !!!!
So no way back -> I have to cut the frames afterwards
 
More glue and fixed ledges

IMG_1319.jpg

I started with the ledges on midship - sometimes smaller adjustments of the prepared recesses mainly on the lodging knees are necessary, in order to move the recess half or one mm sidewards to that the ledge is parallel to the beams (f.e. slightly visible on the middle and right ledge of the knee axis 34 to 32)

IMG_1316.jpg

BTW: You can see everywhere that the recess for the hanging knees are prepared - the hanging knees will be adjusted and fixed after the "BIG CUT"

IMG_1318.jpg

IMG_1320.jpg

At the end the top of the complete deck structure should be on one level to get a smooth basis for the deck planking - when all ledges are also fixed there will be also a final sanding necessary.

IMG_1321.jpg

Many Thanks for your kind interest in my building log ..... to be continued .....
 
More glue and fixed ledges

View attachment 338159

I started with the ledges on midship - sometimes smaller adjustments of the prepared recesses mainly on the lodging knees are necessary, in order to move the recess half or one mm sidewards to that the ledge is parallel to the beams (f.e. slightly visible on the middle and right ledge of the knee axis 34 to 32)

View attachment 338157

BTW: You can see everywhere that the recess for the hanging knees are prepared - the hanging knees will be adjusted and fixed after the "BIG CUT"

View attachment 338158

View attachment 338160

At the end the top of the complete deck structure should be on one level to get a smooth basis for the deck planking - when all ledges are also fixed there will be also a final sanding necessary.

View attachment 338161

Many Thanks for your kind interest in my building log ..... to be continued .....
Wow, Uwe. That’s a huge amount of beams installed, so tight and flat! My compliments. And I am glad the cut definitely will come.
Regards, Peter
 
Wow, Uwe. That’s a huge amount of beams installed, so tight and flat! My compliments. And I am glad the cut definitely will come.
Regards, Peter
Good morning…you guys and your cuts… o_O. Makes for an outstanding model though. I know Uwek will pull that off as you did Peter but that takes precision to the mm. Cheers Grant
 
Back
Top