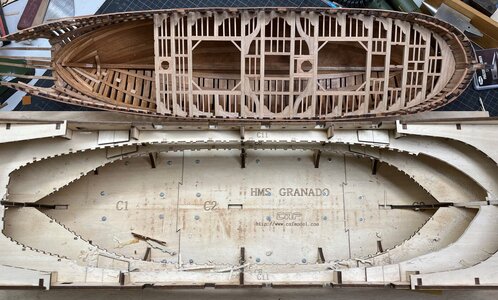
Good morning Uwe, perhaps I have overlooked it but I would be interested to know if you have already glued the deck construction to the frames or can you take everything out again completely. My question is based on the interior construction. As I understand it, you are going to make the parting cut and I assume that you will then do the finishing. I imagine it is difficult how to proceed in this case so that everything fits together again afterwards. Or can you take the deck out again and then build the interior, put the decks back in and then cut it? Questions about questions I know but I'm just interested in what the plan is.
-

Win a Free Custom Engraved Brass Coin!!!
As a way to introduce our brass coins to the community, we will raffle off a free coin during the month of August. Follow link ABOVE for instructions for entering.
-

PRE-ORDER SHIPS IN SCALE TODAY!
The beloved Ships in Scale Magazine is back and charting a new course for 2026!
Discover new skills, new techniques, and new inspirations in every issue.
NOTE THAT OUR FIRST ISSUE WILL BE JAN/FEB 2026
You are using an out of date browser. It may not display this or other websites correctly.
You should upgrade or use an alternative browser.
You should upgrade or use an alternative browser.
HMS GRANADO - full hull - POF kit by CAF in 1:48 - by Uwe
Let me try to explain.Good morning Uwe, perhaps I have overlooked it but I would be interested to know if you have already glued the deck construction to the frames or can you take everything out again completely. My question is based on the interior construction. As I understand it, you are going to make the parting cut and I assume that you will then do the finishing. I imagine it is difficult how to proceed in this case so that everything fits together again afterwards. Or can you take the deck out again and then build the interior, put the decks back in and then cut it? Questions about questions I know but I'm just interested in what the plan is.
Here once more an older sketch with the first idea, which will be most probable the cuting line
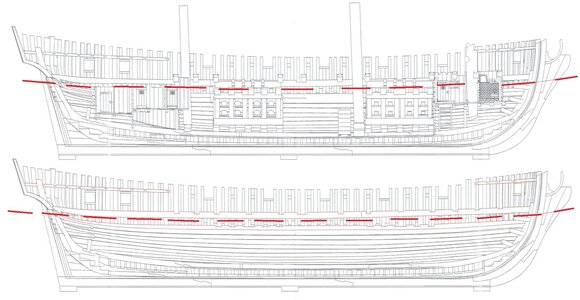
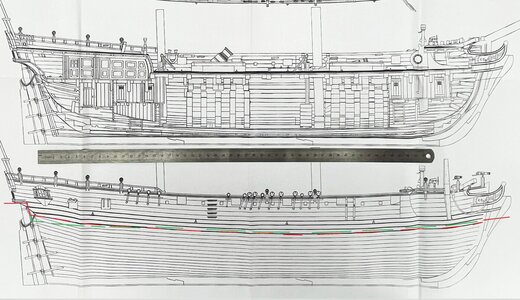
I checked with the outer planking, especially with the wales, which should be on the upper part, that it will be appr. this cuuting line
the cutting line is appr. the green dotted line
the red line shows the final planked line with the complete wales on the upper element - so the wales will slightly overlapp the cut
In the cross section (midship) it is looking like this (here sorry the colours are changed)
The red line is th cutting of the farmes and the beams for the mortar beds are lower part
the center area with the mortar is still open for discussion (pink lines)
On the right side I showed the outer planking, dark blue are the three wale-planks which will be fixed to the upper part
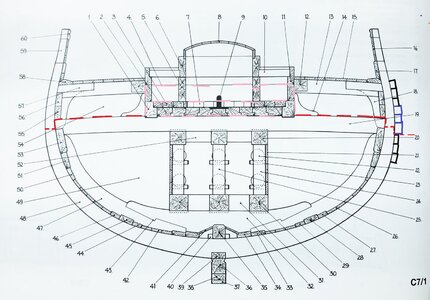
Here with red lines the approximate cutting line

Now to your question related to the deck structures
The structure of the deck in the green area (numbered #13 in the cross section) is fixed to the hull, because it is definitely higher than the cutting line
Only the structure of the aft area (marked in red) is lower and I am afraid, that I could damage it when I cut the hull - so I will not fix it to the hull before the "BIG CUT" - I will fix this afterwards
The problem that the upper part of the hull will be weak at the aft area where no deck structure is fixed inside, I have to strengthen it from outside, maybe with already installed wales..... I will see
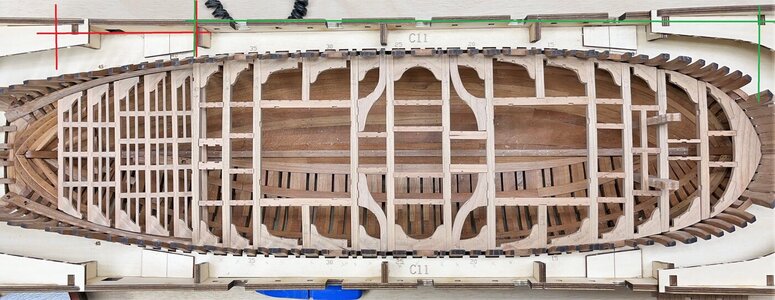
It sounds very weired and complex -
Yes - IT IS weired and complex and I am thinking about this already over weeks
- and I am pretty sure, that I will forget something when I start with the saw
But there is no way back
Last edited:
- Joined
- Oct 17, 2020
- Messages
- 1,691
- Points
- 488

Ciao Uwek, mi permetto di osare la mia opinione? Grazie, è un lavoro duro con risultati non degni di questo bellissimo che lavoro stai facendo,Alla fine sarà in qualche modo come il modello Leighton - con alcune differenze, ma l'idea principale di tagliare sotto il Galles sarà la stessa.
Anche l'interno sarà diviso nelle due metà (parte superiore e parte inferiore) in modo similitudine
[ALLEGARE=completo]339163[/ALLEGARE]
[ALLEGARE=completo]339164[/ALLEGARE]
[ALLEGARE=completo]339166[/ALLEGARE]
[ALLEGARE=completo]339165[/ALLEGARE]
Ciao Uwek, mi permetti di osare la mia opinione? Grazie, è un duro lavoro con risultati non degni di questo bellissimo lavoro che stai facendo,
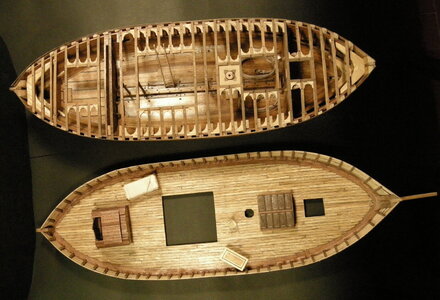
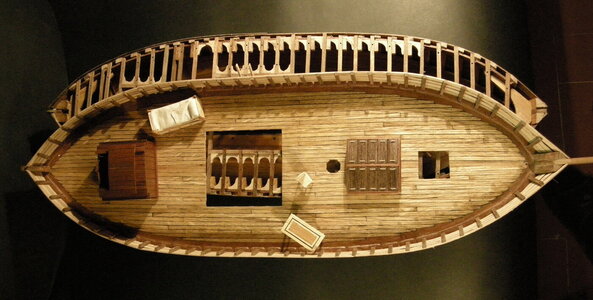
sono della Tartana fatta da un modellista di mia conoscenza
Last edited:
Hi Uwe,At the end It will be somehow like the Leighton model - with some differences, but the main idea cutting under the wales will be the same.
Also the interior will be splitted into the two half (upper and lower part) in a similar way
View attachment 339163
View attachment 339164
View attachment 339166
View attachment 339165
This is a very difficult thing to pull off IMHO.
Are you thinking of fitting a temporary batten to use as a cutting guide?
Cheers,
Stephen.
A Deja-Vu for me, Uwe.It sounds very weired and complex -
Yes - IT IS weired and complex and I am thinking about this already over weeks
- and I am pretty sure, that I will forget something when I start with the saw
But there is no way back
And after so much and so long thinking about it, I have every confidence that it will go well. I forgot also something, but plan some rest moments. And don't hesitate to adjust your plan if necessary.
Regards, Peter
- Joined
- Aug 8, 2019
- Messages
- 5,585
- Points
- 738

Use a bandsaw, no rest necessaryplan some rest moments.
But all "crazyness on a sticky" what is this with all you guys cutting ships in half? I wouldn't sleep for weeks.
Hallo Stephen,Hi Uwe,
This is a very difficult thing to pull off IMHO.
Are you thinking of fitting a temporary batten to use as a cutting guide?
Cheers,
Stephen.
I was thinking about, but I guess, that I will cut "free hand" following a pencil line showing a marked line.
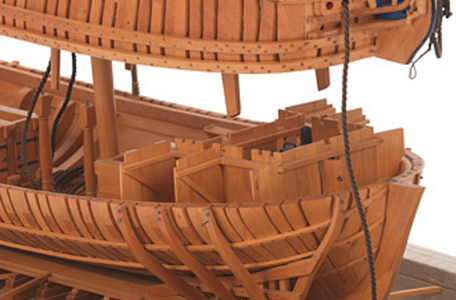
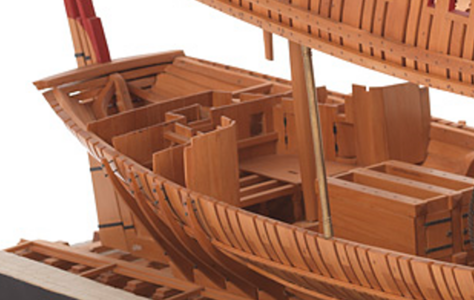
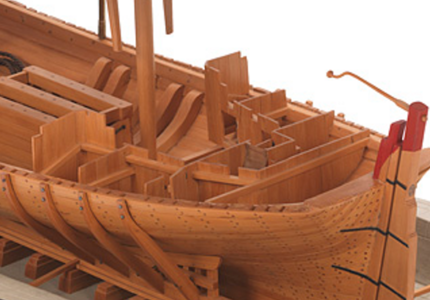
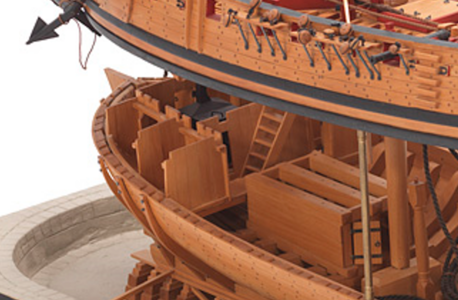
At the end, the upper part will be presented appr. 20cm over the lower hull.
The cutting edge on the upper part will be "covered" by the lower planking row of the wales
At the lower part the frames will be visible, but I can sand the tops of the frames to get a smooth top - following appr. the cuvature of the wales (which are 20cm away)
In short time, in some days - after some more preparation works for example stiffening the frames, I will make the Big Cut - I have to.....
Frank, Stefan and Peter - many thanks for your kind words
and all the others for your likes received
A short post with some more boring photos 
The deck structure is closed with installing the carlings, knees and ledges midship around the main hatch
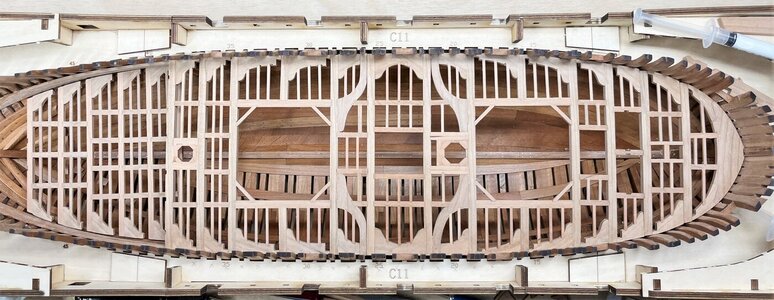
also the mast partners were fixed
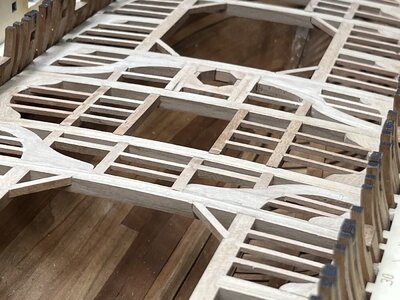
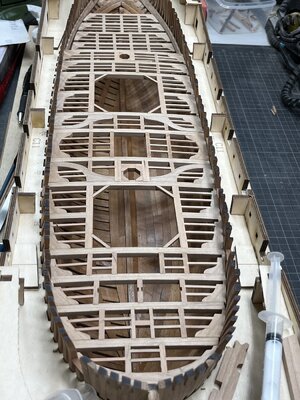
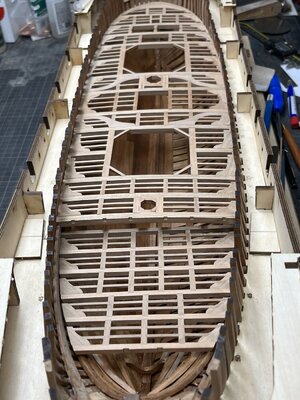
As mentioned before, the tops of the frames have to be more stabilised before the cut, so I decided to install already the small clamps for the for the fore and aft decks
In order to get the correct height, CAF once more supplied a small plywood template on which the small beams can lay - with this the correct height of beams and clamps above the deck is defined
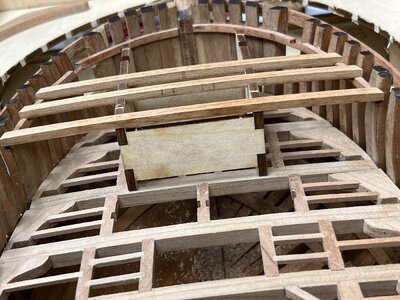
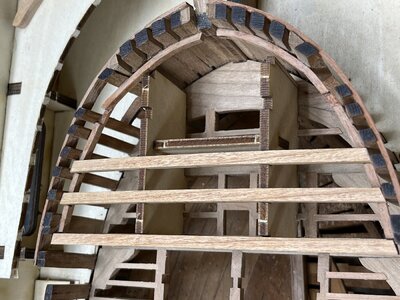
the beams are still only dry fitted (the small crack of one clamp will be not a problem
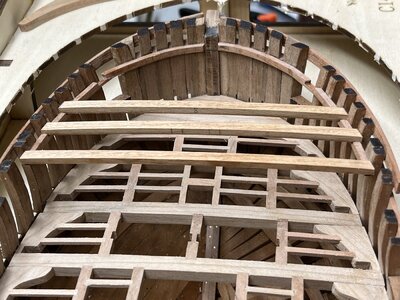
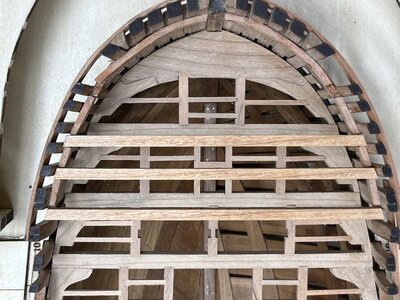
a fast test fit with the later base of the bowsprit - only for me to see, how it will work (and if the clamps are correct) - but final assembly will be much later
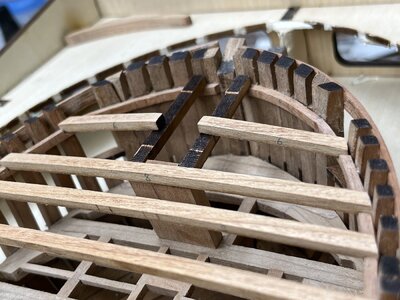
Many Thanks for your interest ..... to be continued
The deck structure is closed with installing the carlings, knees and ledges midship around the main hatch

also the mast partners were fixed


As mentioned before, the tops of the frames have to be more stabilised before the cut, so I decided to install already the small clamps for the for the fore and aft decks
In order to get the correct height, CAF once more supplied a small plywood template on which the small beams can lay - with this the correct height of beams and clamps above the deck is defined


the beams are still only dry fitted (the small crack of one clamp will be not a problem


a fast test fit with the later base of the bowsprit - only for me to see, how it will work (and if the clamps are correct) - but final assembly will be much later

Many Thanks for your interest ..... to be continued
- Joined
- Oct 17, 2020
- Messages
- 1,691
- Points
- 488

Hi Uwe, I repeat myself sorry, don'tHallo Stephen,
I was thinking about, but I guess, that I will cut "free hand" following a pencil line showing a marked line.
At the end, the upper part will be presented appr. 20cm over the lower hull.
The cutting edge on the upper part will be "covered" by the lower planking row of the wales
At the lower part the frames will be visible, but I can sand the tops of the frames to get a smooth top - following appr. the cuvature of the wales (which are 20cm away)
In short time, in some days - after some more preparation works for example stiffening the frames, I will make the Big Cut - I have to.....
Frank, Stefan and Peter - many thanks for your kind words
and all the others for your likes received
Before removing the hull out of the jig I fixed around the complete hull at the top ends of the frames from outside some temporary strips - they are only for stiffening and fixing the top ends of the frames, especially when the Big Cut was done - these stripes will be removed later, when i make the final planking of the upper part of the hull
Partly maybe you recognized thes stripes already in my last photos
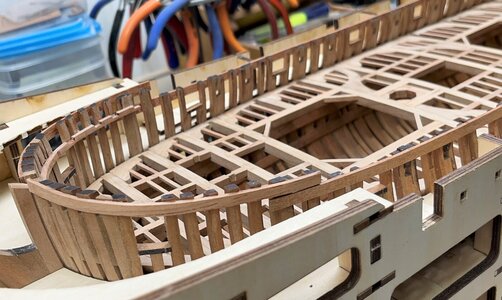
Due to the fact, that it is here important, that all frames have really a contact with the stripes I needed a lot of clamps - you can never have enough of them
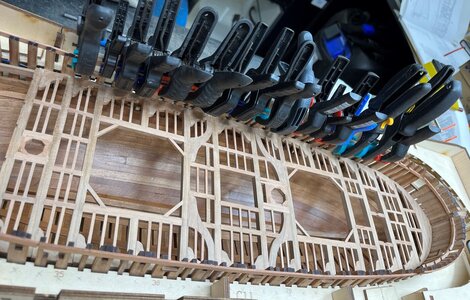
Also for stiffening the hulls I installed the smaller clamps for the rear after cabin deck
First the measurment of the correct height on both sides
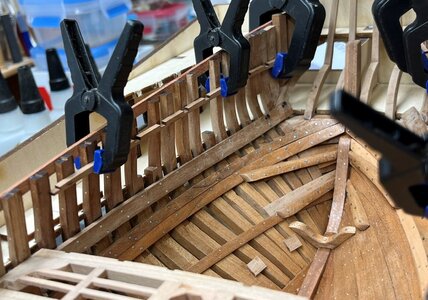
also with the help of the small beams
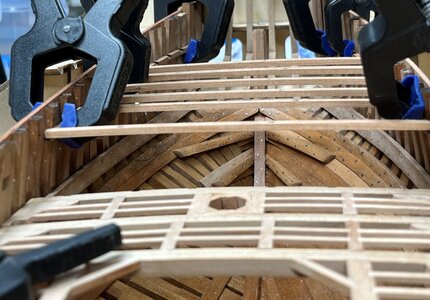
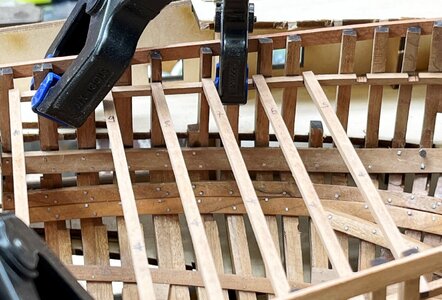
the beam clamps are now fixed and the beams are laying dry fit
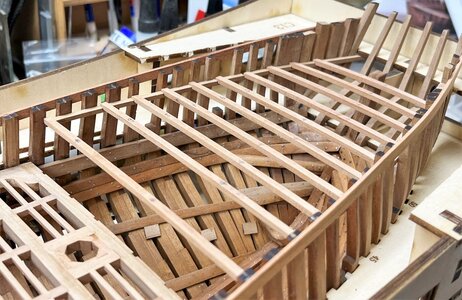
once more with checking of the correct height
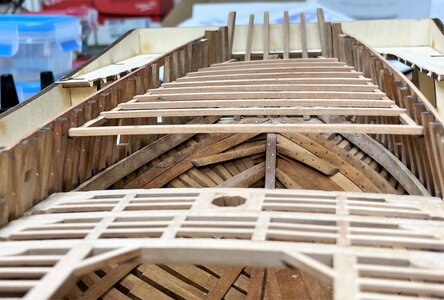
and the correct alignment
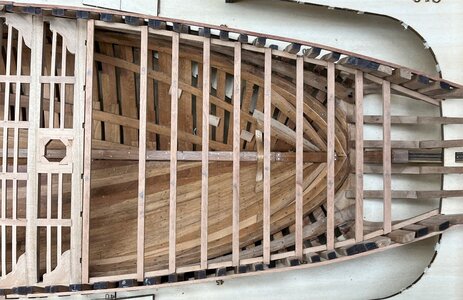
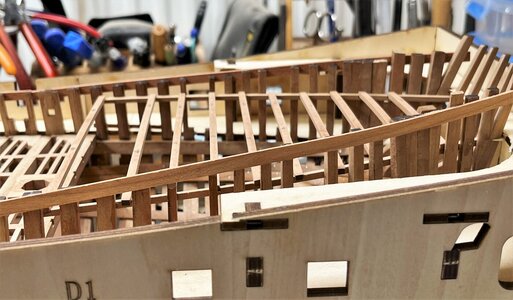
Now I have the feeling, that the hull with all frames are stabilized and I can try to remove the hull from the jig - please cross the fingers
Many Thanks for your interest .... to be continued and hopefull next post with the naked hull outside the jig
Partly maybe you recognized thes stripes already in my last photos

Due to the fact, that it is here important, that all frames have really a contact with the stripes I needed a lot of clamps - you can never have enough of them

Also for stiffening the hulls I installed the smaller clamps for the rear after cabin deck
First the measurment of the correct height on both sides

also with the help of the small beams


the beam clamps are now fixed and the beams are laying dry fit

once more with checking of the correct height

and the correct alignment


Now I have the feeling, that the hull with all frames are stabilized and I can try to remove the hull from the jig - please cross the fingers
Many Thanks for your interest .... to be continued and hopefull next post with the naked hull outside the jig
Good evening Uwek. Fingers are crossed.Before removing the hull out of the jig I fixed around the complete hull at the top ends of the frames from outside some temporary strips - they are only for stiffening and fixing the top ends of the frames, especially when the Big Cut was done - these stripes will be removed later, when i make the final planking of the upper part of the hull
Partly maybe you recognized thes stripes already in my last photos
View attachment 339572
Due to the fact, that it is here important, that all frames have really a contact with the stripes I needed a lot of clamps - you can never have enough of them
View attachment 339571
Also for stiffening the hulls I installed the smaller clamps for the rear after cabin deck
First the measurment of the correct height on both sides
View attachment 339573
also with the help of the small beams
View attachment 339574
View attachment 339575
the beam clamps are now fixed and the beams are laying dry fit
View attachment 339576
once more with checking of the correct height
View attachment 339577
and the correct alignment
View attachment 339578
View attachment 339579
Now I have the feeling, that the hull with all frames are stabilized and I can try to remove the hull from the jig - please cross the fingers
Many Thanks for your interest .... to be continued and hopefull next post with the naked hull outside the jig
Very precise and clean work, Uwe!
That is stable without doubt.
Thumbs up!
That is stable without doubt.
Thumbs up!
Just a plan that has been well thought out, Uwe. That every frame part, after the cut, has at least 2 connections.Before removing the hull out of the jig I fixed around the complete hull at the top ends of the frames from outside some temporary strips - they are only for stiffening and fixing the top ends of the frames, especially when the Big Cut was done - these stripes will be removed later, when i make the final planking of the upper part of the hull
Partly maybe you recognized thes stripes already in my last photos
View attachment 339572
Due to the fact, that it is here important, that all frames have really a contact with the stripes I needed a lot of clamps - you can never have enough of them
View attachment 339571
Also for stiffening the hulls I installed the smaller clamps for the rear after cabin deck
First the measurment of the correct height on both sides
View attachment 339573
also with the help of the small beams
View attachment 339574
View attachment 339575
the beam clamps are now fixed and the beams are laying dry fit
View attachment 339576
once more with checking of the correct height
View attachment 339577
and the correct alignment
View attachment 339578
View attachment 339579
Now I have the feeling, that the hull with all frames are stabilized and I can try to remove the hull from the jig - please cross the fingers
Many Thanks for your interest .... to be continued and hopefull next post with the naked hull outside the jig
Regards, Peter.
- Joined
- Sep 3, 2021
- Messages
- 5,199
- Points
- 738

In another life I said I would repeat the build of a POF Bluenose, this one then to be cut in half on the water line. There was only one condition to be met: my current build should be declared a succes upon completion. Although not close to being finished, I don't think I'll have to declare a successful build once I've put in the last ratline in. Uwe is among a select group of daredevils, in all likelihood capable of pulling if this stunt.But all "crazyness on a sticky" what is this with all you guys cutting ships in half? I wouldn't sleep for weeks.
I think your work is just top-notch an I'm keeping my fingers crossed that your cutting plan works out to your complete satisfaction. But I'm pretty sure about that.
Good morning Uwe, super great work. I keep my fingers crossed that everything goes according to plan with your final cut. I am convinced that you can do it.
Many thanks to @Frank48 , @Tobias , @pianoforte , @RDN1954 , @Peter Voogt , @Foxtrott and @GrantTyler for the kind words and all others for the likes received
YES - It will work !!!
and no question mark any more
It is the so called "Handy Craft Saw" from Tamiya - originally used in plastic modeling - so fine teeth and only 0,5mm thick
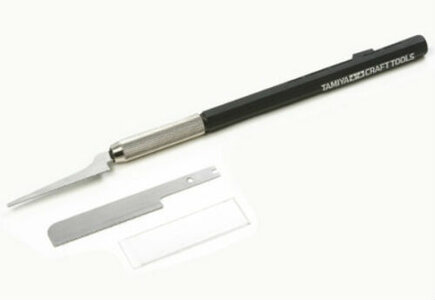
and the height dimensions - it will be not visible - one or two even three mm missing will be not possible to recognize
The two halfs will be seperate - the upper part will "fly" 20 cm above the lower part
YES - It will work !!!
and no question mark any more
I am planning to cut with a thin blade installed in a skalpel-knifeHello Uwe, sorry about the cut you will make. How thick is the cutting blade? I think you will no longer have the height dimensions of the hull, right?
It is the so called "Handy Craft Saw" from Tamiya - originally used in plastic modeling - so fine teeth and only 0,5mm thick

and the height dimensions - it will be not visible - one or two even three mm missing will be not possible to recognize
The two halfs will be seperate - the upper part will "fly" 20 cm above the lower part


