Good morning Uwek. South and Central America counties have always fascinated me. Riding an off road bike through some parts is on my bucket list for sure. Pity you only had one day to explore. Nice. Cheers GrantSorry my friends for the bigger break and not posting any update of the works.
I was on a business trip in sunny Panama, with most of the time not in Panama City, but driving with car direction to Columbian border, with bad or no internet connection, and very small free time
definitely the country would need some repair or development of roads and bridges - the last bridge in Panama is only a pedestrian cable bridge - afterwards only jungle
a beautiful country where a civil engineer will find some tasks.....
View attachment 357175
...... only at the last day I had some hours free and visited the "old" Panama canal
View attachment 357176
Sorry for not beeing online here in our forum for more than 10 days (also without any birthday wishes etc.)
-

Win a Free Custom Engraved Brass Coin!!!
As a way to introduce our brass coins to the community, we will raffle off a free coin during the month of August. Follow link ABOVE for instructions for entering.
-

PRE-ORDER SHIPS IN SCALE TODAY!
The beloved Ships in Scale Magazine is back and charting a new course for 2026!
Discover new skills, new techniques, and new inspirations in every issue.
NOTE THAT OUR FIRST ISSUE WILL BE JAN/FEB 2026
You are using an out of date browser. It may not display this or other websites correctly.
You should upgrade or use an alternative browser.
You should upgrade or use an alternative browser.
HMS GRANADO - full hull - POF kit by CAF in 1:48 - by Uwe
a little progress on the deck planking
first the planks sanded and adjusted to fit between the waterways, hatches and the mortar box
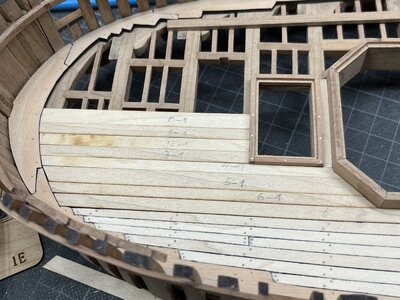
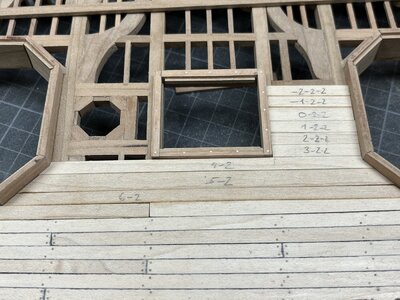
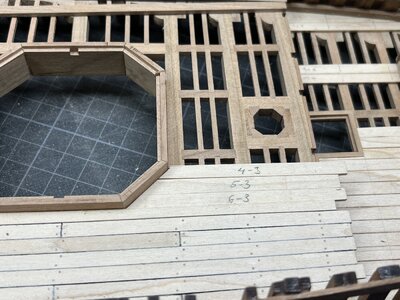
and fixed with the made "Ecoline-caulking"
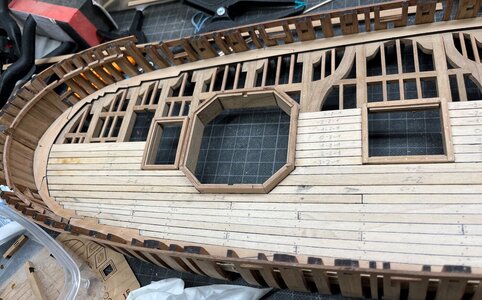
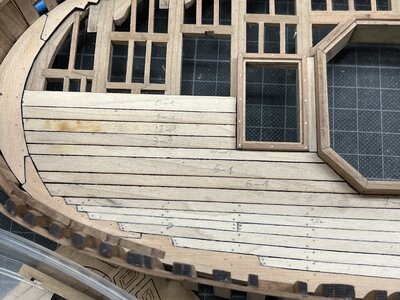
(according the Goodwin book, the planking goes also over the mast-partners)
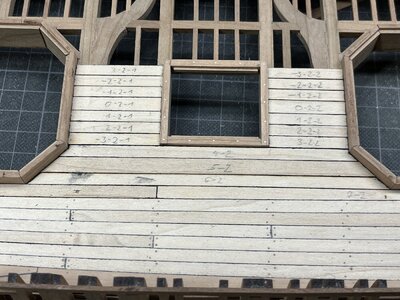
Tomorrow the treenailing will follow
Many Thanks for your interest ..... to be continued .....
first the planks sanded and adjusted to fit between the waterways, hatches and the mortar box


and fixed with the made "Ecoline-caulking"


(according the Goodwin book, the planking goes also over the mast-partners)

Tomorrow the treenailing will follow
Many Thanks for your interest ..... to be continued .....
Many Thanks for the kind reply @Mirek and the likes received. Highly appreciated
Before the weekend, where I hope I can work a little bit more on the model, I would like to show you the latest treenailing works on the deck and the result
Based on a tip I saw in @Maarten building log I adjusted my Tooth-pick treenailing method
with using my drawplate
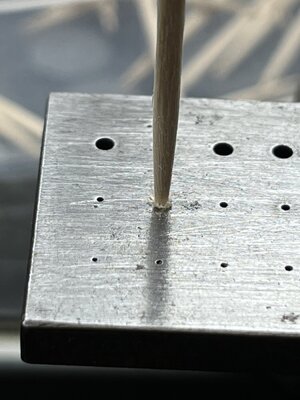
in order to get a 2 or 3mm long permanent 0,5mm diameter pointed toothpick
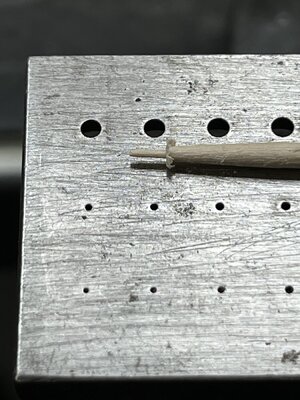
a little bit additional work, but let us see the final result, if it is worth to do so
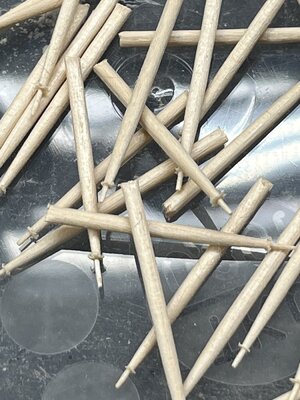
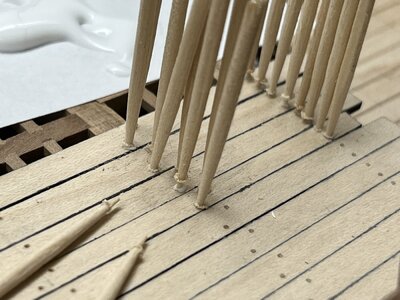
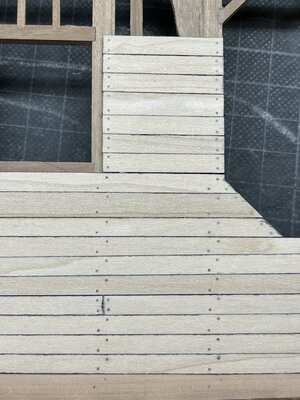
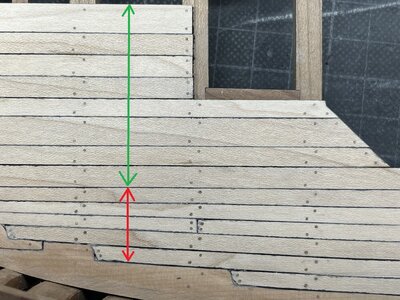
red area - normal toothpicks
green area - with drawplate pointed toothpicks
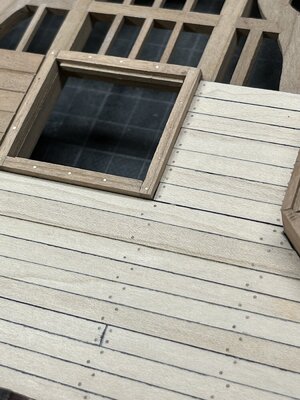
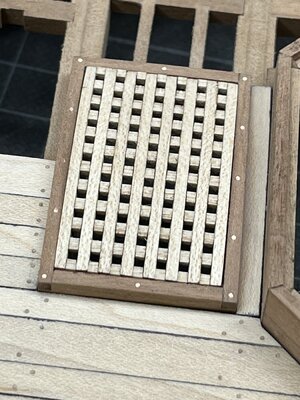
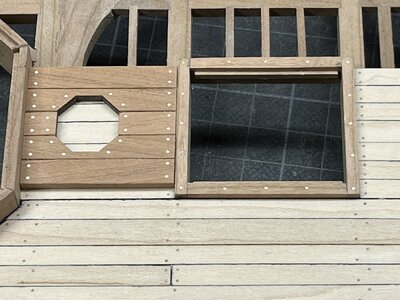
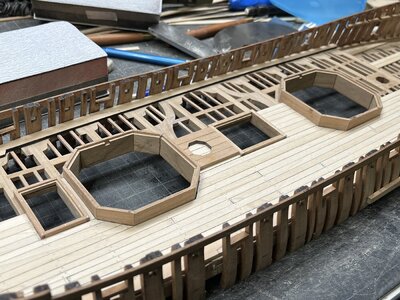
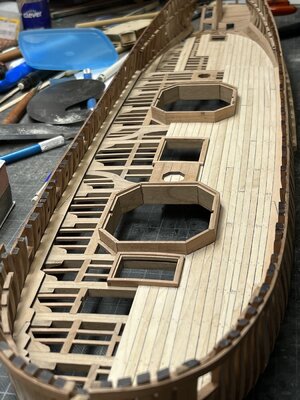
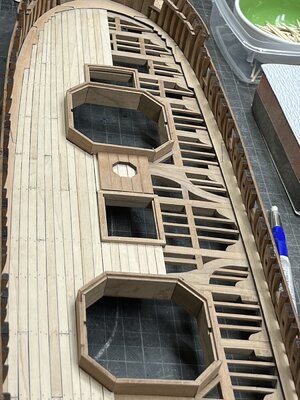
Now I finished more or less the final planking of the deck - the rest will stay "open" to see the deck structure

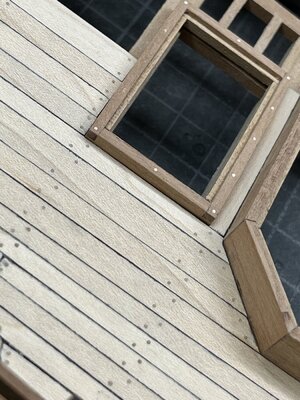
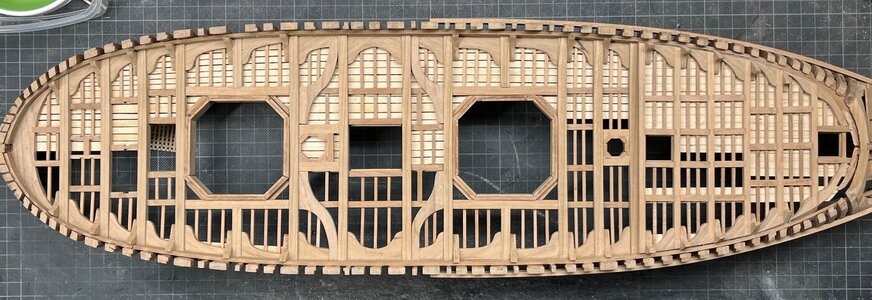
and this will be the sight from the other side, which will be visible later on - here also the caulking is slightly visible
Many Thanks for your interest ...... to be continued .....
Before the weekend, where I hope I can work a little bit more on the model, I would like to show you the latest treenailing works on the deck and the result
Based on a tip I saw in @Maarten building log I adjusted my Tooth-pick treenailing method
with using my drawplate

in order to get a 2 or 3mm long permanent 0,5mm diameter pointed toothpick

a little bit additional work, but let us see the final result, if it is worth to do so


red area - normal toothpicks
green area - with drawplate pointed toothpicks


Now I finished more or less the final planking of the deck - the rest will stay "open" to see the deck structure

and this will be the sight from the other side, which will be visible later on - here also the caulking is slightly visible

Many Thanks for your interest ...... to be continued .....
- Joined
- Dec 9, 2019
- Messages
- 970
- Points
- 403

Witaj
Zielony obszar wygląda super, spróbuj kiedyś kołków z igły lekarskiej wszystkie są idealnie równe i tej samej średnicy. Pozdrawiam Mirek
Hello
The green area looks great, try the doctor's needle pins sometime, they are all perfectly even and the same diameter. Regards, Mirek
Zielony obszar wygląda super, spróbuj kiedyś kołków z igły lekarskiej wszystkie są idealnie równe i tej samej średnicy. Pozdrawiam Mirek
Hello
The green area looks great, try the doctor's needle pins sometime, they are all perfectly even and the same diameter. Regards, Mirek
Last edited by a moderator:
Very nice result, very cleanly worked as I know it from you. 

A very nice result. The prepared trenails are nice and round and consistent in size.
Kurt Konrath
Kurt Konrath
The difference is noticeable and looks great.
Thanks for showing us this new method of adding treenails.
Thanks for showing us this new method of adding treenails.
A nice result with the treenails, Uwe. Did a few thousand on my BN with the same technique. Very useful and with a constant quality.Many Thanks for the kind reply @Mirek and the likes received. Highly appreciated
Before the weekend, where I hope I can work a little bit more on the model, I would like to show you the latest treenailing works on the deck and the result
Based on a tip I saw in @Maarten building log I adjusted my Tooth-pick treenailing method
with using my drawplate
View attachment 357886
in order to get a 2 or 3mm long permanent 0,5mm diameter pointed toothpick
View attachment 357887
a little bit additional work, but let us see the final result, if it is worth to do so
View attachment 357888
View attachment 357889
View attachment 357890
red area - normal toothpicks
green area - with drawplate pointed toothpicks
View attachment 357901
View attachment 357895
View attachment 357896
View attachment 357897
View attachment 357898
View attachment 357892
View attachment 357893
View attachment 357894
Now I finished more or less the final planking of the deck - the rest will stay "open" to see the deck structure
View attachment 357899
and this will be the sight from the other side, which will be visible later on - here also the caulking is slightly visible
View attachment 357900
Many Thanks for your interest ...... to be continued .....
Regards, Peter
- Joined
- Oct 23, 2018
- Messages
- 886
- Points
- 403

Really wonderful Uwe, Your model is a great inspiration for me if I will come back to the Granado.
Many Thanks to @Mirek , @Tobias , @dockattner , @Kurt Konrath , @Peter Voogt and @AnobiumPunctatum for the direkt comments and kind words and also to everybody for the likes received
Just wanted to show you the comparison between the Goodwin deck plan an my deck planking - The pattern is follwing completely the drawing, so I followed here the Goodwin information for example the locations of joints
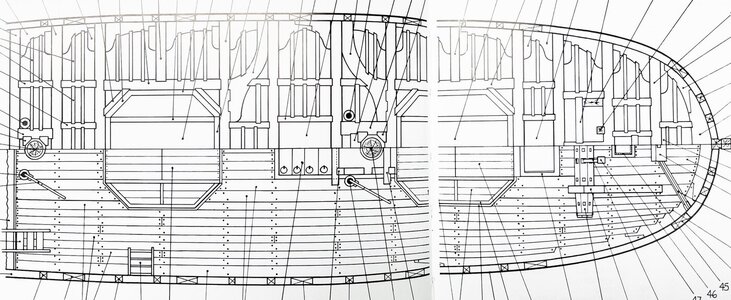
(Photo mirrored)
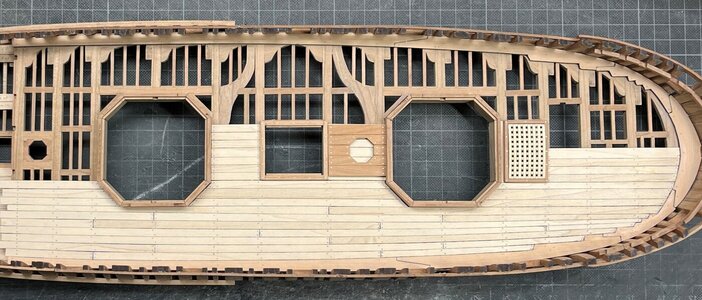
and in addition some closeups to see the "caulking" from the undersight - I could imagine, that in real ships it could also look like this
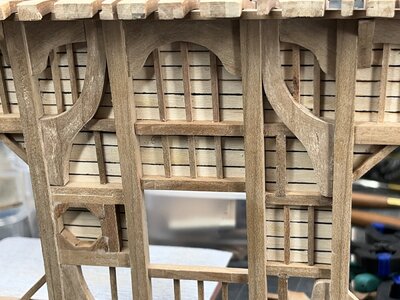
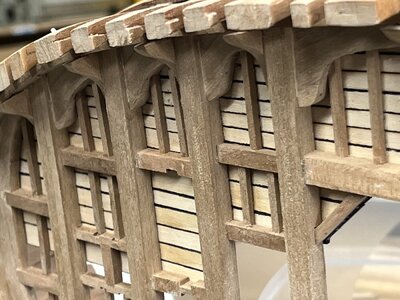
and the mast partners with wedges are also finally prepared
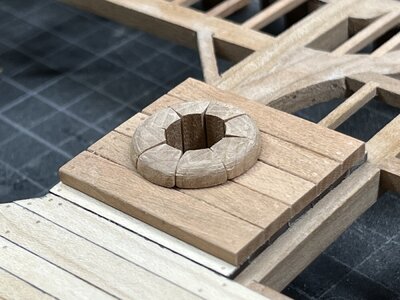
Many Thanks for your interest - to be continued ......
Just wanted to show you the comparison between the Goodwin deck plan an my deck planking - The pattern is follwing completely the drawing, so I followed here the Goodwin information for example the locations of joints

(Photo mirrored)

and in addition some closeups to see the "caulking" from the undersight - I could imagine, that in real ships it could also look like this


and the mast partners with wedges are also finally prepared

Many Thanks for your interest - to be continued ......
- Joined
- Apr 20, 2020
- Messages
- 6,257
- Points
- 738

wonderful work my dear friendMany Thanks to @Mirek , @Tobias , @dockattner , @Kurt Konrath , @Peter Voogt and @AnobiumPunctatum for the direkt comments and kind words and also to everybody for the likes received
Just wanted to show you the comparison between the Goodwin deck plan an my deck planking - The pattern is follwing completely the drawing, so I followed here the Goodwin information for example the locations of joints
View attachment 358515
(Photo mirrored)
View attachment 358516
and in addition some closeups to see the "caulking" from the undersight - I could imagine, that in real ships it could also look like this
View attachment 358517
View attachment 358518
and the mast partners with wedges are also finally prepared
View attachment 358519
Many Thanks for your interest - to be continued ......


The underside of the deck looks even more impressive then the top side. Very nice and detailed work Uwe.
Beautiful work! Wood tones and precision are excellent. 
Kurt Konrath
Kurt Konrath
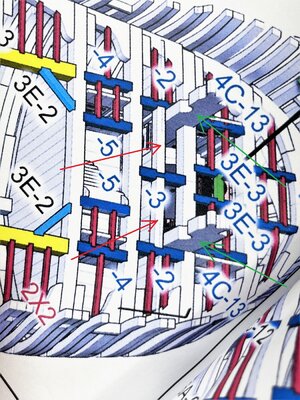
Looks like a few cross members missing under the planked section.Many Thanks to @Mirek , @Tobias , @dockattner , @Kurt Konrath , @Peter Voogt and @AnobiumPunctatum for the direkt comments and kind words and also to everybody for the likes received
Just wanted to show you the comparison between the Goodwin deck plan an my deck planking - The pattern is follwing completely the drawing, so I followed here the Goodwin information for example the locations of joints
View attachment 358515
(Photo mirrored)
View attachment 358516
and in addition some closeups to see the "caulking" from the undersight - I could imagine, that in real ships it could also look like this
View attachment 358517
View attachment 358518
and the mast partners with wedges are also finally prepared
View attachment 358519
Many Thanks for your interest - to be continued ......
you have good eyes or recognize such thingsLooks like a few cross members missing under the planked section.
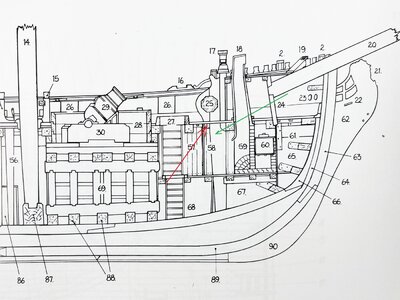
The two carlings (red) are on purpose missing and will be installed later on.
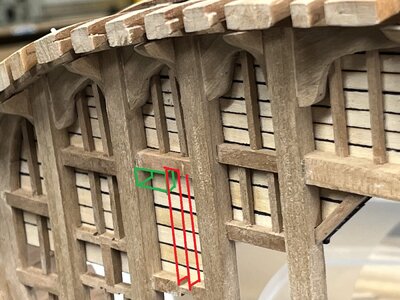
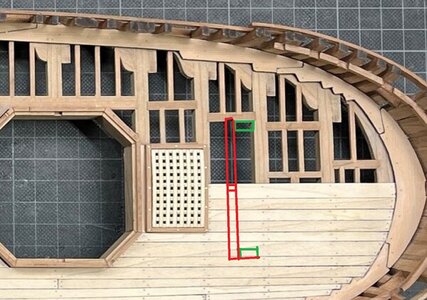
They will be installed together with the windlass carrick bitts (green), which will be fixed when I know finally how I will present them - partly cut or completely in the upper half of the model
