-

Win a Free Custom Engraved Brass Coin!!!
As a way to introduce our brass coins to the community, we will raffle off a free coin during the month of August. Follow link ABOVE for instructions for entering.
-

PRE-ORDER SHIPS IN SCALE TODAY!
The beloved Ships in Scale Magazine is back and charting a new course for 2026!
Discover new skills, new techniques, and new inspirations in every issue.
NOTE THAT OUR FIRST ISSUE WILL BE JAN/FEB 2026
You are using an out of date browser. It may not display this or other websites correctly.
You should upgrade or use an alternative browser.
You should upgrade or use an alternative browser.
HMS GRANADO - full hull - POF kit by CAF in 1:48 - by Uwe
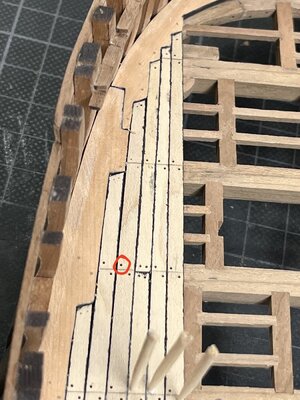
I am using the Proxxon drills nominal 0,5mm - in reality they are 0,46mmBonjour,
Les avants trous sont de quel diamètre ? 0.5mm ?
Hello,
What diameter are the pilot holes? 0.5mm?
View attachment 353931
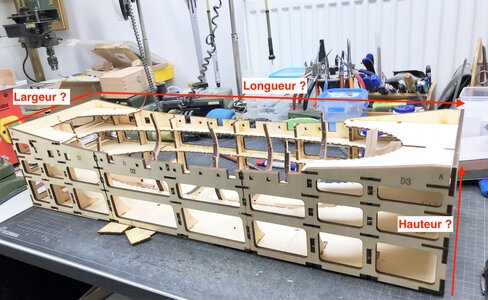
In the evening when I am back in workshop I can make the measurement .....Encore une question, Pouvez vous me donner les co^tes d'encombrement de la boite à construction ?
Merci d'avance
Another question, Can you give me the dimensions of the construction box?
Thanks in advance
View attachment 353932
Sorry, but yesterday I came home late, so no chance for a visit in the workshop - Today it will be possible, so the data will come ....In the evening when I am back in workshop I can make the measurement .....
Many Thanks for your continuous interest in my building log
Many Thanks for your comments, hints, remarks and questions
and
Many Thanks for your likes received
much much appreciated and a continuous motivation to follow up postings showing the progress
Not only the boxes for the mortars are necessary to be finished before the deck planking can be finalized,
no also the hatch coamings have to be prepared.
The HMS Granado was an english ship, so the coamings were installed on top of the beams and carlings. Sometimes the french ships were deifferent, here the planking was first installed and the coamings were fixed on top of the planking
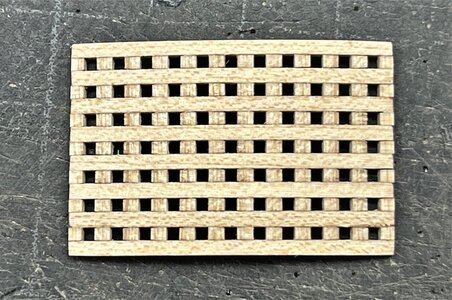
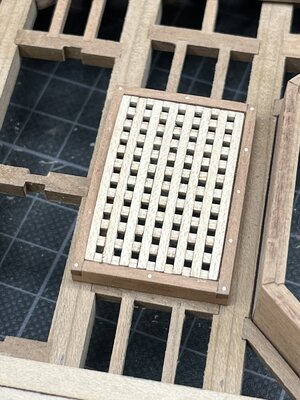
The fore hatch coaming is covered with a grating
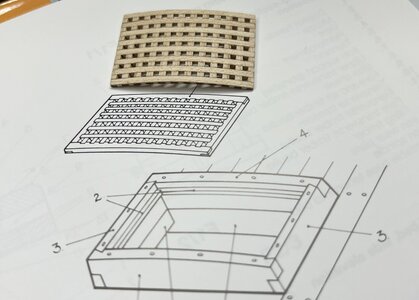
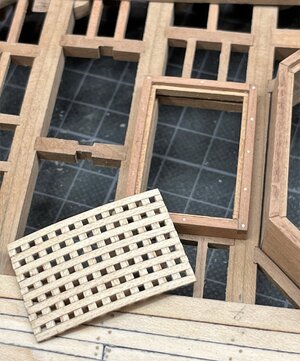
The grating elements are also lasered - in one direction already with a small camber
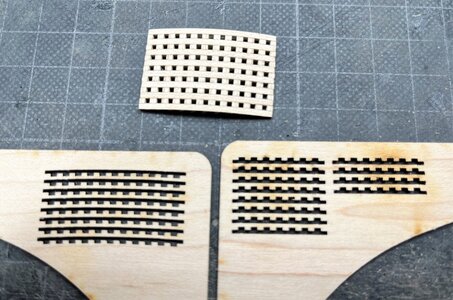
a close up to see the extremly good fitting
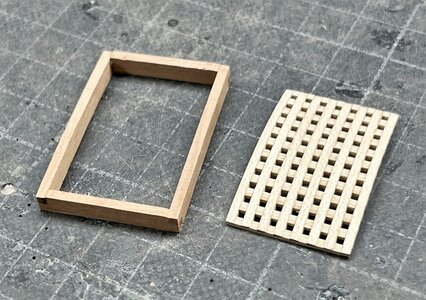
the coamings were fitted also with copper bolts - on the right the coaming for the main hatch
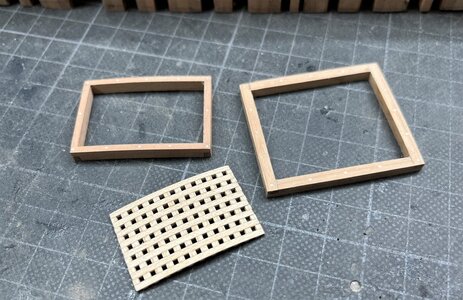
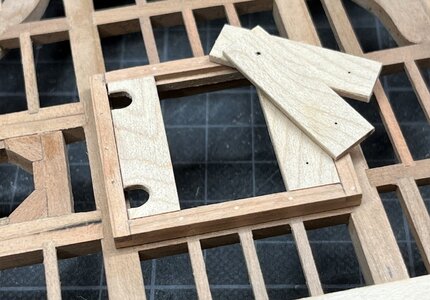
still missing here are the supports on which the covers are laying
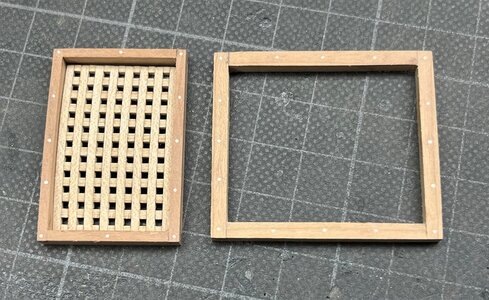
both are more less finished - only the boards will get some eyelets with rings later on
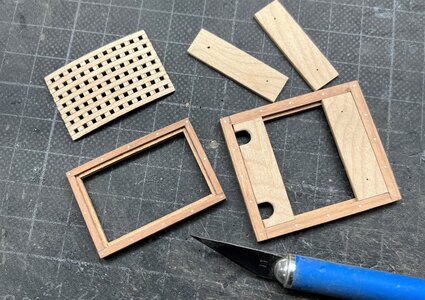
dryfitted on the place
Many Thanks for your interest ..... to be continued ......
Many Thanks for your comments, hints, remarks and questions
and
Many Thanks for your likes received
much much appreciated and a continuous motivation to follow up postings showing the progress
Not only the boxes for the mortars are necessary to be finished before the deck planking can be finalized,
no also the hatch coamings have to be prepared.
The HMS Granado was an english ship, so the coamings were installed on top of the beams and carlings. Sometimes the french ships were deifferent, here the planking was first installed and the coamings were fixed on top of the planking
The fore hatch coaming is covered with a grating

The grating elements are also lasered - in one direction already with a small camber

a close up to see the extremly good fitting


the coamings were fitted also with copper bolts - on the right the coaming for the main hatch

still missing here are the supports on which the covers are laying

both are more less finished - only the boards will get some eyelets with rings later on

dryfitted on the place


Many Thanks for your interest ..... to be continued ......
Lovely precise work Uwe! I'm surprised the coaming on the cambered piece isn't similarly cambered but I'm sure you have it right...
Bonjour, la forme bombée est certainement du au bois qui a travaillé.Many Thanks for your continuous interest in my building log
Many Thanks for your comments, hints, remarks and questions
and
Many Thanks for your likes received
much much appreciated and a continuous motivation to follow up postings showing the progress
Not only the boxes for the mortars are necessary to be finished before the deck planking can be finalized,
no also the hatch coamings have to be prepared.
The HMS Granado was an english ship, so the coamings were installed on top of the beams and carlings. Sometimes the french ships were deifferent, here the planking was first installed and the coamings were fixed on top of the planking
The fore hatch coaming is covered with a grating
View attachment 354674
The grating elements are also lasered - in one direction already with a small camber
View attachment 354673
a close up to see the extremly good fitting
View attachment 354672
View attachment 354671
the coamings were fitted also with copper bolts - on the right the coaming for the main hatch
View attachment 354675
still missing here are the supports on which the covers are laying
View attachment 354676
both are more less finished - only the boards will get some eyelets with rings later on
View attachment 354677
dryfitted on the place
View attachment 354680
View attachment 354682
View attachment 354679
Many Thanks for your interest ..... to be continued ......
Comment allez vous redresser cette pièce (peut être en la trempant dans de l'eau et la faire sécher sous un poids ?
Hello, the curved shape is certainly due to the wood that has been worked.
How are you going to straighten this part (perhaps by soaking it in water and drying it under a weight ?
Now I have the dimensions of the jigEncore une question, Pouvez vous me donner les co^tes d'encombrement de la boite à construction ?
Merci d'avance
Another question, Can you give me the dimensions of the construction box?
Thanks in advance
View attachment 353932
Longueur - length -> 70cm
Largeur - width -> 20cm
Hauteur - Height -> in center 12cm at the endings of the jig 15,5cm
Please have in mind, that for stability reasons (maybe not necessary, but I made it) the hig should / could be fixed to a base board
Hope this is helping
Bonjour, la forme bombée est certainement du au bois qui a travaillé.
Comment allez vous redresser cette pièce (peut être en la trempant dans de l'eau et la faire sécher sous un poids ?
Hello, the curved shape is certainly due to the wood that has been worked.
How are you going to straighten this part (perhaps by soaking it in water and drying it under a weight ?
The original curved shape / camber of the carlings was slightly too small, so after finishing the grating I soaked it slightly with water and let it dry fixed around a bigger bottle with some rubberbands. Unfortunately the camber is now slightly too much, so for the final installation I have to reduce the camber once more (in the same way, but I need a bigger radius.
But this step is necessary, only when I show finaly the hatch open and the grating laying next to it - in case the grating is finaly installed on top of the grating, the camber will be reduced by "strong forces" and I use some glue - the grating is still flexibel
Oui j'ai prévu de fixer la boite de construction sur une planche assez épaisse pour rigidifier l'ensemble.C'est la raison pour laquelle j'avais besoin des dimensions d'encombrement. Encore merci pour les renseignements.Now I have the dimensions of the jig
Longueur - length -> 70cm
Largeur - width -> 20cm
Hauteur - Height -> in center 12cm at the endings of the jig 15,5cm
Please have in mind, that for stability reasons (maybe not necessary, but I made it) the hig should / could be fixed to a base board
Hope this is helping
Yes, I planned to fix the construction box on a board thick enough to stiffen the assembly. This is the reason why I needed the overall dimensions. Thanks again for the information.
Hallo Ken,Uwek, what materials did you use for the bolts on your grate coamings? Thank you.
I am using since some time (some models) for metal "bolts" copper nails - these for the coaming have a diameter of 0,6mm (sometimes I use also 0,7mm)
take a look at my post #580 where I show the nails
HMS GRANADO - full hull - POF kit by CAF in 1:48 - by Uwe
Before I can finalize the walls and deck of the after cabin I have to make the inner planking and before I can make the inner planking I have to finalize the waterway(s) on which the planking / spirketing is laying ..... so one of the next working steps will be the waterway(s) The kit offers...
shipsofscale.com
- Joined
- Oct 15, 2017
- Messages
- 1,191
- Points
- 443

Ah, yes, thank you Uwek. I guess the reason I asked is I sensed the coaming bolts looked silver to me. I think I will try working with copper bolts to test workability and appearance for my use. You obviously have taught yourself a method that reaches great results. Thank you.
Many Thanks for your interest in my building and all the likes received
I made another small "one day excursion" from the deck planking and prepared the mast wedges, which are fixing the masts against the mast partners.
Also these wedges have an influence on the planking, so therefore once it is necessary
On the left side the additional planking, which has to be installed on top of the normal deck planking (according Goodwins cross section)
and on the right side the cnc milled 8 wedges, here for the main mast
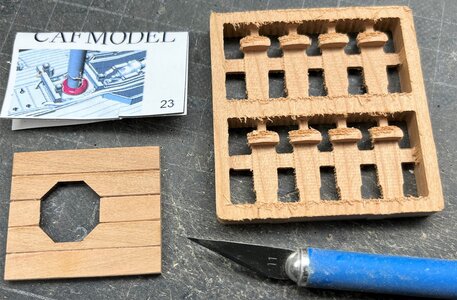
cut our, not sanded or adjusted, only to show the function
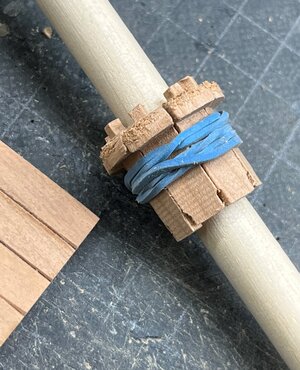
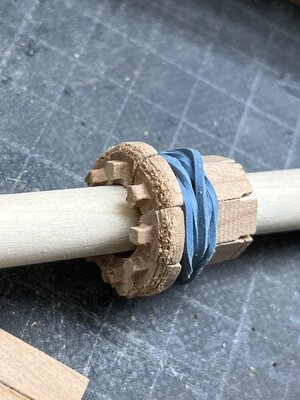
let us see, if they fit already into the mast partners?
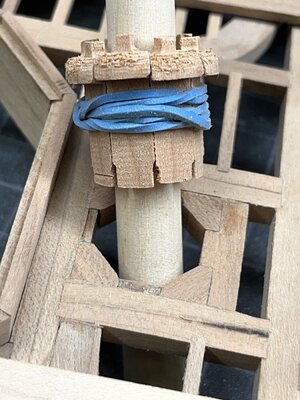
yes - but now the parts have to be sanded .....
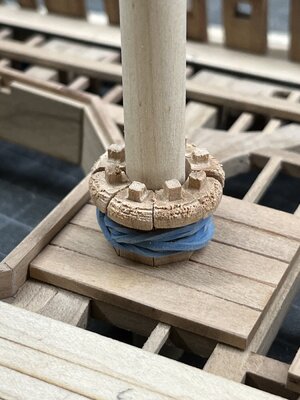
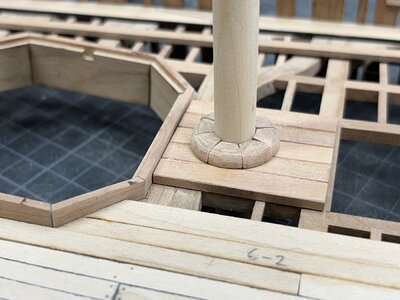
More or less the final appearance
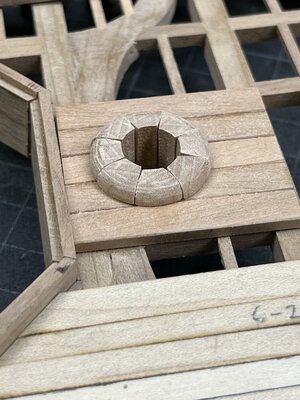
Usually the kit manufacturer are delivering only a wooden ring, and the modeler has to cut the gaps with a knife to immitate the 8 wedges - Here with this kit it is different - Bravo
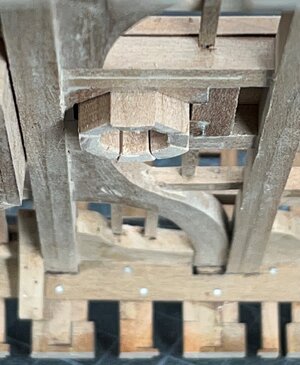
and the wedges visible from the undersight
Many Thanks for the interest ..... tob continued .....
I made another small "one day excursion" from the deck planking and prepared the mast wedges, which are fixing the masts against the mast partners.
Also these wedges have an influence on the planking, so therefore once it is necessary
On the left side the additional planking, which has to be installed on top of the normal deck planking (according Goodwins cross section)
and on the right side the cnc milled 8 wedges, here for the main mast

cut our, not sanded or adjusted, only to show the function


let us see, if they fit already into the mast partners?

yes - but now the parts have to be sanded .....

More or less the final appearance

Usually the kit manufacturer are delivering only a wooden ring, and the modeler has to cut the gaps with a knife to immitate the 8 wedges - Here with this kit it is different - Bravo

and the wedges visible from the undersight

Many Thanks for the interest ..... tob continued .....
Sorry my friends for the bigger break and not posting any update of the works.
I was on a business trip in sunny Panama, with most of the time not in Panama City, but driving with car direction to Columbian border, with bad or no internet connection, and very small free time
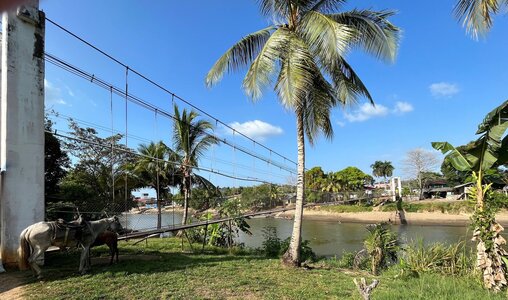
definitely the country would need some repair or development of roads and bridges - the last bridge in Panama is only a pedestrian cable bridge - afterwards only jungle
a beautiful country where a civil engineer will find some tasks.....
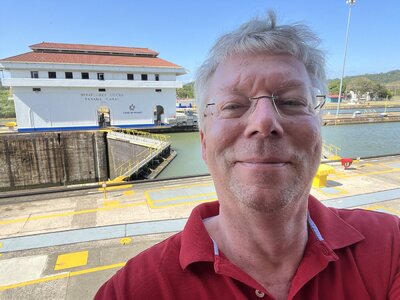
...... only at the last day I had some hours free and visited the "old" Panama canal
Sorry for not beeing online here in our forum for more than 10 days (also without any birthday wishes etc.)
I was on a business trip in sunny Panama, with most of the time not in Panama City, but driving with car direction to Columbian border, with bad or no internet connection, and very small free time
definitely the country would need some repair or development of roads and bridges - the last bridge in Panama is only a pedestrian cable bridge - afterwards only jungle
a beautiful country where a civil engineer will find some tasks.....

...... only at the last day I had some hours free and visited the "old" Panama canal

Sorry for not beeing online here in our forum for more than 10 days (also without any birthday wishes etc.)
Uwe,
That mast wedge is BRILLIANT. well along with the rest of this project as well.
That mast wedge is BRILLIANT. well along with the rest of this project as well.

Last edited:
Looks like some nice weather there! Hope you had time to enjoy! 


