
Uwe, there you make a clean diligence work which is really worthwhile. Very nice.

-

SUBSCRIBE TO SHIPS IN SCALE TODAY!
The beloved Ships in Scale Magazine is back and charting a new course for 2026!
Discover new skills, new techniques, and new inspirations in every issue.
NOTE THAT OUR NEXT ISSUE WILL BE July/August 2026 -

Win a Free Custom Engraved Brass Coin!!!
As a way to introduce our brass coins to the community, we will raffle off a free coin during the month of August. Follow link ABOVE for instructions for entering.
You are using an out of date browser. It may not display this or other websites correctly.
You should upgrade or use an alternative browser.
You should upgrade or use an alternative browser.
HMS GRANADO - full hull - POF kit by CAF in 1:48 - by Uwe


I'm curious as to why you couldn't use the factory sheer rail. It doesn't look like it has to move much. Wouldn't it bend into shape until the glue dries? Or is it a lot stiffer than it looks?
Bending the original part would mean, that you have to bend it against the wider dimension of 8mm which is extremely hard to make. The thickness of 1,5mm would be no problem, but 8mm could cause much bigger problems - it is much easier to cut out a new top rail with the correct formI'm curious as to why you couldn't use the factory sheer rail. It doesn't look like it has to move much. Wouldn't it bend into shape until the glue dries? Or is it a lot stiffer than it looks?
Something completely different, but I wanted to show this new additional possible add-on, which could be interesting for everybody building a 1:48 full hull or also section model
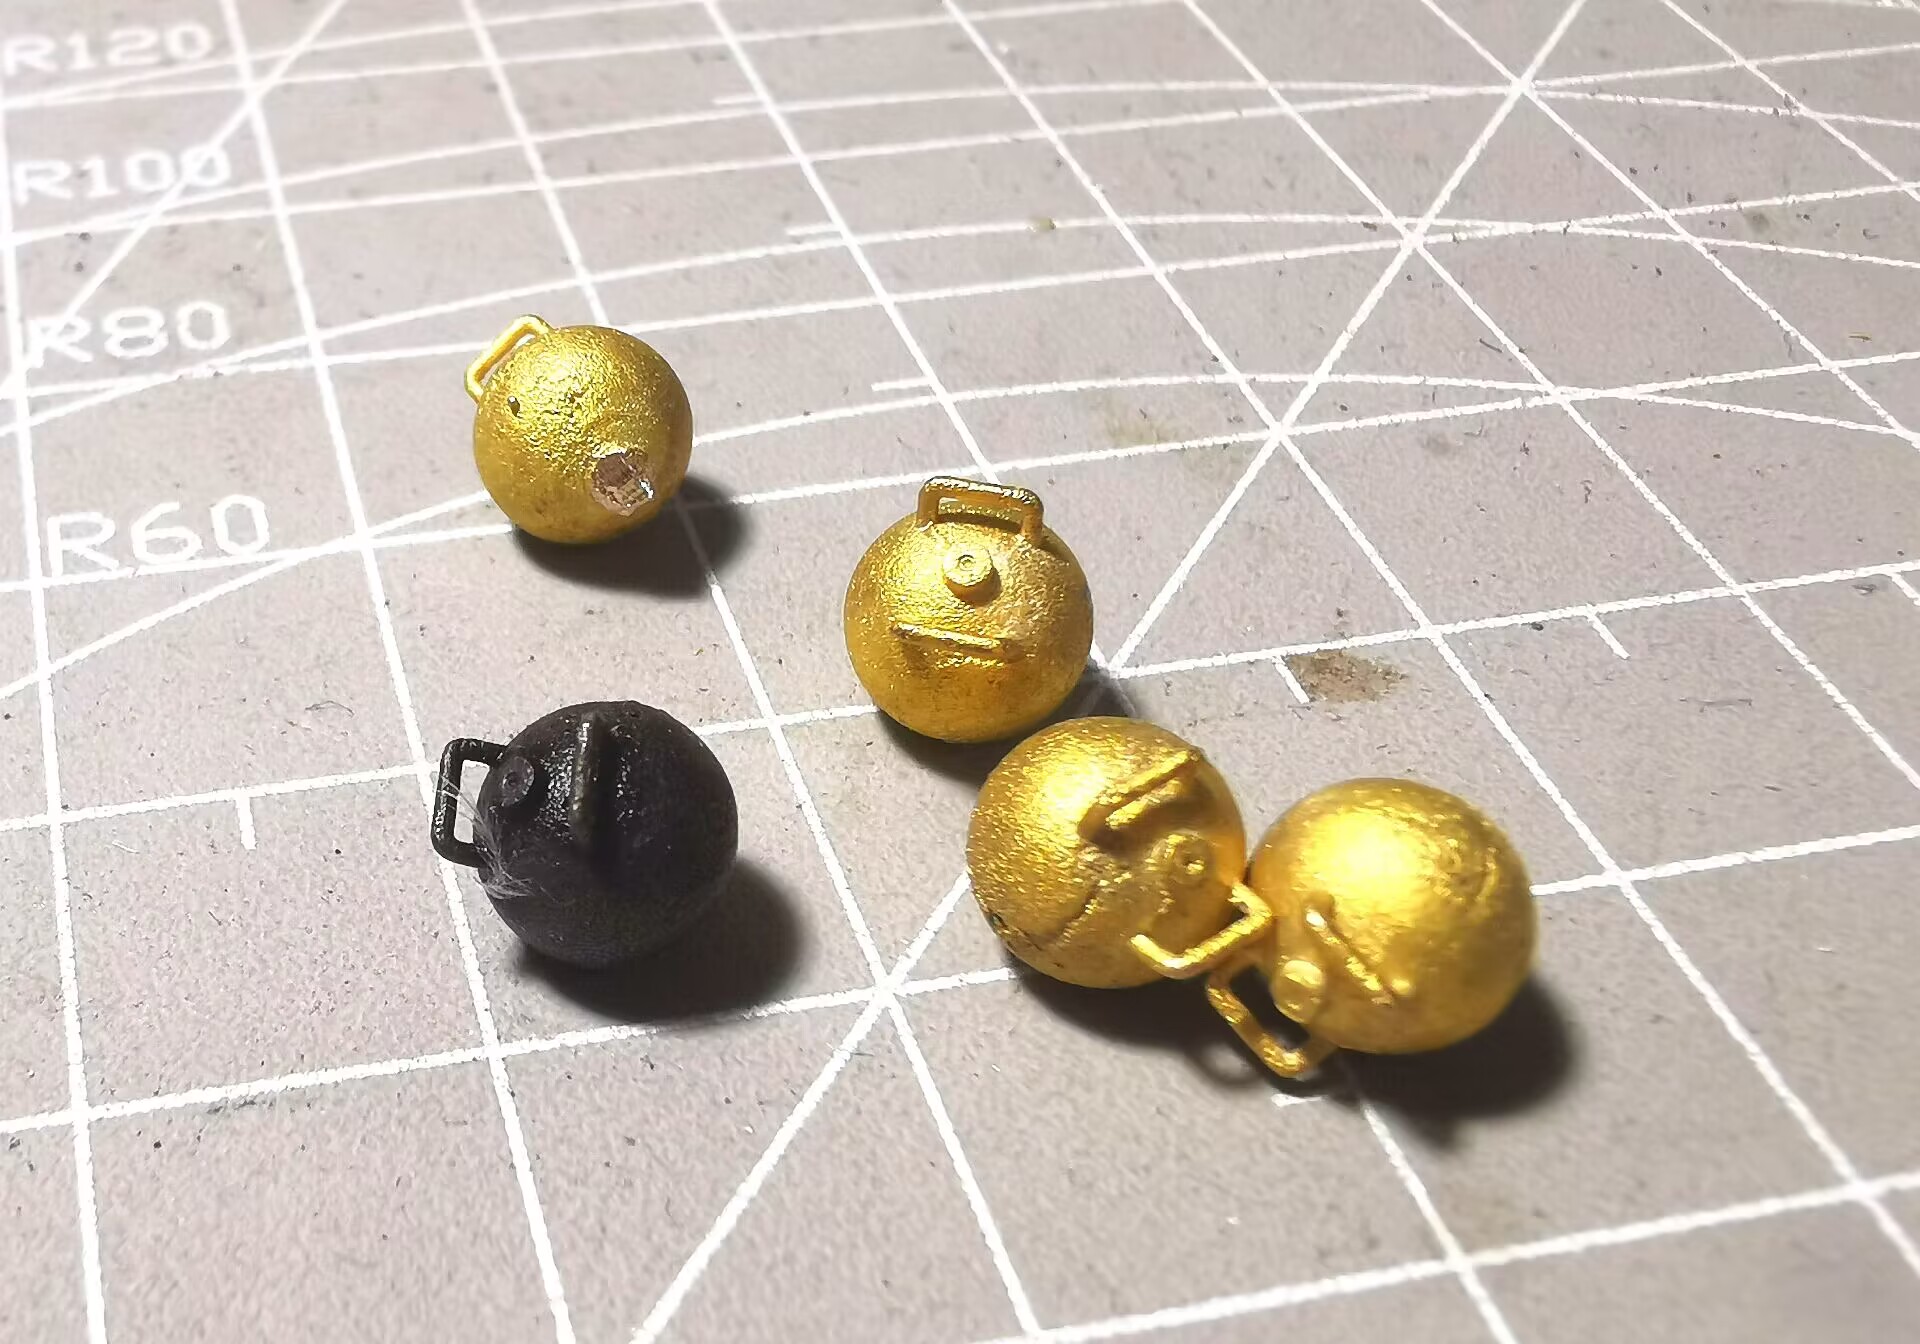
@CAFmodel is now also offering a set of brass made mortar shells with the lifting lugs and an elevated fuse hole


Please take a look at the Goodwin sketches

- this new aftersale offer is making the model much more realstic, maybe not all balls have to ber changed in the hold (shell racks) but for the final presentation the modeler can add some of these new smortar shells close to the mortar on deck - now we need only the shell carcass which was used for transports of the shells from the hold to the mortar......
Many Thanks to CAF for this additional new detail - reall a great idea
@CAFmodel is now also offering a set of brass made mortar shells with the lifting lugs and an elevated fuse hole
Please take a look at the Goodwin sketches
- this new aftersale offer is making the model much more realstic, maybe not all balls have to ber changed in the hold (shell racks) but for the final presentation the modeler can add some of these new smortar shells close to the mortar on deck - now we need only the shell carcass which was used for transports of the shells from the hold to the mortar......
Many Thanks to CAF for this additional new detail - reall a great idea

Hi Uwe,
For some reason I missed your recent updates.
You are making really some progress. Love the open drck you created, always difficult to fing the right look but you succeded.
Hope you still add the paintings on the bullwarks as on the rmmg model.
For some reason I missed your recent updates.
You are making really some progress. Love the open drck you created, always difficult to fing the right look but you succeded.
Hope you still add the paintings on the bullwarks as on the rmmg model.
Many Thanks for the kind comments and all the likes received.
Going further with the works on the sheerrails - this time the poopdeck at the bow

The outer epper plank was neded and installed - the kit sheerrail top is fitting very good from the form


Visible in the drawing is the fact, that the cathead is embedded inside so is deviding the top into two parts (see the laser marks on the part)
So before going further I had to make the cathead beam

and I had to make a notch in the inner and also outer plank

The necessary bolts (copper nails) are installed - these bolts are fixing the cathead down to the available beams and the top of the frame at the sheer rail


and the view from the outside

I have to go a little bit deeper.....the cathead beam has to lay flat on the planking
Many Thanks for your interest ..... to be continued ....
Going further with the works on the sheerrails - this time the poopdeck at the bow
The outer epper plank was neded and installed - the kit sheerrail top is fitting very good from the form
Visible in the drawing is the fact, that the cathead is embedded inside so is deviding the top into two parts (see the laser marks on the part)
So before going further I had to make the cathead beam
and I had to make a notch in the inner and also outer plank
The necessary bolts (copper nails) are installed - these bolts are fixing the cathead down to the available beams and the top of the frame at the sheer rail
and the view from the outside
I have to go a little bit deeper.....the cathead beam has to lay flat on the planking
Many Thanks for your interest ..... to be continued ....

Uwe,
I just reviewed your tree nailing techniques, very nice. Later this week I'll be doing the same on my San Felipe. How wide are your deck planks? I plan on swapping out the provided (low quality) ZHL planks for some 0.05 pear vinier.
I just reviewed your tree nailing techniques, very nice. Later this week I'll be doing the same on my San Felipe. How wide are your deck planks? I plan on swapping out the provided (low quality) ZHL planks for some 0.05 pear vinier.
I do not know exactly, but I think they are around 5mm wide - my treenails are 0,5mm in diameter.Uwe,
I just reviewed your tree nailing techniques, very nice. Later this week I'll be doing the same on my San Felipe. How wide are your deck planks? I plan on swapping out the provided (low quality) ZHL planks for some 0.05 pear vinier.
In my opinion it is important, if you can show the treenailing more or less in scale, independent how wide the planks are.
So a 0,5mm treenail in scale 1:48 would mean that the treenails are appr. 2,4cm in diameter in real => which is more or less in scale
A 0,8mm treenail in scale 1:50 would be already 4cm - and a 0,8mm in scale 1:75 would be already 6cm
Here we are coming fastly into the area, that the treenail is out of scale - at the end a question of taste
In smaller scale models, I would rather do the planking without treenailing.
When you try to make a planking overlay with thin veneer I would make some trials of treenailing before, so not trying the method on the ship model.
The planking material of the Granado kit is 0,5mm thick and a relatively hard wood - so the pushed toothpick is not displace the planking wood very much - it is more, that the toothpick material is softer and squeezed into the hole (over the complete thickness of the plank.
With veneer, although it is pear wood, it could react differently - therefore make a planking template with some butt joints etc. and test it.
f.e. do you have to glue down the veneer on the full surface - will the veneer, when it is wet by the glue, warp ?
At the end, when all treenails are installed, you have to make a scratch and / or sanding the planking surface - is the veneer thick enough, for this working step?
Sheer rail top -scratched in pear, so that the complete rail is made out of the same wood
Starting with the first part from the bowsprit toards the cathead - the end at the bowsprit will be adjusted afterwards when the bowsprit will be installed


and further


all dry fit until now, they will be fixed when I have all parts prepared
Many Thanks for your interest - to be continued .....
Starting with the first part from the bowsprit toards the cathead - the end at the bowsprit will be adjusted afterwards when the bowsprit will be installed
and further
all dry fit until now, they will be fixed when I have all parts prepared
Many Thanks for your interest - to be continued .....
Wonderful Uwe. This is just really fine work my friend!
A very nice fit of the rail top besides the cathead and following the bow curves, Uwe.Sheer rail top -scratched in pear, so that the complete rail is made out of the same wood
Starting with the first part from the bowsprit toards the cathead - the end at the bowsprit will be adjusted afterwards when the bowsprit will be installed
View attachment 394491
View attachment 394492
and further
View attachment 394493
View attachment 394494
View attachment 394496
all dry fit until now, they will be fixed when I have all parts prepared
Many Thanks for your interest - to be continued .....
Regards, Peter

Really beautiful work Uwe, how about a couple pictures with the whole model in there please? Haven’t seen a full shot for a while, the close ups are awesome and show your meticulous craftsmanship but I would love to get a complete view? Just if you think of it please… awesome, just awesome!
Here we goReally beautiful work Uwe, how about a couple pictures with the whole model in there please? Haven’t seen a full shot for a while, the close ups are awesome and show your meticulous craftsmanship but I would love to get a complete view? Just if you think of it please… awesome, just awesome!
unfortunately I was the last days not anymore in my workshop, so no real progress, but I have an "old" photo which I made some days ago

you can see, that the middle part of the top rail is still roughly cut and needs a final sanding as well as the scratching .....

DittoDear Uwe,
Your attention to detail and pursuit of perfection inspires us all.