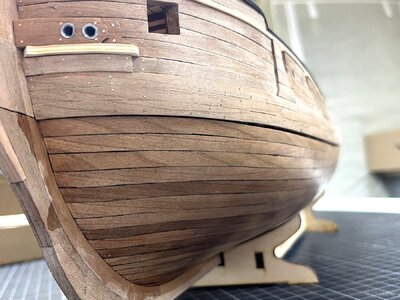
HMS GRANADO - full hull - POF kit by CAF in 1:48 - by Uwe

Dear Uwe, I have to commend you on your dedication. That seems like an awful lot of work (with inherent risk) for something that is barely visible. Subtlety is certainly the name of the game here - except for when you have a saw in hand! :)
Heinrich,

He's not SO subtle with the saw...his model is cut in half!!

Guess that is the ultimate in subtle sawing, a perfect slice on the exact preplanned line!

This build never ceases to amaze me!
 
For a short time my hull was looking like a brown Hedgehog

View attachment 426843

you see, I did not make a change of so much of the treenails ..... and nowhere (puh) damages made by the drill

The final result

View attachment 426844

View attachment 426845

only some last touch with a fine steelwool will be done

View attachment 426846

View attachment 426847

View attachment 426848

View attachment 426849

View attachment 426850

View attachment 426851

Now I can start with the interior works of the lower part - JuHu

Many Thanks for your interest ..... to be continued .....
Your last series of pictures gave me a lot of deja-vu’s: Hedgehog-treenailing, subtle result after sanding and oil/Clou-ing, a open lower part for easy acces to make the inner construction.
You are a proud representative member of the HCSA (Half-Cut Saw Association).
Regards, Peter
 
La perceuse a beaucoup travaillé. Quel diamètre de foret avez vous utilisé?
Très beau travail! Félicitations!

The drill worked a lot. What diameter drill bit did you use?
Very nice job! Congratulations!
Hallo,
for these work I use the small drills from Proxxon - officially they are 0,5mm - but in real slightly smaller with appr. 0,46 mm - the treenails / toothpicks are prepared with 0,53 or 0,52mm diameter - > a little bit bigger than the drilled hole, so they hold in place without any glue
 
Many Thanks to all your comments and all the likes received

Before I start with the interior walls - some elements were already prepared one year ago - I have to remember which part belongs to which area........

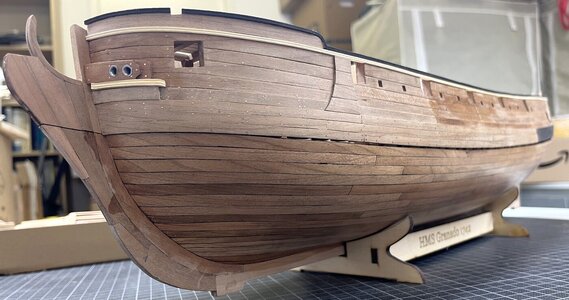
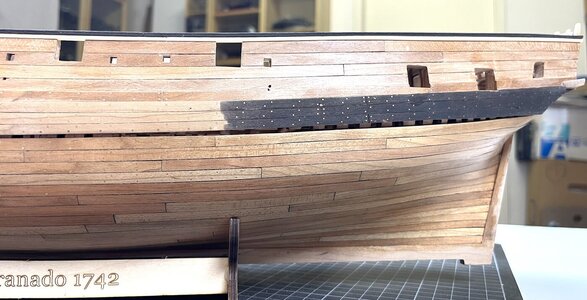
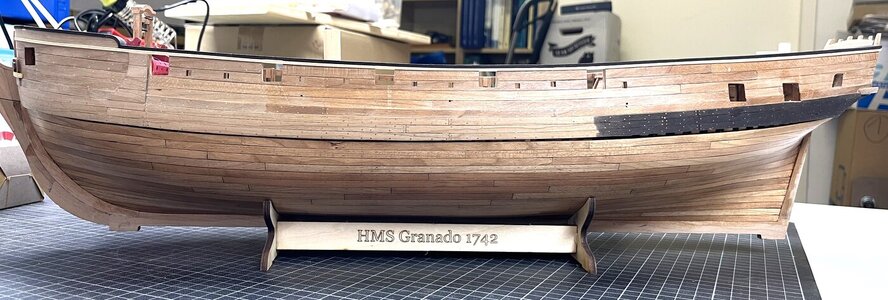
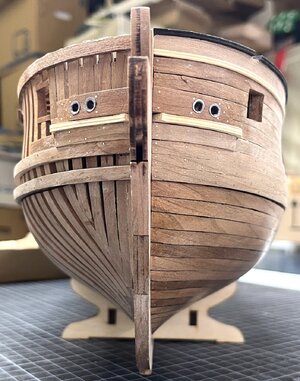
for fun I put the upper part on top - so for a short time it was once more a full model

IMG_4193.jpg

IMG_4194.jpg

IMG_4195.jpg

IMG_4196.jpg

IMG_4197.jpg

see you soon .... to be continued .....
 
Many Thanks to all your comments and all the likes received

Before I start with the interior walls - some elements were already prepared one year ago - I have to remember which part belongs to which area........

for fun I put the upper part on top - so for a short time it was once more a full model

View attachment 427404

View attachment 427405

View attachment 427406

View attachment 427407

View attachment 427408

see you soon .... to be continued .....
Good to see these 'full hull' pictures, Uwe. Otherwise the header of your build-log would no longer be correct. Looking forward to the inside construction.
Regards, Peter
 
The hull in full mounted position looks really great. Like the colour of the wood and the summary use of tree nailing.
One question about the fit between the upper part on the lower part. It looks that on the stern and stem the wood is not fit right. Does the wood work or is it not just put in the right way together.
 
For a short time my hull was looking like a brown Hedgehog

View attachment 426843

you see, I did not make a change of so much of the treenails ..... and nowhere (puh) damages made by the drill

The final result

View attachment 426844

View attachment 426845

only some last touch with a fine steelwool will be done

View attachment 426846

View attachment 426847

View attachment 426848

View attachment 426849

View attachment 426850

View attachment 426851

Now I can start with the interior works of the lower part - JuHu

Many Thanks for your interest ..... to be continued .....
Good afternoon Uwek. Yep you totally owned this!! Cheers Grant
 
Back
Top