-

Win a Free Custom Engraved Brass Coin!!!
As a way to introduce our brass coins to the community, we will raffle off a free coin during the month of August. Follow link ABOVE for instructions for entering.
-

PRE-ORDER SHIPS IN SCALE TODAY!
The beloved Ships in Scale Magazine is back and charting a new course for 2026!
Discover new skills, new techniques, and new inspirations in every issue.
NOTE THAT OUR FIRST ISSUE WILL BE JAN/FEB 2026
You are using an out of date browser. It may not display this or other websites correctly.
You should upgrade or use an alternative browser.
You should upgrade or use an alternative browser.
HMS GRANADO - full hull - POF kit by CAF in 1:48 - by Uwe
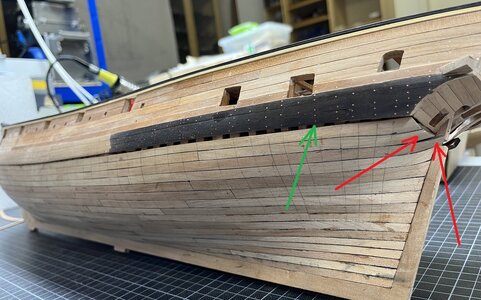
Hallo my friend,One question about the fit between the upper part on the lower part. It looks that on the stern and stem the wood is not fit right. Does the wood work or is it not just put in the right way together.
you are absolutely correct at the stern part - it is not fitting 100% only 99%
One reason is the still not adjusted planking at the stem which you can see at the older photo - the red arrows
and in addition, the green arrow is showing to the approximate location where some inner laying knees and also hanging knees are slightly hindering that both parts are fitting the last 1%
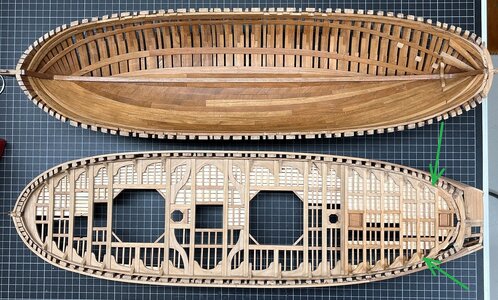
I was thinking about to adjust as much as possible, but in the next working steps
I have to add in addition internal walls which will be fixed in the lower hull, but have notches in the top (of the wall elements) which have to fit between the beams and carlings etc. of the upper part of the hull
=> This 100% perfection will be never possible, that all elements will fit - never ever - so I decided to stop adjusting the knees
Defintely the upper part of the hull will be appr. 20cm above the lower half of the hull -> so never ever somebody can recognize it
I am afraid when I try, that I make it worse.....
=> and I am ok with it, that you know it - it fits for 99% and this is ok, I think
Thank you for the comment my friendThis is looking very good, Uwe. You are creating a once-in-a-lifetime model here!
but I hope, that there will be some more "once in a lifetime" models in the future .....
Which therefore proves the point about being “half-cut”, which is informally interpreted in some countries as slightly intoxicatedNot necessary Jim a saw is a saw, but the HCAA club is that's when you f#@ked up your model and use an axe instead of a saw
 .
.- Joined
- Aug 8, 2019
- Messages
- 5,575
- Points
- 738

Leave it like it is, 20 cm above nobody will notice indeed. Fixing it, I agree, sometimes you can make things more worse. I just wonder if the glue was the reason of the gap. Believe me, my HZ model is also not that correct like pictures sometimes show. There are a lot of imperfections.Defintely the upper part of the hull will be appr. 20cm above the lower half of the hull -> so never ever somebody can recognize it
I am afraid when I try, that I make it worse.....
DoneWell well, that's great!
Then I did that right away. If I can grant that freedom to myself...... Perhaps a tip for Maarten @Maarten ?
We are open to more registrations!
Regards, Peter

OK - where did I loose the last 18 months?
It is already 18 months ago, that I prepared temporary some elements of the interior of the Granado
So I had two important recognitions
1) Time is running
2) It is good to make a regular building log, so you can take a look back in history in order check what you have made already - Hope to find all parts
Most important are the mortar beds and the mortar base structures (still only dry-fit)
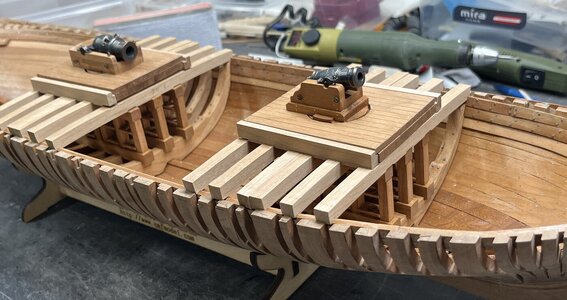
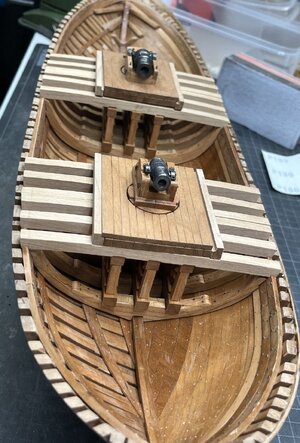
Now I mark them and the order, so I know .....
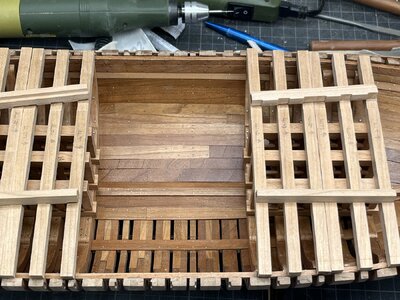
and after some time I recoignized, that also at the internal planking some of the treenails are not nice - so - it was hammer-time
Many Thanks for your interest .... to be continued ......
It is already 18 months ago, that I prepared temporary some elements of the interior of the Granado
HMS GRANADO - full hull - POF kit by CAF in 1:48 - by Uwe
I would follow your interpretation for the ladder, Uwe
shipsofscale.com
So I had two important recognitions
1) Time is running
2) It is good to make a regular building log, so you can take a look back in history in order check what you have made already - Hope to find all parts
Most important are the mortar beds and the mortar base structures (still only dry-fit)


Now I mark them and the order, so I know .....

and after some time I recoignized, that also at the internal planking some of the treenails are not nice - so - it was hammer-time

Many Thanks for your interest .... to be continued ......
- Joined
- Oct 23, 2018
- Messages
- 886
- Points
- 403

Hi Uwe,
have you tested how the upper parts fits at the beams? If I look to the photos I think that you will have there a small problem. The lower part of the beams are smaller the top.
have you tested how the upper parts fits at the beams? If I look to the photos I think that you will have there a small problem. The lower part of the beams are smaller the top.
What a wonderful way to spend 18 months!
So the mortars will stay with the bottom half and the top half will have two big holes?
- Joined
- Jun 17, 2021
- Messages
- 3,202
- Points
- 588

I applaud your decision not to allow the perfect to be the enemy of the good, declare victory (which, indeed it is) and to move on. 
Hallo Christian, which beams do you mean? keep in mind, that I will present the model splitted, but I would like to respond and check your pointhave you tested how the upper parts fits at the beams? If I look to the photos I think that you will have there a small problem. The lower part of the beams are smaller the top.
This way of presnetation was only to remind to myself, how the parts would be located and work together before I start to fix them.So the mortars will stay with the bottom half and the top half will have two big holes?
I plan in moment, that the mortars with the wooden bases will be on the upper part of the model and only the beams on top of the mortar beam structure at the lower one
something like this shown with the arrows
red - upper part of the hull
green - lower part of the hull
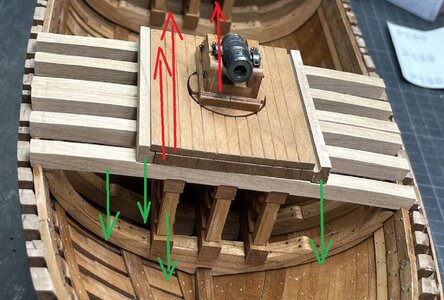
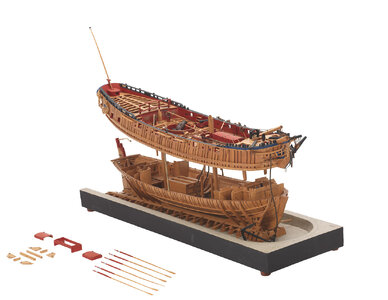
somehow shown on the NMM-museum model - but I will leave the 2 times 6 heavy beams at the lower part
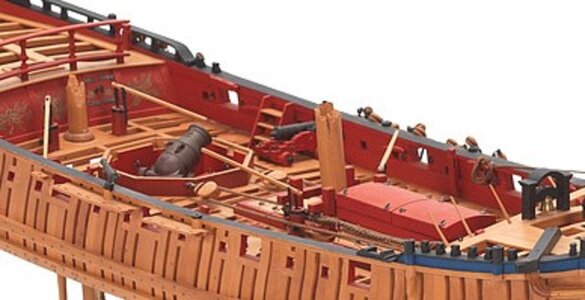
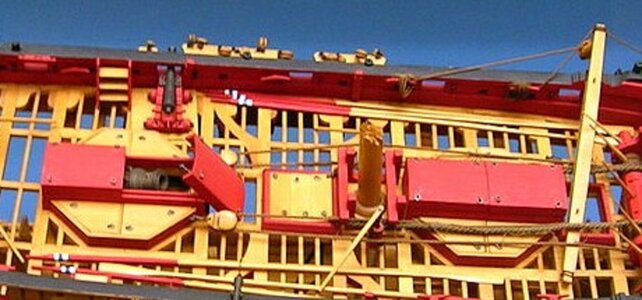
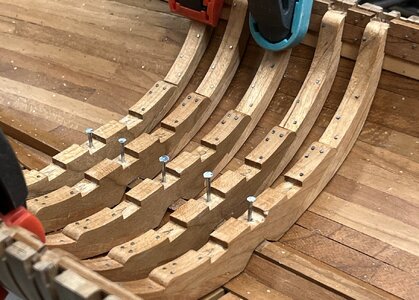
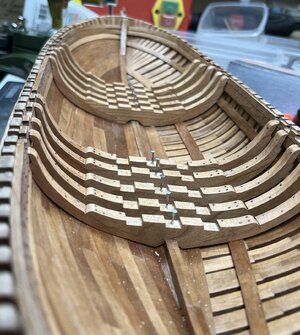
going further, better re-starting the interior works
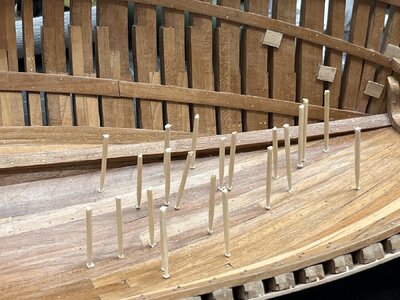
not really in scale but I decided to use here some "bolts" to fix the floor riders finally on the keel - here I did not trust the glue alone
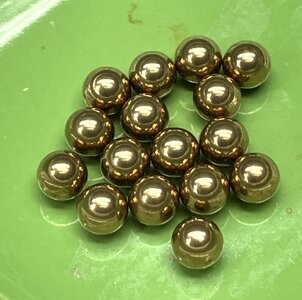
In the kit 50 brass mortar shots are included
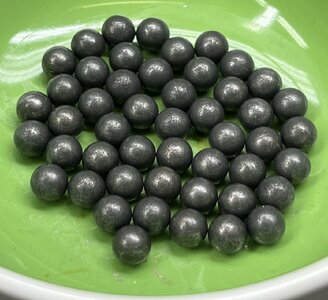
blackened they are looking more realistic
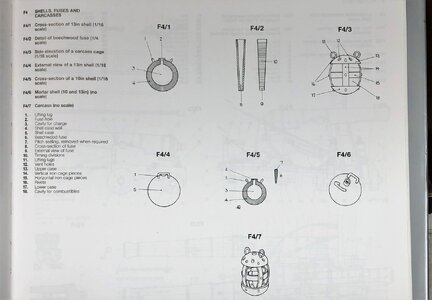
In reality these shots or shells had two handles / lifting lugs and a fuse hole ......
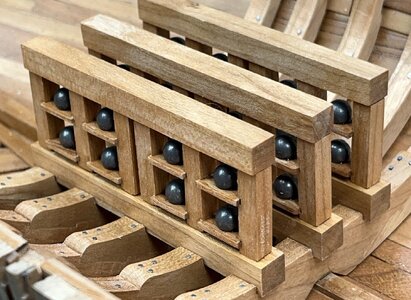
but when these shells are stored in the hold in the racks it will be hardly visible that the shells are are only round balls .....
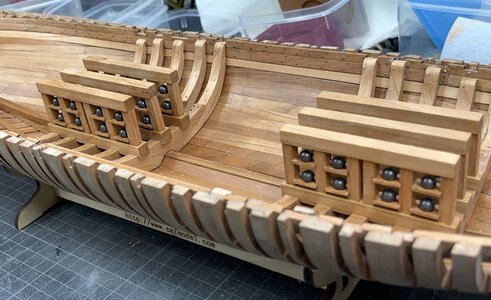
Many Thanks for your interest .... to be continued .....
not really in scale


In the kit 50 brass mortar shots are included

blackened they are looking more realistic

In reality these shots or shells had two handles / lifting lugs and a fuse hole ......

but when these shells are stored in the hold in the racks it will be hardly visible that the shells are are only round balls .....


Many Thanks for your interest .... to be continued .....
Very precise work Uwe. Those cannon balls also look very realistic. I had never heard of lifting handles/lugs so it’s time for me to do some homework  .
.
I agree with Roger, the shells look realistic once blackened. The entire shell holder looks great along with floor riders. Very accurate work, mon ami.
- Joined
- Jan 10, 2022
- Messages
- 860
- Points
- 403

It is looking really good Uwe. Those shot racks and the riders make an impressive structure. You can only imagine what that must have looked like in real lifegoing further, better re-starting the interior works
not really in scalebut I decided to use here some "bolts" to fix the floor riders finally on the keel - here I did not trust the glue alone
View attachment 429017
View attachment 429018
In the kit 50 brass mortar shots are included
View attachment 429015
blackened they are looking more realistic
View attachment 429016
In reality these shots or shells had two handles / lifting lugs and a fuse hole ......
View attachment 429021
but when these shells are stored in the hold in the racks it will be hardly visible that the shells are are only round balls .....
View attachment 429019
View attachment 429020
Many Thanks for your interest .... to be continued .....
Soooo good!going further, better re-starting the interior works
not really in scalebut I decided to use here some "bolts" to fix the floor riders finally on the keel - here I did not trust the glue alone
View attachment 429017
View attachment 429018
In the kit 50 brass mortar shots are included
View attachment 429015
blackened they are looking more realistic
View attachment 429016
In reality these shots or shells had two handles / lifting lugs and a fuse hole ......
View attachment 429021
but when these shells are stored in the hold in the racks it will be hardly visible that the shells are are only round balls .....
View attachment 429019
View attachment 429020
Many Thanks for your interest .... to be continued .....


