HMS GRANADO - full hull - POF kit by CAF in 1:48 - by Uwe

Witaj
Pasowanie tego wszystkiego jest bardzo trudne ale zrobiłeś bardzo bobrze Uwe .Oglądam z przyjemnością twoją pracę . Pozdrawiam Mirek

Hello
Putting it all together is very difficult, but you did a great job, Uwe. I watch your work with pleasure. Regards, Mirek
 
Last edited by a moderator:
Many Thanks my dear friends - Many Thanks for all your interest

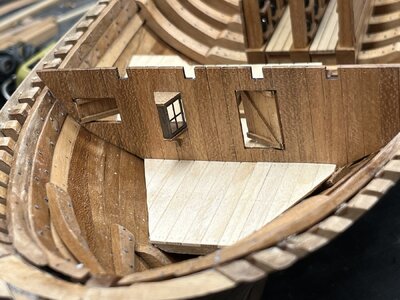
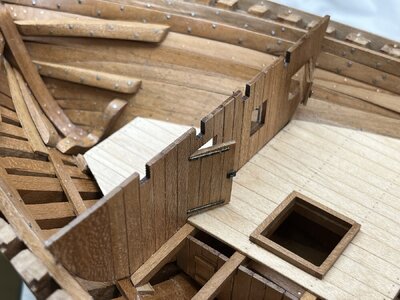
working more on the bulkhead walls - here the after bulkhead magazing

View attachment 436462

not so easy to adjust the outer form that they fit well with the interior hull planking

View attachment 436463

Here I want to show the door towards the powder magazin open - also the small door towards the breadroom

View attachment 436467

and the light box - glas is made out of Mica

View attachment 436464

dryfit

View attachment 436465

View attachment 436466

More or less ready for final installation

View attachment 436468

View attachment 436470

View attachment 436469

Many Thanks for your interest in my work and building log .... to be continued ....
Quality stuff Uwek…wow. Cheers Grant
 
Many Thanks to all for your interest, the comments and hints as well the likes received - that is the motivation to post the progress

I have sanded the cant frames of one side carefully with the drum sander

View attachment 305156
I believe I will be shortly ordering this model, so want to ask: How do you use the drum sander when sanded edges are not perpendicular to the frame faces? I tried this with other objects, and it is difficult to get the right angle. Plus, with a drum sander, you cannot view the edge being sanded, and have to pull it away to see the progress. I over-sanded some of my Bonhomme Richard frames because of this, but here I do not want to oversand.
 
Sorry to jump in here Ewe. Can l answer this question by saying you use a hand held spindle sander to shape the frames. It works perfectly with a gentle touch. l have almost completed this part of the build with no problems at all. lt is definitely the best tool to use
 
Sorry to jump in here Ewe. Can l answer this question by saying you use a hand held spindle sander to shape the frames. It works perfectly with a gentle touch. l have almost completed this part of the build with no problems at all. lt is definitely the best tool to use
But if you use it in the normal way, the sanded areas will be perpendicular to the faces, and in the model, that would only occur with frames toward the middle of the ship, right?
 
I believe I will be shortly ordering this model, so want to ask: How do you use the drum sander when sanded edges are not perpendicular to the frame faces? I tried this with other objects, and it is difficult to get the right angle. Plus, with a drum sander, you cannot view the edge being sanded, and have to pull it away to see the progress. I over-sanded some of my Bonhomme Richard frames because of this, but here I do not want to oversand.
Hallo my friend,
sanding the frames inside and outside -> I make this with my JET oszillating spindle sander


But I am using the table only for straight rectangel sanding activities. on 95% of the frames I keep the frame in my hand and control the frame "in the air", I think I never used the tilting of my table. Because of this you can see the sanding dust on the complete height of my spindles.
- Only at the floor timber area (where the smallest spindle is not able) I use my small Proxxon drum sander similar to this one @Keef showed
Thanks for providing that. I think the difference is the craftsman: When I use the spindle sander, I always remove too much material, partly because I cannot see what I am removing. You are definitely more careful and skilled than I so can work more slowly and accurately. I will try my best on this model, though. I have asked Tom at CAF by PM some questions prior to ordering, and will order once I receive the answers.
 
Question, when you assembled the frames I noticed that you removed the laser char before mating the parts. Did you make sure when the frames were complete that the frame matched the provided frame drawing exactly?
Hallo,
first of all - many thanks for the interest in my log.
I am not removing the char before I assemble the indivicual frames, only at the contact joints between the frames segments, so between floor timber, futtocks and top timbers
Please take a look at one of my first posts in this building log, where I show the working steps for one frame


And defintely I take care in comparing with the frame drawing - they are very important and the guideline for the form of each frame.
I fix a copy of the frame drawing on a glass plate and fix the frame parts temorarily with fixogum on the paper - when the frame is glued and dry you can easily remove the paper
 
Thanks for providing that. I think the difference is the craftsman: When I use the spindle sander, I always remove too much material, partly because I cannot see what I am removing. You are definitely more careful and skilled than I so can work more slowly and accurately. I will try my best on this model, though. I have asked Tom at CAF by PM some questions prior to ordering, and will order once I receive the answers.
In the beginning making the first frames of my Salamandre with the JET I was too careful with sanding - not sure about my work and how exact and accurate the laser marks (on the frame parts) for fairing are - so I had afterwards a much longer work in sanding the complete hull.
In 99,8% the marks are very accurate and exact......
and with the JET it is the same - less pressure -> less sanding -> less problem
It is like working with a saw - the saw shall make the work (without pressure) - our hands are only for the accuracy - so only important to guide the parts with our hands
After two or three frames - you make it automatically => such a spindle sander is an extreme good helper and reduces the handwork sanding very much - and without pressure also very accurate
 
Hallo,
first of all - many thanks for the interest in my log.
I am not removing the char before I assemble the indivicual frames, only at the contact joints between the frames segments, so between floor timber, futtocks and top timbers
Please take a look at one of my first posts in this building log, where I show the working steps for one frame


And defintely I take care in comparing with the frame drawing - they are very important and the guideline for the form of each frame.
I fix a copy of the frame drawing on a glass plate and fix the frame parts temorarily with fixogum on the paper - when the frame is glued and dry you can easily remove the paper

Thank you.
 
Good morning Uwe, as always, very precise work, I'm looking forward to the moment when I can see it in real life.

Thanks for providing that. I think the difference is the craftsman: When I use the spindle sander, I always remove too much material, partly because I cannot see what I am removing. You are definitely more careful and skilled than I so can work more slowly and accurately. I will try my best on this model, though. I have asked Tom at CAF by PM some questions prior to ordering, and will order once I receive the answers.

Hello @Signet , you can also leave some excess and then scrape the inside after assembly, this way you get a good transition and the frames fit together perfectly.

eZy Watermark_28-02-2023_08-41-50PM.jpeg
 
Hallo my friends,
many thanks for your replies with the comments and suggestions - I have to consider these ideas especially for the one wall which will be close to the carrick bitt pin..... still I have some time to think about it

I added a little bit of the "iron"-works on the doors - the walls are still only dry fitted - but in the meantime the wood is treated with CLOU

View attachment 435088

View attachment 435089

View attachment 435090

View attachment 435091

View attachment 435092

and I realized, that the second bitt pin needs a notch through the deck planking

View attachment 435093

Many Thanks for your interest in my log ....... to be continued .....
GEIL/VERY WELL DONE!!!
 
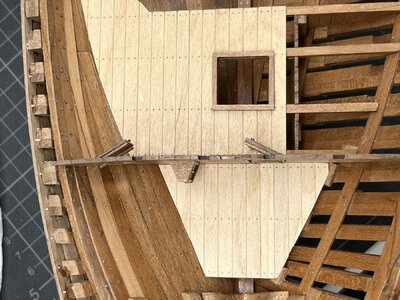
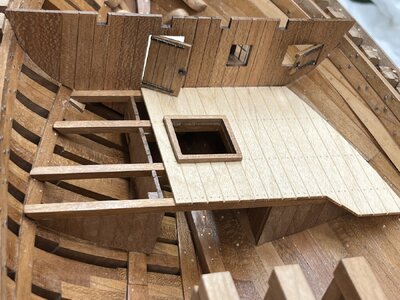
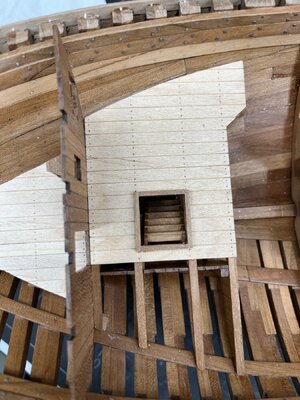
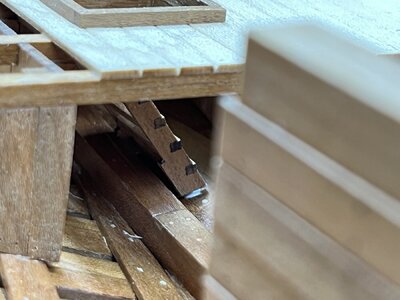
some small progress on the fore platform

The bulkhead wall was fixed and also the two platforms - "no way back"

IMG_4338.jpg

IMG_4340.jpg

IMG_4339.jpg

IMG_4341.jpg

and also the small ladder down to the hold towards the captains storeroom etc.

IMG_4342.jpg

IMG_4343.jpg

wish you all Happy Eastern .... see you soon
 
Back
Top