Amazing work with al those details of the walls Uwe
-

Win a Free Custom Engraved Brass Coin!!!
As a way to introduce our brass coins to the community, we will raffle off a free coin during the month of August. Follow link ABOVE for instructions for entering.
-

PRE-ORDER SHIPS IN SCALE TODAY!
The beloved Ships in Scale Magazine is back and charting a new course for 2026!
Discover new skills, new techniques, and new inspirations in every issue.
NOTE THAT OUR FIRST ISSUE WILL BE JAN/FEB 2026
You are using an out of date browser. It may not display this or other websites correctly.
You should upgrade or use an alternative browser.
You should upgrade or use an alternative browser.
HMS GRANADO - full hull - POF kit by CAF in 1:48 - by Uwe
Hallo my friends,
many thanks for your replies with the comments and suggestions - I have to consider these ideas especially for the one wall which will be close to the carrick bitt pin..... still I have some time to think about it
I added a little bit of the "iron"-works on the doors - the walls are still only dry fitted - but in the meantime the wood is treated with CLOU
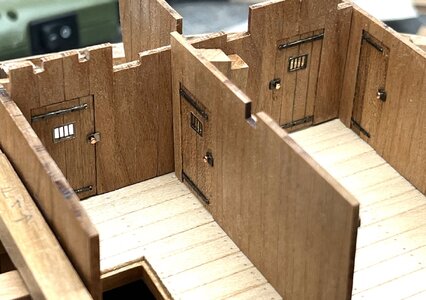
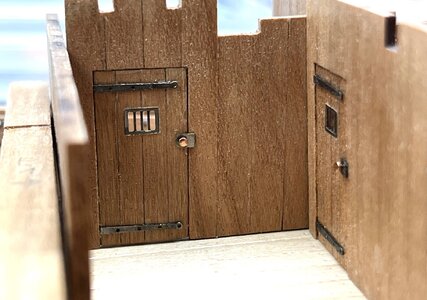
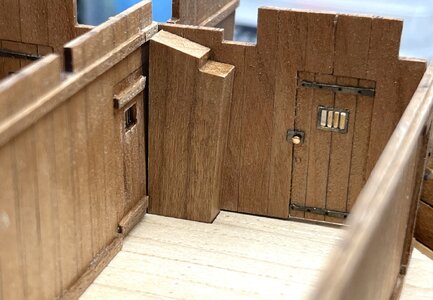
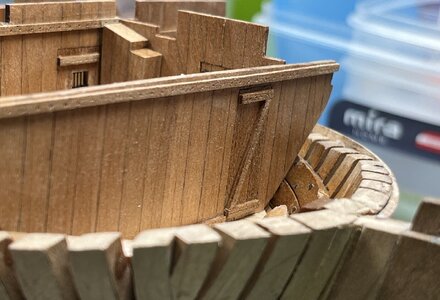
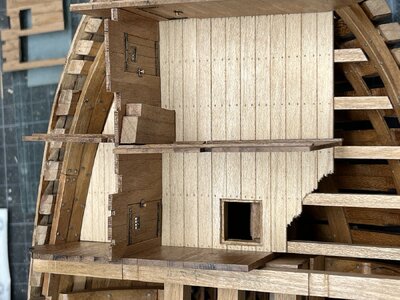
and I realized, that the second bitt pin needs a notch through the deck planking
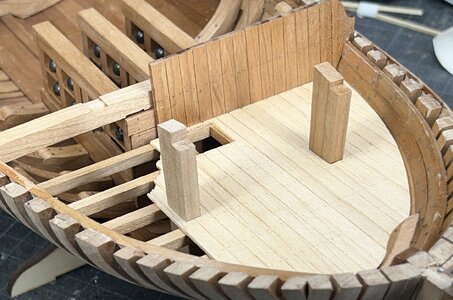
Many Thanks for your interest in my log ....... to be continued .....
many thanks for your replies with the comments and suggestions - I have to consider these ideas especially for the one wall which will be close to the carrick bitt pin..... still I have some time to think about it
I added a little bit of the "iron"-works on the doors - the walls are still only dry fitted - but in the meantime the wood is treated with CLOU


and I realized, that the second bitt pin needs a notch through the deck planking

Many Thanks for your interest in my log ....... to be continued .....
Good afternoon Uwek. Your work is brilliant. Some prison cells up front I see…Hallo my friends,
many thanks for your replies with the comments and suggestions - I have to consider these ideas especially for the one wall which will be close to the carrick bitt pin..... still I have some time to think about it
I added a little bit of the "iron"-works on the doors - the walls are still only dry fitted - but in the meantime the wood is treated with CLOU
View attachment 435088
View attachment 435089
View attachment 435090
View attachment 435091
View attachment 435092
and I realized, that the second bitt pin needs a notch through the deck planking
View attachment 435093
Many Thanks for your interest in my log ....... to be continued .....
 . I don’t know if it will “grow” on you, however as you build more the effect of the bulkheads and cabin walls above the cut is becoming effective….My humble opinion. Cheers Grant
The door hardware is just in perfect scale! Way better than I was able to do!
Many Thanks to all for your comments, all the likes and the high interest in visiting my building log - highly appreciated and a big motivation
after the preparation of the walls of the fore platform, I jumped "backwards" to aft and worked some hours on the so called "after platform"
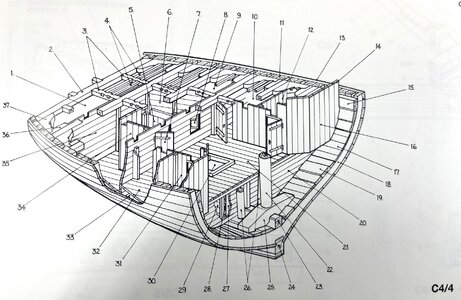
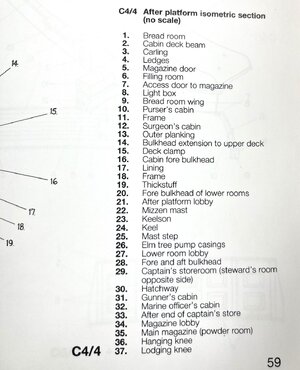
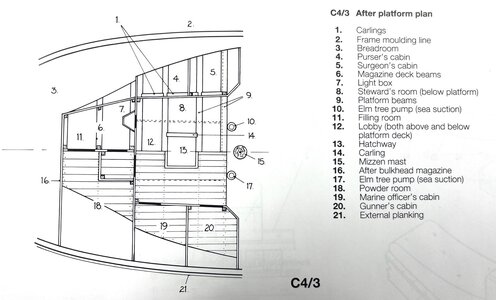
It was already 1 1/2 years ago, in September 2022, when I was preparring already the first elements - now step by step I have to adjust and finalize them
I recongnized that at this time the "fore bulkhead of the lower rooms" (#20) was not really fitting the ciurvature of the iinner planking, so I added one more layer
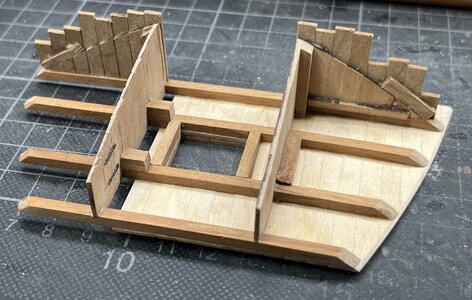
now these vertical planks are long enough to reshape the curve
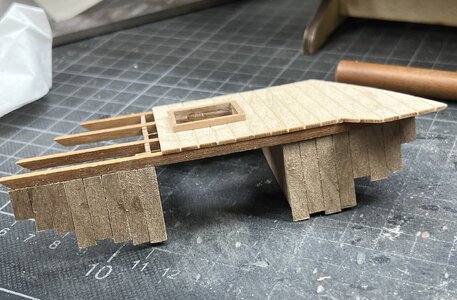
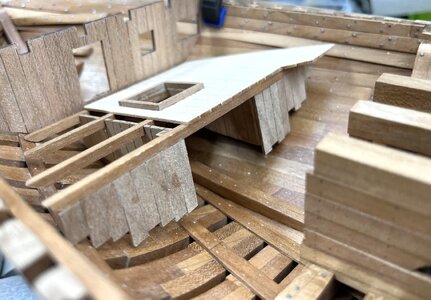
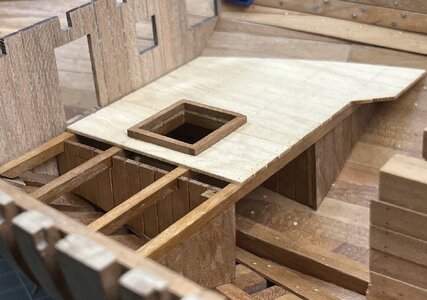
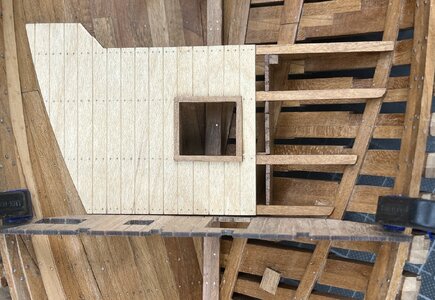
much better than before
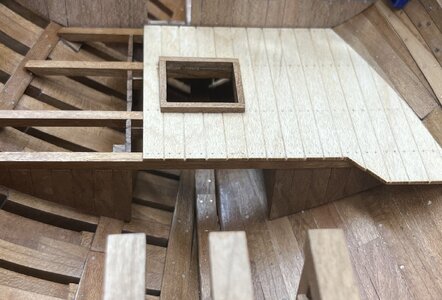
nobody will see thes walls in the hold ..... but
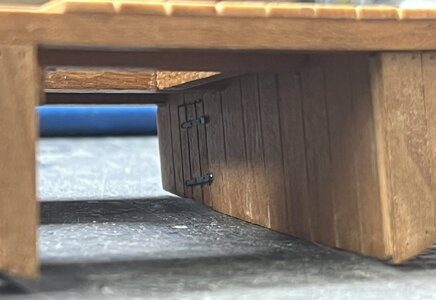
Many Thanks for your interest .... to be continued .....
after the preparation of the walls of the fore platform, I jumped "backwards" to aft and worked some hours on the so called "after platform"


It was already 1 1/2 years ago, in September 2022, when I was preparring already the first elements - now step by step I have to adjust and finalize them
I recongnized that at this time the "fore bulkhead of the lower rooms" (#20) was not really fitting the ciurvature of the iinner planking, so I added one more layer

now these vertical planks are long enough to reshape the curve


much better than before

nobody will see thes walls in the hold ..... but

Many Thanks for your interest .... to be continued .....
This is EXCELLENT work getting these wall and floor panels to fit so nicely! Always a joy to see your excellent example Uwe!
Good afternoon Uwek…. From what I can see this is spot on.Many Thanks to all for your comments, all the likes and the high interest in visiting my building log - highly appreciated and a big motivation
after the preparation of the walls of the fore platform, I jumped "backwards" to aft and worked some hours on the so called "after platform"
View attachment 435780
View attachment 435781 View attachment 435782
It was already 1 1/2 years ago, in September 2022, when I was preparring already the first elements - now step by step I have to adjust and finalize them
I recongnized that at this time the "fore bulkhead of the lower rooms" (#20) was not really fitting the ciurvature of the iinner planking, so I added one more layer
View attachment 435783
now these vertical planks are long enough to reshape the curve
View attachment 435784
View attachment 435785
View attachment 435786
View attachment 435787
much better than before
View attachment 435788
nobody will see thes walls in the hold ..... but
View attachment 435790
Many Thanks for your interest .... to be continued .....
Absolutely clean and excellent work. Wonderful.
No one will see the walls in the hold, but the man who built that beautiful ship will know! Fantastic work and skill.Many Thanks to all for your comments, all the likes and the high interest in visiting my building log - highly appreciated and a big motivation
after the preparation of the walls of the fore platform, I jumped "backwards" to aft and worked some hours on the so called "after platform"
View attachment 435780
View attachment 435781 View attachment 435782
It was already 1 1/2 years ago, in September 2022, when I was preparring already the first elements - now step by step I have to adjust and finalize them
I recongnized that at this time the "fore bulkhead of the lower rooms" (#20) was not really fitting the ciurvature of the iinner planking, so I added one more layer
View attachment 435783
now these vertical planks are long enough to reshape the curve
View attachment 435784
View attachment 435785
View attachment 435786
View attachment 435787
much better than before
View attachment 435788
nobody will see thes walls in the hold ..... but
View attachment 435790
Many Thanks for your interest .... to be continued .....
Hi Uwek, I've been scanning through the progress of your build & I'm throughly impressed by your work. Your detailed progress reports are very helpful to all of us ship builders. Thank you for all of your contributions.
A nice build and nice pictures, PeterMany Thanks to all for your comments, all the likes and the high interest in visiting my building log - highly appreciated and a big motivation
after the preparation of the walls of the fore platform, I jumped "backwards" to aft and worked some hours on the so called "after platform"
View attachment 435780
View attachment 435781 View attachment 435782
It was already 1 1/2 years ago, in September 2022, when I was preparring already the first elements - now step by step I have to adjust and finalize them
I recongnized that at this time the "fore bulkhead of the lower rooms" (#20) was not really fitting the ciurvature of the iinner planking, so I added one more layer
View attachment 435783
now these vertical planks are long enough to reshape the curve
View attachment 435784
View attachment 435785
View attachment 435786
View attachment 435787
much better than before
View attachment 435788
nobody will see thes walls in the hold ..... but
View attachment 435790
Many Thanks for your interest .... to be continued .....
Neat and tidy, and that is a huge understatement.
Many Thanks my dear friends - Many Thanks for all your interest
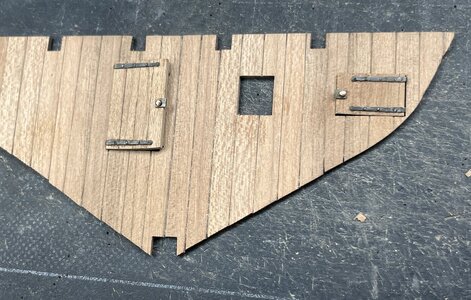
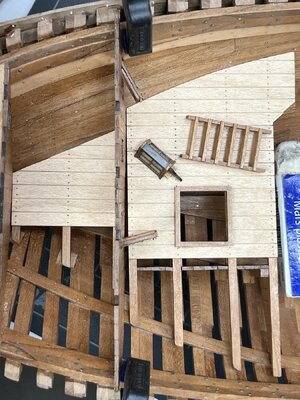
working more on the bulkhead walls - here the after bulkhead magazing
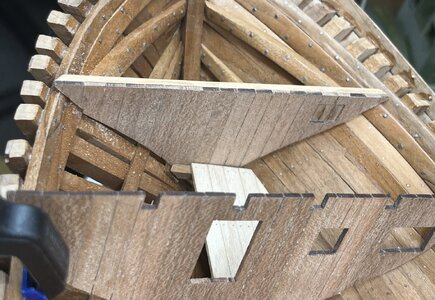
not so easy to adjust the outer form that they fit well with the interior hull planking
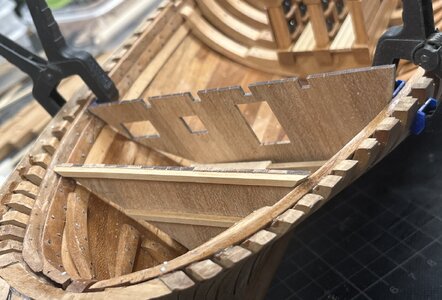
Here I want to show the door towards the powder magazin open - also the small door towards the breadroom
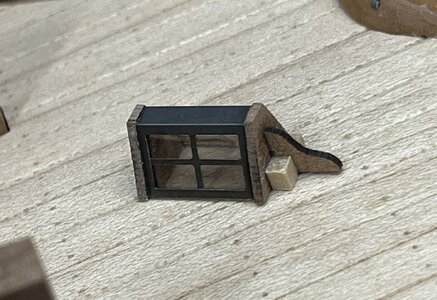
and the light box - glas is made out of Mica
dryfit
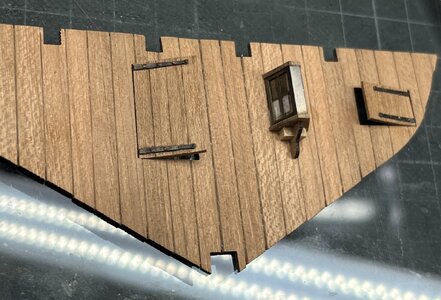
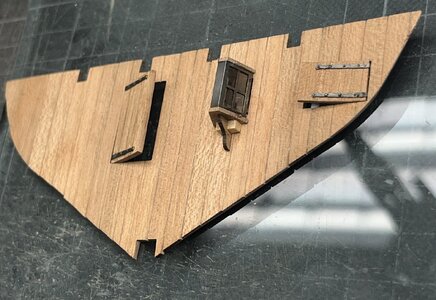
More or less ready for final installation
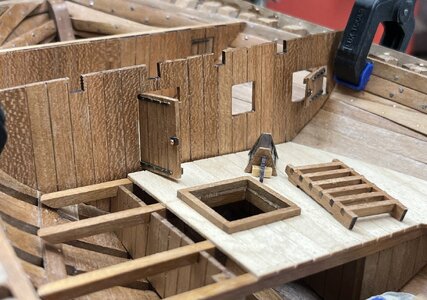
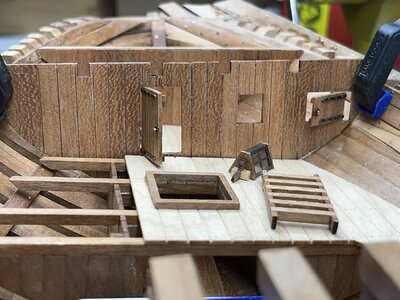
Many Thanks for your interest in my work and building log .... to be continued ....
working more on the bulkhead walls - here the after bulkhead magazing

not so easy to adjust the outer form that they fit well with the interior hull planking

Here I want to show the door towards the powder magazin open - also the small door towards the breadroom

and the light box - glas is made out of Mica

dryfit


More or less ready for final installation


Many Thanks for your interest in my work and building log .... to be continued ....
- Joined
- Jul 6, 2020
- Messages
- 8
- Points
- 33

Question, when you assembled the frames I noticed that you removed the laser char before mating the parts. Did you make sure when the frames were complete that the frame matched the provided frame drawing exactly?
Impressive detail!


