HMS GRANADO - full hull - POF kit by CAF in 1:48 - by Uwe

Witaj
Praca jak zawsze bardzo dobra chwytak świetny i bardzo pomocny ale zastanawiają mnie Uwe kolana zazwyczaj kończą na wysokości belki a te są wyższe ? czy to tylko złudzenie. Pozdrawiam Mirek

Hello
Very good work as always, the gripper is great and very helpful, but I wonder if your knees usually end at the height of the beam and are these higher? Is it just an illusion? Regards, Mirek
 
Last edited by a moderator:
With the time I am realizing, that some parts are still missing and have to be installed.
These f.e. I recognized in an other building log -> damn, these I have also to install

The small knees which are taking over the horizontal forces when the mortar is firing

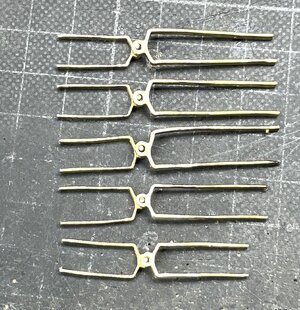
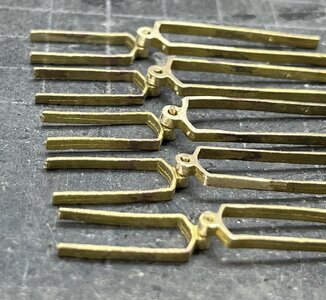
And I remembered also this small and important small helper to fix small parts during f.e. the laser char removal

View attachment 460743

After char removal I also "installed" copper "bolts"

View attachment 460745

View attachment 460744

View attachment 460746

View attachment 460747

View attachment 460749

View attachment 460750

View attachment 460748

one more small thing installed - some hours of work, nobody will recognize them, but they belong to the Granado
and especially on my "open version" of the Granado they are important

Many Thanks for your interest in my building log ........ to be continued with the rudder assembly
Small things can make a big difference, Uwe. And yes, it did!:)
Regards, Peter
 
Witaj
Praca jak zawsze bardzo dobra chwytak świetny i bardzo pomocny ale zastanawiają mnie Uwe kolana zazwyczaj kończą na wysokości belki a te są wyższe ? czy to tylko złudzenie. Pozdrawiam Mirek

Hello
Very good work as always, the gripper is great and very helpful, but I wonder if your knees usually end at the height of the beam and are these higher? Is it just an illusion? Regards, Mirek
Hallo Mirek,
N
Many Thanks for your interest in the build...... the small knees have to be higher - it is correct in the model

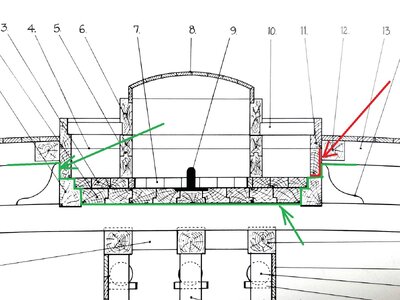
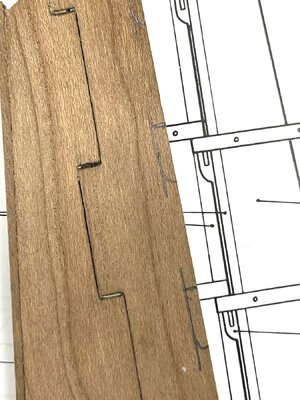
Taking a look at the drawings in Goodwin

the four knees on each side of the mortar bed in top view
IMG_5571a.jpg

the green line is the "cut" between the upper and the lower part of the model
in red you can see the bulkhead of the mortar box

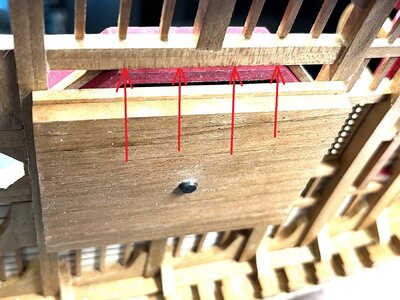
IMG_5572a.jpg

which is visible at the upper part of the model - here the red arrows would be the four knees


IMG_5575a.jpg

IMG_5476.jpg

I hope, that my explanations are understandable ?
 
Cześć Mirek,
N
Dziękuję bardzo za zainteresowanie budową... małe kolana muszą być wyżej - tak jest w tym modelu

Przyjrzyjmy się rysunkom w Goodwin

cztery kolana po każdej stronie łoża zaprawy w widoku z góry
View attachment 461025

zielona linia to „cięcie” między górną i dolną częścią modelu
na czerwono widać grodź moździerza

View attachment 461026

co jest widoczne w górnej części modelu - tutaj czerwone strzałki to cztery kolana


View attachment 461028

View attachment 461029

Mam nadzieję, że moje wyjaśnienia są zrozumiałe ?
Witaj
Bardzo dziękuje Uwe. Pozdrawiam Mirek
 
I'm not sure what sense it would make to have a door from the Purser's cabin to the Bread Room Annex.

Maybe because that was a key part of his trading Empire? The purser was a civilian provision manager responsible for the procurement and distribution of food, beer, spirits, clothing, bedding and tobacco, and often the cooks and stewards were also subordinate to him. Initially appointed by the Admiralty, from the 18th century onwards the purser had to purchase his warrant for £65 and pay a food loss bond of £2,500 to the Admiralty.
 
Many Thanks for all your interest and the comments, and of course also the likes received - much appreciated and a motivation for this work and posting

The next project in the project is the rudder with all hinches

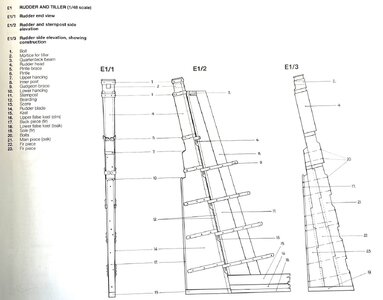
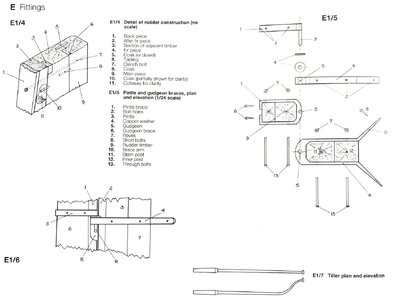
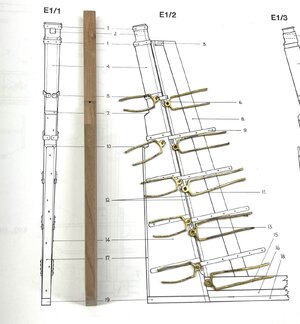
We have some good detailed drawings published in the Anatomy book from Goodwin -> a lot of work

IMG_5379.jpg

IMG_5378.jpg

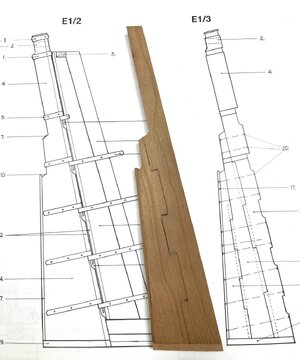
you can see that the kit rudder has two interlocked parts of the rudder blade, the drawing three (Main piece #21 made from oak and two fir pieces #22 and #23) - ok - my Granado will have only one oak piece and a second "fir" piece......

I added already the back piece #17 (fir) and also the sole #19 (fir)

IMG_5357.jpg

BTW: when you are interested we have an interesting topic describing jury and emergency rudders, afterwards we understand better why such an original rudder was constructed like shown by Goodwin


Many Thanks for your interest in my building log
 
Many Thanks for all your interest and the comments, and of course also the likes received - much appreciated and a motivation for this work and posting

The next project in the project is the rudder with all hinches

We have some good detailed drawings published in the Anatomy book from Goodwin -> a lot of work

View attachment 461303

View attachment 461302

you can see that the kit rudder has two interlocked parts of the rudder blade, the drawing three (Main piece #21 made from oak and two fir pieces #22 and #23) - ok - my Granado will have only one oak piece and a second "fir" piece......

I added already the back piece #17 (fir) and also the sole #19 (fir)

View attachment 461305

BTW: when you are interested we have an interesting topic describing jury and emergency rudders, afterwards we understand better why such an original rudder was constructed like shown by Goodwin


Many Thanks for your interest in my building log
my dear friend
the rudder looks great, which wood is it?
 
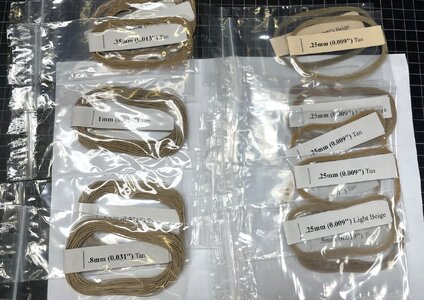
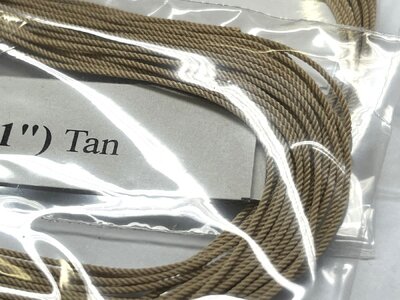
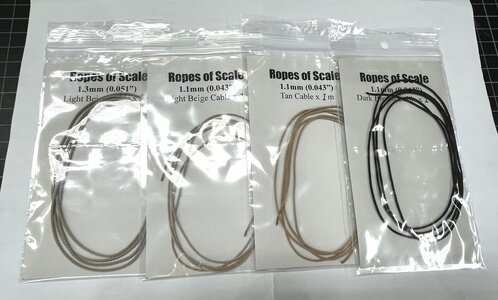
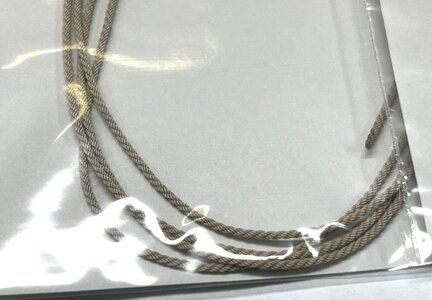
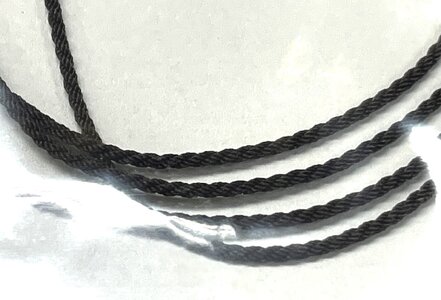
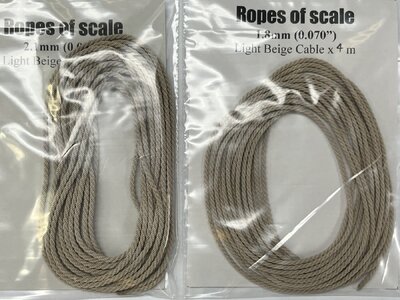
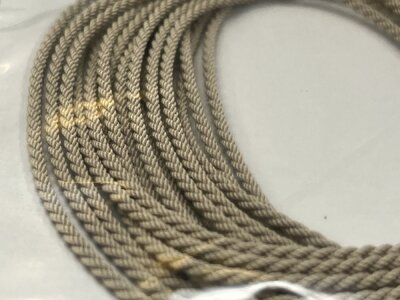
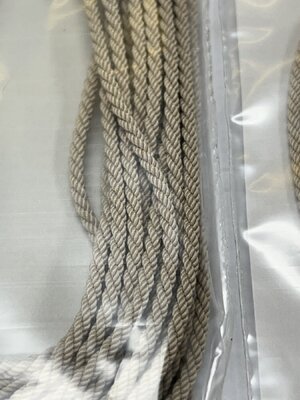
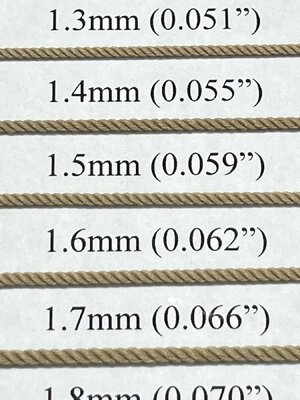
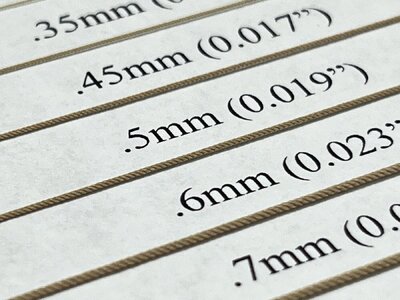
I got my supply of polyester rope material for my HMS Granado (anchor cable, messenger, gun and mortar tackles etc.)

It is the first time, that I ordered from Ropes of Scale alias @BenD
and I am extremely happy with the quality and also the service provided.

Many Thanks to Ben

Take a look

IMG_5616.jpg

IMG_5617.jpg

IMG_5618.jpg

IMG_5619.jpg

IMG_5620.jpg

IMG_5621.jpg

IMG_5622.jpg

IMG_5623.jpg

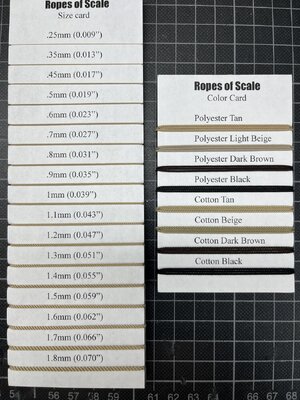
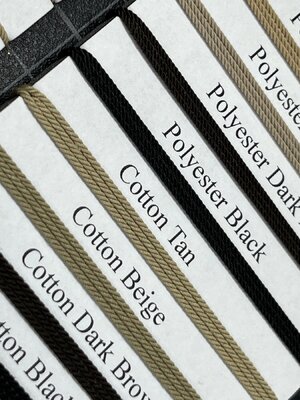
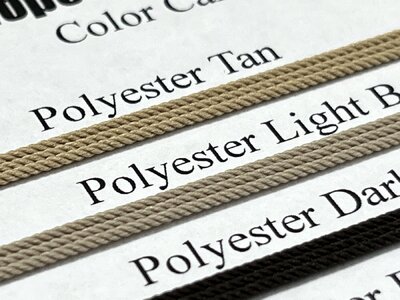
IN addition I git also these two sample cards - will be very helpful for decision for the next delivery - Very good

IMG_5611.jpg

IMG_5612.jpg

IMG_5615.jpg

IMG_5613.jpg

IMG_5614.jpg

I am very happy
 
Just a idle question. How did you decide how much to order? I can't imagine how much rope I've made for the Discovery. I seem to have to make some every day (my walk makes seven feet a time) and I wouldn't have had a clue as to how much to order from some one.
 
....the rudder looks great, which wood is it?
The complete kit is Cherry wood - and a little bit boxwood, but the priciple structure. planking and rudder is all Cherry

Just a idle question. How did you decide how much to order?.....
for this project it is not a problem, because the model will be not rigged - I have only the anchors and the guns which will need some rope material.......
 
With the time I am realizing, that some parts are still missing and have to be installed.
These f.e. I recognized in an other building log -> damn, these I have also to install

The small knees which are taking over the horizontal forces when the mortar is firing

And I remembered also this small and important small helper to fix small parts during f.e. the laser char removal

View attachment 460743

After char removal I also "installed" copper "bolts"

View attachment 460745

View attachment 460744

View attachment 460746

View attachment 460747

View attachment 460749

View attachment 460750

View attachment 460748

one more small thing installed - some hours of work, nobody will recognize them, but they belong to the Granado
and especially on my "open version" of the Granado they are important

Many Thanks for your interest in my building log ........ to be continued with the rudder assembly
Excellent and accurate build I like many others here wish we had your skills
Andy
 
The work on the rudder continues ......

IMG_5481.jpg

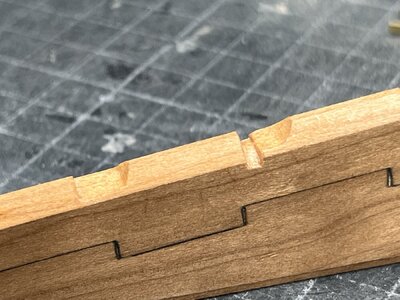
Marking the notches

IMG_5482.jpg

the first one for test is roughly done

IMG_5484.jpg

the necessary champfer will be done later on

IMG_5488.jpg

I am still old-fashioned and make such things with the needle file

IMG_5489.jpg

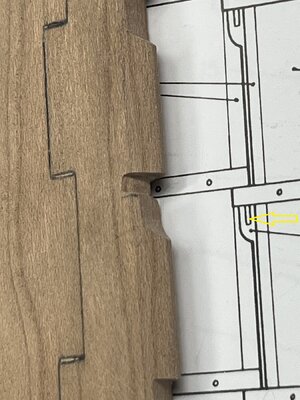
still some small adjustments necessary - I have to check every notch with the correct hinge

IMG_5490.jpg

and the champfer - I love it when some wooden chips are laying on the desk - we are still wood-worker

IMG_5491.jpg

Many Thanks for your interest in my log .....
 
The work on the rudder continues ......

View attachment 461947

Marking the notches

View attachment 461948

the first one for test is roughly done

View attachment 461949

the necessary champfer will be done later on

View attachment 461950

I am still old-fashioned and make such things with the needle file

View attachment 461951

still some small adjustments necessary - I have to check every notch with the correct hinge

View attachment 461952

and the champfer - I love it when some wooden chips are laying on the desk - we are still wood-worker

View attachment 461953

Many Thanks for your interest in my log .....
Loving the hand work here Uwe!
 
The work on the rudder continues ......

View attachment 461947

Marking the notches

View attachment 461948

the first one for test is roughly done

View attachment 461949

the necessary champfer will be done later on

View attachment 461950

I am still old-fashioned and make such things with the needle file

View attachment 461951

still some small adjustments necessary - I have to check every notch with the correct hinge

View attachment 461952

and the champfer - I love it when some wooden chips are laying on the desk - we are still wood-worker

View attachment 461953

Many Thanks for your interest in my log .....
Good afternoon Uwek. Did you make those gudgeons. They are so very good. Cheers Grant
 
The work on the rudder continues ......

View attachment 461947

Marking the notches

View attachment 461948

the first one for test is roughly done

View attachment 461949

the necessary champfer will be done later on

View attachment 461950

I am still old-fashioned and make such things with the needle file

View attachment 461951

still some small adjustments necessary - I have to check every notch with the correct hinge

View attachment 461952

and the champfer - I love it when some wooden chips are laying on the desk - we are still wood-worker

View attachment 461953

Many Thanks for your interest in my log .....
Very nice work on the rudder, Uwe. with nice hand work.
Regards, Peter
 
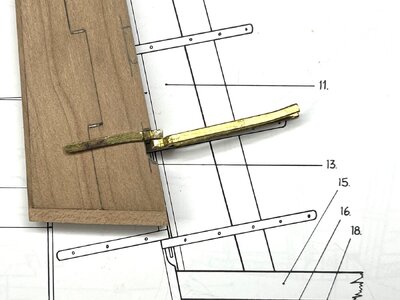
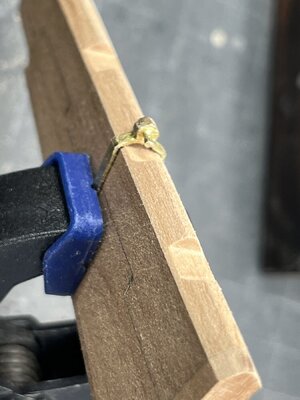
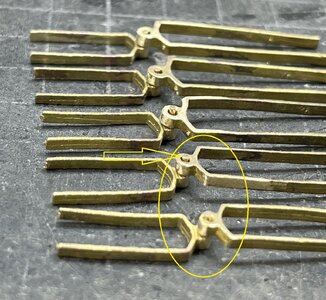
Now the gudgeons / hinges are fitting already better - but still a lot of work

IMG_5492.jpg

IMG_5501.jpg

IMG_5502.jpg

I tried to bring all of the pins along the edge of the rudder blade - only than the gap between stern post and rudder is small

IMG_5497.jpg

IMG_5498.jpg

IMG_5499.jpg

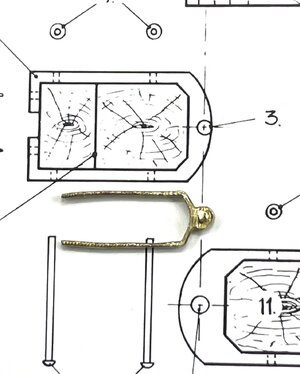
These are included in the great kit - Many thanks to CAF

IMG_5504.jpg

some cleaning works are still necessary

IMG_5505.jpg

Many Thanks for your interest
 
Now the gudgeons / hinges are fitting already better - but still a lot of work

View attachment 462083

View attachment 462088

View attachment 462089

I tried to bring all of the pins along the edge of the rudder blade - only than the gap between stern post and rudder is small

View attachment 462085

View attachment 462086

View attachment 462087

These are included in the great kit - Many thanks to CAF

View attachment 462090

some cleaning works are still necessary

View attachment 462091

Many Thanks for your interest
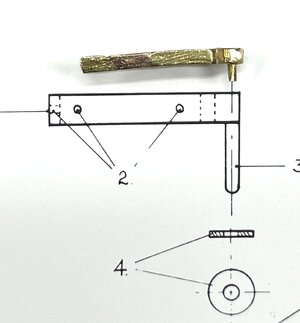
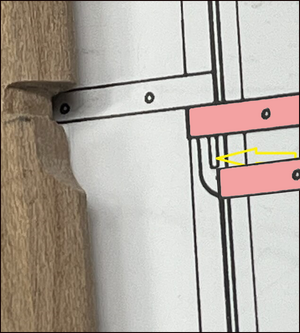
Uwe, pay attention to this element. Its length is usually 3 loop widths. The drawing shows how much the axis protrudes from the lower loop. On your loops they are short
IMG_5498.jpgIMG_5505.jpg
 
Uwe, pay attention to this element. Its length is usually 3 loop widths. The drawing shows how much the axis protrudes from the lower loop. On your loops they are short
View attachment 462092View attachment 462093
I can not fully agree with the length of the pins as shown on the drawing. The the rudder can never be lifted of:
1722441804172.png
The space below the pin must be at least the hight of the lower part of the hing.
Or I must be totally wrong .........
With the lengt of Uwe's parts it is probably just possible. Otherwise the open part must be longer.
Regards, Peter
 
Back
Top