- Joined
- Oct 1, 2023
- Messages
- 2,006
- Points
- 488

 |
As a way to introduce our brass coins to the community, we will raffle off a free coin during the month of August. Follow link ABOVE for instructions for entering. |
 |
 |
The beloved Ships in Scale Magazine is back and charting a new course for 2026! Discover new skills, new techniques, and new inspirations in every issue. NOTE THAT OUR FIRST ISSUE WILL BE JAN/FEB 2026 |
 |


I agree Daniel but, as this is the first layer of planking, I am guessing Ted will have the second layer extend over the deadwood and end in the rabbet at the stern post.I believe the planking should run all the way to the stern post as well as along the entire length of the keel
That is a possibility if he can keep the curvatures in their proper perspective.I am guessing Ted will have the second layer extend over the deadwood and end in the rabbet at the stern post.
Allan

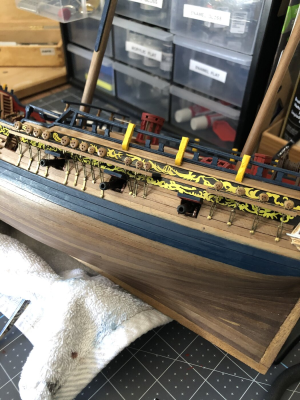
I see what you mean. I was going to cover the deadwood with the second layer. The plans don't show any layers over the keel and stern posts. It also doesn't show any coppering.I believe the planking should run all the way to the stern post as well as along the entire length of the keel. The area bounded by the stern post and the keel (where you have not planked is called the dead wood zone). You would sand out, carve out whichever an amount so that the planking surface ends up flush with the stern post and keel.
View attachment 505736
Thats up to you Ted, it all goes into your experience locker.Should I tear out or add onto what I have


Thankfully it was probably the most decorated that was saved. I've always had a sort spot for the Wasa.Yea I have seen those, they are great. It's very rare to have a ship that old preserved as good as the Vasa is.
Up to you in the end but it going to be a project of its own either way. As it looks now, you didn't adjust the width of the planks so there is way more room aft than where the planking currently ends so sizing pieces is going to require some lining off to get them right.Should I tear out or add onto what I have
The plans don't show any layers over the keel and stern posts. It also doesn't show any coppering.


Thanks, in bot sure what to do. Thinking about itUp to you in the end but it going to be a project of its own either way. As it looks now, you didn't adjust the width of the planks so there is way more room aft than where the planking currently ends so sizing pieces is going to require some lining off to get them right.
There was no wood planking over the keel or sternpost. It ended at the rabbet at the keel and covered the inner post which formed a rabbet at the stern post itself. As Jalouse was launched about 1809 she would have had her bottom sheathed in copper. If you are going to copper over the planking, I would consider just leaving the planking as is.
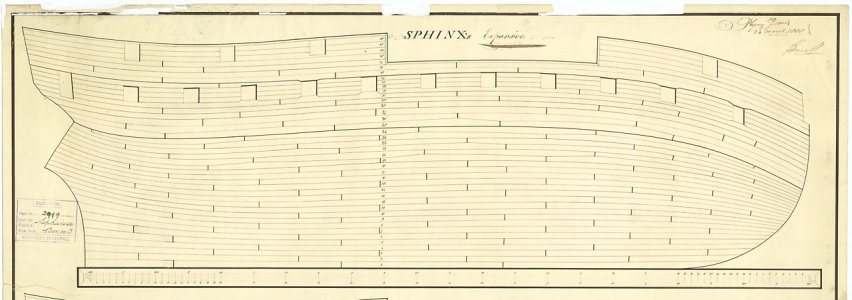
If you look at some external planking expansion plans like those on the RMG Collections site and you can see how the planks need to widen aft (or you can add a couple stealers.
Allan
View attachment 506233

Oh Lord Ted! Take care of yourself, broken ribs are painful.I had a small failure in the adjustment of my blood pressure medication. I passed out and broke some ribs. It's slowing me down some
They had me on Lisenopril for my blood preseure and it made me very dizzy every time I stood up. So I quit taking it. My last BP was 114/65.....Don't need no steenking medicineI had a small failure in the adjustment of my blood pressure medication. I passed out and broke some ribs. It's slowing me down some
Take it slow and easy. Good time to read old contracts on the RMG siteI passed out and broke some ribs. It's slowing me down some

Mine was low too 120/69 now it's crazy.wonder whyThey had me on Lisenopril for my blood preseure and it made me very dizzy every time I stood up. So I quit taking it. My last BP was 114/65.....Don't need no steenking medicine


is this single planked or double planked ( or going to be plated)?I read that you're supposed to sand the hull planking in the longitudinal direction and not a ross the planks. Ue fire road, not too to bottom.
About 45 degrees makes sense to me but what do I know
Any recommendations

Double planks and copperedis this single planked or double planked ( or going to be plated)?
